版权声明:更多信息请关注 wwws.shinians.com 官网 https://blog.csdn.net/zzhuan_1/article/details/85106968
配置文件注入案例讲解(知识点汇总)
配置文件占位符
${random.value}、${random.int}、${random.long} ${random.int(10)}、${random.int[1024,65536]}
属性配置占位符
![]()
– 可以在配置文件中引用前面配置过的属性(优先级前面配置过的这里都能用)。
– ${app.name:默认值}来指定找不到属性时的默认值
配置文件加载位置
spring boot 启动会扫描以下位置的application.properties或者 application.yml文件作为Spring boot的默认配置文件
– file:./config/
– file:./ – classpath:/config/
– classpath:/
– 以上是按照优先级从高到低的顺序,所有位置的文件都会被加载,高优先级配置内容会覆盖低优先级配置内容。 – 我们也可以通过配置spring.config.location来改变默认配置
Spring Configuration 和 Component 区别(精简汇总版)
参考:https://www.toutiao.com/i6636541118316020231/
配置文件值注入(各种类型list、map、int、Sting、boolen等)
创建实体类:Student
@Component
@ConfigurationProperties(prefix = "student")

public class Student {

    private String lastName;
    private Integer age;
    private Boolean boss;
    private Date birth;
    private Map<String,Object> maps;
    private List<Object> lists;
    private Book  book;

    /**
     * 特别注意!!特别注意!!:如果通过前缀的方式注入,一定要有get set 方法
     * @return
     */

    @Override
    public String toString() {
        return "Student{" +
                "lastName='" + lastName + '\'' +
                ", age=" + age +
                ", boss=" + boss +
                ", birth=" + birth +
                ", maps=" + maps +
                ", lists=" + lists +
                ", book=" + book +
                '}';
    }

    public String getLastName() {
        return lastName;
    }

    public void setLastName(String lastName) {
        this.lastName = lastName;
    }

    public Integer getAge() {
        return age;
    }

    public void setAge(Integer age) {
        this.age = age;
    }

    public Boolean getBoss() {
        return boss;
    }

    public void setBoss(Boolean boss) {
        this.boss = boss;
    }

    public Date getBirth() {
        return birth;
    }

    public void setBirth(Date birth) {
        this.birth = birth;
    }

    public Map<String, Object> getMaps() {
        return maps;
    }

    public void setMaps(Map<String, Object> maps) {
        this.maps = maps;
    }

    public List<Object> getLists() {
        return lists;
    }

    public void setLists(List<Object> lists) {
        this.lists = lists;
    }

    public Book getBook() {
        return book;
    }

    public void setBook(Book book) {
        this.book = book;
    }
}
application.properties配置相关属性
student.last-name=你好spring cloud ${random.uuid}
student.age=${random.int}
student.birth=2017/12/15
student.boss=false
student.maps.k1=mapv1
student.maps.k2=mapv2
student.lists=spring boot ,spring cloud ,spring mvc
student.book.name=${student.hello:hello}_book
student.book.price=15
运行测试类
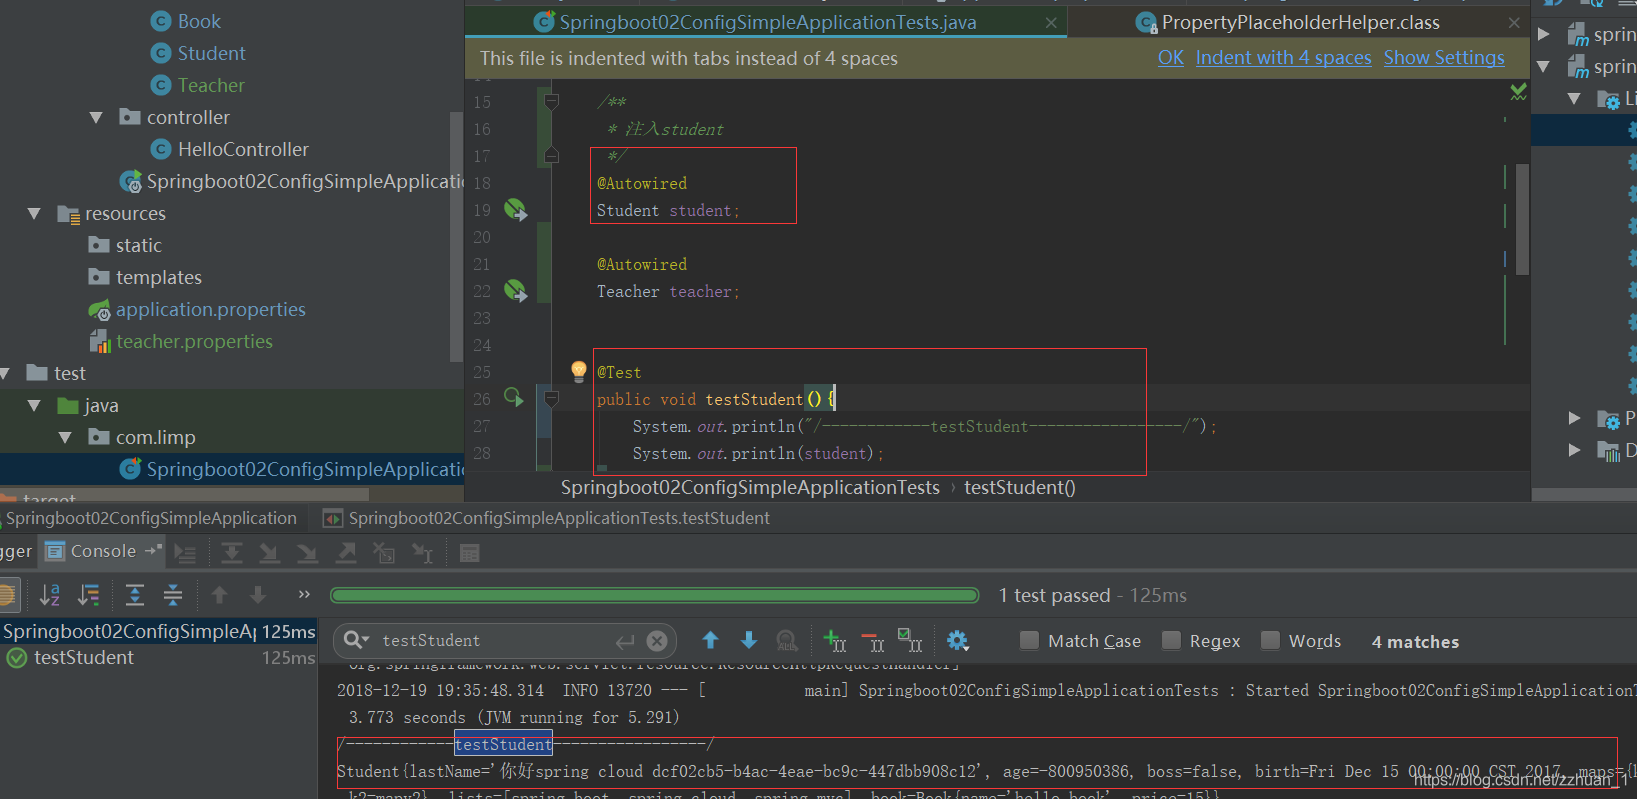
我们可以看到Student已经被注入相关值
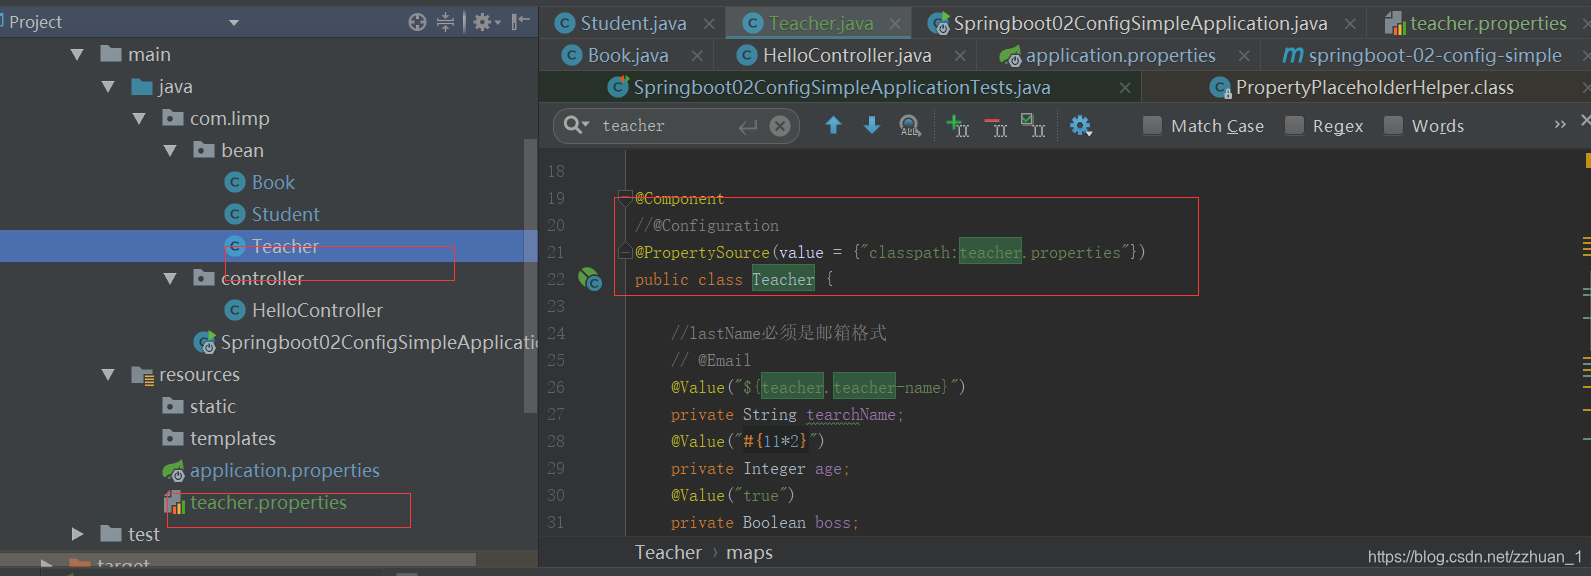
同样Teacher类也可以通过@PropertySource(value = {"classpath:teacher.properties"})的方式注入
源码下载地址:
https://github.com/shinians/springboot-demos
项目springboot-02-config-simple
希望对您有所帮助。
