版权声明:本博客所有原创文章未经准许不得转载或保存转发,本人保留版权法律追诉权。 https://blog.csdn.net/haigear/article/details/84927689
当我们在arduino中有大量的代码需要在不同的工程中重复时,我们可以把这段代码进行封装,那么由此我们就想到了要编写自己的arduino类库。这个工作并不复杂,稍有面对对象编程经验的小伙伴即可比较容易完成。下面我们以实例的方式将步骤一一列出。
我们以,我前面编写的《Arduino中使用超声波测距实验》为例来进行说明。代码如下:
int TrgPin = A0;
int EcoPin = A1;
float dist;
void setup()
{
Serial.begin(9600);
//设置TrgPin为输出状态
pinMode(TrgPin, OUTPUT);
// 设置EcoPin为输入状态
pinMode(EcoPin, INPUT);
}
void loop()
{
digitalWrite(TrgPin, LOW);
delayMicroseconds(8);
digitalWrite(TrgPin, HIGH);
// 维持10毫秒高电平用来产生一个脉冲
delayMicroseconds(10);
digitalWrite(TrgPin, LOW);
// 读取脉冲的宽度并换算成距离
dist = pulseIn(EcoPin, HIGH) / 58.00;
Serial.print("Distance:");
Serial.print(dist);
Serial.println("cm");
delay(300);
}
我在看来,封装的目的就是让必要而机械的步骤得到简化。
从这段代码中我们可以看出:
1、对Trig及Echo两个管脚与Arduino板上的两个信号管脚的绑定是必要且机械的工作,所以这个初始化工作我们可以交给我们的初始化函数。
2、让Trig脚保持高电平已经后续读取Echo脚的数值,也是机械的,我们可以封装为一个获取距离的函数;
3、距离的输出,是否输出提示字符串是可选的,但距离的数值是必须的,通过串口发送到上位机必须靠它了。
通过上面的分析我们明白了封装类的设计目的了就好办了。假定我们定义的类为USensor我们来看看代码如何实现:
USensor.h
#ifndef USensor_H
#define USensor_H

#if defined(ARDUINO) && ARDUINO >= 100
	#include "Arduino.h"
#else
	#include "WProgram.h"
#endif
//#include "pins_arduino.h"

#include <inttypes.h>

#define PULSE_TIMEOUT 150000L	// 100ms
#define DEFAULT_DELAY 10
#define DEFAULT_PINGS 5
class USensor {
public:

	/**
	* Constructor
	* Ultrasonic sensor SR04, four connections pins
	* VCC, ECHO, TRIGGER, GND
	* <br>
	* \param echoPin digital INPUT-Pin for measuring distance
	* \param triggerPin if 10us high a trigger signal is generated from
	*					SR04
	*
	* \return void
	*/
	USensor(int echoPin, int triggerPin);

	/**
	* Do a measurment for this sensor. Return distance as long
	* in centimenter
	* \return long distance in centimeter
	*/
	long Distance();

	/**
	* Do count measurents and calculate the average.
	* To avoid defilement from ow/high peaks, min/max values
	* are substracted from the average
	*
	* \param wait delay between measurements, default = DEFAULT_DELAY/ms
	* \param count number of measurements, default DEFAULT_PINGS
	* \return long distance in centimeter
	**/
	long DistanceAvg(int wait=DEFAULT_DELAY, int count=DEFAULT_PINGS);

	/**
	* Do only a ping. Get result with methode getDistance()
	*
	* \param keine
	*/
	void Ping() ;

	/**
	* return latest distance. Methode Ping() should be called before
	* \param keine
	* \return Distanz in Zentimeter
	*/
	long getDistance();


private:
	/**
	* Do the measurement calculation and return result in centimeter
	* SR04 measure echo time to obstacle and return way.
	* <br>
	* Sound travels with 340m/sec
	* <br>
	* Example: Obstace 100cm away from SR04. Measure time is 100cm to
	* obstacle and 100cm return = 200cm
	* <br>
	* 1sec = 1000ms = 1.000.000uS
	* 1.000.000 / 340 = Distance in microseconds for 100cm
	* 2941uS fuer 100cm = 5882 uS fuer 200cm
	*
	* duration / 5882 * 100 = distance in cm
	*/
	long MicrosecondsToCentimeter(long duration);

	long _currentDistance;
	int _echoPin, _triggerPin;
	long _duration, _distance;
	bool _autoMode;
};
#endif
USensor.cpp
//Ultrasonic Sensor Class
#include "USensor.h"

USensor::USensor(int echoPin, int triggerPin) {
    _echoPin = echoPin;
    _triggerPin = triggerPin;
    pinMode(_echoPin, INPUT);
    pinMode(_triggerPin, OUTPUT);
    _autoMode = false;
    _distance = 999;
}


long USensor::Distance() {
    long d = 0;
    _duration = 0;
    digitalWrite(_triggerPin, LOW);
    delayMicroseconds(2);
    digitalWrite(_triggerPin, HIGH);
    delayMicroseconds(10);
    digitalWrite(_triggerPin, LOW);
    delayMicroseconds(2);
    _duration = pulseIn(_echoPin, HIGH, PULSE_TIMEOUT);
    d = MicrosecondsToCentimeter(_duration);
    delay(25);
    return d;
}

long USensor::DistanceAvg(int wait, int count) {
    long min, max, avg, d;
    min = 999;
    max = 0;
    avg = d = 0;

    if (wait < 25) {
        wait = 25;
    }

    if (count < 1) {
        count = 1;
    }

    for (int x = 0; x < count + 2; x++) {
        d = Distance();

        if (d < min) {
            min = d;
        }

        if (d > max) {
            max = d;
        }

        avg += d;
    }

    // substract highest and lowest value
    avg -= (max + min);
    // calculate average
    avg /= count;
    return avg;
}

void USensor::Ping() {
    _distance = Distance();
}

long USensor::getDistance() {
    return _distance;
}

long USensor::MicrosecondsToCentimeter(long duration) {
    long d = (duration * 100) / 5882;
    //d = (d == 0)?999:d;
    return d;
}
keyword.txt
#######################################
# Syntax Coloring Map For 你的类名
#######################################
#######################################
# Datatypes (KEYWORD1) 数据类型关键字
#######################################
TN901        KEYWORD1
#######################################
# Methods and Functions (KEYWORD2) 方法类型关键字
#######################################
Init        KEYWORD2
Read        KEYWORD2
ReadData        KEYWORD2
GetData        KEYWORD2
#######################################
# Constants (LITERAL1)  常量类型关键字
#######################################
ET        LITERAL1
OT        LITERAL1
最重要的是以下几点,如果我们不遵照这几点,我们可能无法真正能使我们封装的类在arduino的IDE中看到:
1、类名和文件名必须统一(比如你的类名叫做ABC,那么你的文件名对应为ABC.cpp)
2、必须要有keyword,否则你的在IDE中将无法以颜色却分于普通的代码,普通的变量。
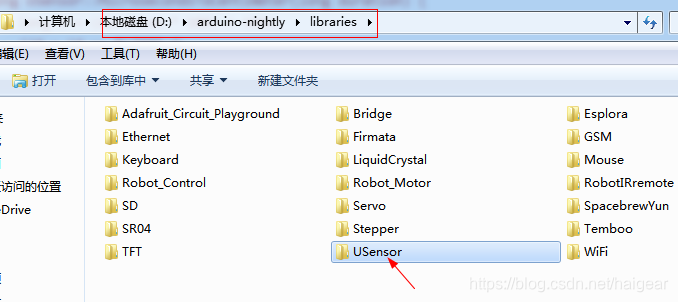
3、编辑好的类文件必须防止在IDE所在libraries目录下;
4、编辑好的文件和keyword必须放在同一个目录下