本节讲的是spring对dao层的封装,之前可能有更好的做法,但是要知道spring也提供了这种技术。
本节的主要内容是:
1、spring的jdbcTemplate操作(实现事务crud操作)
2、spring配置连接池
(1)配置c3p0连接池
(2)service和dao注入操作
3、spring事务管理
(1)事务的概念
(2)spring进行事务的api
(3)spring进行事务配置
一、使用jdbcTemplate对jdbc进行封装(需要自己创建表)
第一步:导入jar包,注意还需导入jdbc驱动的jar包

第二步:创建对象,设置数据库信息

第三步:创建jdbcTemole对象,设置数据源

第四步:调用jdbcTemplate的接口,进行数据库操作crud
code:JdbcTemplateDemo.class
package com.test.dao;

import org.junit.Test;
import org.springframework.jdbc.core.JdbcTemplate;
import org.springframework.jdbc.datasource.DriverManagerDataSource;

public class JdbcTemplateDemo {
    @Test
    public void test() {
        DriverManagerDataSource dataSource = new DriverManagerDataSource();
        dataSource.setDriverClassName("com.mysql.jdbc.Driver");
        dataSource.setUrl("jdbc:mysql:///spring_day03");
        dataSource.setUsername("root");
        dataSource.setPassword("root");

        JdbcTemplate jdbcTemplate = new JdbcTemplate(dataSource);
        String sql = "insert into account values(?,?,?)";
        int row = jdbcTemplate.update(sql,3,"lucy",100);
        System.out.println(row);
    }
}
效果是:表中多了一项lucy 100。
二、案例实战:spring配置连接池和dao使用jdbcTemplate
本场案例:完成银行转账的操作,在Service实现业务逻辑,调用Dao,Dao是封装了JdbcTemplate的对数据库操作。
知识回顾:
- service层又叫业务逻辑层, 比如说小王多1000,小马少1000.
- 而dao层不涉及业务逻辑,仅仅封装对数据库的操作(crud)
什么是连接池?
一般我们在项目中操作数据库时,都是每次需要操作数据库就建立一个连接,操作完成后释放连接。因为jdbc没有保持连接的能力,一旦超过一定时间没有使用(大约几百毫秒),连接就会被自动释放掉。而每次新建连接都需要140毫秒左右的时间,所以耗费时间比较多。若使用C3P0连接池来池化连接,随时取用,则平均每次取用只需要10-20毫秒。这在高并发随机访问数据库的时候对效率的提升有很大帮助。
使用步骤
第一步:导入jar包

第二步:创建OrdersService.class方法实现业务逻辑,在这个类中调用Dao层的方法
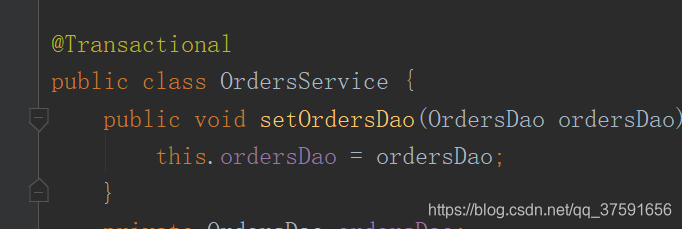
code:OrdersService.class
public class OrdersService {
    public void setOrdersDao(OrdersDao ordersDao) {
        this.ordersDao = ordersDao;
    }
    private OrdersDao ordersDao;
    // 调用dao
    //业务逻辑,写转账业务
    public void accountMoney() {
        ordersDao.addMoney();
        ordersDao.lessMoney();
    }
}
第三步:创建OrderDao.class,封装了lessMoney()和addMoney(),本质上是对jdbcTemplate的封装
code:OrdersDao.class
//dao层完成对数据库的编写
public class OrdersDao {
    // 注入jdbcTemplate
    private JdbcTemplate jdbcTemplate;
    public void setJdbcTemplate(JdbcTemplate jdbcTemplate) {
        this.jdbcTemplate = jdbcTemplate;
    }
    // 少钱的方法
    public void lessMoney() {
        System.out.println("少钱执行");
        String sql = "update account set salary=salary-? where username=?";
        jdbcTemplate.update(sql, 1000, "xiaowang");
    }
    // 多钱的方法
    public void addMoney() {
        System.out.println("多钱执行");
        String sql = "update account set salary=salary+? where username=?";
        jdbcTemplate.update(sql, 1000, "xiaoma");
    }
}
第四步:配置Spring的核心配置文件,在配置文件中,建立链接和数据源dataSource,完成Service和Dao对象的创建。
注意:这里其实是把dataSource用IOC创建出来。
code:beanTx.xml
<?xml version="1.0" encoding="UTF-8"?>
<beans xmlns="http://www.springframework.org/schema/beans"
       xmlns:xsi="http://www.w3.org/2001/XMLSchema-instance"
       xmlns:context="http://www.springframework.org/schema/context"
       xmlns:aop="http://www.springframework.org/schema/aop"
       xmlns:tx="http://www.springframework.org/schema/tx"
       xsi:schemaLocation="http://www.springframework.org/schema/beans
	http://www.springframework.org/schema/beans/spring-beans.xsd
	http://www.springframework.org/schema/context
	http://www.springframework.org/schema/context/spring-context.xsd
	http://www.springframework.org/schema/aop
	http://www.springframework.org/schema/aop/spring-aop.xsd
	http://www.springframework.org/schema/tx
	http://www.springframework.org/schema/tx/spring-tx.xsd">

    <!-- 配置c3p0连接池 -->
    <bean id="dataSource" class="com.mchange.v2.c3p0.ComboPooledDataSource">
        <!-- 注入属性值 -->
        <property name="driverClass" value="com.mysql.jdbc.Driver"></property>
        <property name="jdbcUrl" value="jdbc:mysql:///spring_day03"></property>
        <property name="user" value="root"></property>
        <property name="password" value="root"></property>
    </bean>

    <!--service中注入dao-->
    <bean class="tx.itcast.service.OrdersService" id="ordersService">
        <property name="ordersDao" ref="ordersDao"></property>
    </bean>
    <!--dao注入jdbcTemplate对象-->
    <bean class="tx.itcast.dao.OrdersDao" id="ordersDao">
        <property name="jdbcTemplate" ref="jdbcTemplate">
        </property>
    </bean>
    <!--jdbc模板对象注入dataSouce-->
    <bean class="org.springframework.jdbc.core.JdbcTemplate" id="jdbcTemplate">
        <!--源代码中有datesource的对象,所以要注入连接池提供的dataSourse-->
        <property name="dataSource" ref="dataSource"/>
    </bean>
注意: 这里和第一节的区别在于,创建DataSource方式的不同,第一节是
DriverManagerDataSource dataSource = new DriverManagerDataSource();
而这里是通过连接池创建的dataSource。
第五步:调用Service对象,测试结果
  @Test
    public void test() {
        ApplicationContext context =
                new ClassPathXmlApplicationContext("beanTx.xml");
        OrdersService service = (OrdersService) context.getBean("ordersService");
        service.accountMoney();
    }
结果:数据库中一个人少钱,一个人多钱,测试完毕!
三、本节核心:Spring的事务管理
上面的案例,完成后,不要高兴的太早,我们并没有对事务进行隔离,因此会发生事务的一系列错误,例如在A->B转账过程中,A账户-1000,接着断电了,而B账户还未+1000,程序就结束,本小节要解决这个问题。
code:OrdersService.class
public class OrdersService {
    public void setOrdersDao(OrdersDao ordersDao) {
        this.ordersDao = ordersDao;
    }
    private OrdersDao ordersDao;
    // 调用dao
    //业务逻辑,写转账业务
    public void accountMoney() {
        ordersDao.addMoney();
        //发生错误
        int i = 8/0;
        ordersDao.lessMoney();
    }
}
3.1 如何解决上诉问题 —> Spring的事务管理
spring封装了事务管理的方法,我们只需把它增强到需要管理的方法即可,在本次案例中,增强到OrdersDao的方法里。
code:beanTx.xml 在上一小节的基础上额外添加的代码
<!--事务管理部分-->
    <!--第一步:配置事务管理器-->
    <bean id="DataSourceTransactionManager" class="org.springframework.jdbc.datasource.DataSourceTransactionManager">
        <!--对事务管理器的属性进行注入
            dataSource
        -->
            <property name="dataSource" ref="dataSource"/>
    </bean>

    <!--第二步: 配置事务增强
        规定一个名称
        指定针对的事务管理器:DataSourceTransactionManager
    -->
    <tx:advice id="txadvice" transaction-manager="DataSourceTransactionManager">
        <!--做事务操作-->
        <tx:attributes>
            <!--设置进行事务操作的方法,匹配规则
                目的是规定对哪些方法进行增强
                propagation:隔离级别
            -->
            <tx:method name="account*" propagation="REQUIRED"/>
        </tx:attributes>
    </tx:advice>

    <!--第三步:配置切面-->
    <aop:config>
        <!--切入点-->
        <aop:pointcut id="pointcut1" expression="execution(* tx.itcast.service.OrdersService.*(..))"
        <!--切面-->
        <aop:advisor advice-ref="txadvice" pointcut-ref="pointcut1"/>
    </aop:config>
3.4 验收
增加了上面的代码后,如果在事务处理过程中,发生了异常,那么会自动回滚,保证了事务的一致性。
三、用注释的方式实现事务管理
上面的代码太复杂了,贴心的Spring又支持注释的方式来替代配置了,具体操作看代码
第一步:在beanTx.xml中,添加下面的代码
code:beanTx.xml
<?xml version="1.0" encoding="UTF-8"?>
<beans xmlns="http://www.springframework.org/schema/beans"
       xmlns:xsi="http://www.w3.org/2001/XMLSchema-instance"
       xmlns:context="http://www.springframework.org/schema/context"
       xmlns:aop="http://www.springframework.org/schema/aop"
       xmlns:tx="http://www.springframework.org/schema/tx"
       xsi:schemaLocation="http://www.springframework.org/schema/beans
	http://www.springframework.org/schema/beans/spring-beans.xsd
	http://www.springframework.org/schema/context
	http://www.springframework.org/schema/context/spring-context.xsd
	http://www.springframework.org/schema/aop
	http://www.springframework.org/schema/aop/spring-aop.xsd
	http://www.springframework.org/schema/tx
	http://www.springframework.org/schema/tx/spring-tx.xsd">

    <!--事务管理部分-->
    <!--第一步:配置事务管理器-->
    <bean id="DataSourceTransactionManager" class="org.springframework.jdbc.datasource.DataSourceTransactionManager">
        <!--对事务管理器的属性进行注入
            dataSource
        -->
        <property name="dataSource" ref="dataSource"/>
    </bean>
    <!--第二步:开启事务注解-->
    <tx:annotation-driven transaction-manager="DataSourceTransactionManager"/>

	<!-- 下面的是第一节的内容 -->


    <!-- 配置c3p0连接池 -->
    <bean id="dataSource" class="com.mchange.v2.c3p0.ComboPooledDataSource">
        <!-- 注入属性值 -->
        <property name="driverClass" value="com.mysql.jdbc.Driver"></property>
        <property name="jdbcUrl" value="jdbc:mysql:///spring_day03"></property>
        <property name="user" value="root"></property>
        <property name="password" value="root"></property>
    </bean>

    <!--dao注入jdbcTemplate对象-->
    <bean class="tx.itcast.dao.OrdersDao" id="ordersDao">
        <property name="jdbcTemplate" ref="jdbcTemplate">
        </property>
    </bean>
    <!--service中注入dao-->
    <bean class="tx.itcast.service.OrdersService" id="ordersService">
        <property name="ordersDao" ref="ordersDao"></property>
    </bean>
    <!--jdbc模板对象-->
    <bean class="org.springframework.jdbc.core.JdbcTemplate" id="jdbcTemplate">
        <!--源代码中有datesource的对象,所以要注入连接池提供的dataSourse-->
        <property name="dataSource" ref="dataSource"/>
    </bean>
第二步:在要增强事务管理功能的类上面加上注解
这样能达到的效果也是一样的!