Solr安装与配置
1.1什么是Solr
大多数搜索引擎应用都必须具有某种搜索功能,问题是搜索功能往往是巨大的资源消耗并且它们由于沉重的数据库加载而拖垮你的应用的性能。
这就是为什么转移负载到一个外部的搜索服务器是一个不错的主意,Apache Solr是一个流行的开源搜索服务器,它通过使用类似REST的HTTP API,这就确保你能从几乎任何编程语言来使用solr。
Solr是一个开源搜索平台,用于构建搜索应用程序。 它建立在Lucene(全文搜索引擎)之上。 Solr是企业级的,快速的和高度可扩展的。 使用Solr构建的应用程序非常复杂,可提供高性能。
为了在CNET网络的公司网站上添加搜索功能,Yonik Seely于2004年创建了Solr。并在2006年1月,它成为Apache软件基金会下的一个开源项目。并于2016年发布最新版本Solr 6.0,支持并行SQL查询的执行。
Solr可以和Hadoop一起使用。由于Hadoop处理大量数据,Solr帮助我们从这么大的源中找到所需的信息。不仅限于搜索,Solr也可以用于存储目的。像其他NoSQL数据库一样,它是一种非关系数据存储和处理技术。
总之,Solr是一个可扩展的,可部署,搜索/存储引擎,优化搜索大量以文本为中心的数据。
1.2 Solr安装
- 1:安装 Tomcat,解压缩即可。
- 2:解压 solr。
- 3:把 solr 下的dist目录solr-4.10.3.war部署到 Tomcat\webapps下(去掉版本号)。
- 4:启动 Tomcat解压缩 war 包
- 5:把solr下example/lib/ext 目录下的所有的 jar 包,添加到 solr 的工程中(\WEB-INF\lib目录下)。
- 6:创建一个 solrhome 。solr 下的/example/solr 目录就是一个 solrhome。复制此目录到D盘改名为solrhome
- 7:关联 solr 及 solrhome。需要修改 solr 工程的 web.xml 文件。
    <env-entry>
       <env-entry-name>solr/home</env-entry-name>
       <env-entry-value>d:\solrhome</env-entry-value>
       <env-entry-type>java.lang.String</env-entry-type>
</env-entry>- 8:启动 Tomcat
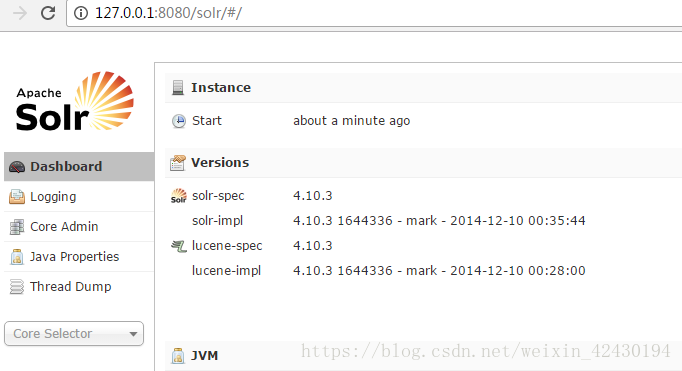
http://IP:8080/solr/
1.3中文分析器IK Analyzer
1.3.1 IK Analyzer简介
IK Analyzer 是一个开源的,基亍 java 语言开发的轻量级的中文分词工具包。从 2006年 12 月推出 1.0 版开始, IKAnalyzer 已经推出了 4 个大版本。最初,它是以开源项目Luence 为应用主体的,结合词典分词和文法分析算法的中文分词组件。从 3.0 版本开始,IK 发展为面向 Java 的公用分词组件,独立亍 Lucene 项目,同时提供了对 Lucene 的默认优化实现。在 2012 版本中,IK 实现了简单的分词歧义排除算法,标志着 IK 分词器从单纯的词典分词向模拟语义分词衍化。
1.3.2 IK Analyzer配置
步骤:
- 1、把IKAnalyzer2012FF_u1.jar 添加到 solr 工程的 lib 目录下
- 2、创建WEB-INF/classes文件夹 把扩展词典、停用词词典、配置文件放到 solr 工程的 WEB-INF/classes 目录下。
- 3、修改 Solrhome 的solrhome\collection1\conf下的 schema.xml 文件,配置一个 FieldType,使用 IKAnalyzer
fileType: 字段类型
<fieldType name="text_ik" class="solr.TextField">
     <analyzer class="org.wltea.analyzer.lucene.IKAnalyzer"/>
</fieldType>
1.4配置域
域相当于数据库的表字段,用户存放数据,因此用户根据业务需要去定义相关的Field(域),一般来说,每一种对应着一种数据,用户对同一种数据进行相同的操作。
域的常用属性:
• name:指定域的名称
• type:指定域的类型
• indexed:是否索引 如果需要搜索,则必须有索引.
• stored:是否存储
• required:是否必须
• multiValued:是否多值
1.4.1域
修改solrhome的schema.xml 文件 设置业务系统 Field
    <!--item_goodsid:  spu-->
    <field name="item_goodsid" type="long" indexed="true" stored="true"/>
    <field name="item_title" type="text_ik" indexed="true" stored="true"/>
    <field name="item_price" type="double" indexed="true" stored="true"/>
    <field name="item_image" type="string" indexed="false" stored="true" />
    <field name="item_category" type="string" indexed="true" stored="true" />
    <field name="item_seller" type="text_ik" indexed="true" stored="true" />
    <field name="item_brand" type="string" indexed="true" stored="true" />
1.4.2复制域
在solrhome的schema.xml 文件中添加复制域:
复制域的作用在于将某一个Field中的数据复制到另一个域中
需要建立索引,不需要从存储,需要多个值,复制域相当于其他几个域的总和.
这样就避免了使用多表查询.
<field name="item_keywords" type="text_ik" indexed="true" stored="false" multiValued="true"/>
<copyField source="item_title" dest="item_keywords"/>
<copyField source="item_category" dest="item_keywords"/>
<copyField source="item_seller" dest="item_keywords"/>
<copyField source="item_brand" dest="item_keywords"/>
1.4.3动态域
当我们需要动态扩充字段时,我们需要使用动态域。对于项目,规格的值是不确定的,所以我们需要使用动态域来实现。需要实现的效果如下:
配置:
<dynamicField name="item_spec_*" type="string" indexed="true" stored="true" />
2.Spring Data Solr入门
2.1 Spring Data Solr简介
虽然支持任何编程语言的能力具有很大的市场价值,你可能感兴趣的问题是:我如何将Solr的应用集成到Spring中?可以,Spring Data Solr就是为了方便Solr的开发所研制的一个框架,其底层是对SolrJ(官方API)的封装。
2.2 Spring Data Solr入门小Demo
2.2.1 搭建工程
(1)创建maven工程, 选择jar pom.xml中引入依赖
   <dependencies>
    <dependency>
        <groupId>org.springframework.data</groupId>
        <artifactId>spring-data-solr</artifactId>
        <version>1.5.5.RELEASE</version>
    </dependency>
    <dependency>
        <groupId>org.springframework</groupId>
        <artifactId>spring-test</artifactId>
        <version>4.2.4.RELEASE</version>
    </dependency>
    <dependency>
        <groupId>junit</groupId>
        <artifactId>junit</artifactId>
        <version>4.9</version>
    </dependency>
  </dependencies>
(2)在src/main/resources下创建 applicationContext-solr.xml
<?xml version="1.0" encoding="UTF-8"?>
<beans xmlns="http://www.springframework.org/schema/beans"
    xmlns:xsi="http://www.w3.org/2001/XMLSchema-instance" xmlns:p="http://www.springframework.org/schema/p"
    xmlns:context="http://www.springframework.org/schema/context"
    xmlns:solr="http://www.springframework.org/schema/data/solr"
    xsi:schemaLocation="http://www.springframework.org/schema/data/solr
        http://www.springframework.org/schema/data/solr/spring-solr-1.0.xsd
        http://www.springframework.org/schema/beans
        http://www.springframework.org/schema/beans/spring-beans.xsd
        http://www.springframework.org/schema/context
        http://www.springframework.org/schema/context/spring-context.xsd">
    <!-- solr服务器地址 -->
    <solr:solr-server id="solrServer" url="http://127.0.0.1:8080/solr" />
    <!-- solr模板,使用solr模板可对索引库进行CRUD的操作 -->
    <bean id="solrTemplate" class="org.springframework.data.solr.core.SolrTemplate">
        <constructor-arg ref="solrServer" />
    </bean>
</beans>
2.2.2 @Field 注解
创建TbItem实体类,属性使用@Field注解标识 。 如果属性与配置文件定义的域名称不一致,需要在注解中指定域名称。
动态域有些特殊,这里没有注解
 public class TbItem implements Serializable{

    @Field
    private Long id;

    @Field("item_title")
    private String title;

    private String sellPoint;

    @Field("item_price")
    private BigDecimal price;

    private Integer stockCount;

    private Integer num;

    private String barcode;

    @Field("item_image")
    private String image;

    private Long categoryid;

    private String status;

    private Date createTime;

    private Date updateTime;

    private String itemSn;

    private BigDecimal costPirce;

    private BigDecimal marketPrice;

    private String isDefault;

    @Field("item_goodsId")
    private Long goodsId;

    private String sellerId;

    private String cartThumbnail;

    @Field("item_category")
    private String category;

    @Field("item_brand")
    private String brand;

    private String spec;

    @Field("item_seller")
    private String seller;
    //  get set方法省略
}
2.2.3 增加(修改)
- 创建测试类TestTemplate.java
如果id一样,数据存在,则修改,数据不存在就增加
@RunWith(SpringJUnit4ClassRunner.class)
@ContextConfiguration(locations="classpath:applicationContext-solr.xml")
public class TestTemplate {

    @Autowired
    private SolrTemplate solrTemplate;

    @Test
    public void testAdd(){

        TbItem item = new TbItem();
        item.setId(1L);
        item.setTitle("华为METE10");
        item.setCategory("手机");
        item.setBrand("华为");
        item.setSeller("华为旗帜店");
        item.setGoodsId(2L);
        item.setPrice(new BigDecimal(999.99));

        solrTemplate.saveBean(item);
        solrTemplate.commit();//提交
    }
}
2.2.4 按主键查询和删除
    /**
     * 查询
     */
    @Test
    public void findById(){
        TbItem item = solrTemplate.getById(1L, TbItem.class);
        System.out.println(item.getBrand());
    }

    /**
     * 删除
     */
    @Test
    public void deleById(){
        solrTemplate.deleteById("1");
        solrTemplate.commit();
    }
2.2.6 分页查询和条件查询
首先循环插入100条测试数据
分页查询测试代码:
@Test
    public void testPageQueryMutil(){

        Query query = new SimpleQuery("*:*");

        // contains : 包含,不分词   is : 匹配,分词
        Criteria criteria = new Criteria("item_category").is("手机");

        //增加一个条件
        criteria=criteria.and("item_title").contains("2");

        query.addCriteria(criteria);

        //从查询的结果的第二条开始显示
        query.setOffset(1);//开始索引 以查询的结果建立索引
        query.setRows(50);//每页记录数

        ScoredPage<TbItem> page = solrTemplate.queryForPage(query, TbItem.class);

        for(TbItem item : page.getContent()){
            System.out.println(item.getTitle() + item.getBrand());
        }

        System.out.println("总记录数"+page.getTotalElements());
        System.out.println("总页数"+page.getTotalPages());
    }
2.2.7 删除全部数据
    /**
     * 删除
     */
    @Test
    public void deleAll(){
        //可以跟上条件
        Query query = new SimpleQuery("*:*");
        solrTemplate.delete(query);
        solrTemplate.commit();
    }