版权声明:精心研究,潜心学习,本文为博主原创文章,未经博主允许不得转载。 https://blog.csdn.net/qq_33468857/article/details/85092909
一、更改my.cnf配置文件
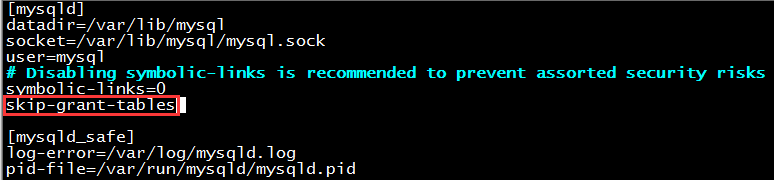
编辑/etc/my.cnf文件,在[mysqld]下添加skip-grant-tables,保存退出。如图:
重启mysql服务:services mysqld restart
二、更改root密码
重启mysqld服务后,执行mysql命令,进入mysql命令行:
| 1 2 3 4 5 6 7 8 9 10 11 12 13 14 |
[root@yeebian ~]# mysql
Welcome to the MySQL monitor. Commands end with ; or \g.
Your MySQL connection id is 2
Server version: 5.1.73 Source distribution
Copyright (c) 2000, 2013, Oracle and/or its affiliates. All rights reserved.
Oracle is a registered trademark of Oracle Corporation and/or its
affiliates. Other names may be trademarks of their respective
owners.
Type 'help;' or '\h' for help. Type '\c' to clear the current input statement.
mysql>
|
修改root密码
| 1 2 3 4 5 6 7 8 9 |
mysql> UPDATE mysql.user SET Password=PASSWORD('mysqladmin') where USER='root';
Query OK, 0 rows affected (0.00 sec)
Rows matched: 3 Changed: 0 Warnings: 0
mysql> flush privileges;
Query OK, 0 rows affected (0.00 sec)
mysql> exit
Bye
|
三、删除/etc/my.cnf中的skip-grant-tables,或者注释掉,重启mysql即可。