- 搭建LNMP(ansible)
ansible安装nginx,php,mysql(nginx.yaml等)
分发nginx配置文件,作为web服务器
重启nginx - 搭建LNMT(ansible)
ansible安装nginx,tomcat,mysql(nginx.yaml等)
分发nginx配置文件,作为web服务器
重启nginx
先写子目录剧本,再将参数加入主目录剧本main.yaml
roles/nginx/tasks/main.yaml 这个剧本只写tasks任务(都是一级标题)
files目录存放:脚本,rpm包,源码包等
给脚本x权限
无需指定路径,默认去固定目录下查找
templates目录,别写错了,指定相对路径即可
notify模块在handlers目录下查找
搭建wordpress博客
先搭建LNMP
nginx,php,MySQL模块只定义最原始文件,无需修改配置文件(不变部分)
分别对这三个分发文件,触发启动
在搭建一个LNMP模块,修改参数(可变部分)
再搭建tomcat模块原始文件,及可变动的LNMT模块即可
分发范围一样的,hosts设置一个
分发范围不一样,hosts设置不同角色即可
部署ansible环境
- 搭建ansible
- 环境部署
[root@localhost myroles]# tree /myroles/
/myroles/
├── main.yaml
├── mysql.yaml
├── nginx.yaml
├── php.yaml
├── roles
│   ├── main
│   │   ├── files
│   │   │   ├── main.sh
│   │   │   └── wordpress-4.7.4-zh_CN.tar.gz
│   │   ├── handlers
│   │   │   └── main.yaml
│   │   ├── tasks
│   │   │   └── main.yaml
│   │   ├── templates
│   │   │   └── nginx.conf
│   │   └── vars
│   │       └── main.yaml
│   ├── mysql
│   │   ├── files
│   │   │   ├── mysql-5.5.32-linux2.6-x86_64.tar.gz
│   │   │   └── mysql.sh
│   │   ├── handlers
│   │   │   └── main.yaml
│   │   ├── tasks
│   │   │   └── main.yaml
│   │   ├── templates
│   │   └── vars
│   │       └── main.yaml
│   ├── nginx
│   │   ├── files
│   │   │   ├── nginx-1.10.2.tar.gz
│   │   │   ├── nginx.conf
│   │   │   └── nginx.sh
│   │   ├── handlers
│   │   │   └── main.yaml
│   │   ├── tasks
│   │   │   └── main.yaml
│   │   ├── templates
│   │   └── vars
│   ├── php
│   │   ├── files
│   │   │   ├── libiconv-1.14.tar.gz
│   │   │   ├── libmcrypt-2.5.8-9.el6.x86_64.rpm
│   │   │   ├── libmcrypt-devel-2.5.8-9.el6.x86_64.rpm
│   │   │   ├── mcrypt-2.6.8-10.el6.x86_64.rpm
│   │   │   ├── mhash-0.9.9.9-3.el6.x86_64.rpm
│   │   │   ├── php-5.3.28.tar.gz
│   │   │   └── php.sh
│   │   ├── handlers
│   │   │   └── main.yaml
│   │   ├── tasks
│   │   │   └── main.yaml
│   │   ├── templates
│   │   └── vars
│   └── tomcat
│       ├── files
│       │   ├── apache-maven-3.3.9-bin.tar.gz
│       │   ├── apache-tomcat-8.0.27.tar.gz
│       │   ├── java.sh
│       │   ├── jdk-8u60-linux-x64.tar.gz
│       │   ├── jpress-web-newest.war
│       │   ├── memtest.war
│       │   └── tomcat.sh
│       ├── handlers
│       │   └── main.yaml
│       ├── tasks
│       │   └── main.yaml
│       ├── templates
│       └── vars
└── tomcat.yaml

31 directories, 39 files
部署nginx环境
- 配置nginx.yaml剧本
[root@localhost files]# cd /myroles/
[root@localhost myroles]# cat nginx.yaml
---
- hosts: all
  gather_facts: True
  roles:
  - nginx
- 配置nginx配置文件
[root@localhost myroles]# cd roles/nginx/
[root@localhost nginx]# ls
files  handlers  tasks  templates  vars
[root@localhost nginx]# cd files/
[root@localhost files]# ls
nginx-1.10.2.tar.gz  nginx.conf  nginx.sh

[root@localhost files]# cat nginx.conf
worker_processes  1;
events {
    worker_connections  1024;
}
http {
    include       mime.types;
    default_type  application/octet-stream;
    sendfile        on;
    keepalive_timeout  65;
    server {
        listen       80;
        server_name  localhost;
        location / {
            root   html;
            index  index.html index.htm;
        }
    }
}
- 配置nginx的安装脚本
[root@localhost files]# cat nginx.sh
#!/bin/bash
rpm -qf nginx
if [ $? -ne 0 ];then umount /dev/sr0
[ -d /media/cdrom ] || mkdir -p /media/cdrom
mount /dev/sr0 /media/cdrom
	if [ $? -ne 0 ];then
		echo "请插入光盘!"
		exit
	fi
[ -d /etc/yum.repo.d ] || mkdir -p /etc/yum.repos.d
cd /etc/yum.repos.d
cat > /etc/yum.repos.d/localyum.repo << FEF
[local]
name=local
baseurl=file:///media/cdrom
gpgcheck=0
enabled=1
FEF
/usr/bin/yum -y clean all &>/dev/null
/usr/bin/yum makecache &>/dev/null
[ $? -eq 0 ] && echo "yum 搭建完毕" || echo "yum搭建失败"
/usr/bin/yum -y install gcc gcc-c++ make pcre-devel openssl-devel &>/dev/null
[ $? -eq 0 ] && echo "nginx软件包安装完毕" || echo "nginx软件包安装失败"
fi
cd ~
tar xf nginx-1.10.2.tar.gz -C /usr/src/
cd /usr/src/nginx-1.10.2/
useradd -s /sbin/nologin -M www
./configure --user=www --group=www --prefix=/usr/local/nginx --with-http_stub_status_module --with-http_ssl_module &>/dev/null
make && make install
[ $? -eq 0 ] && echo "nginx编译成功" || echo "nginx编译失败"
ln -s /usr/local/nginx/sbin/* /usr/local/sbin/
- 配置nginx的notify脚本
[root@localhost handlers]# cd ..
[root@localhost nginx]# ls
files  handlers  tasks  templates  vars
[root@localhost nginx]# cd handlers/
[root@localhost handlers]# ls
main.yaml
[root@localhost handlers]# cat main.yaml
---
- name: start_nginx
  shell: /usr/local/nginx/sbin/nginx
- name: stop_nginx
  shell: /usr/local/nginx/sbin/nginx -s stop
- name: reload_nginx
  shell: /usr/local/nginx/sbin/nginx -s reload
- 配置nginx的tasks执行脚本
[root@localhost handlers]# cd ..
[root@localhost nginx]# ls
files  handlers  tasks  templates  vars
[root@localhost nginx]# cd tasks/
[root@localhost tasks]# ls
main.yaml
[root@localhost tasks]# cat main.yaml
---
- name: check alived
  ping:
- name: cp install_source
  copy: src=nginx-1.10.2.tar.gz dest=/root/
- name:
  shell: chmod +x nginx.sh
- name: nginx install
  script: nginx.sh
  register: ls_result
- debug: var=ls_result
- name: nginx conf
  copy: src=nginx.conf dest=/usr/local/nginx/conf/ backup=yes
  notify: start_nginx
[root@localhost nginx]# ls templates/
[root@localhost nginx]# ls vars/
- 执行nginx.yaml剧本,一键安装测试
[root@localhost myroles]# ansible-playbook nginx.yaml
- 查看客户端
[root@localhost ~]# netstat -antup | grep 80
tcp        0      0 0.0.0.0:80                  0.0.0.0:*                   LISTEN      4711/nginx
部署MySQL环境
- 配置mysql.yaml剧本
[root@localhost myroles]# ls
mysql.retry  mysql.yaml  nginx.retry  nginx.yaml  php.retry  php.yaml  roles  tomcat.yaml
[root@localhost myroles]# cat mysql.yaml
---
- hosts: all
  gather_facts: True
  roles:
  - mysql
- 配置mysql安装脚本
[root@localhost myroles]# cd roles/mysql/
[root@localhost mysql]# ls
files  handlers  tasks  templates  vars
[root@localhost mysql]# cd files/
[root@localhost files]# ls
mysql-5.5.32-linux2.6-x86_64.tar.gz  mysql.sh
[root@localhost files]# cat mysql.sh
#!/bin/bash
rpm -qf mysql
if [ $? -ne 0 ];then umount /dev/sr0
[ -d /media/cdrom ] || mkdir -p /media/cdrom
mount /dev/sr0 /media/cdrom
        if [ $? -ne 0 ];then
                echo "请插入光盘!"
                exit
        fi
[ -d /etc/yum.repo.d ] || mkdir -p /etc/yum.repos.d
cd /etc/yum.repos.d
cat > /etc/yum.repos.d/localyum.repo << FEF
[local]
name=local
baseurl=file:///media/cdrom
gpgcheck=0
enabled=1
FEF
/usr/bin/yum -y clean all &>/dev/null
/usr/bin/yum makecache &>/dev/null
[ $? -eq 0 ] && echo "yum 搭建完毕" || echo "yum搭建失败"
/usr/bin/yum -y install gcc gcc-c++ make libaio &>/dev/null
[ $? -eq 0 ] && echo "mysql软件包安装完毕" || echo "mysql软件包安装失败"
fi
cd ~
tar xf mysql-5.5.32-linux2.6-x86_64.tar.gz -C /usr/local/
useradd -s /sbin/nologin -M mysql
echo "`hostname -I` LNMP" >> /etc/hosts
ln -s /usr/local/mysql-5.5.32-linux2.6-x86_64/ /usr/local/mysql
cd /usr/local/mysql/
/bin/cp support-files/my-small.cnf  /etc/my.cnf
chown -R mysql.mysql /usr/local/mysql
/usr/local/mysql/scripts/mysql_install_db --basedir=/usr/local/mysql --datadir=/usr/local/mysql/data/ --user=mysql &>/dev/null
/bin/cp support-files/mysql.server /etc/init.d/mysqld
chmod +x /etc/init.d/mysqld
ln -s /usr/local/mysql/bin/* /usr/local/bin/
- 配置notify通知脚本
[root@localhost mysql]# ls
files  handlers  tasks  templates  vars
[root@localhost mysql]# cd handlers/
[root@localhost handlers]# ls
main.yaml
[root@localhost handlers]# cat main.yaml
---
- name: start_mysql
  shell: /etc/init.d/mysqld start
- name: stop_mysql
  shell: /etc/init.d/mysqld stop
- name: reload_mysql
  shell: /etc/init.d/mysqld reload
- name: restart_mysql
  shell: /etc/init.d/mysqld restart
- name: chkon_mysql
  shell: chkconfig mysqld on
- name: chkoff_mysql
  shell: chkconfig mysqld off
- 配置tasks的执行脚本
[root@localhost mysql]# ls
files  handlers  tasks  templates  vars
[root@localhost mysql]# cd tasks/
[root@localhost tasks]# ls
main.yaml
[root@localhost tasks]# cat main.yaml
---
- name: check alived
  ping:
- name: cp install_source
  copy: src=mysql-5.5.32-linux2.6-x86_64.tar.gz dest=/root/
- name: mysql install
  script: mysql.sh
  register: my_result
  notify:
  - start_mysql
- debug: var=my_result
- name:
  shell: chkconfig --add mysqld
  notify:
  - chkon_mysql
- name: mysqladmin
  shell: mysqladmin -u{{ user }} password '{{ password }}'
- 配置自定义变量脚本
[root@localhost mysql]# ls
files  handlers  tasks  templates  vars
[root@localhost mysql]# ls templates/
[root@localhost mysql]# ls vars/
main.yaml
[root@localhost mysql]# cat vars/main.yaml
user: "root"
password: "123456"
- 执行mysql.yaml剧本,一键安装测试
[root@localhost myroles]# ansible-playbook mysql.yaml
- 查看客户端
[root@localhost ~]# netstat -antup | grep 3306
tcp        0      0 0.0.0.0:3306                0.0.0.0:*                   LISTEN      6447/mysqld
部署PHP环境
- 配置php.yaml剧本
[root@localhost myroles]# cat php.yaml
---
- hosts: all
  gather_facts: True
  roles:
  - php
- 配置php安装脚本
[root@localhost myroles]# cd roles/php/
[root@localhost php]# ls
files  handlers  tasks  templates  vars
[root@localhost php]# cd files/
[root@localhost files]# ls
libiconv-1.14.tar.gz                    mcrypt-2.6.8-10.el6.x86_64.rpm  php.sh
libmcrypt-2.5.8-9.el6.x86_64.rpm        mhash-0.9.9.9-3.el6.x86_64.rpm
libmcrypt-devel-2.5.8-9.el6.x86_64.rpm  php-5.3.28.tar.gz
[root@localhost files]# cat php.sh
#!/bin/bash
rpm -qf php
if [ $? -ne 0 ];then umount /dev/sr0
[ -d /media/cdrom ] || mkdir -p /media/cdrom
mount /dev/sr0 /media/cdrom
        if [ $? -ne 0 ];then
                echo "请插入光盘!"
                exit
        fi
[ -d /etc/yum.repo.d ] || mkdir -p /etc/yum.repos.d
cd /etc/yum.repos.d
cat > /etc/yum.repos.d/localyum.repo << FEF
[local]
name=local
baseurl=file:///media/cdrom
gpgcheck=0
enabled=1
FEF
/usr/bin/yum -y clean all &>/dev/null
/usr/bin/yum makecache &>/dev/null
[ $? -eq 0 ] && echo "yum 搭建完毕" || echo "yum搭建失败"
/usr/bin/yum -y install openssl-devel openssl
/usr/bin/yum -y install gcc gcc-c++ make zlib-devel libxml2-devel libjpeg-devel libjpeg-turbo-devel libiconv-devel &>/dev/null
/usr/bin/yum -y install freetype-devel libpng-devel gd libcurl-devel libxslt-devel &>/dev/null
[ $? -eq 0 ] && echo "php软件包安装完毕" || echo "php软件包安装失败"
fi
cd ~
tar xf libiconv-1.14.tar.gz -C /usr/src/
cd /usr/src/libiconv-1.14/
./configure --prefix=/usr/local/libiconv && make && make install &>/dev/null
[ $? -eq 0 ] && echo "libiconv编译成功" || echo "libiconv编译失败"
cd ~
rpm -ivh mhash-0.9.9.9-3.el6.x86_64.rpm &>/dev/null
rpm -ivh libmcrypt-2.5.8-9.el6.x86_64.rpm &>/dev/null
rpm -ivh libmcrypt-devel-2.5.8-9.el6.x86_64.rpm &>/dev/null
rpm -ivh mcrypt-2.6.8-10.el6.x86_64.rpm &>/dev/null
tar xf php-5.3.28.tar.gz -C /usr/src/
cd /usr/src/php-5.3.28/
./configure --prefix=/usr/local/php5.3.28  --with-mysql=mysqlnd --with-iconv-dir=/usr/local/libiconv --with-freetype-dir  --with-jpeg-dir  --with-png-dir --with-zlib --with-libxml-dir=/usr  --enable-xml --disable-rpath  --enable-safe-mode --enable-bcmath --enable-shmop --enable-sysvsem --enable-inline-optimization --with-curl --with-curlwrappers --enable-mbregex  --enable-fpm --enable-mbstring --with-mcrypt --with-gd --enable-gd-native-ttf --with-openssl --with-mhash --enable-pcntl --enable-sockets --with-xmlrpc --enable-zip --enable-soap --enable-short-tags --enable-zend-multibyte --enable-static --with-xsl  --with-fpm-user=www  --with-fpm-group=www  --enable-ftp &>/dev/null
[ $? -eq 0 ] && echo "php编译成功" || echo "php编译失败"
touch ext/phar/phar.phar
make && make install &>/dev/null
[ $? -eq 0 ] && echo "php搭建成功" || echo "php搭建失败"
ln -s /usr/local/php5.3.28/ /usr/local/php
cd /usr/src/php-5.3.28/
/bin/cp php.ini-production /usr/local/php/lib/php.ini
cd /usr/local/php/etc/
/bin/cp php-fpm.conf.default php-fpm.conf
- 配置notify通知脚本
[root@localhost php]# ls
files  handlers  tasks  templates  vars
[root@localhost php]# cd handlers/
[root@localhost handlers]# ls
main.yaml
[root@localhost handlers]# cat main.yaml
---
- name: start_php
  shell: /usr/local/php/sbin/php-fpm
- name: stop_php
  shell: pkill php-fpm
- 配置tasks的执行脚本
[root@localhost php]# ls
files  handlers  tasks  templates  vars
[root@localhost php]# cd tasks/
[root@localhost tasks]# ls
main.yaml
[root@localhost tasks]# cat main.yaml
---
- name: check alived
  ping:
- name: cp install_source1
  copy: src=libiconv-1.14.tar.gz dest=/root/
- name: cp install_source2
  copy: src=mcrypt-2.6.8-10.el6.x86_64.rpm dest=/root/
- name: cp install_source3
  copy: src=libmcrypt-2.5.8-9.el6.x86_64.rpm dest=/root/
- name: cp install_source4
  copy: src=libmcrypt-devel-2.5.8-9.el6.x86_64.rpm dest=/root/
- name: cp install_source5
  copy: src=mhash-0.9.9.9-3.el6.x86_64.rpm dest=/root/
- name: cp install_source6
  copy: src=php-5.3.28.tar.gz dest=/root/
- name: php install
  script: php.sh
  register: p_result
  notify:
  - start_php
- debug: var=p_result
[root@localhost php]# ls templates/
[root@localhost php]# ls vars/
- 执行php.yaml剧本,一键安装测试
[root@localhost myroles]# ansible-playbook php.yaml
- 查看客户端
[root@localhost ~]# netstat -antup | grep 9000
tcp        0      0 127.0.0.1:9000              0.0.0.0:*                   LISTEN      65105/php-fpm
配置nginx支持PHP程序请求访问
- 配置主变量main.yaml剧本
[root@localhost myroles]# ls
main.retry  mysql.retry  nginx.retry  php.retry  roles
main.yaml   mysql.yaml   nginx.yaml   php.yaml   tomcat.yaml
[root@localhost myroles]# cat main.yaml
---
- hosts: all
  gather_facts: True
  roles:
  - main
- 配置主变量安装脚本
[root@localhost roles]# ls
main  mysql  nginx  php  tomcat
[root@localhost roles]# cd main/
[root@localhost main]# ls
files  handlers  tasks  templates  vars
[root@localhost main]# cd files/
[root@localhost files]# ls
main.sh
[root@localhost files]# cat main.sh
#!/bin/bash
cd /usr/local/nginx/html
[ -d blog ] || mkdir -p blog
echo "`hostname -I` blog.yunjisuan.com" > blog/index.html
echo "`hostname -I` blog.yunjisuan.com" >> /etc/hosts
- 配置notify通知脚本
[root@localhost main]# ls
files  handlers  tasks  templates  vars
[root@localhost main]# cd handlers/
[root@localhost handlers]# ls
main.yaml
[root@localhost handlers]# cat main.yaml
---
- name: start_nginx
  shell: /usr/local/nginx/sbin/nginx
- name: stop_nginx
  shell: /usr/local/nginx/sbin/nginx -s stop
- name: reload_nginx
  shell: /usr/local/nginx/sbin/nginx -s reload
- 配置tasks的执行脚本
[root@localhost main]# ls
files  handlers  tasks  templates  vars
[root@localhost main]# cd tasks/
[root@localhost tasks]# ls
main.yaml
[root@localhost tasks]# cat main.yaml
---
- name: cd
  shell: cd /usr/local/nginx/conf/
- name: nginx conf
  template: src=nginx.conf dest=/usr/local/nginx/conf/nginx.conf
  notify:
  - reload_nginx
- name:
  script: main.sh
  notify: reload_nginx
- 配置template模块下发可变的配置文件
[root@localhost main]# ls
files  handlers  tasks  templates  vars
[root@localhost main]# cd templates/
[root@localhost templates]# ls
nginx.conf
[root@localhost templates]# cat nginx.conf
worker_processes  {{ ansible_processor_count }};
error_log logs/error.log;
events {
    worker_connections  1024;
}
http {
    include       mime.types;
    default_type  application/octet-stream;
    sendfile        on;
    keepalive_timeout  65;
    server {
        listen       80;
        server_name  blog.yunjisuan.com;
        location / {
            root   html/blog;
            index  index.html index.htm;
        }
        location ~ .*\.(php|php5)?$ {
                root html/blog;
                fastcgi_pass 127.0.0.1:9000;
                fastcgi_index index.php;
                include fastcgi.conf;
        }
    }
}
- 执行main.yaml剧本,一键安装测试
[root@localhost myroles]# ansible-playbook main.yaml
- 测试客户端
[root@localhost nginx]# curl blog.yunjisuan.com
192.168.239.141  blog.yunjisuan.com
WordPress博客程序的搭建准备
- 配置主变量main.yaml剧本
[root@localhost myroles]# ls
main.retry  mysql.retry  nginx.retry  php.retry  roles
main.yaml   mysql.yaml   nginx.yaml   php.yaml   tomcat.yaml
[root@localhost myroles]# cat main.yaml
---
- hosts: all
  gather_facts: True
  roles:
  - main
- 配置主变量安装脚本
[root@localhost roles]# ls
main  mysql  nginx  php  tomcat
[root@localhost roles]# cd main/
[root@localhost main]# ls
files  handlers  tasks  templates  vars
[root@localhost main]# cd files/
[root@localhost files]# ls
main.sh  wordpress-4.7.4-zh_CN.tar.gz
[root@localhost files]# cat main.sh
#!/bin/bash
cd /usr/local/nginx/html
[ -d blog ] || mkdir -p blog
echo "`hostname -I` blog.yunjisuan.com" > blog/index.html
echo "`hostname -I` blog.yunjisuan.com" >> /etc/hosts
cd ~
tar xf wordpress-4.7.4-zh_CN.tar.gz
cd /usr/local/nginx/html/blog/
rm -rf *
mv ~/wordpress .
/bin/mv wordpress/* .
rm -rf wordpress/
chown -R www.www /usr/local/nginx/html/blog
- 配置notify通知脚本
[root@localhost main]# ls
files  handlers  tasks  templates  vars
[root@localhost main]# cd handlers/
[root@localhost handlers]# ls
main.yaml
[root@localhost handlers]# cat main.yaml
---
- name: start_nginx
  shell: /usr/local/nginx/sbin/nginx
- name: stop_nginx
  shell: /usr/local/nginx/sbin/nginx -s stop
- name: reload_nginx
  shell: /usr/local/nginx/sbin/nginx -s reload
- 配置tasks的执行脚本
[root@localhost main]# ls
files  handlers  tasks  templates  vars
[root@localhost main]# cd tasks/
[root@localhost tasks]# ls
main.yaml
[root@localhost tasks]# cat main.yaml
---
- name:
  shell: mysql -u{{ user }} -p{{ password }} -e "create database wordpress"
- name:
  shell: mysql -u{{ user }} -p{{ password }} -e " grant all on wordpress.* to wordpress@'localhost' identified by '{{ passwd }}'"
- name:
  shell: mysql -u{{ user }} -p{{ password }} -e "flush privileges"
- name: cd
  shell: cd /usr/local/nginx/conf/
- name: nginx conf
  template: src=nginx.conf dest=/usr/local/nginx/conf/nginx.conf
  notify:
  - reload_nginx
- name:
  copy: src=wordpress-4.7.4-zh_CN.tar.gz dest=/root/
- name:
  script: main.sh
  notify: reload_nginx
- 配置template模块下发可变的配置文件
[root@localhost main]# ls
files  handlers  tasks  templates  vars
[root@localhost main]# cd templates/
[root@localhost templates]# ls
nginx.conf
[root@localhost templates]# cat nginx.conf
worker_processes  {{ ansible_processor_count }};
error_log logs/error.log;
events {
    worker_connections  1024;
}
http {
    include       mime.types;
    default_type  application/octet-stream;
    sendfile        on;
    keepalive_timeout  65;
    server {
        listen       80;
        server_name  blog.yunjisuan.com;
        location / {
            root   html/blog;
            index  index.php index.html index.htm;
        }
        location ~ .*\.(php|php5)?$ {
                root html/blog;
                fastcgi_pass 127.0.0.1:9000;
                fastcgi_index index.php;
                include fastcgi.conf;
        }
    }
}
- 配置自定义变量脚本
[root@localhost main]# ls
files  handlers  tasks  templates  vars
[root@localhost main]# cd vars/
[root@localhost vars]# ls
main.yaml
[root@localhost vars]# cat main.yaml
user: "root"
password: "123456"
passwd: "123456"
- 执行main.yaml剧本,一键安装测试
[root@localhost myroles]# ansible-playbook main.yaml
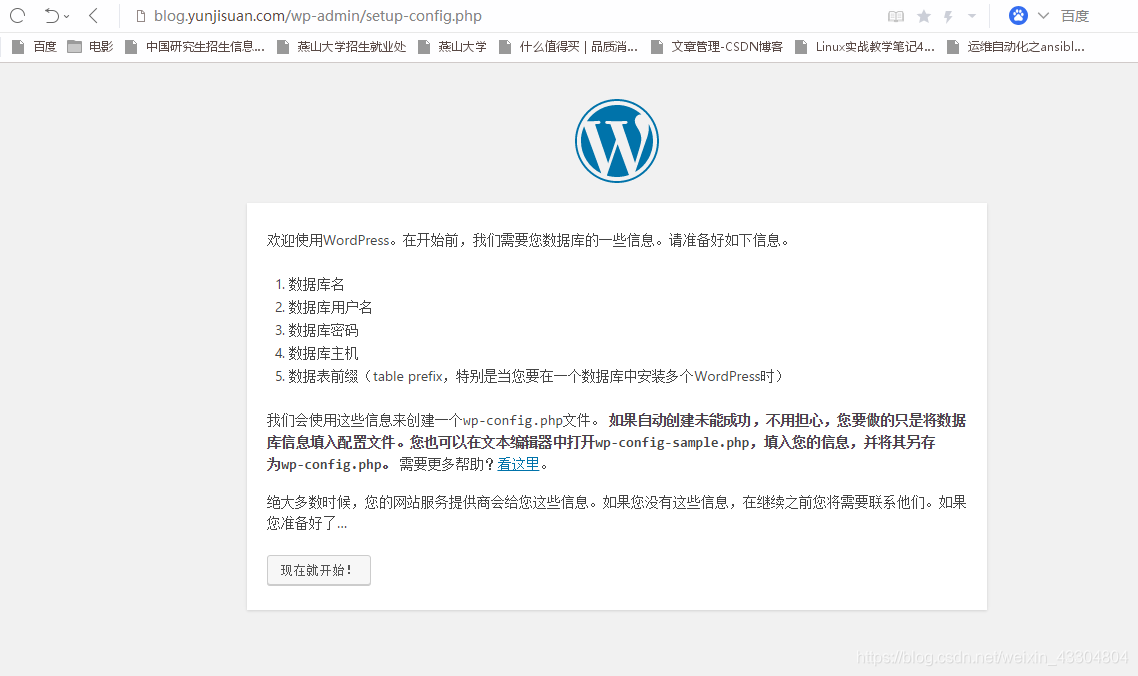
- 安装blog博客程序