ActiveMQ是面向消息中间件(Message-oriented middleware),是用于以分布式应用或系统中的异步、松耦合、可靠、可扩展和安全通信的一类软件。总体思想是它作为消息发送器和消息接收器之间的消息中介,这种中介提供了一个全新水平的松耦合。
JMS 叫做 Java 消息服务(Java Message Service),是 Java 平台上有关面向 MOM 的技术规范,旨在通过提供标准的产生、发送、接收和处理消息的 API 简化企业应用的开发,类似于 JDBC 和关系型数据库通信方式的抽象。
首先到网上下载activemq,网站:http://activemq.apache.org/download-archives.html
下载完后解压后文件结构:

打开doc命令,进入到activemq的bin目录,输入activemq.bat,回车:


打开浏览器访问网站http://localhost:8161/admin,用户名密码默认是admin,activemq便启动好了


接下来我们用idea进行测试:
首先搭建好项目,在pom.xml中导入所需jar包:
<?xml version="1.0" encoding="UTF-8"?>
<project xmlns="http://maven.apache.org/POM/4.0.0"
         xmlns:xsi="http://www.w3.org/2001/XMLSchema-instance"
         xsi:schemaLocation="http://maven.apache.org/POM/4.0.0 http://maven.apache.org/xsd/maven-4.0.0.xsd">
    <modelVersion>4.0.0</modelVersion>

    <groupId>com.szxs</groupId>
    <artifactId>AcviteMQQueueDemo1</artifactId>
    <version>1.0-SNAPSHOT</version>
    <packaging>jar</packaging>

    <dependencies>
        <!-- https://mvnrepository.com/artifact/org.apache.activemq/activemq-client -->
        <dependency>
            <groupId>org.apache.activemq</groupId>
            <artifactId>activemq-client</artifactId>
            <version>5.8.0</version>
        </dependency>

        <dependency>
            <groupId>org.springframework</groupId>
            <artifactId>spring-context</artifactId>
            <version>4.2.9.RELEASE</version>
        </dependency>
        <dependency>
            <groupId>org.springframework</groupId>
            <artifactId>spring-jms</artifactId>
            <version>4.2.9.RELEASE</version>
        </dependency>

    </dependencies>
</project>
activemq中分为两种模式:
第一种:queue,队列模式,一对一消息发送和接受(先发送,后接受)
第二张:topic,订阅模式,多对多消息发送和接受(先接受,后发送)
下面先来测试queue模式,分为三类(监听器,发送消息,接受消息):
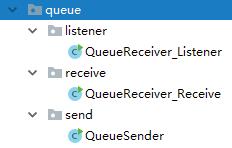
queue监听器listener代码:
package com.szxs.queue.listener;

import org.apache.activemq.ActiveMQConnection;
import org.apache.activemq.ActiveMQConnectionFactory;

import javax.jms.*;

/**
 * 点对点消息接收者 使用Listener 监听方式 在实际项目开发中使用比较多
 */
public class QueueReceiver_Listener {
    // tcp 地址 服务器器端地址
    public static final String BROKER_URL = ActiveMQConnection.DEFAULT_BROKER_URL;  // 其值为 "tcp://localhost:61616";
    // 目标地址,在ActiveMQ管理员控制台创建 http://localhost:8161/admin/queues.jsp中可以查询到发送的mq消息
    public static final String DESTINATION = "xs.mq.queue";
    //测试连接使用默认的用户名
    public static final String DEFAULT_USER = ActiveMQConnection.DEFAULT_USER;//默认为null
    //测试连接使用默认的密码
    public static final String DEFAULT_PASSWORD = ActiveMQConnection.DEFAULT_PASSWORD;//默认为null

    public static void run() throws Exception {

        QueueConnection connection = null;
        QueueSession session = null;
        try {
            // 1、创建链接工厂
            QueueConnectionFactory factory = new ActiveMQConnectionFactory(QueueReceiver_Listener.DEFAULT_USER, QueueReceiver_Listener.DEFAULT_PASSWORD,QueueReceiver_Listener.BROKER_URL);
            // 2、通过工厂创建一个连接
            connection = factory.createQueueConnection();
            // 3、启动连接
            connection.start();
            // 4、创建一个session会话
            session = connection.createQueueSession(Boolean.TRUE, Session.AUTO_ACKNOWLEDGE);
            // 5、创建一个消息队列
            Queue queue = session.createQueue(DESTINATION);
            // 创建消息接收者
            javax.jms.QueueReceiver receiver = session.createReceiver(queue);

            //使用内部类为消息接收者加载相应的Listener监听
            receiver.setMessageListener(new MessageListener() {
                //重写onMessage方法
                public void onMessage(Message msg) {
                    if (msg != null) {
                        TextMessage textMessage = (TextMessage) msg;
                        try {
                            System.out.println("接收#" + textMessage.getText());
                        } catch (JMSException e) {
                            e.printStackTrace();
                        }
                    }
                }
            });
            // 休眠10s再关闭 接收生产者发送的全部的10条消息
            // 需要注意的是这里使用sleep会使当前正在执行的线程进入休眠状态
            // 也就是QueueReceiver_Listener这个类进入休眠状态了,而接收者的监听器仍然会继续执行的哦。
            Thread.sleep(1000 * 10);

            // 提交会话
            session.commit();

        } catch (Exception e) {
            throw e;
        } finally {
            // 关闭释放资源
            if (session != null) {
                session.close();
            }
            if (connection != null) {
                connection.close();
            }
        }
    }

    public static void main(String[] args) throws Exception {
        QueueReceiver_Listener.run();
    }
}
queue发送消息sender代码:
package com.szxs.queue.send;

import org.apache.activemq.ActiveMQConnection;
import org.apache.activemq.ActiveMQConnectionFactory;

import javax.jms.*;

/**
 * 点对点消息发送者
 */
public class QueueSender {
    // 发送次数
    public static final int SEND_NUM = 10;
    // tcp 地址 服务器器端地址
    public static final String BROKER_URL = ActiveMQConnection.DEFAULT_BROKER_URL;  // 其值为 "tcp://localhost:61616";
    // 目标地址,在ActiveMQ管理员控制台创建 http://localhost:8161/admin/queues.jsp中可以查询到发送的mq消息
    public static final String DESTINATION = "xs.mq.queue";
    //测试连接使用默认的用户名
    public static final String DEFAULT_USER = ActiveMQConnection.DEFAULT_USER;//默认为null
    //测试连接使用默认的密码
    public static final String DEFAULT_PASSWORD = ActiveMQConnection.DEFAULT_PASSWORD;//默认为null

    /**
     * 发送消息
     * @param session
     * @param sender
     * @throws Exception
     */
    public static void sendMessage(QueueSession session, javax.jms.QueueSender sender) throws Exception {
        for (int i = 0; i < SEND_NUM; i++) {

            String message = "发送第" + (i + 1) + "条消息";
            TextMessage textMessage = session.createTextMessage(message);
            System.out.println(textMessage.getText());
            sender.send(textMessage);
        }
    }

    /**
     * 创建连接并发送消息
     * @throws Exception
     */
    public static void run() throws Exception {

        //点对点队列连接
        QueueConnection connection = null;
        //点对点会话Session
        QueueSession session = null;
        try {
            // 1、创建链接工厂
            QueueConnectionFactory factory = new ActiveMQConnectionFactory(QueueSender.DEFAULT_USER, QueueSender.DEFAULT_PASSWORD, QueueSender.BROKER_URL);
            // 2、通过工厂创建一个连接
            connection = factory.createQueueConnection();
            // 3、启动连接
            connection.start();
            // 4、创建一个session会话
            session = connection.createQueueSession(Boolean.TRUE, Session.AUTO_ACKNOWLEDGE);
            // 5、创建一个消息队列
            Queue queue = session.createQueue(DESTINATION);
            // 6、创建消息发送者
            javax.jms.QueueSender sender = session.createSender(queue);
            // 设置持久化模式
            sender.setDeliveryMode(DeliveryMode.NON_PERSISTENT);
            sendMessage(session, sender);
            // 提交会话
            session.commit();

        } catch (Exception e) {
            throw e;
        } finally {
            // 关闭释放资源
            if (session != null) {
                session.close();
            }
            if (connection != null) {
                connection.close();
            }
        }
    }

    public static void main(String[] args) throws Exception {
        QueueSender.run();
    }
}
queue接受消息receive代码:
package com.szxs.queue.receive;

import org.apache.activemq.ActiveMQConnection;
import org.apache.activemq.ActiveMQConnectionFactory;

import javax.jms.*;

/**
 * 点对点消息接收者  直接Receive 方式
 */
public class QueueReceiver_Receive {
    // 接收消息的个数
    public static final int Receive_NUM = 10;
    // tcp 地址 服务器器端地址
    public static final String BROKER_URL =ActiveMQConnection.DEFAULT_BROKER_URL;  // 其值为 "tcp://localhost:61616";
    // 目标地址,在ActiveMQ管理员控制台创建 http://localhost:8161/admin/queues.jsp中可以查询到发送的mq消息
    public static final String DESTINATION = "xs.mq.queue";
    //测试连接使用默认的用户名
    public static final String DEFAULT_USER = ActiveMQConnection.DEFAULT_USER;//默认为null
    //测试连接使用默认的密码
    public static final String DEFAULT_PASSWORD = ActiveMQConnection.DEFAULT_PASSWORD;//默认为null

    public static void run() throws Exception {

        QueueConnection connection = null;
        QueueSession session = null;
        try {
            // 1、创建链接工厂
            QueueConnectionFactory factory = new ActiveMQConnectionFactory(QueueReceiver_Receive.DEFAULT_USER, QueueReceiver_Receive.DEFAULT_PASSWORD,QueueReceiver_Receive.BROKER_URL);
            // 2、通过工厂创建一个连接
            connection = factory.createQueueConnection();
            // 3、启动连接
            connection.start();
            // 4、创建一个session会话
            session = connection.createQueueSession(Boolean.TRUE, Session.AUTO_ACKNOWLEDGE);
            // 5、创建一个消息队列
            Queue queue = session.createQueue(DESTINATION);
            // 创建消息接收者
            javax.jms.QueueReceiver receiver = session.createReceiver(queue);
            // 直接Receive 方式 接收消息
            for(int i=0;i<QueueReceiver_Receive.Receive_NUM;i++){
                TextMessage textMessage=(TextMessage) receiver.receive();
                if(textMessage!=null)
                    System.out.println("接收#" + textMessage.getText());
            }
            // 提交会话
            session.commit();

        } catch (Exception e) {
            throw e;
        } finally {
            // 关闭释放资源
            if (session != null) {
                // 关闭会话
                session.close();
            }
            if (connection != null) {
                connection.close();
            }
        }
    }

    public static void main(String[] args) throws Exception {
        QueueReceiver_Receive.run();
    }
}
然后分别执行queue代码(发送消息—>接受消息—>监听器),浏览器按下图点击,这就是queue队列模式

下面测试topic模式,分为三类(监听器,发送消息,接受消息):

topic监听器listener代码:
package com.szxs.topic.listener;

import org.apache.activemq.ActiveMQConnection;
import org.apache.activemq.ActiveMQConnectionFactory;

import javax.jms.*;

/**
 * 发布订阅式消息接收者
 */
public class TopicReceiver_Listener {
    // tcp 地址 服务器器端地址
    public static final String BROKER_URL = ActiveMQConnection.DEFAULT_BROKER_URL;  // 其值为 "tcp://localhost:61616";
    // 目标地址,在ActiveMQ管理员控制台创建 http://localhost:8161/admin/topics.jsp中可以查询到发送的mq消息
    public static final String DESTINATION = "xs.mq.topic";
    //测试连接使用默认的用户名
    public static final String DEFAULT_USER = ActiveMQConnection.DEFAULT_USER;//默认为null
    //测试连接使用默认的密码
    public static final String DEFAULT_PASSWORD = ActiveMQConnection.DEFAULT_PASSWORD;//默认为null


    public static void run() throws Exception {

        TopicConnection connection = null;
        TopicSession session = null;
        try {
            // 1、创建链接工厂
            TopicConnectionFactory factory = new ActiveMQConnectionFactory(TopicReceiver_Listener.DEFAULT_USER, TopicReceiver_Listener.DEFAULT_PASSWORD, TopicReceiver_Listener.BROKER_URL);
            // 2、通过工厂创建一个连接
            connection = factory.createTopicConnection();
            // 3、启动连接
            connection.start();
            // 4、创建一个session会话
            session = connection.createTopicSession(Boolean.TRUE, Session.AUTO_ACKNOWLEDGE);
            // 5、创建一个消息队列
            Topic topic = session.createTopic(DESTINATION);
            // 6、创建消息制作者
            TopicSubscriber subscriber = session.createSubscriber(topic);

            //使用监听器的方式订阅消息
            subscriber.setMessageListener(new MessageListener() {
                public void onMessage(Message msg) {
                    if (msg != null) {
                        TextMessage textMessage = (TextMessage) msg;
                        try {
                            System.out.println("接收#" + textMessage.getText());
                        } catch (Exception e) {
                            e.printStackTrace();
                        }
                    }
                }
            });
            // 休眠100s再关闭 接收生产者发送的全部的10条消息
            // 需要注意的是这里使用sleep会使当前正在执行的线程进入休眠状态
            // 也就是TopicReceiver_Listener这个类进入休眠状态了,而接收者的监听器仍然会继续执行的哦。
            Thread.sleep(1000 *100);

            // 提交会话
            session.commit();

        } catch (Exception e) {
            throw e;
        } finally {
            // 关闭释放资源
            if (session != null) {
                session.close();
            }
            if (connection != null) {
                connection.close();
            }
        }
    }

    public static void main(String[] args) throws Exception {
        TopicReceiver_Listener.run();
    }
}
topic发送消息sender代码:
package com.szxs.topic.send;

import org.apache.activemq.ActiveMQConnection;
import org.apache.activemq.ActiveMQConnectionFactory;

import javax.jms.*;

/**
 * 发布订阅式消息发送者
 */
public class TopicProducer {
    // 发送次数
    public static final int SEND_NUM = 10;
    // tcp 地址 服务器器端地址
    public static final String BROKER_URL = ActiveMQConnection.DEFAULT_BROKER_URL;  // 其值为 "tcp://localhost:61616";
    // 目标地址,在ActiveMQ管理员控制台创建 http://localhost:8161/admin/topics.jsp中可以查询到发送的mq消息
    public static final String DESTINATION = "xs.mq.topic";
    //测试连接使用默认的用户名
    public static final String DEFAULT_USER = ActiveMQConnection.DEFAULT_USER;//默认为null
    //测试连接使用默认的密码
    public static final String DEFAULT_PASSWORD = ActiveMQConnection.DEFAULT_PASSWORD;//默认为null

    /**
     * 消息发送端
     * @param session
     * @param publisher
     * @throws Exception
     */
    public static void sendMessage(TopicSession session, TopicPublisher publisher) throws Exception {
        for (int i = 0; i < SEND_NUM; i++) {
            String message = "发送消息第" + (i + 1) + "条";

            TextMessage textMessage = session.createTextMessage(message);
            System.out.println(textMessage.getText());
            //发送 Topic消息
            publisher.send(textMessage);
        }
    }

    public  void run() throws Exception {
        //Topic连接
        TopicConnection connection = null;
        //Topic会话
        TopicSession session = null;
        try {
            // 1、创建链接工厂
            TopicConnectionFactory factory = new ActiveMQConnectionFactory(TopicProducer.DEFAULT_USER, TopicProducer.DEFAULT_PASSWORD, TopicProducer.BROKER_URL);
            // 2、通过工厂创建一个连接
            connection = factory.createTopicConnection();
            // 3、启动连接
            connection.start();
            // 4、创建一个session会话
            session = connection.createTopicSession(Boolean.TRUE, Session.AUTO_ACKNOWLEDGE);
            // 5、创建一个消息队列
            Topic topic = session.createTopic(DESTINATION);
            // 6、创建消息发送者
            TopicPublisher publisher = session.createPublisher(topic);
            // 设置持久化模式
            publisher.setDeliveryMode(DeliveryMode.NON_PERSISTENT);
            sendMessage(session, publisher);
            // 提交会话
            session.commit();


        } catch (Exception e) {
            throw e;
        } finally {
            // 关闭释放资源
            if (session != null) {
                session.close();
            }
            if (connection != null) {
                connection.close();
            }
        }
    }

    public static void main(String[] args) throws Exception {
        new  TopicProducer().run();
    }
}
topic接受消息receive代码:
package com.szxs.topic.receive;

import org.apache.activemq.ActiveMQConnection;
import org.apache.activemq.ActiveMQConnectionFactory;

import javax.jms.*;

/**
 * 发布订阅式消息接收者
 */
public class TopicReceiver_Receive {
    // tcp 地址 服务器器端地址
    public static final String BROKER_URL = ActiveMQConnection.DEFAULT_BROKER_URL;  // 其值为 "tcp://localhost:61616";
    // 目标地址,在ActiveMQ管理员控制台创建 http://localhost:8161/admin/topics.jsp中可以查询到发送的mq消息
    public static final String DESTINATION = "xs.mq.topic";
    //测试连接使用默认的用户名
    public static final String DEFAULT_USER = ActiveMQConnection.DEFAULT_USER;//默认为null
    //测试连接使用默认的密码
    public static final String DEFAULT_PASSWORD = ActiveMQConnection.DEFAULT_PASSWORD;//默认为null


    public static void run() throws Exception {

        TopicConnection connection = null;
        TopicSession session = null;
        try {
            // 1、创建链接工厂
            TopicConnectionFactory factory = new ActiveMQConnectionFactory(TopicReceiver_Receive.DEFAULT_USER, TopicReceiver_Receive.DEFAULT_PASSWORD, TopicReceiver_Receive.BROKER_URL);
            // 2、通过工厂创建一个连接
            connection = factory.createTopicConnection();
            // 3、启动连接
            connection.start();
            // 4、创建一个session会话
            session = connection.createTopicSession(Boolean.TRUE, Session.AUTO_ACKNOWLEDGE);
            // 5、创建一个消息队列
            Topic topic = session.createTopic(DESTINATION);
            // 6、创建消息制作者
            final TopicSubscriber subscriber = session.createSubscriber(topic);

            //接收Topic生产者发送过来的消息
            //需要注意的是此处需要启动一个新的线程来处理问题
            new Thread(){
                public void run(){
                    TextMessage textMessage = null;
                    try {
                        while(true){//持续接收消息
                            textMessage = (TextMessage) subscriber.receive();
                            if(textMessage==null)
                                break;
                            System.out.println("接收#" + textMessage.getText());
                        }
                    } catch (JMSException e) {
                        e.printStackTrace();
                    }
                }
            }.start();

            // 休眠100s再关闭 接收生产者发送的全部的10条消息
            // 需要注意的是这里使用sleep会使当前正在执行的线程进入休眠状态
            // 也就是TopicReceiver_Receive这个类进入休眠状态了,而接收者.start方法刚刚启动的新线程会继续执行的哦。
            Thread.sleep(1000 *100);

            // 提交会话
            session.commit();

        } catch (Exception e) {
            throw e;
        } finally {
            // 关闭释放资源
            if (session != null) {
                session.close();
            }
            if (connection != null) {
                connection.close();
            }
        }
    }

    public static void main(String[] args) throws Exception {
        TopicReceiver_Receive.run();
    }
}
然后分别执行topic代码(接受消息—>发送消息—>监听器),浏览器按下图点击,这就是topic订阅模式
结合spring使用:
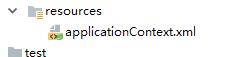
首先创建applicationContext.xml文件,代码如下:
<?xml version="1.0" encoding="UTF-8"?>
<beans xmlns="http://www.springframework.org/schema/beans"
       xmlns:context="http://www.springframework.org/schema/context"
       xmlns:xsi="http://www.w3.org/2001/XMLSchema-instance"
       xsi:schemaLocation="http://www.springframework.org/schema/beans
    http://www.springframework.org/schema/beans/spring-beans-3.1.xsd
    http://www.springframework.org/schema/context
    http://www.springframework.org/schema/context/spring-context-3.1.xsd">

    <!--连接池-->
    <!--<bean id="pooledConnectionFactory" class="org.apache.activemq.pool.PooledConnectionFactory" destroy-method="stop">
        <property name="connectionFactory">
            <bean class="org.apache.activemq.ActiveMQConnectionFactory">
                <property name="brokerURL" value="tcp://localhost:61616"/>
            </bean>
        </property>
    </bean>-->
    <!-- 连接工厂 -->
    <bean id="activeMQConnectionFactory" class="org.apache.activemq.ActiveMQConnectionFactory">
        <property name="brokerURL" value="tcp://localhost:61616" />
    </bean>

    <!-- 配置消息目标 -->
    <bean id="destination" class="org.apache.activemq.command.ActiveMQQueue">
        <!-- 目标,在ActiveMQ管理员控制台创建 http://localhost:8161/admin/queues.jsp -->
        <constructor-arg index="0" value="xs.mq.queue"/>
    </bean>

    <!-- 消息模板 -->
    <bean id="jmsTemplate" class="org.springframework.jms.core.JmsTemplate">
        <property name="connectionFactory" ref="activeMQConnectionFactory"/>
        <property name="defaultDestination" ref="destination"/>
        <property name="messageConverter">
            <bean class="org.springframework.jms.support.converter.SimpleMessageConverter"/>
        </property>
    </bean>
</beans>
然后创建发送消息,接受消息类:

发送消息Sender代码:
package com.spring.send;

import java.text.SimpleDateFormat;
import java.util.Date;

import javax.jms.*;

import org.springframework.context.ApplicationContext;
import org.springframework.context.support.FileSystemXmlApplicationContext;
import org.springframework.jms.core.JmsTemplate;
import org.springframework.jms.core.MessageCreator;
/**
 * Spring JMSTemplate 消息发送者<br>
 *  将JMS整合到spring上面进行开发
 */
public class Sender {
    public static void main(String[] args) {
        ApplicationContext ctx = new FileSystemXmlApplicationContext("classpath:applicationContext.xml");
        JmsTemplate jmsTemplate = (JmsTemplate) ctx.getBean("jmsTemplate");

        jmsTemplate.send(new MessageCreator() {
            public Message createMessage(Session session) throws JMSException {
                TextMessage message = session.createTextMessage();
                SimpleDateFormat formatter = new SimpleDateFormat("yyyy-MM-dd HH:mm:ss");
                String date=formatter.format(new Date());
                String text="current system time: "+date;
                message.setText(text);
                System.out.println(text);
                return message;
            }
        });
    }
}
接受消息Receiver代码:
package com.spring.receive;

import javax.jms.JMSException;
import javax.jms.TextMessage;

import org.springframework.context.ApplicationContext;
import org.springframework.context.support.FileSystemXmlApplicationContext;
import org.springframework.jms.core.JmsTemplate;

/**
 * Spring JMSTemplate 消息接收者<br>
 *  将JMS整合到spring上面进行开发
 */
public class Receiver {
    public static void main(String[] args) throws JMSException {
        ApplicationContext ctx = new FileSystemXmlApplicationContext("classpath:applicationContext.xml");

        JmsTemplate jmsTemplate = (JmsTemplate) ctx.getBean("jmsTemplate");
        while(true) {
            //设置10s超时时间
            jmsTemplate.setReceiveTimeout(1000*10);
            TextMessage text =   (TextMessage) jmsTemplate.receive();
            if(text==null)
                break;
            //接收到相应的消息
            System.out.println("收到消息:" + text.getText());
        }
    }
}
然后运行,浏览器点击,这就是结合spring使用:

谢谢大家!