文件操作
文件读取的三部曲:打开—>操作---->关闭
r:(默认)
-只能读,不能写
-读取文件不存在,会报错
FileNotFoundError: [Errno 2] No such file or directory:
w:
-write only
-文件不存在,不报错,并创建新的文件
-文件存在,会清空文件内容并写入新的内容
a:
-write only
-写:文件不存在,不报错,并创建新的文件
-写:不会清空原文件的内容,会在文件末尾追加
a+:
-rw
-文件不存在,不报错
-不会清空文件内容,在末尾追加
r+:
-读写
-文件不存在,报错
-默认情况下,从文件指针所在的位置开始写入
w+:
-rw
-文件不存在,不报错
-会清空文件内容
“”"
打开文件
f = open('/tmp/passwd')
print(f)
操作
告诉当前文件指针所在的位置
print(f.tell())
content = f.read()
print(content)
print(f.tell())
读操作
print(f.read())
写操作
f.write('python')
判断文件对象拥有的权限
print(f.readable())
print(f.writable())
f.write('python')
关闭
print(f.read())
print(f.tell())
f.close()


f = open('/tmp/passwd','r+')
print(f.read())
f.write('123')
print(f.read())
f.close()
非纯文本文件的读取
如果读取图片,音频或视频(非纯文本文件),需要通过二进制的方式进行读取与写入
-读取文本文件
r r+ w w+ a a+ == rt rt+ wt wt+ at at+
-读取二进制文件
rb rb+ wb wb+ ab ab+
先读取二进制文件内容
f1 = open('1111.jpg', mode='rb')
content = f1.read()
print(content)
f1.close()

f2 = open('hello.jpg', mode='wb')
写入要复制的文件读到的内容
f2.write(content)
f2.close()
文件的常用操作
f = open(’/tmp/passwd’, ‘r’)
默认情况下读取文件的所有内容,小的文件,直接用read读取即可
如果是一个大文件(文件大小>内存大小) readline()
#类似于head -c
print(f.read(3))
#4g 5g
每次读取一行内容
print(f.readline())
print(f.readline())
读取文件内容,返回一个列表,列表元素分贝为文件的行内容
print(f.readlines())
print(f.readable())

对于每一行,去掉后面的'\n' ---(列表生成式 map())
print([line.strip() for line in f.readlines()])
print(list(map(lambda x:x.strip(),f.readlines())))

f.close()


f = open('/tmp/passwd','rb')
f.write('hello') #从指针所在位置写入,写的就是字符串的内容
f.writelines(['a','b']) #将列表中的每个元素写入文件
f.writable()
指针的操作
print(f.tell())
print('1:',f.read(3))
print(f.tell())
f.seek(0,2)
"""
seek:移动指针
    第一个参数:偏移量>0:代表向后移动 <0:代表前移动
    第二个参数:
        0:移动指针到文件开头
        1:当前位置
        2:移动指针到文件末尾
"""
print(f.tell())
f.close()
文件练习
创建文件data.txt,文件共100000行,每行存放一个1~100之间的整数
import random

f=open('data.txt','a+')
for i in range(100000):
    f.write(str(random.randint(1,101))+'\n')
f.seek(0,0)
#print(f.read())
print([i.strip() for i in f.readlines()])
#print(list(map(lambda x:x.strip(),f.readlines())))
f.close()
with
上下文管理器:打开文件,执行完with语句内容之后,自动关闭文件对象
f = open('/tmp/passwd')
with open('/tmp/passwd') as f:
    print('with语句里面:',f.closed)
    print(f.read())

print('after with语句:',f.closed)


#python2(只能这么写)
with open('/tmp/passwd') as f1:
    content = f1.read()
with open('/tmp/passwdbackup','w+') as f2:
    f2.write(content)

#python3
with open('/tmp/passwd') as f1,\
    open('/tmp/passwdbackup','w+')as f2:
    # 将第一个文件的内容写入第二个文件中
    f2.write(f1.read())
    # f2.seek(0,0)
    # f2.read()
通过yield实现文件的读取
def bylineread(fimename):
    with open(fimename) as f:
        line = f.readline()
        while line:
            yield line
            line = f.readline()

read是一个生成器对象
read = bylineread('data.txt')
print(read)
1.next读取生成器内容
print(next(read))
print(next(read))

for
for item in read:
    print(item)

文件对象是可以for循环遍历的
from collections import Iterable

f = open('data.txt')
print(isinstance(f,Iterable))
for i,item in enumerate(f):
    if i == 10:
        break
    print(i,item)
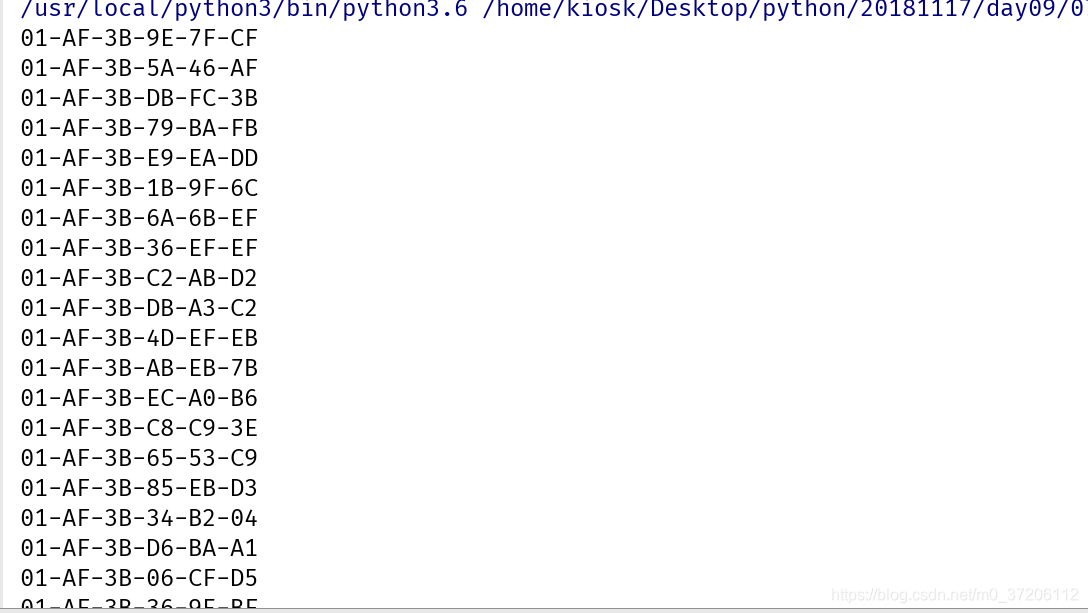
文件练习–生成MAC地址
生成100个MAC地址并写入文件中,MAC地址前6位(16进制)为01-AF-3B
01-AF-3B-xx-xx-xx
-xx
01-AF-3B-xx
-xx
01-AF-3B-xx-xx
-xx
01-AF-3B-xx-xx-xx
import string
import random

#随机生成一个MAC地址的函数
def creat_mac():
    MAC= '01-AF-3B'
    # 生成16进制的数
    hex_num = string.hexdigits
    for i in range(3):
        # 从16进制字符串中随机选出2个数来(返回值为列表)
        n = random.sample(hex_num,2)
        # 拼接列表中的内容,将小写字母转换为大写
        sn = '-' + ''.join(n).upper()
        MAC += sn

    return MAC

#主函数,随机生成100个MAC地址
def main():
    # 以写的方式打开文件
    with open('mac.txt','w') as f:
        for i in range(100):
            mac= creat_mac()
            print(mac)
            # 每生成一个MAC地址,存入文件(注意换行)
            f.write(mac+'\n')

main()
文件练习–生成ip和排列ip
京东二面编程题
1.生成一个大文件ips.txt,要求1200行, 每行随机为172.25.254.0/24段的ip;
2.读取ips.txt文件统计这个文件中ip出现频率排前10的ip;
import random

def create_ip_file(filename):
    ips = ['172.25.254.' + str(i) for i in range(0,255)]
    print(ips)
    with open(filename,'a+') as f:
        for count in range(1200):
            f.write(random.sample(ips,1)[0] + '\n')


#create_ip_file('ips.txt')

def sorted_ip(filename,count=10):
    ips_dict = dict()
    with open(filename) as f:
        for ip in f:
            if ip in ips_dict:
                ips_dict[ip] += 1
            else:
                ips_dict[ip] = 1
    sorte_ip = sorted(ips_dict.items(),key=lambda
        x:x[1],reverse=True)[:count]
    return sorte_ip

print(sorted_ip('ips.txt'))

读取文件方式效率对比
import functools

import time


def timeit(fun):
    """这是一个装饰器timeit"""
    @functools.wraps(fun) #可以保留被装饰函数的函数名和帮助信息文档
    def wrapper(*args, **kwargs):  # 接收可变参数和关键字参数
        """这是一个wrapper函数"""
        # args:元组  kwargs:字典
        # 在函数执行之前
        start_time = time.time()
        # 执行函数
        res = fun(*args, **kwargs)
        # 函数执行之后
        end_time = time.time()
        print('运行时间为:%.6f' % (end_time - start_time))
        return res
    return wrapper


 @timeit
 def read1(filename):
     # for 迭代
     with open(filename) as f:
         for line in f:
             # 对文件的处理操作
             line = int(line.strip())
             line = line + 1

@timeit
def read2(filename):
     with open(filename) as f:
         for line in f.readlines():
             line = int(line.strip())
             line = line+1
#
#
#
#
#
read1('data.txt')
read2('data.txt')

@timeit
def copy(sourcefile,destfile):
    with open(sourcefile) as f1:
        content = f1.read()
        with open(destfile,'w') as f2:
            f2.write(content)

@timeit
def copy1(sourcefile,destfile):
    with open(sourcefile) as f1,open(destfile,'w')as f2:
        # for line in f1:
        #     f2.write(line)
        f2.write(f1.read())

copy('data.txt','data_1.txt')
copy1('data.txt','data_2.txt')
通过计时器对进行装饰,发现python内置的方法的运行时间明显短。
os模块
对于字典里面嵌套字典进行排序
 d = {
     '003':{
         'name':'apple1',
         'count':100,
         'price':10
     },
     '002':{
         'name':'apple2',
         'count':200,
         'price':2
     }

 }
 print(d.items()) #[('key',{}),(),()]

 x:('003', {'name': 'apple1', 'count': 100, 'price': 10})
 print(sorted(d.items(),key=lambda x:x[1]['count']))
 print(sorted(d.items(),key=lambda x:x[1]['price']))

import os
 1.返回操作系统类型 值为:posix,是Linux操作系统 值为nt,是windows操作系统
 print(os.name)
 print('Linux' if os.name == 'posix' else 'Windows')

 2.操作系统的详细信息
 info = os.uname()
 print(info)
 print(info.sysname)
 print(info.nodename)
 3.系统的环境变量
print(os.environ)

4.通过key值获取环境变量对应的value值
print(os.environ.get('PATH'))

5.判度是否为绝对路径 /tmp/passwd data.txt
print(os.path.isabs('/tmp/passwd3'))
print(os.path.isabs('hello'))

6.生成绝对路径
print(os.path.abspath('hello.png'))
print(os.path.join('/home/kiosk','hello.png'))
print(os.path.join(os.path.abspath('.'),'hello.png'))

7.获取目录名或文件名
filename = '/home/kiosk/PycharmProjects/20181117/day09/hello.png'
print(os.path.basename(filename))
print(os.path.dirname(filename))

8.创建目录 删除目录
mkdir mkdir -p
os.makedirs('img/file1/file2')
os.mkdir('img')
os.rmdir('img')


9.创建文件 删除文件
os.mknod('00_ok.txt')
os.remove('00_ok.txt')


10.文件重命名(mv)
os.rename('data.txt','data1.txt')

11.判断文件或目录是否存在
print(os.path.exists('ips.txt'))

12.分离后缀名和文件名
print(os.path.splitext('hello.png'))

13.将目录和文件名分离
print(os.path.split('/tmp/hello/hello.png'))
os练习–创建学生目录
完成自动创建100个目录,目录名称为学生学号,
学号的前四位均为‘0405’,
学号总计为8位。举例如学号04050001
import os

sid = 4050001

for i in range(1,101):
     res_sid = '0' + str(sid + i)
     os.mkdir(res_sid)

sid_pre = '0405'

for i in range(1,101):
    i = str(i)
    i_len = len(i)
    if i_len == 1:
        sid_last = '000' + i

    elif i_len ==2:
        sid_last = '00' + i

    elif i_len == 3:
        sid_last = '0' + i
    else:
        pass
    res_sid = sid_pre + sid_last
    os.mkdir(res_sid)

os练习
1.在当前目录新建目录img, 里面包含多个文件, 文件名各不相同(X4G5.png)
2.将当前img目录所有以.png结尾的后缀名改为.jpg
import os
import string
import random


def gen_code(len=4):
    # 随机生成4位的验证码
    li = random.sample(string.ascii_letters + string.digits, len)
    return ''.join(li)


def create_file():
    # 随机生成100个验证码
    li = {gen_code() for i in range(100)}
    os.mkdir('img')
    for name in li:
        os.mknod('img/' + name + '.png')


#create_file()


def modify_suffix(dirname, old_suffix, new_suffix):
    """
    :param dirname:操作的目录
    :param old_suffix: 之前的后缀名
    :param new_suffix: 新的后缀名
    :return:
    """
    # 1.判断查找的目录是否存在,如果不存在,报错
    if os.path.exists(dirname):
        # 2.找出所有以old_suffix(.png)结尾的文件
        pngfile = [filename for filename in os.listdir(dirname)
                   if filename.endswith(old_suffix)]
        # pngfiles = filter(lambda filename:filename.endswith(old_suffix)
        #                   ,os.listdir(dirname))
        # 3.将文件名和后缀名分开,留下文件名
        basefiles = [os.path.splitext(filename)[0] for filename in pngfile]
        print(basefiles)
        # 4.文件重命名
        for filename in basefiles:
            #需要加上目录名
            oldname = os.path.join(dirname,filename+old_suffix)
            newname = os.path.join(dirname,filename+new_suffix)
            os.rename(oldname,newname)
            print('%s命名为%s成功' %(oldname,newname))
    else:
        print('%s不存在,不能操作....' %(dirname))

modify_suffix('img','.jpg','.png')