Mybatis的快速入门
1、什么是Mybatis?
Mybatis与Hibernate一样是一个持久层框架,通过整合第三方数据源,比如C3P0和Druid连接池,来与数据库DataBase进行交互。将查询的结果集返回给Dao层(数据访问层)
两者的区别:1、使用场景不同:Hibernate适用于中小型项目,例如ERP项目
Mybatis适用于大型项目,例如电商项目
2、灵活性:Mybatis由于是半自动化框架,SQL语句可以由企业人员来进行编写,
这样的sql更符合企业的要求,尤其针对于大型项目。但是Hibernate是全
表检索,对于中小型项目而言是比较合适的,但是对于大型项目而言,会
大大降低企业的开发效率
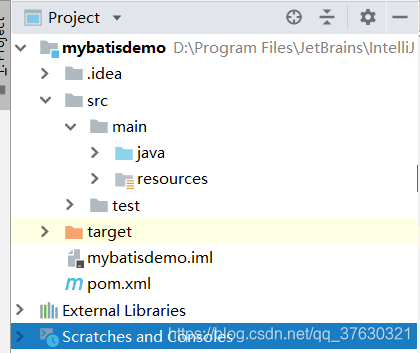
2、创建一个maven项目
一、 在pom.xml文件中导入相关的依赖
<?xml version="1.0" encoding="UTF-8"?>
<project xmlns="http://maven.apache.org/POM/4.0.0"
         xmlns:xsi="http://www.w3.org/2001/XMLSchema-instance"
         xsi:schemaLocation="http://maven.apache.org/POM/4.0.0 http://maven.apache.org/xsd/maven-4.0.0.xsd">
    <modelVersion>4.0.0</modelVersion>

    <groupId>cn.zyyx</groupId>
    <artifactId>mybatisdemo</artifactId>
    <version>1.0-SNAPSHOT</version>

    <dependencies>
        <!-- 单元测试Junit -->
        <dependency>
            <groupId>junit</groupId>
            <artifactId>junit</artifactId>
            <version>4.11</version>
        </dependency>
        <!-- 连接mysql数据库 -->
        <dependency>
            <groupId>mysql</groupId>
            <artifactId>mysql-connector-java</artifactId>
            <version>5.1.39</version>
        </dependency>
        <!-- 引入mybatis的核心包 -->
        <dependency>
            <groupId>org.mybatis</groupId>
            <artifactId>mybatis</artifactId>
            <version>3.2.2</version>
        </dependency>
    </dependencies>
</project>
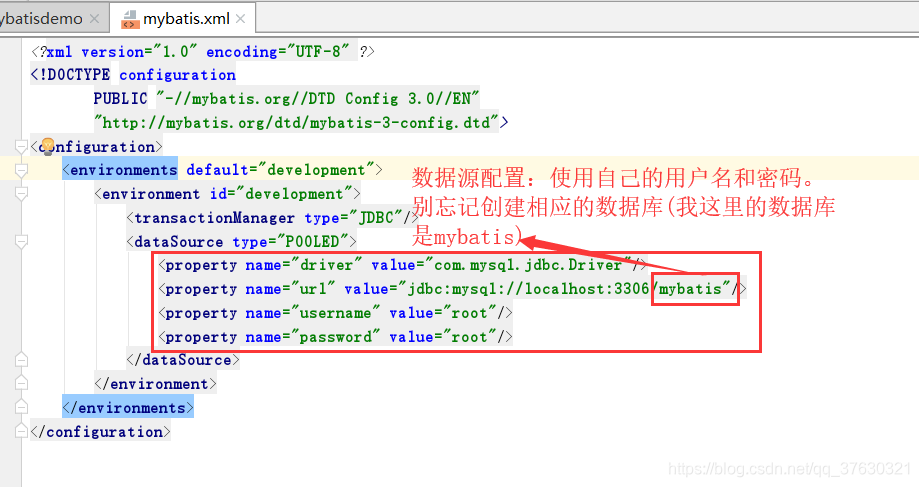
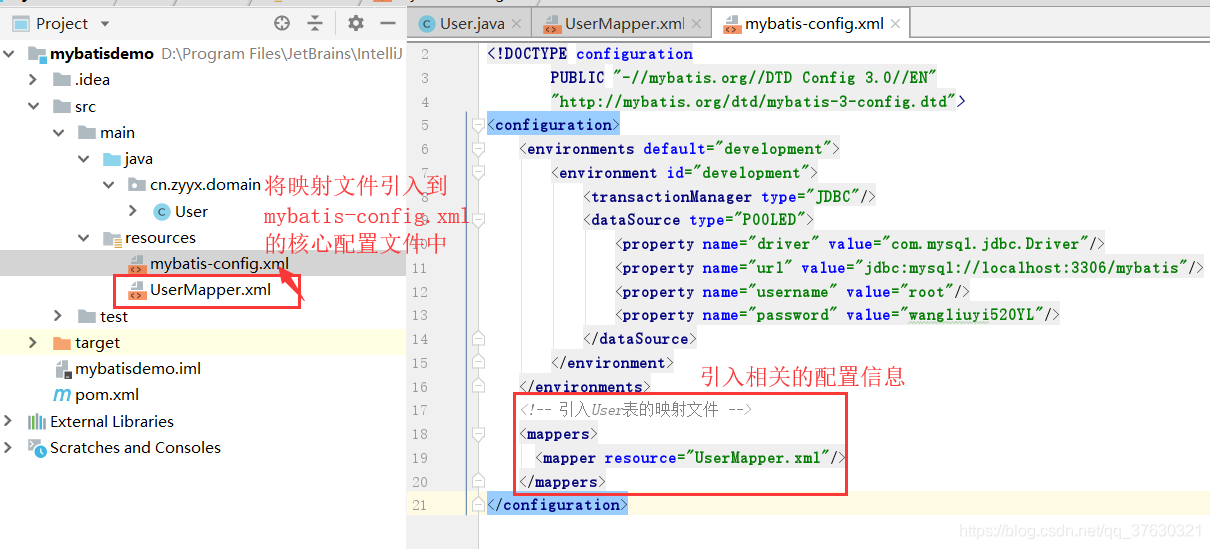
二、 在resources资源文件夹下创建Mybatis的核心配置文件mybatis-config.xml,并进行如下配置
<?xml version="1.0" encoding="UTF-8" ?>
<!DOCTYPE configuration
        PUBLIC "-//mybatis.org//DTD Config 3.0//EN"
        "http://mybatis.org/dtd/mybatis-3-config.dtd">
<configuration>
    <environments default="development">
        <environment id="development">
            <transactionManager type="JDBC"/>
            <dataSource type="POOLED">
                <property name="driver" value="com.mysql.jdbc.Driver"/>
                <property name="url" value="jdbc:mysql://localhost:3306/mybatis"/>
                <property name="username" value="root"/>
                <property name="password" value="root"/>
            </dataSource>
        </environment>
    </environments>
</configuration>
三、 创建相应的实体类和映射文件

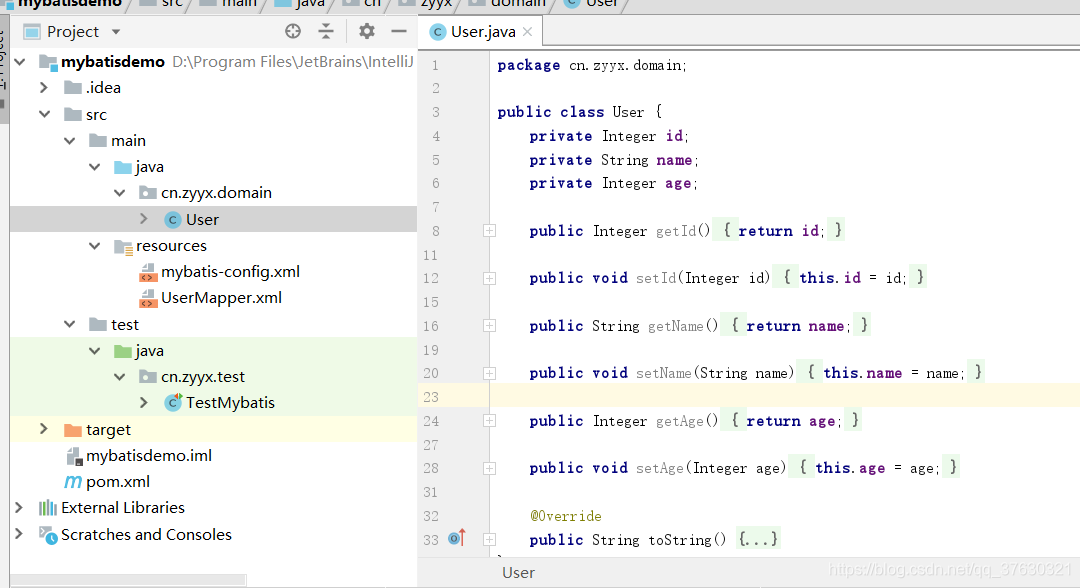
package cn.zyyx.domain;

public class User {
    private Integer id;
    private String name;
    private Integer age;

    public Integer getId() {
        return id;
    }

    public void setId(Integer id) {
        this.id = id;
    }

    public String getName() {
        return name;
    }

    public void setName(String name) {
        this.name = name;
    }

    public Integer getAge() {
        return age;
    }

    public void setAge(Integer age) {
        this.age = age;
    }

    @Override
    public String toString() {
        return "User{" +
                "id=" + id +
                ", name='" + name + '\'' +
                ", age=" + age +
                '}';
    }
}
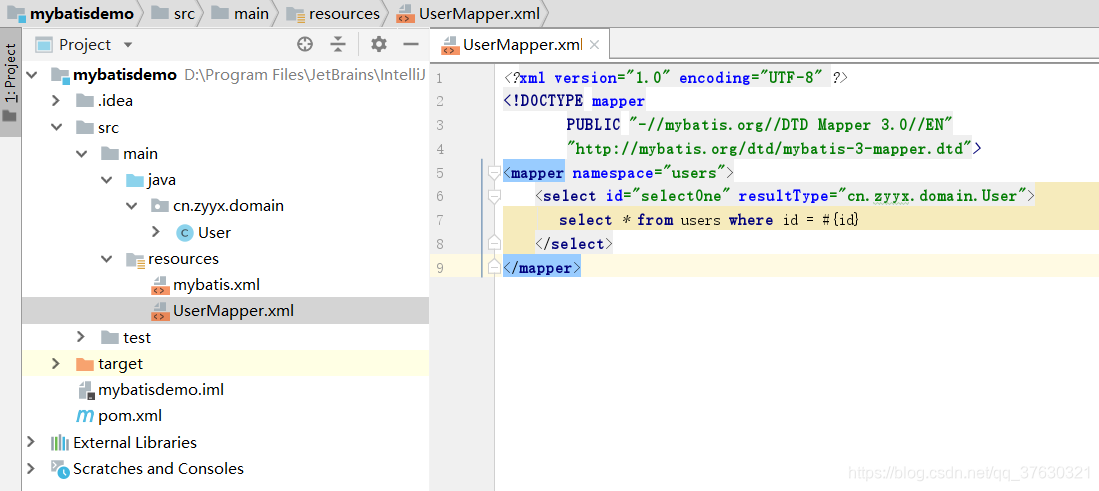
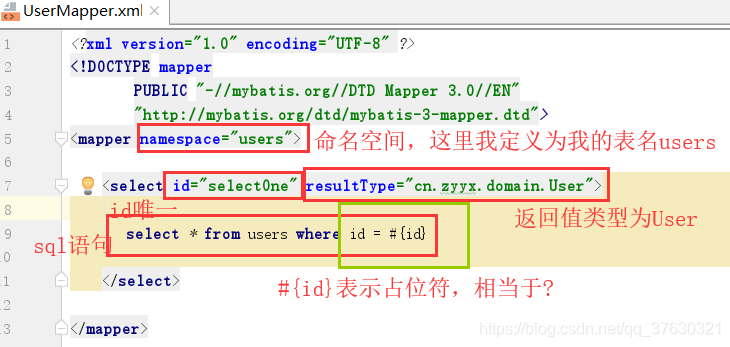
<?xml version="1.0" encoding="UTF-8" ?>
<!DOCTYPE mapper
        PUBLIC "-//mybatis.org//DTD Mapper 3.0//EN"
        "http://mybatis.org/dtd/mybatis-3-mapper.dtd">
<mapper namespace="users">
    <select id="selectOne" resultType="cn.zyyx.domain.User">
       select * from users where id = #{id}
    </select>
</mapper>
3、接下来我们进行单元测试,看是否配置成功
1、创建单元测试的类TestMybatis

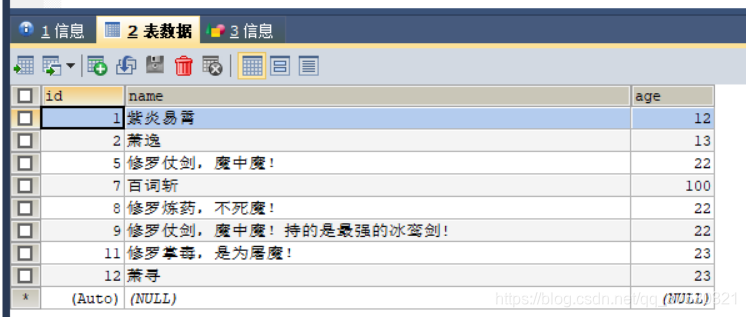
2、这是我的数据库里面的数据
3、查询的结果

4、代码
package cn.zyyx.test;

import cn.zyyx.domain.User;
import org.apache.ibatis.io.Resources;
import org.apache.ibatis.session.SqlSession;
import org.apache.ibatis.session.SqlSessionFactory;
import org.apache.ibatis.session.SqlSessionFactoryBuilder;
import org.junit.Test;

import java.io.IOException;
import java.io.InputStream;

public class TestMybatis {
    @Test
    public void testMybatis(){
        //mybatis核心文件所存放的位置
        String resource = "mybatis-config.xml";
        InputStream inputStream = null;
        SqlSessionFactory sqlSessionFactory = null;
        SqlSession sqlSession = null;
        try {
            //将文件信息转换成流
            inputStream = Resources.getResourceAsStream(resource);
            //创建SqlSessionFactory对象
            sqlSessionFactory = new SqlSessionFactoryBuilder().build(inputStream);
            //打开一次会话相当于JDBC中的获取一次连接
            sqlSession = sqlSessionFactory.openSession();
            //执行查询操作
            User user = sqlSession.selectOne("users.selectOne", 9);
            System.out.println(user);
            //提交事务
            sqlSession.commit();
        } catch (IOException e) {
            e.printStackTrace();
            if(sqlSession != null){
                //发生异常,事务的回滚
                sqlSession.rollback();
            }
        } finally {
            if(sqlSession != null){
                //释放资源
                sqlSession.close();
            }
        }
    }
}
3、代码
链接:https://pan.baidu.com/s/1RXQGKipocJ-G_Tfwv8Of4g
提取码:83b1
4、总结
上面的代码可以让初学Mybatis新手快速入门,如果大家在配置的过程中遇到什么问题,可以在下方留言,我会进行回复,如果需要相关的资源,比如idea的安装与破解、mysql的安装包以及sqlyong的安装包等资源,大家都可以在下方留言。