springboot 配置 https
1.springboot 打包方式有两种 JAR包和 WAR包
|-打成JAR包
cmd-->项目根路径下---> mvn clean package--->生成的jar包在target下面
|-打成WAR包
首先修改pom文件
<packaging>WAR</packaging>
第二步 添加项目打包依赖

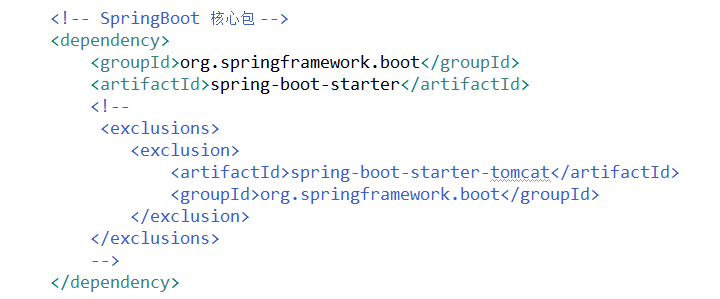
第三步,移除内置tomcat
第四步打包
cmd-->项目根路径下---> mvn clean package--->生成的jar包在target下面
2.配置https
(1).准备备案的域名
(2).准备证书,阿里云有免费证书,时效1年
修改端口和添加ssl:
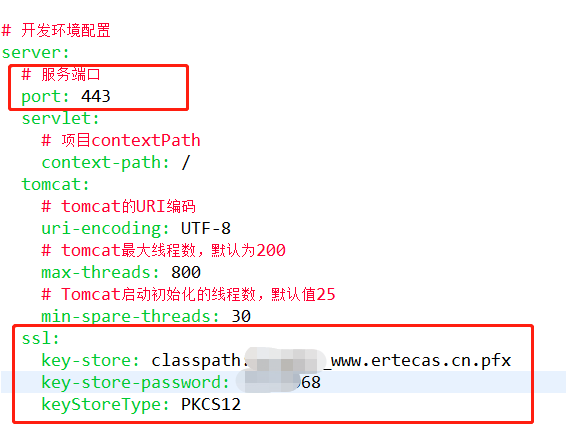
(3).把证书放到resources下面
(4).修改tomcat 配置
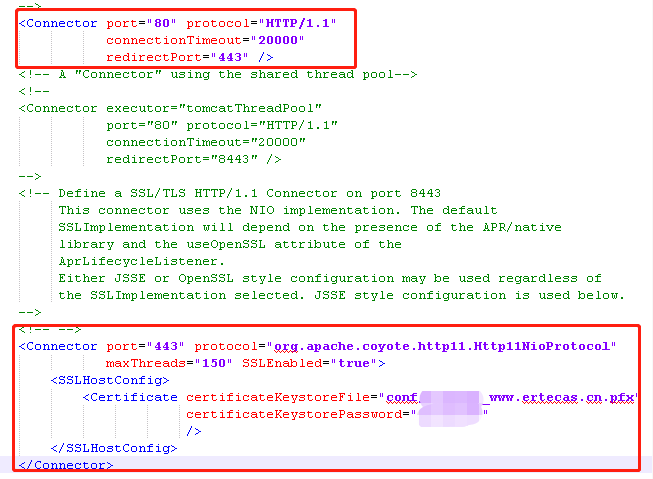
证书tomcat的conf下面也放一份
启动类配置
 @Bean
    public Connector connector(){
        Connector connector=new Connector("org.apache.coyote.http11.Http11NioProtocol");
        connector.setScheme("http");
        connector.setPort(80);
        connector.setSecure(false);
        connector.setRedirectPort(443);
        return connector;
    }

    @Bean
    public TomcatServletWebServerFactory tomcatServletWebServerFactory(Connector connector){
        TomcatServletWebServerFactory tomcat=new TomcatServletWebServerFactory(){
            @Override
            protected void postProcessContext(Context context) {
                SecurityConstraint securityConstraint=new SecurityConstraint();
                securityConstraint.setUserConstraint("CONFIDENTIAL");
                SecurityCollection collection=new SecurityCollection();
                collection.addPattern("/*");
                securityConstraint.addCollection(collection);
                context.addConstraint(securityConstraint);
            }
        };
        tomcat.addAdditionalTomcatConnectors(connector);
        return tomcat;
    }
至此所有配置OK。
总结:1.启动类添加代码 跳转
2.修改yml,端口号和添加ssl
3.如果是WAR包,修改POM文件
4.如果tomcat服务器,修改tomcat配置