版权声明:本文为博主原创文章,未经博主允许不得转载。 https://blog.csdn.net/chancein007/article/details/78118259
现在Web开发越来越倾向于前后端分离,前端使用AngularJS,React,Vue等,部署在NodeJS上,后面采用SpringBoot发布Rest服务,前后端进行分离。这样的架构灵活且特别适合大型团队的协作开发。 那么问题来了,因为前端都是和后端通过API进行交互的,那么前后端的Rest API的接口如何进行定义和沟通呢?首先想到的应该就是Swagger。
那么什么是Swagger,Swagger™的目标是为REST APIs 定义一个标准的,与语言无关的接口,使人和计算机在看不到源码或者看不到文档或者不能通过网络流量检测的情况下能发现和理解各种服务的功能。当服务通过Swagger定义,消费者就能与远程的服务互动通过少量的实现逻辑。类似于低级编程接口,Swagger去掉了调用服务时的很多猜测。 浏览 Swagger-Spec 去了解更多关于Swagger 项目的信息,包括附加的支持其他语言的库。
那么在SpringBoot中,如何和Swagger进行集成呢?其实非常的简单,只需要把
下面的依赖添加到Maven项目的pom.xml文件中,然后加上一个配置java类就可以了。SpringBoot就会自动应用Swagger,并生成相应的接口。
@Maven依赖
        <dependency>
            <groupId>io.springfox</groupId>
            <artifactId>springfox-swagger2</artifactId>
            <version>2.6.1</version>
            <scope>compile</scope>
        </dependency>
        <dependency>
            <groupId>io.springfox</groupId>
            <artifactId>springfox-swagger-ui</artifactId>
            <version>2.6.1</version>
            <scope>compile</scope>
        </dependency>
@加一个Swagger的配置类,从而控制要暴露哪些package下面的REST API已经Swagger web页面上需要显示的应用相关的介绍信息。
import org.springframework.context.annotation.Bean;
import org.springframework.context.annotation.Configuration;
import springfox.documentation.builders.PathSelectors;
import springfox.documentation.builders.RequestHandlerSelectors;
import springfox.documentation.service.ApiInfo;
import springfox.documentation.service.Contact;
import springfox.documentation.spi.DocumentationType;
import springfox.documentation.spring.web.plugins.Docket;
import springfox.documentation.swagger2.annotations.EnableSwagger2;
@Configuration
@EnableSwagger2
public class SwaggerConfig {
@Bean
public Docket createRestApi() {
return new Docket(DocumentationType.SWAGGER_2)
.apiInfo(apiInfo())
.select()
.apis(RequestHandlerSelectors.basePackage("com.example.controller"))
.paths(PathSelectors.any())
.build();
}
private ApiInfo apiInfo() {
ApiInfo apiInfo = new ApiInfo(
"Example REST API",
"Example REST API for Service Pack",
"1.0",
"Terms of service",
new Contact("Chancein007 Team", "", ""),"","");
return apiInfo;
}
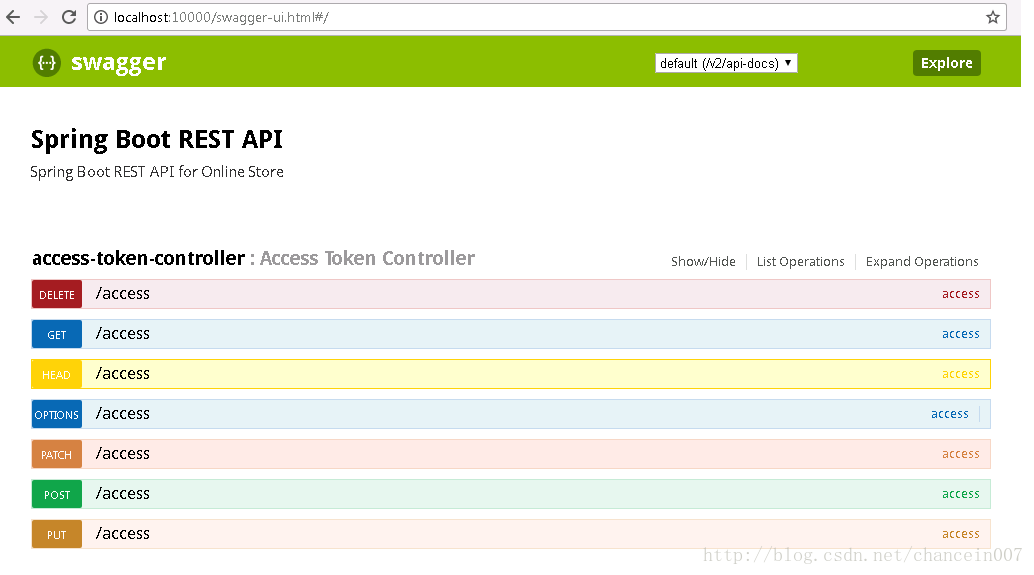
}上面的2个步骤完成后,就直接启动SpringBoot,当SpringBoot启动完成后,直接在网站后面加上swagger-ui.html就能访问,具体见下图,也太神奇了。