最近在做一个CMS的管理系统,其中一个功能就是图片文件上传到七牛之后,将返回的url写入到数据库中。由于不是前端开发,作为一名Androider,也就摸着石头过河了。
说实话七牛很好用,但是文档讲真的对于我们这种小白来说还是有点难懂的。尤其七牛云存储中jssdk还分了1.0版本还有2.x版本,最新的是2.x版本,而网上很多例子都是1.0老版本的。官方给的demo又写的比较复杂,自己索性就按照文档慢慢的自己写了一个比较简单易懂的例子,希望能够帮助到大家。
例子可以拿来即用的:
一共分两步:
1.获取文件上传的token,在这里如果是测试的话,可以自己生成之后写死,但是为了安全同时token是有有效期的,建议后台写一个接口返回token,我这里后台使用nodejs,用的是thinkjs框架,相关接口代码如下:
其中accessKey,secretKey可在七牛后台获得,nodejs的sdk参考:
https://developer.qiniu.com/kodo/sdk/1289/nodejs
 /**
   * http://127.0.0.1:8360/api/qiniu/getToken
   */
  async getTokenAction() {
    console.log('callbackAction.....');
    var accessKey = '';
    var secretKey = '';
    var mac = new qiniu.auth.digest.Mac(accessKey, secretKey);
    var options = {
      scope: bucket,
      // returnBody: '{"key":"$(key)","hash":"$(etag)","fsize":$(fsize),"bucket":"$(bucket)","name":"$(x:name)"}',
      // callbackUrl: 'http://127.0.0.1:8360/api/qiniu/callback',
      // callbackBody: 'key=$(key)&hash=$(etag)&bucket=$(bucket)&fsize=$(fsize)&name=$(x:name)',
      // callbackBodyType: 'application/json'
    };
    var putPolicy = new qiniu.rs.PutPolicy(options);
    var uploadToken = putPolicy.uploadToken(mac);
    var obj = new Object();
    obj.uptoken = uploadToken;
    return this.ctx.json(obj);
  }
第二步:
写html,由于本人不是专业的前端,为了加进度条,理解官方文档中的
file: Blob 对象,上传的文件;
还花费了一点时间,一下代码配合上面的接口大家拿来就可以用了:
<html>

<head>
    <link rel="stylesheet" href="../../static/css/common/common.css">
    <script type="text/javascript" src="https://cdn.staticfile.org/jquery/1.10.2/jquery.min.js"></script>
    <script src="https://unpkg.com/[email protected]/dist/qiniu.min.js"></script>
    <style>

    </style>
</head>

<body>
        <div id="box2" styple="margin-left:20px;">
        <input type="file" id="fileInput" name="file" multiple="multiple" accept="image/*">
        <select>
            <option value="1">111</option>
            <option value="2">222</option>
            <option value="3">333</option>
        </select>
        <button id="btn_start_upload">开始上传</button>
        <button id="btn_clear_upload">清空上传列表</button>
    </div>
    <div id="progress_area" style="height: 220px;width:960px;border:1px solid black; overflow:auto;">
        <!-- <div style="text-align:left;margin-left: 20px;">
            <label id="file_name"></label>
            <label style="">上传进度:</label>
            <progress style="" max="100" value="0" id="pg"></progress>
            <label id="progress_value">0%</label>
            <label>图片地址:</label>
            <label id="file_url"></label>
        </div> -->

    </div>
    <script>
        var token = '';
        $.get("/api/qiniu/getToken", function (data, status) { //这里的token需要自己写一个接口动态生成,因为安全考虑而且token是有效期的
            console.log(JSON.stringify(data));
            token = data.uptoken;
            console.log(token);
        });


        var fileInput = document.querySelector("#fileInput");
        var isFilesChanged = false;
        fileInput.addEventListener("change", function (event) {
            isFilesChanged = true;
            console.log('fileInput.addEventListener');
        }, false);

        $('#btn_start_upload').click(function () {
            if (isFilesChanged) {
                uploadMutileFile(fileInput);
                isFilesChanged = false; //防止重复点击,上传重复图片
            }
        });
        $('#btn_clear_upload').click(function () {
            document.getElementById("progress_area").innerHTML = "";
        });

        function uploadMutileFile(files) {
            for (let i = 0; i < fileInput.files.length; i++) {
                var file = fileInput.files[i];
                // name: 文件名.
                // lastModified: UNIX timestamp 形式的最后修改时间.
                // lastModifiedDate:  Date 形式的最后修改时间.
                // size: 文件的字节大小.
                // type: DOMString 文件的 MIME 类型.
                console.log('name = ' + file.name + ' lastModified = ' +
                    ' lastModifiedDate = ' + file.lastModifiedDate +
                    ' size = ' + file.size +
                    ' type = ' + file.type + '\n');
                //在for循环中增加元素
                // <div style="text-align:left;margin-left: 20px;">
                //     <label id="file_name"></label>
                //     <label style="">上传进度:</label>
                //     <progress style="" max="100" value="0" id="pg"></progress>
                //     <label id="progress_value">0%</label>
                //     <label>图片地址:</label>
                //     <label id="file_url"></label>
                // </div>
                var parent = document.getElementById('progress_area');
                var divChild = document.createElement('div');
                var labelFileName = document.createElement('label');
                var labelUploadProgress = document.createElement('label');
                var progress = document.createElement('progress');
                progress.setAttribute('max', 100);
                progress.setAttribute('value', 0);
                var progressValue = document.createElement('label');
                var resultLabel = document.createElement('label');

                divChild.appendChild(labelFileName);
                divChild.appendChild(labelUploadProgress);
                divChild.appendChild(progress);
                divChild.appendChild(progressValue);
                divChild.appendChild(resultLabel);
                parent.appendChild(divChild);


                labelFileName.innerText = file.name;
                labelUploadProgress.innerText = '上传进度:';
                //设置相关的css布局
                labelFileName.style.width = '50px';
                labelFileName.style.textOverflow = 'ellipsis';
                labelFileName.style.overflow = 'hidden';
                labelFileName.style.whiteSpace = 'nowrap';

                labelUploadProgress.style.marginLeft = '8px';

                progress.style.marginLeft = '8px';
                resultLabel.style.marginLeft = '20px';

                uploadFile(file, progress, progressValue, resultLabel);
            }
        }


        function getModifiedName(file) {
            var fileName = '';
            var currentDate = new Date();
            fileName = 'test/' +
                currentDate.getFullYear() + '_' +
                currentDate.getMonth() + 1 + '_' +
                currentDate.getDate() + '_' +
                currentDate.getHours() + '_' +
                currentDate.getMinutes() + '_' +
                currentDate.getSeconds() + '_' +
                currentDate.getMilliseconds() + '_' +
                file.name;
            return fileName;
        }

        function uploadFile(file, progress, progressValue, resultLabel) {
            var key = getModifiedName(file);
            var config = {
                useCdnDomain: true,
            };
            var putExtra = {
                fname: "",
                params: {},
                mimeType: [] || null
            };
            var observable = qiniu.upload(file, key, token, putExtra, config);
            // observer: observer 为一个 object,
            // 用来设置上传过程的监听函数,有三个属性 next、error、complete:
            var observer = {
                next(res) {
                    console.log('in observer next:')
                    // var pg = document.getElementById('pg');
                    // var labelProgress = document.getElementById('progress_value');
                    // var fileName = document.getElementById('file_name');
                    progress.value = res.total.percent;
                    progressValue.innerText = res.total.percent.toFixed(0) + '%';
                    console.log(res.total.loaded + '====>' + res.total.total + '====>' + res.total.percent);
                },
                error(err) {
                    console.log('in observer error:')
                    console.log(JSON.stringify(err));
                    resultLabel.innerText = '上传失败';
                },
                complete(res) {
                    console.log('in observer complete:')
                    console.log(JSON.stringify(res));
                    // var resultLabel = document.getElementById('file_url');
                    // resultLabel.innerText = '' + res.key; //加上自己在七牛配置的domian则可以获得上传后七牛空间的url地址了
                    resultLabel.innerText = '上传成功';
                    console.log('res.key = ' + res.key);
                }
            }
            var subscription = observable.subscribe(observer) // 上传开始
            // or
            // var subscription = observable.subscribe(next, error, complete) // 这样传参形式也可以

            // subscription.unsubscribe() // 上传取消
        }
    </script>
</body>

</html>
相比较官网的demo,对于前端小白来说我觉得这段代码更加好理解。
附官网JSSDK的例子:
https://developer.qiniu.com/kodo/sdk/1283/javascript
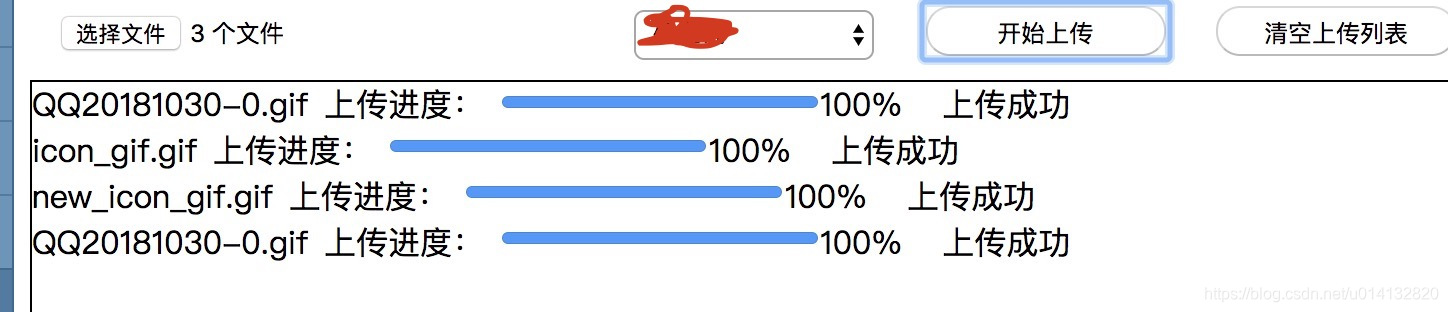
最后实现效果如下: