版权声明:转载需标明该文链接。 https://blog.csdn.net/zaibeijixing/article/details/80594963
本文地址:https://blog.csdn.net/zaibeijixing/article/details/80594963
本文地址:https://blog.csdn.net/zaibeijixing/article/details/80594963
Win7x64 + vs2017 + dlib-19.13 + cmake-gui
以前用cmake-cmd方式编译19.7版本,但这次失败了,不再细究,故而用gui方式。(同时编译了19.7,过程一模一样,生成的”.lib”文件名不一样而已,调用方法一模一样。)
下载不再赘述,略过。历史版本地址https://sourceforge.net/projects/dclib/files/dlib/
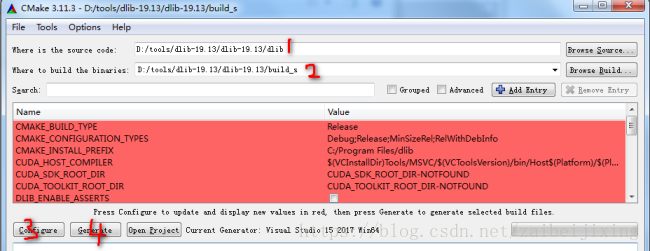
【1】cmake-gui。在“dlib”的同级目录新建“build_s”文件夹,以保存编译生成。主要步骤如图:
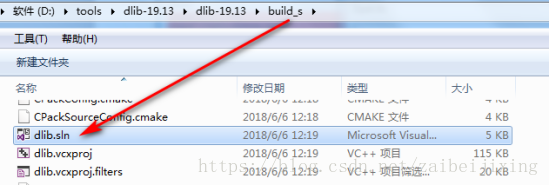
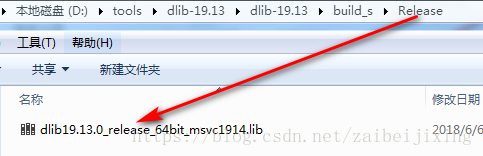
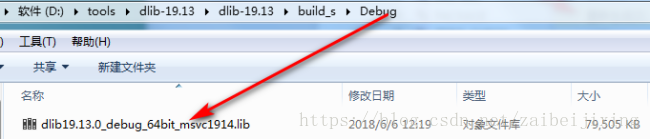
【2】编译。对生成的“dlib.sln”建议先右键点击“管理员取得所有权”再VS打开。选择Debug(Release),再选择【dlib】右键“重新生成”,完毕,即编译完成。(19.7生成的文件名都是“dlib.lib”)
扫描二维码关注公众号,回复:
4364391 查看本文章


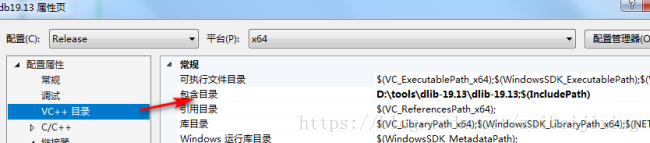
【3】调用配置VS。只需配置“包含目录”和“附加依赖项”两个即可。

【4】代码示例:
#include<dlib/image_processing/frontal_face_detector.h>
#include<dlib/image_processing/render_face_detections.h>
#include<dlib/gui_widgets.h>
#include<dlib/image_io.h>
#include<iostream>
#include<vector>
using namespace dlib;
using namespace std;
int main(/*int argc, char **argv*/)
{
try
{
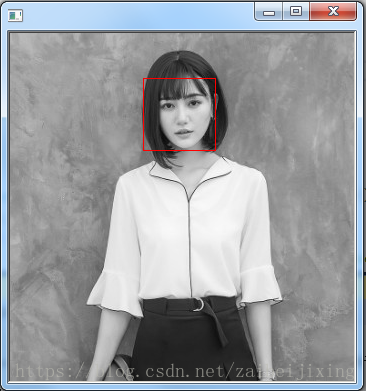
frontal_face_detector detector = get_frontal_face_detector();
image_window win; //一个显示窗口
array2d<unsigned char> img;
//cout << "processing image" << argv[1] << endl;
load_image(img,"E:/mypic/face001.jpg"); //加载一张图片 load_image(img, argv[1]);
//pyramid_up(img);//对图像进行上采样,检测更小的人脸
//开始检测,返回一系列的边界框
std::vector<rectangle> dets = detector(img); //detector()函数检测人脸,返回一系列边界盒子
cout << "Number of faces detected:" << dets.size() << endl;//re
//在原图上显示结果
win.clear_overlay();
win.set_image(img);
win.add_overlay(dets, rgb_pixel(255, 0, 0));
cout << "Hit enter to process the next image..." << endl;
cin.get();
}
catch (const std::exception& e)
{
cout << "\nexception thrown!" << endl;
cout << e.what() << endl;
}
getchar();
}
【注】解决错误的步骤没记录,如果运行错误,请网上搜索。
可以转载分享,但需在文章开头注明本文原始链接:https://blog.csdn.net/zaibeijixing/article/details/80594963