OpenResty是一款基于Nginx的高性能负载均衡服务器容器,简单来说是Nginx+Lua。结合了Lua语言来对Nginx进行扩展,使得在Nginx上具有web容器功能。
首先是安装过程:
    # 导入GPG 密钥:
    wget -qO - https://openresty.org/package/pubkey.gpg | sudo apt-key add -

    # 安装 add-apt-repository 命令
    # (之后你可以删除这个包以及对应的关联包)
    sudo apt-get -y install software-properties-common

    # 添加我们官方 official APT 仓库:
    sudo add-apt-repository -y "deb http://openresty.org/package/ubuntu $(lsb_release -sc) main"

    # 更新 APT 索引:
    sudo apt-get update
然后就可以像下面这样安装软件包,比如 openresty:

    sudo apt-get install openresty
之后,openresty会被安装到/usr/local/openresty目录下,目录结构如下
root@forever:/usr/local# cd openresty/
root@forever:/usr/local/openresty# ls
bin  luajit  lualib  nginx  openssl  pcre  site  zlib
其中,nginx是nginx目录,这就是一个nginx服务器,可以单独使用,luajit文件里面是lua运行时的代码解释器,和java的JIT一个意思。lualib为lua的函数库,和python的module一样,lua也有丰富的函数库。其他的先不做介绍。
安装完成后,先配置环境变量:
PATH=$PATH:/usr/local/openresty/nginx/sbin
export PATH
这时候,在命令行里输入nginx命令,所对应的路径为
/usr/local/openresty/nginx在配置文件里做修改时,都要对应这个路径去做相对路径。
到现在openresty环境搭建完成,那能不能运行呢?
首先运行一下nginx服务试一试。
注意,在/usr/local/openresty/nginx/conf里有一个nginx.conf,这是默认的配置文件,建议最好先拷贝一份做备份:
root@forever:/usr/local/openresty/nginx/conf# cp nginx.conf nginx_base.conf
然后就按照默认的配置,先启动nginx试一试,这里有两种启动方式,第一种直接读取默认配置文件启动,习惯性的先看一下配置文件是否书写正确:
root@forever:/usr/local/openresty# nginx -t输入:
root@forever:/usr/local/openresty# nginx -t
nginx: [alert] lua_code_cache is off; this will hurt performance in /usr/local/openresty/nginx/conf/lua.conf:7
nginx: the configuration file /usr/local/openresty/nginx/conf/nginx.conf syntax is ok
nginx: configuration file /usr/local/openresty/nginx/conf/nginx.conf test is successful
看到successful证明配置文件没有问题,然后继续进行:
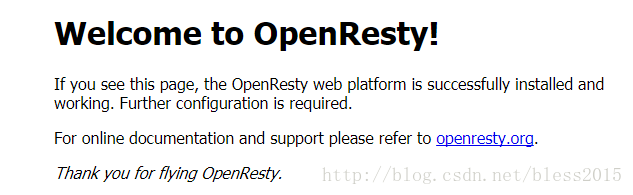
root@forever:/usr/local/openresty# nginx打开浏览器查看
http://lcalhost:8080看到下图即启动成功。
第二种启动方式是指定配置文件:
root@forever:/usr/local/openresty/nginx# nginx -c /usr/local/openresty/nginx/conf/nginx.conf
是一样的效果。在调试时,常用到一个命令,来停止nginx。
root@forever:/usr/local/openresty/nginx# killall nginx停止以后不要忘了reload一下,然后在执行nginx -c …/nginx.conf
root@forever:/usr/local/openresty/nginx# nginx -s reload这样基本的openresty环境搭建完毕,但这里好像还没lua什么事情。
下面在nginx中签入lua代码。
修改nginx配置文件,在http下引入lua库,如果你的openresty不是这个路径,对应修改就可以了:
#lua模块路径,多个之间”;”分隔,其中”;;”表示默认搜索路径,默认到/usr/servers/nginx下找
lua_package_path "/usr/local/openresty/lualib/?.lua;;";  #lua 模块
lua_package_cpath "/usr/local/openresty/lualib/?.so;;";  #c模块
include lua.conf
然后在nginx.conf同级下新建这个lua.conf文件,然后写东西进入:
root@forever:/usr/local/openresty/nginx/conf# touch lua.conf
root@forever:/usr/local/openresty/nginx/conf# vi lua.conf
#lua.conf
server {
    listen       8080;
    server_name  _;
    location /lua {
        default_type 'text/html';
        lua_code_cache off; #关闭缓存,这个配置可以不加。
        content_by_lua_file conf/lua/test.lua; #相对于nginx安装目录
    }
}
然后保存,这里看到,我们在conf下新建了一个lua文件夹,在lua文件夹里新建了一个test.lua文件。为什么要这么建立呢?可以看到我们整个的目录结构:
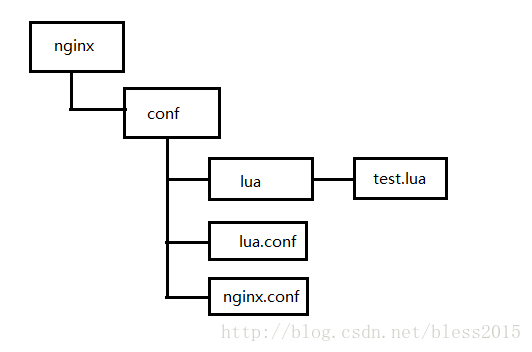
这里仅作测试,并不是一个很好的目录结构,但是可以参考。lua代码就放到lua目录下。
test.lua里面只有一行代码:
ngx.say("hello lua!");之后保存,我们先把之前的nginx停掉:
killall nginxnginx -s reloadnginx -c /usr/local/openresty/nginx/conf/nginx.conf然后打开浏览器
http://localhost:8080/lua看到如下界面
即部署完成。