9.1、什么是AOP
AOP是面向切面编程。全称:Aspect Oriented Programming
面向切面编程指的是:程序是运行期间,动态地将某段代码插入到原来方法代码的某些位置中。这就叫面向切面编程。
使用一个案例来体现AOP底层实现原理
9.2、一个简单计算数功能加日记
日记工具类
public class LogUtils {
	public static void logBefore(String method, Object... args) {
		System.out.println("说明有变 。方法名:" + method + ". 参数是:" + Arrays.asList(args));
	}
	public static void logAfterReturning(String method, Object result) {
		System.out.println("方法名:" + method + ". 返回值是:" + result);
	}
}
计算器类
public class Calculator implements Calculate {
	@Override
	public int add(Integer num1, Integer num2) {
		LogUtils.logBefore("add", num1,num2);
		int result = num1 + num2;
		LogUtils.logAfterReturning("add", result);
		return result;
	}
	@Override
	public int add(Integer num1, Integer num2, Integer num3) {
		LogUtils.logBefore("add", num1,num2,num3);
		int result = num1 + num2 + num3;
		LogUtils.logAfterReturning("add", result);
		return result;
	}
	@Override
	public int div(Integer num1, Integer num2) {
		LogUtils.logBefore("div", num1,num2);
		int result = num1 / num2;
		LogUtils.logAfterReturning("div", result);
		return result;
	}
}
9.4、使用代理实现日记(了解内容)
9.4.1、使用jdk动态代理统一日记
计算器
public class Calculator implements Calculate {
	@Override
	public int add(Integer num1, Integer num2) {
		int result = num1 + num2;
		return result;
	}
	@Override
	public int add(Integer num1, Integer num2, Integer num3) {
		int result = num1 + num2 + num3;
		return result;
	}
	@Override
	public int div(Integer num1, Integer num2) {
		int result = num1 / num2;
		return result;
	}
}
public class LogUtils {
	// 前置通知===前置增强
	public static void logBefore(String method, Object... args) {
		System.out.println("前置通知 : 方法名:" + method + ". 参数是:" + Arrays.asList(args));
	}
	// 后置通知
	public static void logAfter(String method, Object... args) {
		System.out.println("后置通知: 方法名:" + method + ". 参数是:" + Arrays.asList(args));
	}
	// 返回通知===返回增强
	public static void logAfterReturning(String method, Object result) {
		System.out.println("返回通知: 方法名:" + method + ". 返回值是:" + result);
	}
	// 异常通知===异常增强
	public static void logAfterThrowing(String method, Exception e) {
		System.out.println("异常通知: 方法名:" + method + ". 异常信息是:" + e);
	}
}
public class JdkProxyFactory {
	// 通过创建一个代理对象方式解决所有类,需要添加这些日记 的功能
	public static Object createProxy(Object target) {
		/**
		 * 第一个参数是代理目标对象的类加载器<br/>
		 * 第二个参数是代理对象需要实现哪些接口 <br/>
		 * 第三个参数是InvocationHandler实现类
		 */
		return Proxy.newProxyInstance(target.getClass().getClassLoader(), target.getClass().getInterfaces(),
				new InvocationHandler() {
					// 每次代理对象调用方法的时候,都会调用invoke方法
					public Object invoke(Object proxy, Method method, Object[] args) throws Throwable {
						// 前置通知 ===>>>目标方法 ====>>>后置通知====>>>返回通知
						// 前置通知 ===>>>目标方法 ====>>>后置通知====>>>异常通知
						Object result = null; // 记录目标方法返回值
						try {
							try {
								// 前置通知
								LogUtils.logBefore(method.getName(), args);
								// 调用目标对象方法
								result = method.invoke(target, args);
							} finally {
								// 后置通知
								LogUtils.logAfter(method.getName(), args);
							}
							// 返回通知
							LogUtils.logAfterReturning(method.getName(), result);
						} catch (Exception e) {
							// 异常通知
							LogUtils.logAfterThrowing(method.getName(), e);
						}
						return result;
					}
				});
	}
	public static void main(String[] args) {
		Calculate calculate = new Calculator();
		Calculate proxy = (Calculate) createProxy(calculate);
		System.out.println(proxy.add(100, 200));
		System.out.println("===============================");
		System.out.println(proxy.div(100, 0));
	}
}
优点:这种方式已经解决我们前面所有日记需要的问题。非常的灵活。而且可以方便的在后期进行维护和升级。
缺点:当然使用jdk动态代理,需要有接口。如果没有接口。就无法使用jdk动态代理。
9.5、AOP编程的专业术语
通知(Advice)
通知就是增强的代码。比如前置增强的代码。后置增强的代码。异常增强代码。这些就叫通知
切面(Aspect)
切面就是包含有通知代码的类叫切面。
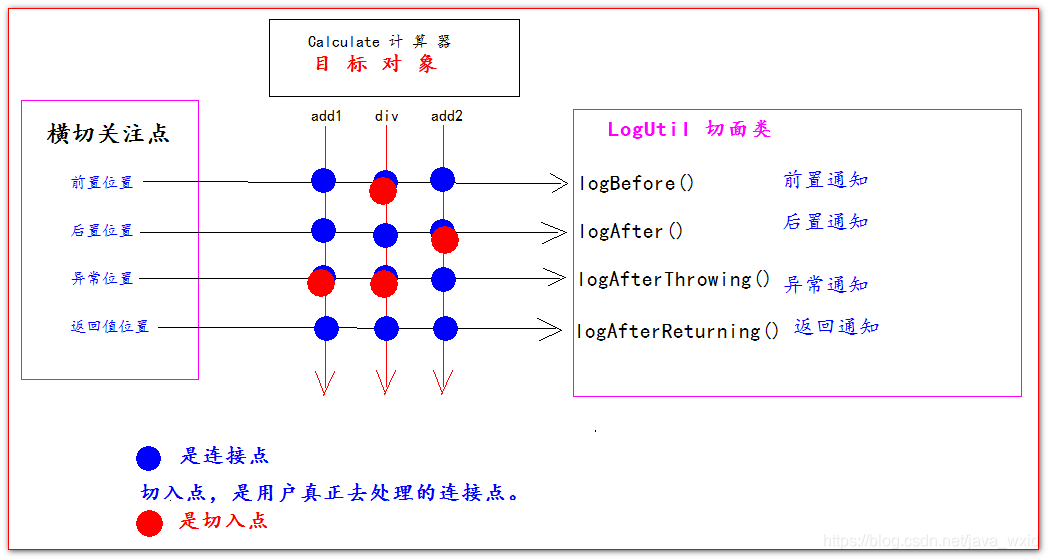
横切关注点
横切关注点,就是我们可以添加增强代码的位置。比如前置位置,后置位置,异常位置。和返回值位置。这些都叫横切关注点。
目标(Target)
目标对象就是被关注的对象。或者被代理的对象。
代理(Proxy)
为了拦截目标对象方法,而被创建出来的那个对象,就叫做代理对象。
连接点(Joinpoint)
连接点指的是横切关注点和程序代码的连接,叫连接点。
切入点(pointcut)
切入点指的是用户真正处理的连接点,叫切入点。
在Spring中切入点通过org.springframework.aop.Pointcut 接口进行描述,它使用类和方法作为连接点的查询条件。
图解AOP专业术语:
9.6、使用Spring实现AOP简单切面编程
创建一个java工程:
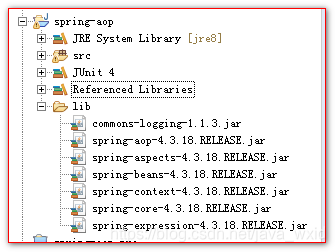
导入jar包:
com.springsource.org.aspectj.weaver-1.6.8.RELEASE.jar
commons-logging-1.1.3.jar
spring-aop-4.3.18.RELEASE.jar
spring-aspects-4.3.18.RELEASE.jar
spring-beans-4.3.18.RELEASE.jar
spring-context-4.3.18.RELEASE.jar
spring-core-4.3.18.RELEASE.jar
spring-expression-4.3.18.RELEASE.jar
配置文件信息:
<?xml version="1.0" encoding="UTF-8"?>
<beans xmlns="http://www.springframework.org/schema/beans"
	xmlns:xsi="http://www.w3.org/2001/XMLSchema-instance"
	xmlns:context="http://www.springframework.org/schema/context"
	xmlns:aop="http://www.springframework.org/schema/aop"
	xsi:schemaLocation="http://www.springframework.org/schema/beans http://www.springframework.org/schema/beans/spring-beans.xsd
		http://www.springframework.org/schema/context http://www.springframework.org/schema/context/spring-context-4.3.xsd
		http://www.springframework.org/schema/aop http://www.springframework.org/schema/aop/spring-aop-4.3.xsd">

	<!-- 包扫描 -->
	<context:component-scan base-package="com"></context:component-scan>
	<!-- 加代理信息 -->
	<aop:aspectj-autoproxy></aop:aspectj-autoproxy>

</beans>
bean对象
@Component
public class Calculator implements Calculate {

	@Override
	public int add(Integer num1, Integer num2) {
		int result = num1 + num2;
		System.out.println("目标方法 add被执行了");
		return result;
	}
	@Override
	public int add(Integer num1, Integer num2, Integer num3) {
		int result = num1 + num2 + num3;
		System.out.println("目标方法 add被执行了");
		return result;
	}
	@Override
	public int div(Integer num1, Integer num2) {
		System.out.println("目标方法 div被执行了");
		int result = num1 / num2;
		return result;
	}
}
@Aspect
@Component
public class LogUtils {
	/**
	 * @Before是前置通知
	 */
	@Before(value="execution(public int com.pojo.Calculator.add(Integer, Integer))")
	// 前置通知===前置增强
	public static void logBefore() {
		System.out.println("前置通知 : 方法名:xxxx. 参数是:args");
	}
}
测试代码:
public class SpringTest {

	@Test
	public void test1() throws Exception {
		// 创建Spring IOC 容器对象
		ApplicationContext applicationContext = new ClassPathXmlApplicationContext("applicationContext.xml");
		Calculate calculate = (Calculate) applicationContext.getBean("calculator");
		calculate.add(100, 100);
	}
}
9.8、Spring切面中的代理对象
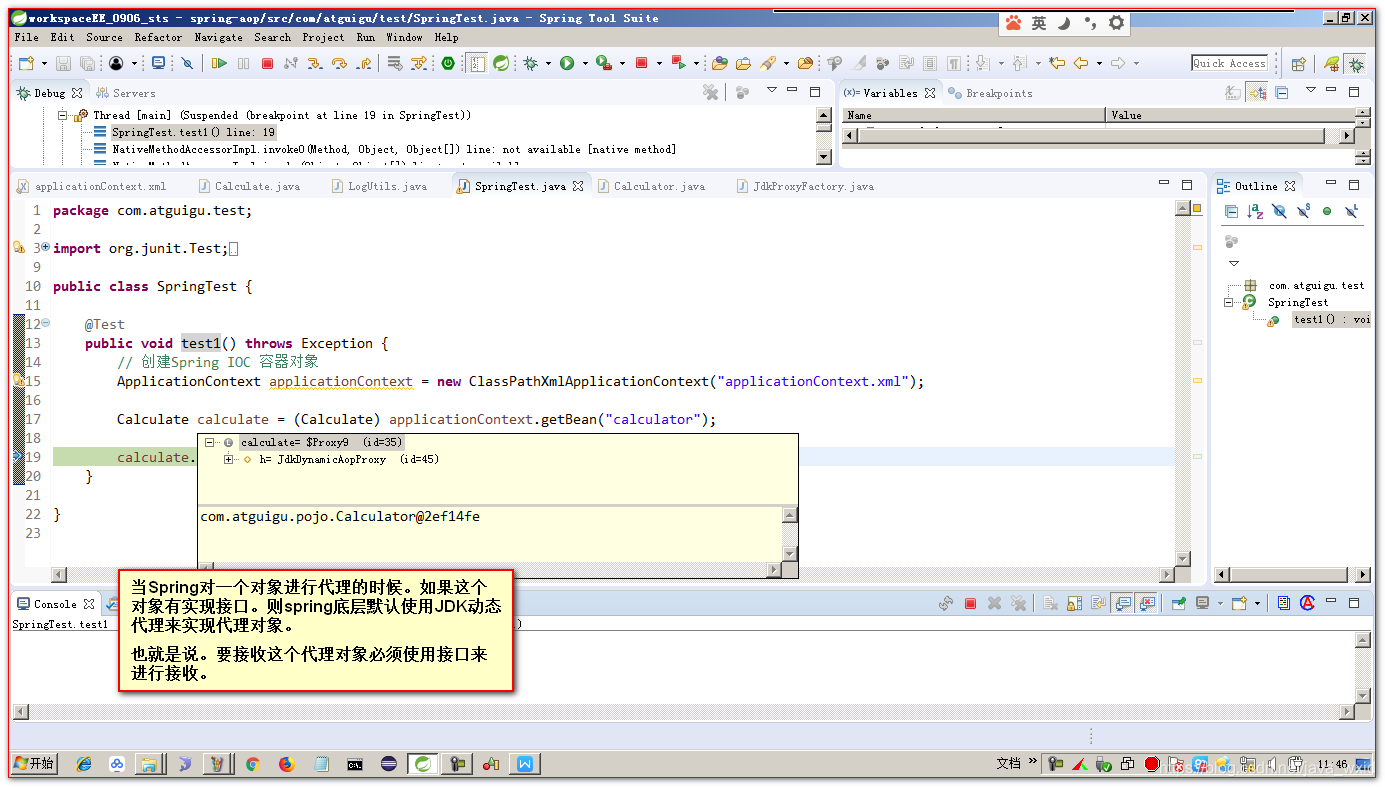
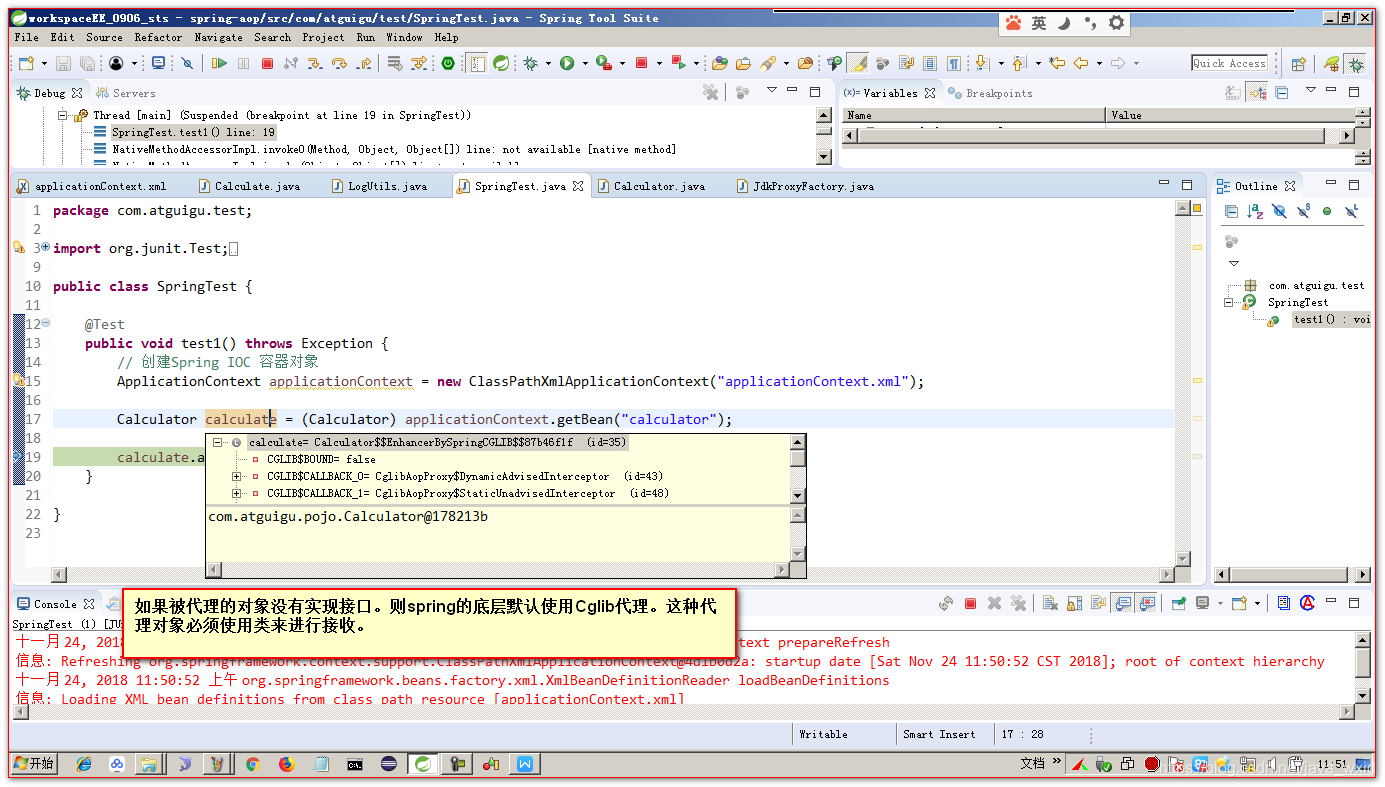
在Spring中,可以对有接口的对象和无接口的对象分别进行代理。在使用上有些细微的差别。
- 如果被代理的对象实现了接口。在获取对象的时候,必须要以接口来接收返回的对象。
- 如果被代理对象,如果没有实现接口。获取对象的时候使用对象类型本身
9.7、Spring的切入点表达式
@PointCut切入点表达式语法格式是:
execution(访问权限 返回值类型 方法全限定名(参数类型列表))
execution(public int com.atguigu.pojo.Calculator.add(Integer, Integer))
限定符:
表示任意的意思:
1)匹配某全类名下,任意或多个方法。
execution(public int com.atguigu.pojo.Calculator.(Integer, Integer))
表示匹配任意的方法
2)在Spring中只有public权限能拦截到,访问权限可以省略(访问权限不能写*)。
execution(int com.atguigu.pojo.Calculator.*(Integer, Integer))
可以省略public访问权限
3)匹配任意类型的返回值,可以使用 * 表示
execution(public * com.atguigu.pojo.Calculator.*(Integer, Integer))
表示可以接受任意返回值类型
4)匹配任意子包。
execution(public int com.atguigu.*.Calculator.add(Integer, Integer))
匹配任意子包
5)任意类型参数
execution(public int com.atguigu.pojo.Calculator.add(Integer, *))
表示第二个参数是任意类型的参数
…:可以匹配多层路径,或任意多个任意类型参数
1)任意层级的包
execution(public int com…pojo.Calculator.add(Integer, Integer))
表示com和pojo之间可以有任意层级的包。
2)任意类型的参数
execution(public int com.atguigu.pojo.Calculator.add(…))
不关心参数的个数,和参数的类型。
模糊匹配:
// 表示任意返回值,任意方法全限定符,任意参数
execution(* (…))
// 表示任意返回值,任意包名+任意方法名,任意参数
execution( .(…))
精确匹配:
execution(public int com.atguigu.aop.Calculator.add(int, int))
切入点表达式连接:&& 、||
// 表示需要同时满足两个表达式
@Before(“execution(public int com.atguigu.aop.Calculator.add(int, int))”
+ " && "
- “execution(public * com.atguigu.aop.Calculator.add(…))”)
// 表示两个条件只需要满足一个,就会被匹配到
@Before(“execution(public int com.atguigu.aop.Calculator.add(int, int))”
+ " || "
+ “execution(public * com.atguigu.aop.Calculator.a*(int))”)
9.9、Spring通知的执行顺序
Spring通知的执行顺序是:
正常情况:
前置通知====>>>>目标方法====>>>>后置通知=====>>>>返回值之后
异常情况:
前置通知====>>>>目标方法====>>>>后置通知=====>>>>抛异常通知
@Aspect
@Component
public class LogUtils {
/**
* @Before是前置通知
/
@Before(value = "execution(public int com.atguigu.pojo.Calculator.(Integer, Integer))")
// 前置通知===前置增强
public static void logBefore() {
System.out.println(“前置通知 : 方法名:xxxx. 参数是:args”);
}
/**
* @After 后置通知
/
@After(value = "execution(public int com.atguigu.pojo.Calculator.(Integer, Integer))")
public static void logAfter() {
System.out.println(“后置通知: 方法名:. 参数是:”);
}
/**
* 返回值通知
/
@AfterReturning(value = "execution(public int com.atguigu.pojo.Calculator.(Integer, Integer))")
public static void logAfterReturning() {
System.out.println(“返回通知: 方法名:. 返回值是:”);
}
/**
* 异常通知
/
@AfterThrowing(value = "execution(public int com.atguigu.pojo.Calculator.(Integer, Integer))")
public static void logAfterThrowing() {
System.out.println(“异常通知: 方法名:. 异常信息是:”);
}
}
9.10、获取连接点信息
JoinPoint 是连接点的信息。
只需要在通知方法的参数中,加入一个JoinPoint参数。就可以获取到拦截方法的信息。
注意:是org.aspectj.lang.JoinPoint这个类。
/**
 * @Before是前置通知
 */
@Before(value = "execution(public int com.atguigu.pojo.Calculator.*(Integer, Integer))")
// 前置通知===前置增强
public static void logBefore(JoinPoint jp) {
// jp.getSignature().getName() 获取方法名
// jp.getArgs() 获取目标方法传递的参数
System.out.println(“前置通知 : 方法名:” + jp.getSignature().getName() + “. 参数是:” + Arrays.asList(jp.getArgs()));
}
9.11、获取拦截方法的返回值和抛的异常信息
获取方法返回的值分为两个步骤:
1、在返回值通知的方法中,追加一个参数 Object result
2、然后在@AfterReturning注解中添加参数returning=“参数名”
/**
 * 返回值通知<br/>
 * 	returning属性设置用哪个参数来接收返回值
 */
@AfterReturning(value = "execution(public int com.atguigu.pojo.Calculator.*(Integer, Integer))",returning="result")
public static void logAfterReturning(JoinPoint jp, Object result) {
	System.out.println("返回通知: 方法名:" + jp.getSignature().getName() + ". 返回值是:" + result);
}
获取方法抛出的异常分为两个步骤:
1、在异常通知的方法中,追加一个参数Exception exception
2、然后在@AfterThrowing 注解中添加参数 throwing=“参数名”
/**
 * 异常通知<br/>
 * throwing="e" 表示使用参数Throwable e来接收抛出的异常
 */
@AfterThrowing(value = "execution(public int com.pojo.Calculator.*(Integer, Integer))",throwing="e")
public static void logAfterThrowing(JoinPoint jp,Throwable e) {
	System.out.println("异常通知: 方法名:" + jp.getSignature().getName() + ". 异常信息是:" + e);
}
9.12、Spring的环绕通知
1、环绕通知使用@Around注解。
2、环绕通知如果和其他通知同时执行。环绕通知会优先于其他通知之前执行。
3、环绕通知一定要有返回值(环绕如果没有返回值。后面的其他通知就无法接收到目标方法执行的结果)。
4、在环绕通知中。如果拦截异常。一定要往外抛。否则其他的异常通知是无法捕获到异常的。
/**
 * @throws Throwable
 * @Around 注解表示环绕通知<br/>
 * 1 环绕通知 执行顺序优先于 普通通知(默认情况)<br/>
 * 2 环绕通知方法一定要有返回值。而且这个返回值一定是目标方法的返回值。
 * 3 环绕通知方法中收到异常后,一定要往外抛
 */
@Around(value = "execution(public int com.pojo.Calculator.*(Integer, Integer))")
public static Object around(ProceedingJoinPoint pjp) throws Throwable {
	Object result = null;
	try {
		try {
			System.out.println("环绕的前置通知");
			// 调用目标方法
			result = pjp.proceed();
		} finally {
			System.out.println("环绕的后置通知");
		}
		System.out.println("环绕的返回通知:" + result);
	} catch (Throwable e) {
		System.out.println("环绕的异常通知:" + e);
		throw e;// 普通的异常通知就会收到异常
	}
	return result;// 普通的返回通知,就会收到返回值
}
9.13、切入点表达式的复用
* 切入点表达式的复用
* 第一步:定义一个方法
* 第二步: 在方法上,使用@Pointcut定义一个切入点表达式
* 第三步:在需要复用切入点表达式的地方换成方法调用
/**
 * 切入点表达式的复用
 * 第一步:定义一个方法<br/>
 * 第二步: 在方法上,使用@Pointcut定义一个切入点表达式<br/>
 * 第三步:在需要复用切入点表达式的地方换成方法调用
 */
@Pointcut(value="execution(public int com.pojo.Calculator.*(Integer, Integer))")
public static void pointcut1() {}
/**
 * @Before是前置通知
 */
@Before(value = "pointcut1()")
// 前置通知===前置增强
public static void logBefore(JoinPoint jp) {
	System.out.println("前置通知 : 方法名:" + jp.getSignature().getName() + ". 参数是:" + Arrays.asList(jp.getArgs()));
}
9.14、多个通知的执行顺序
当我们有多个切面,多个通知的时候:
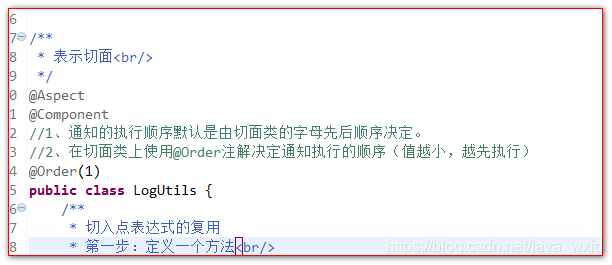
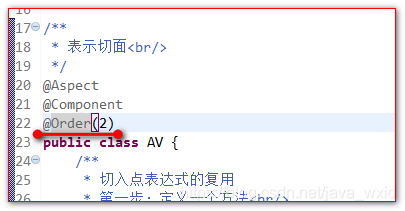
1、通知的执行顺序默认是由切面类的字母先后顺序决定。
2、在切面类上使用@Order注解决定通知执行的顺序(值越小,越先执行)
9.15、如何基于xml配置aop程序
<?xml version="1.0" encoding="UTF-8"?>
<beans xmlns="http://www.springframework.org/schema/beans"
	xmlns:xsi="http://www.w3.org/2001/XMLSchema-instance"
	xmlns:context="http://www.springframework.org/schema/context"
	xmlns:aop="http://www.springframework.org/schema/aop"
	xsi:schemaLocation="http://www.springframework.org/schema/beans http://www.springframework.org/schema/beans/spring-beans.xsd
		http://www.springframework.org/schema/context http://www.springframework.org/schema/context/spring-context-4.3.xsd
		http://www.springframework.org/schema/aop http://www.springframework.org/schema/aop/spring-aop-4.3.xsd">

	<!-- 包扫描 -->
	<context:component-scan base-package="com"></context:component-scan>

	<!-- 配置目标对象 -->
	<bean id="calculator" class="com.pojo.Calculator" />

	<!-- 配置切面类 -->
	<bean id="logUtils" class="com.util.LogUtils" />

	<aop:config>
		<!-- 配置切面 -->
		<aop:aspect ref="logUtils">
			<!-- 定义一个可复用的切入点表达式
					id是唯一标识
					expression 切入点表达式的值
			 -->
			<aop:pointcut expression="execution(public int com.pojo.Calculator.*(Integer, Integer))"
				id="pointcut1"/>
			<!-- 配置前置通知
					method属性配置哪个方法是前置通知<br/>
					pointcut属性配置切入点表达式<br/>
			 -->
			<aop:before method="logBefore"
				pointcut="execution(public int com.pojo.Calculator.*(Integer, Integer))"/>
			<!-- 配置后置通知
					method属性配置哪个方法是前置通知<br/>
					pointcut属性配置切入点表达式<br/>
			 -->
			<aop:after method="logAfter" pointcut-ref="pointcut1"/>
			<!--
				aop:after-returning 配置返回通知
					returning="result" 设置返回通知中哪个参数用来接收返回值。
			 -->
			<aop:after-returning method="logAfterReturning"
				pointcut-ref="pointcut1" returning="result"
			/>
			<!--
				aop:after-throwing 配置异常通知
					throwing="e" 设置异常通知方法中哪个参数用来接收异常
			 -->
			<aop:after-throwing method="logAfterThrowing"
				pointcut-ref="pointcut1" throwing="e"
			/>
		</aop:aspect>
	</aop:config>
</beans>
10、Spring之数据访问
10.1、Spring数据访问工程环境搭建
创建一个java工程
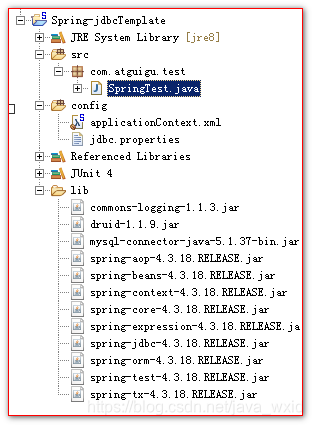
导入jar包:
commons-logging-1.1.3.jar
druid-1.1.9.jar
mysql-connector-java-5.1.37-bin.jar
spring-aop-4.3.18.RELEASE.jar
spring-beans-4.3.18.RELEASE.jar
spring-context-4.3.18.RELEASE.jar
spring-core-4.3.18.RELEASE.jar
spring-expression-4.3.18.RELEASE.jar
spring-jdbc-4.3.18.RELEASE.jar
spring-orm-4.3.18.RELEASE.jar
spring-test-4.3.18.RELEASE.jar
spring-tx-4.3.18.RELEASE.jar
jdbc.properties属性配置文件:
url=jdbc:mysql://localhost:3306/book
user=root
password=root
driverClassName=com.mysql.jdbc.Driver
initialSize=5
maxActive=10
applicationContext.xml配置文件:
<?xml version="1.0" encoding="UTF-8"?>
<beans xmlns="http://www.springframework.org/schema/beans"
	xmlns:xsi="http://www.w3.org/2001/XMLSchema-instance"
	xmlns:context="http://www.springframework.org/schema/context"
	xsi:schemaLocation="http://www.springframework.org/schema/beans http://www.springframework.org/schema/beans/spring-beans.xsd
		http://www.springframework.org/schema/context http://www.springframework.org/schema/context/spring-context-4.3.xsd">

	<!-- 加载jdbc.properties属性配置文件 -->
	<context:property-placeholder location="classpath:jdbc.properties"/>
	<!-- 配置数据库连接池 -->
	<bean id="dataSource" class="com.alibaba.druid.pool.DruidDataSource">
		<property name="username" value="${user}" />
		<property name="password" value="${password}" />
		<property name="driverClassName" value="${driverClassName}" />
		<property name="url" value="${url}" />
		<property name="initialSize" value="${initialSize}" />
		<property name="maxActive" value="${maxActive}" />
	</bean>
	<!-- 配置jdbcTemplate模板类 == 专门用来操作数据库-->
	<bean id="jdbcTemplate" class="org.springframework.jdbc.core.JdbcTemplate">
		<property name="dataSource" ref="dataSource" />
	</bean>

</beans>
10.2、Spring之JdbcTemplate使用
在Spring中提供了对jdbc的封装类叫JdbcTemplate。它可以很方便的帮我们执行sql语句,操作数据库。
先准备单表的数据库数据
drop database if exists jdbctemplate;

create database jdbctemplate;

use jdbctemplate;

CREATE TABLE `employee` (
  `id` int(11) primary key AUTO_INCREMENT,
  `name` varchar(100) DEFAULT NULL,
  `salary` decimal(11,2) DEFAULT NULL
);

insert  into `employee`(`id`,`name`,`salary`)
values (1,'李三',5000.23),(2,'李四',4234.77),(3,'王五',9034.51),
(4,'赵六',8054.33),(5,'孔七',6039.11),(6,'曹八',7714.11);

select * from employee;
实验2:将id=5的记录的salary字段更新为1300.00
@Test
public void test2() throws Exception {
String sql = “update employee set salary = ? where id = ?”;
jdbcTemplate.update(sql, new BigDecimal(1300),5);
}
实验3:批量插入
@Test
	public void test3() throws Exception {
		String sql = "insert into employee(`name`,`salary`) values(?,?)"; // 插入一条记录对应一个 一维数组
		// jdbcTemplate.update(sql, "新来的" , new BigDecimal(10000000));

		List<Object[]> args = new ArrayList<Object[]>();

		args.add(new Object[] {"aaaa",new BigDecimal(11111)});
		args.add(new Object[] {"bbbb",new BigDecimal(22222)});

		jdbcTemplate.batchUpdate(sql, args);
	}
实验4:查询id=5的数据库记录,封装为一个Java对象返回
public void test4() throws Exception {
	String sql = "select id,name,salary from employee where id = ?";
	/**
	 * RowMapper 接口,负责将查询到的每一行记录转换成为一个javaBean对象<br/>
	 * BeanPropertyRowMapper需要把查询的结果转换成为Employee<br/>
	 * queryForObject 用来查询一个对象<br/>
	 */
	Employee employee = jdbcTemplate.queryForObject(sql, new BeanPropertyRowMapper<Employee>(Employee.class), 5);
	System.out.println( employee );
}
实验5:查询salary>4000的数据库记录,封装为List集合返回(List里都是Employee对象)
public void test5() throws Exception {
	String sql = "select id,name,salary from employee where salary > ?";
	/**
	 * RowMapper 接口,负责将查询到的每一行记录转换成为一个javaBean对象<br/>
	 * BeanPropertyRowMapper需要把查询的结果每一行转换成为Employee<br/>
	 */
	List<Employee> list = jdbcTemplate.query(sql, new BeanPropertyRowMapper<Employee>(Employee.class), new BigDecimal(4000));
	System.out.println( list );
}
实验6:查询最大salary
@Test
	public void test6() throws Exception {
		String sql = "select max(salary) from employee";
		// queryForObject 查询只返回一行记录的语句
		// query查询返回多行记录的sql
		BigDecimal maxSalary = jdbcTemplate.queryForObject(sql, BigDecimal.class);
		System.out.println( maxSalary );
	}
实验7:使用带有具名参数的SQL语句插入一条员工记录,并以Map形式传入参数值
测试的代码:
public void test7() throws Exception {
	/**
	 * :name 是占位符。名叫name的参数
	 */
	String sql = "insert into employee(`name`,`salary`) values( :name , :salary )";

	Map<String, Object> paramMap = new HashMap<>();
	paramMap.put("name", "国哥很久没帅了!");
	paramMap.put("salary", new BigDecimal(10000));

	namedParameterJdbcTemplate.update(sql, paramMap);

}
实验8:重复实验7,以SqlParameterSource形式传入参数值
public void test8() throws Exception {
	/**
	 * :name 是占位符。名叫name的参数
	 */
	String sql = "insert into employee(`name`,`salary`) values( :name , :salary )";

	Employee employee = new Employee(null, "xxxx", new BigDecimal(1234));

	namedParameterJdbcTemplate.update(sql, new BeanPropertySqlParameterSource(employee));
}
实验9:创建Dao,自动装配JdbcTemplate对象
		// 实验9:创建Dao,自动装配JdbcTemplate对象

@Repository
public class EmployeeDao {

	@Autowired
	JdbcTemplate jdbcTemplate;

	public int saveEmployee(Employee employee) {
		String sql = "insert into employee(`name`,`salary`) values(?,?)";
		return jdbcTemplate.update(sql, employee.getName(),employee.getSalary());
	}
}
测试的代码:
@Test
public void test9() throws Exception {
	employeeDao.saveEmployee(new Employee(null, "我入一次", new BigDecimal(12342)));
}
实验10:通过继承JdbcDaoSupport创建JdbcTemplate的Dao(了解)
@Repository
public class EmployeeDao extends JdbcDaoSupport{

//	@Autowired
//	JdbcTemplate jdbcTemplate;

	@Autowired
	public void setDataSource2(DataSource dataSource) {
		System.out.println( "setDataSource2 自动注入的:" + dataSource );
		setDataSource(dataSource);
	}

	public int saveEmployee(Employee employee) {
		String sql = "insert into employee(`name`,`salary`) values(?,?)";
		return getJdbcTemplate().update(sql, employee.getName(),employee.getSalary());
	}
}