版权声明:本文为博主原创文章,未经博主允许不得转载。 https://blog.csdn.net/Amy_cloud/article/details/83145727
1.安装:
npm install vue-photo-preview --save
2.在main.js 入口文件中配置:
import vuePicturePreview from 'vue-picture-preview'
Vue.use(vuePicturePreview)
3.页面渲染:
- 情况一: 页面本身就存在img标签,且是独立的一个
:src 对应后台返回的图片路径
preview值相同即表示为同一组
:preview-text    描述文字
<img  :src="s.answer_pic" draggable="false" preview="1" :preview-text="s.student_name+'-'+s.totalscore+'分'">
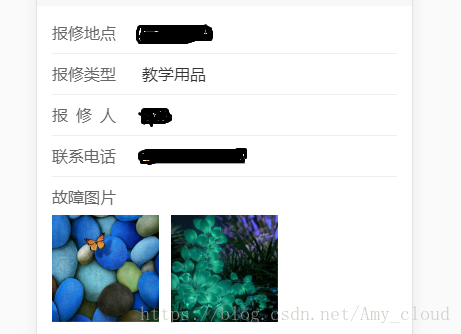
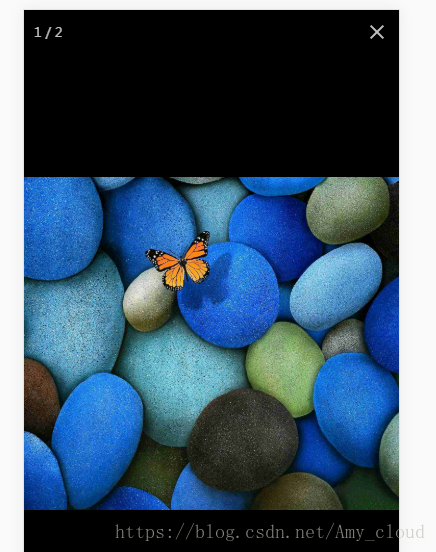
- 情况二:页面展示多个img标签,且循环渲染出来的(为了能够继续相应改插件的查看图片的方法,这里采用在外层套一个div包住元素,并将img渲染的图片地址同时作为父级div的背景图)
<div class="img-box" v-for="(url, index) in context.image" :style="{'background-image': 'url(' + url + ')'}" :key="index">
       <img preview="repairDetail" preview-text="" :src="url" alt="">
</div>


css样式:
.img-box{
    float: left;
    width: 30%;
    padding: 15%;
    margin: 1.65%;
    position: relative;
    overflow: hidden;
    background-size: cover;
    background-position: center;
    background-repeat: no-repeat;
}
.img-box img{
    position: absolute;
    width: 100%;
    height: 100%;
    top: 0;
    right: 0;
    bottom: 0;
    left: 0;
    opacity: 0;
}