RecycleView第一次出江湖,就以迅猛之势打败了老牌“ListView”作为增强版的ListView,优点如何呢,自带ViewHolder不需要自己写,ViewHolder作用是优化加载速度,将浏览过的页面缓存在本地,再上拉不需要再去网络申请加载,用户体验提升,出现白板空白可能性小。TwinklingRefreshLayout则带着完整的刷新功能,与之结合实现完整版本的浏览界面。
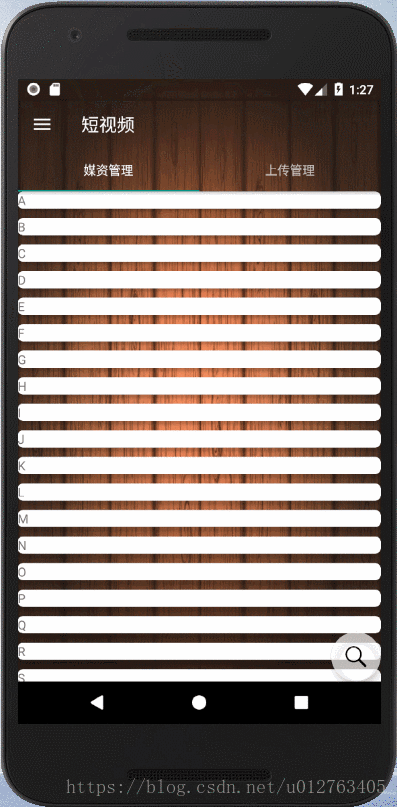
【效果如下】:
RecycleView需要:
-
Adapter:使用RecyclerView之前,你需要一个继承自RecyclerView.Adapter的适配器,作用是将数据与每一个item的界面进行绑定。
-
LayoutManager:用来确定每一个item如何进行排列摆放,何时展示和隐藏。回收或重用一个View的时候,LayoutManager会向适配器请求新的数据来替换旧的数据,这种机制避免了创建过多的View和频繁的调用findViewById方法(与ListView原理类似)。
话不多说,先上简单暴力版本看一下效果
【准备工作,添加依赖】:
implementation 'com.lcodecorex:tkrefreshlayout:1.0.7'由于我使用了CardView为了将显示item包裹起来形成卡片式布局,大家不需要的可以不用,用的话需要添加依赖
implementation 'com.android.support:cardview-v7:27.1.1'【主页面xml】:
<?xml version="1.0" encoding="utf-8"?>
<FrameLayout xmlns:android="http://schemas.android.com/apk/res/android"
    xmlns:tools="http://schemas.android.com/tools"
    android:layout_width="match_parent"
    android:layout_height="match_parent"
    tools:context=".Activity.MediaFragment">

<com.lcodecore.tkrefreshlayout.TwinklingRefreshLayout
    android:id="@+id/refresh"
    android:layout_width="match_parent"
    android:layout_height="match_parent">

    <android.support.v7.widget.RecyclerView
        android:id="@+id/recycleView"
        android:layout_width="match_parent"
        android:layout_height="match_parent"
        android:overScrollMode="never">

    </android.support.v7.widget.RecyclerView>
</com.lcodecore.tkrefreshlayout.TwinklingRefreshLayout>

</FrameLayout>
TwinklingRefreshLayout需要将RecyclerView包裹在里面,
TwinklingRefreshLayout 不会自动结束刷新或者加载更多,需要手动控制,高级功能,后续开发公布
【建立适配器】MediaAdapter.class 注意的是,需要继承 RecyclerView.Adapter
package com.rolarun.vvvv.shortmedia.Activity;

import android.support.annotation.NonNull;
import android.support.v7.widget.RecyclerView;
import android.view.LayoutInflater;
import android.view.View;
import android.view.ViewGroup;
import android.widget.TextView;

import com.rolarun.vvvv.shortmedia.R;

import java.util.List;

public class MediaAdapter extends RecyclerView.Adapter<MediaAdapter.ViewHolder>{
    @NonNull

    public List<String> datas;
    public MediaAdapter(List<String> mDatas) {
        this.datas = mDatas;
    }
    //创建新View,被LayoutManager所调用
    @NonNull
    @Override
    public ViewHolder onCreateViewHolder(@NonNull ViewGroup viewGroup, int viewType) {
        View view = LayoutInflater.from(viewGroup.getContext()).inflate(R.layout.asset_item,viewGroup,false);
        return new ViewHolder(view);
    }


    public void onBindViewHolder(ViewHolder viewHolder, int position) {
        viewHolder.mTextView.setText(datas.get(position));
    }
    //将数据与界面进行绑定的操作


    //获取数据的数量
    @Override
    public int getItemCount() {
        return datas.size();
    }
    //自定义的ViewHolder,持有每个Item的的所有界面元素
    public static class ViewHolder extends RecyclerView.ViewHolder {
        public TextView mTextView;
        public ViewHolder(View view){
            super(view);
            mTextView = (TextView) view.findViewById(R.id.assetTitle);
        }
    }

}
【显示item的xml文件】:
<?xml version="1.0" encoding="utf-8"?>
<LinearLayout xmlns:android="http://schemas.android.com/apk/res/android"
    xmlns:app="http://schemas.android.com/apk/res-auto"
    android:orientation="vertical"
    android:layout_width="match_parent"
    android:layout_height="30dp">
    <android.support.v7.widget.CardView
        android:layout_width="match_parent"
        android:layout_height="wrap_content"
        app:cardCornerRadius="6dp"
        app:cardElevation="4dp"
        >


        <LinearLayout
            android:layout_width="match_parent"
            android:layout_height="match_parent"
            android:orientation="horizontal">

            <FrameLayout
                android:layout_width="match_parent"
                android:layout_height="match_parent">

                <TextView
                    android:id="@+id/assetTitle"
                    android:layout_width="wrap_content"
                    android:layout_height="wrap_content"
                    android:text="TextView" />

            </FrameLayout>
        </LinearLayout>
    </android.support.v7.widget.CardView>

</LinearLayout>
这里最简单的就是放一个TextView
接下来就是最后一步:装载适配器:
package com.rolarun.vvvv.shortmedia.Activity;

import android.os.Bundle;
import android.support.annotation.Nullable;
import android.support.v4.app.Fragment;
import android.support.v7.widget.LinearLayoutManager;
import android.support.v7.widget.RecyclerView;
import android.view.LayoutInflater;
import android.view.View;
import android.view.ViewGroup;

import com.lcodecore.tkrefreshlayout.TwinklingRefreshLayout;
import com.rolarun.vvvv.shortmedia.R;

import java.util.ArrayList;
import java.util.List;

import butterknife.BindView;
import butterknife.ButterKnife;


public class MediaFragment extends Fragment {

    @BindView(R.id.refresh)
    TwinklingRefreshLayout refresh;
    @BindView(R.id.recycleView)
    RecyclerView recyclerView;
    List<String> mDatas;
    public MediaFragment() {
        // Required empty public constructor


    }


    public static MediaFragment newInstance(String param1, String param2) {
        MediaFragment fragment = new MediaFragment();
        Bundle args = new Bundle();
        fragment.setArguments(args);
        return fragment;
    }


    public void onCreate(View view, @Nullable Bundle savedInstanceState) {
        super.onCreate(savedInstanceState);
        ButterKnife.bind(this,view);
    }

    @Override
    public View onCreateView(LayoutInflater inflater, ViewGroup container,
                             Bundle savedInstanceState) {
       View v=inflater.inflate(R.layout.fragment_media, container, false);
        recyclerView=(RecyclerView)v.findViewById(R.id.recycleView);
                mDatas = new ArrayList<String>();
        for (int i = 'A'; i < 'z'; i++)
        {
            mDatas.add("" + (char) i);
        }

        MediaAdapter adapter=new MediaAdapter(mDatas);
        LinearLayoutManager lm=new LinearLayoutManager(getContext());
        lm.setOrientation(LinearLayoutManager.VERTICAL);
        recyclerView.setLayoutManager(lm);
        recyclerView.setAdapter(adapter);
        return v;
    }

}
关键就是:
 MediaAdapter adapter=new MediaAdapter(mDatas);
        LinearLayoutManager lm=new LinearLayoutManager(getContext());
        lm.setOrientation(LinearLayoutManager.VERTICAL);
        recyclerView.setLayoutManager(lm);
        recyclerView.setAdapter(adapter);
        return v;
跟ListView差不多,你可能会问,没有看出哪里比ListView好的,那么下一章会重点讲解ViewHolder的使用