版权声明:A_芦瑞华_i_DO.欢迎转载 https://blog.csdn.net/weixin_43067223/article/details/83998861
pom.xml分块解释
1. groupId,artifactId,version,packaging
groupId,artifactId,version,packaging这四项组成了项目的唯一坐标。一般情况下,前面三项就可以组成项目的唯一坐标了。
  <groupId>com.aaa</groupId>  <!--项目名称,定义为组织名+项目名,类似包名-->
  <artifactId>myFirstMaven</artifactId> <!--模块名称-->
  <version>1.0-SNAPSHOT</version> <!--当前项目版本号,SNAPSHOT为快照版本即非正式版本,release为正式发布版本-->
  <packaging>war</packaging>  <!--打包类型:jar:执行package会打成jar包
                                        war:执行package会打成war
                                        pom:用于maven工程的继承,通常父工程设置为pom-->
2. name,url
  <name>myFirstMaven Maven Webapp</name>  <!--用户描述项目的名称,无关紧要的东西,可选-->
  <!-- FIXME change it to the project's website -->
  <url>http://www.example.com</url> <!--应该是只是写明开发团队的网站,无关紧要,可选-->
3. properties
properties:声明一些常量。如:<file.encoding>UTF-8<file.encoding>引用时 ${file.encoding}
<!--声明一些常量。如:<file.encoding>UTF-8<file.encoding>引用时 ${file.encoding}-->
  <properties>
    <project.build.sourceEncoding>UTF-8</project.build.sourceEncoding>
    <maven.compiler.source>1.7</maven.compiler.source>
    <maven.compiler.target>1.7</maven.compiler.target>
  </properties>
- 常量的举例:
比如现在有一个需求,一部分的依赖版本号都为4.1.1.RELEASE
使用如下代码放到properties标签中。
<spring.version>4.1.1.RELEASE</spring.version>
dependencies标签中引用常量使用如下代码
  <dependency>
    <groupId>org.springframework</groupId>
    <artifactId>spring-web</artifactId>
    <version>${spring.version}</version>
  </dependency>
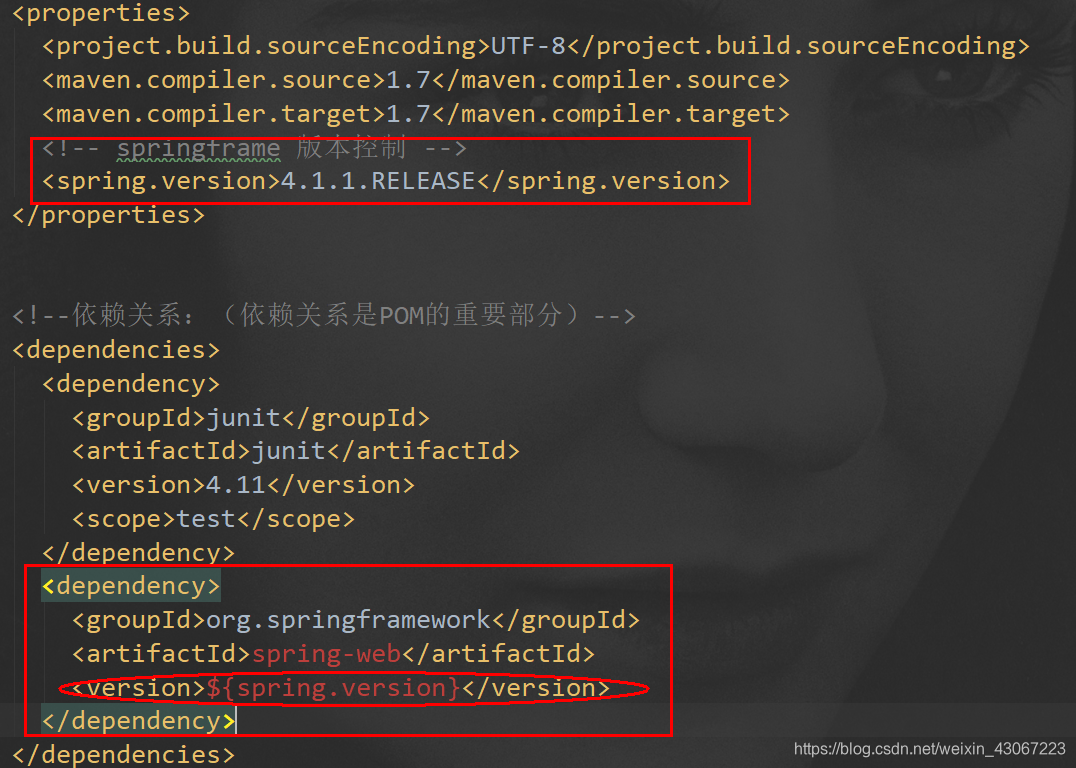
4. 依赖关系:(依赖关系是POM的重要部分)
<!--依赖关系:(依赖关系是POM的重要部分)-->
<dependencies>
  <dependency>
    <groupId>junit</groupId>
    <artifactId>junit</artifactId>
    <version>4.11</version>
    <scope>test</scope>
  </dependency>
</dependencies>
- ** 此处该如何理解并使用呢?**
刚开始我觉的既然是重要部分,一定要理解他的作用和使用方法,下面就说一些我的简单理解。
首先,他的作用我觉的就是用来导jar包和创建依赖关系的,比如整个项目要使用spring的依赖,那么我们就写进如下代码在dependency标签里面。
<dependency>
   <groupId>org.springframework</groupId>
   <artifactId>spring-core</artifactId>
   <version>5.1.2.RELEASE</version>
</dependency>
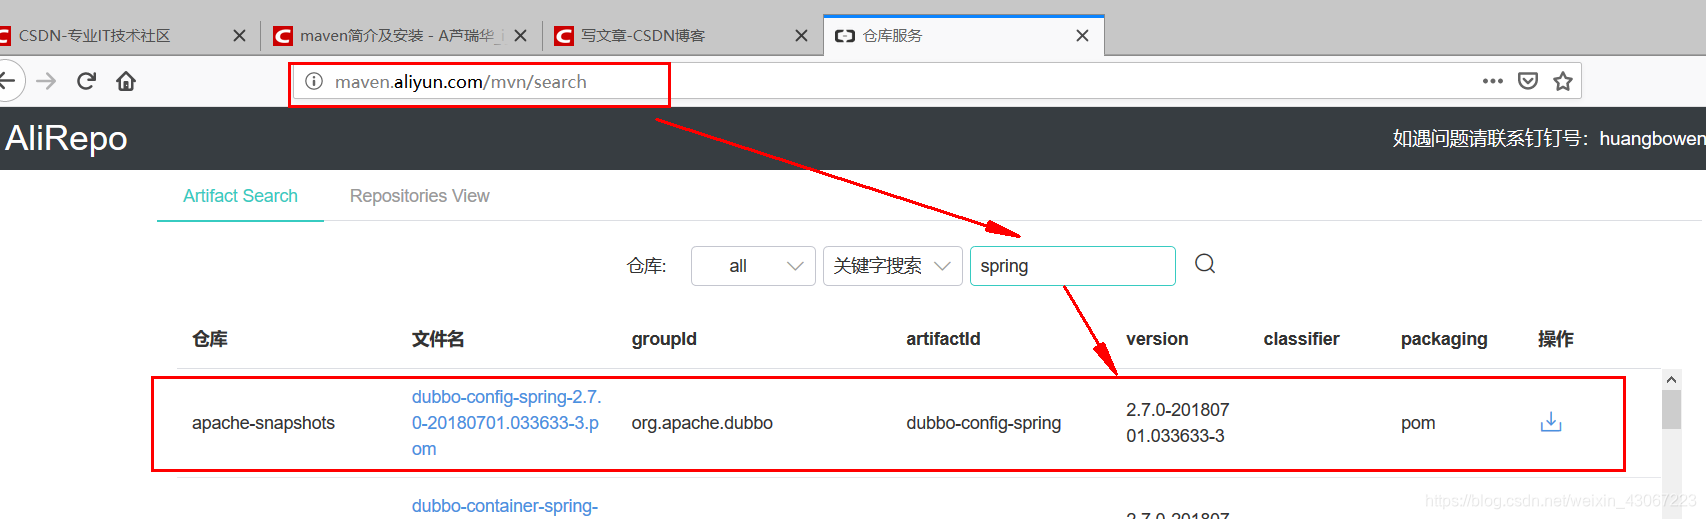
- 那么这些代码,在哪里获取呢?
提供两个网址:
mvn地址:https://mvnrepository.com/
阿里云提供的网址:http://maven.aliyun.com - 首先是阿里云的演示:
进入网站:
这里展示的有groupid,artfactid,version,粘贴进代码块就行。
- mvn演示
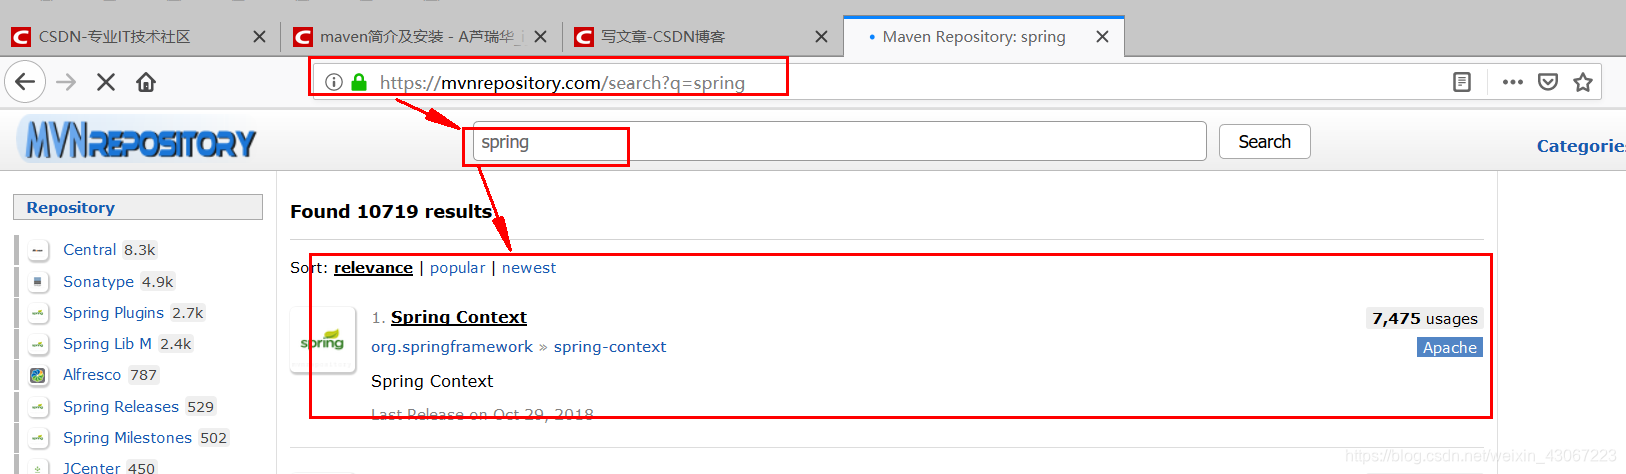
点进去,找到你想要的版本
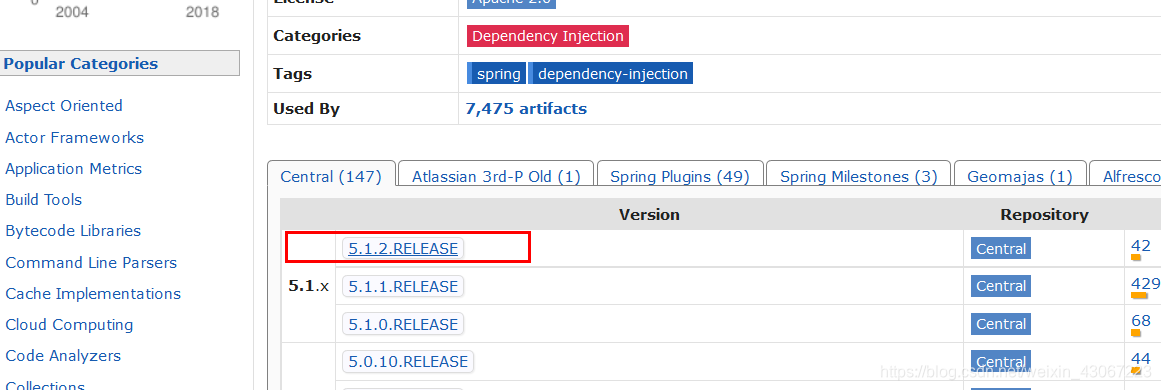
代码就在这里呀
 现在我就把代码考进去,然后出现下面页面
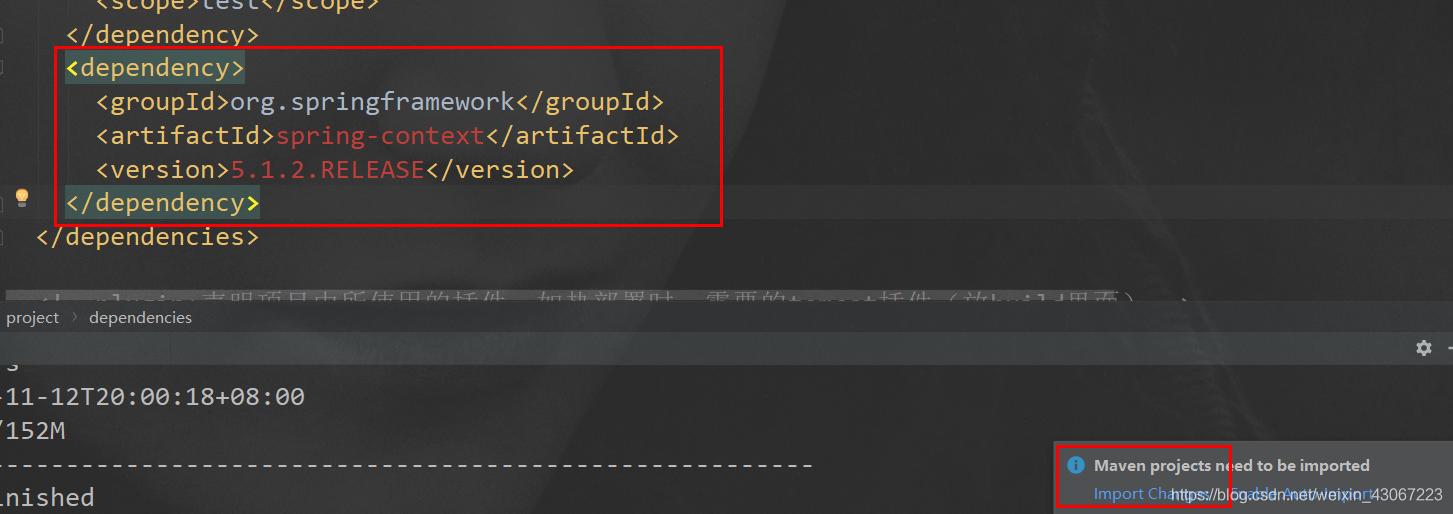 等待一会,他在远程仓库下载到本地仓库,然后点击import changes导入依赖关系。
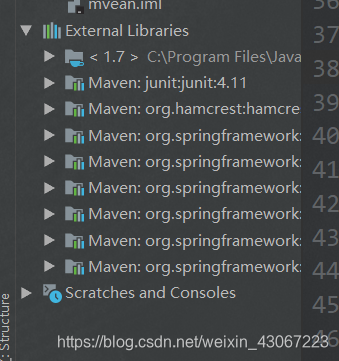
 所有的有关spring的依赖已经导入
ok了~
5.plugin插件(build)
- 提到我今天刚了解的一个名词“热部署”
热部署是为了解决:开发人员修改一个新的功能,无法马上看到效果。需要重启应用程序服务器,才能看到新代码效果。 - 如热部署时,需要的tomcat插件(放build里面)(这个功能我还没有试过,凑合着写上,完整一点,如果大家有更好的例子和理解,联系我):
<plugins>
                   <plugin>
                       <artifactId>maven-war-plugin</artifactId>
                       </plugin>
                  <plugin>
                       <artifactId>maven-compiler-plugin</artifactId>
                       <configuration>
<!-- 源代码使用的开发版本 -->
                       <source>1.7</source>
<!-- 需要生成的目标class文件的编译版本 -->
                       <target>1.7</target>
                       </configuration>
                       </plugin>
                       <plugin>
                       <groupId>org.apache.tomcat.maven</groupId>
                       <artifactId>tomcat7-maven-plugin</artifactId>
                       <version>2.2</version>
                       <configuration>
                           <url>http://localhost:8080/manager/text</url>
                       <path>/ccc</path>
                       <server>tomcat</server>
                       <username>tomcat</username>
                       <password>tomcat</password>
                        </configuration>
                   </plugin>
         </plugins>
以上是我的个人理解,希望大家看到我的问题请指正,我会认真研究并期待与你的讨论。谢谢观看。