获取经常用到的软件的官方的yum仓库和rpm包
- 0、51cto博文链接
- 1、从官网获取nginx的软件包
- 1.1、如何从浏览器检索帮助信息
- 1.2、从nginx官方站点获取nginx的源码包
- 1.3、配置链接到nginx的官方yum仓库的配置文件
- 1.4、从nginx的官方yum仓库获取nginx的rpm包
- 1.5、从nginx的官方yum仓库获取srpm包
- 2、从官网获取mysql的软件包
- 2.1、如何从浏览器检索帮助信息
- 2.2、从mysql官方站点获取mysql的源码包
- 2.3、配置连接到mysql的官方yum仓库的配置文件
- 2.4、从mysql的官方yum仓库获取mysql的rpm包
- 3、从官网获取httpd的软件包
- 4、利用epel源来安装我们常见的软件包
- 5、学会从github检索开源程序
0、51cto博文链接
原先的51cto博文的链接:
http://blog.51cto.com/9657273
今天终于下定决心来CSDN记录自己的学习过程以及笔记总结了,为了自己更好的发展,特地给自己立个flag。
1、从官网获取nginx的软件包
1.1、如何从浏览器检索帮助信息
国内的上网环境,如果没法用google搜索,用百度搜索大部分知名的网站应该也是在首页的前几栏的。如果能用google,建议你所有的检索尽可能的走google。如果不知道nginx的官网,打开搜索界面,输入类似于"nginx", "nginx 官网"的检索关键字,应该可以看到首页的前几栏有关于nginx的官网信息。检索如下图所示:

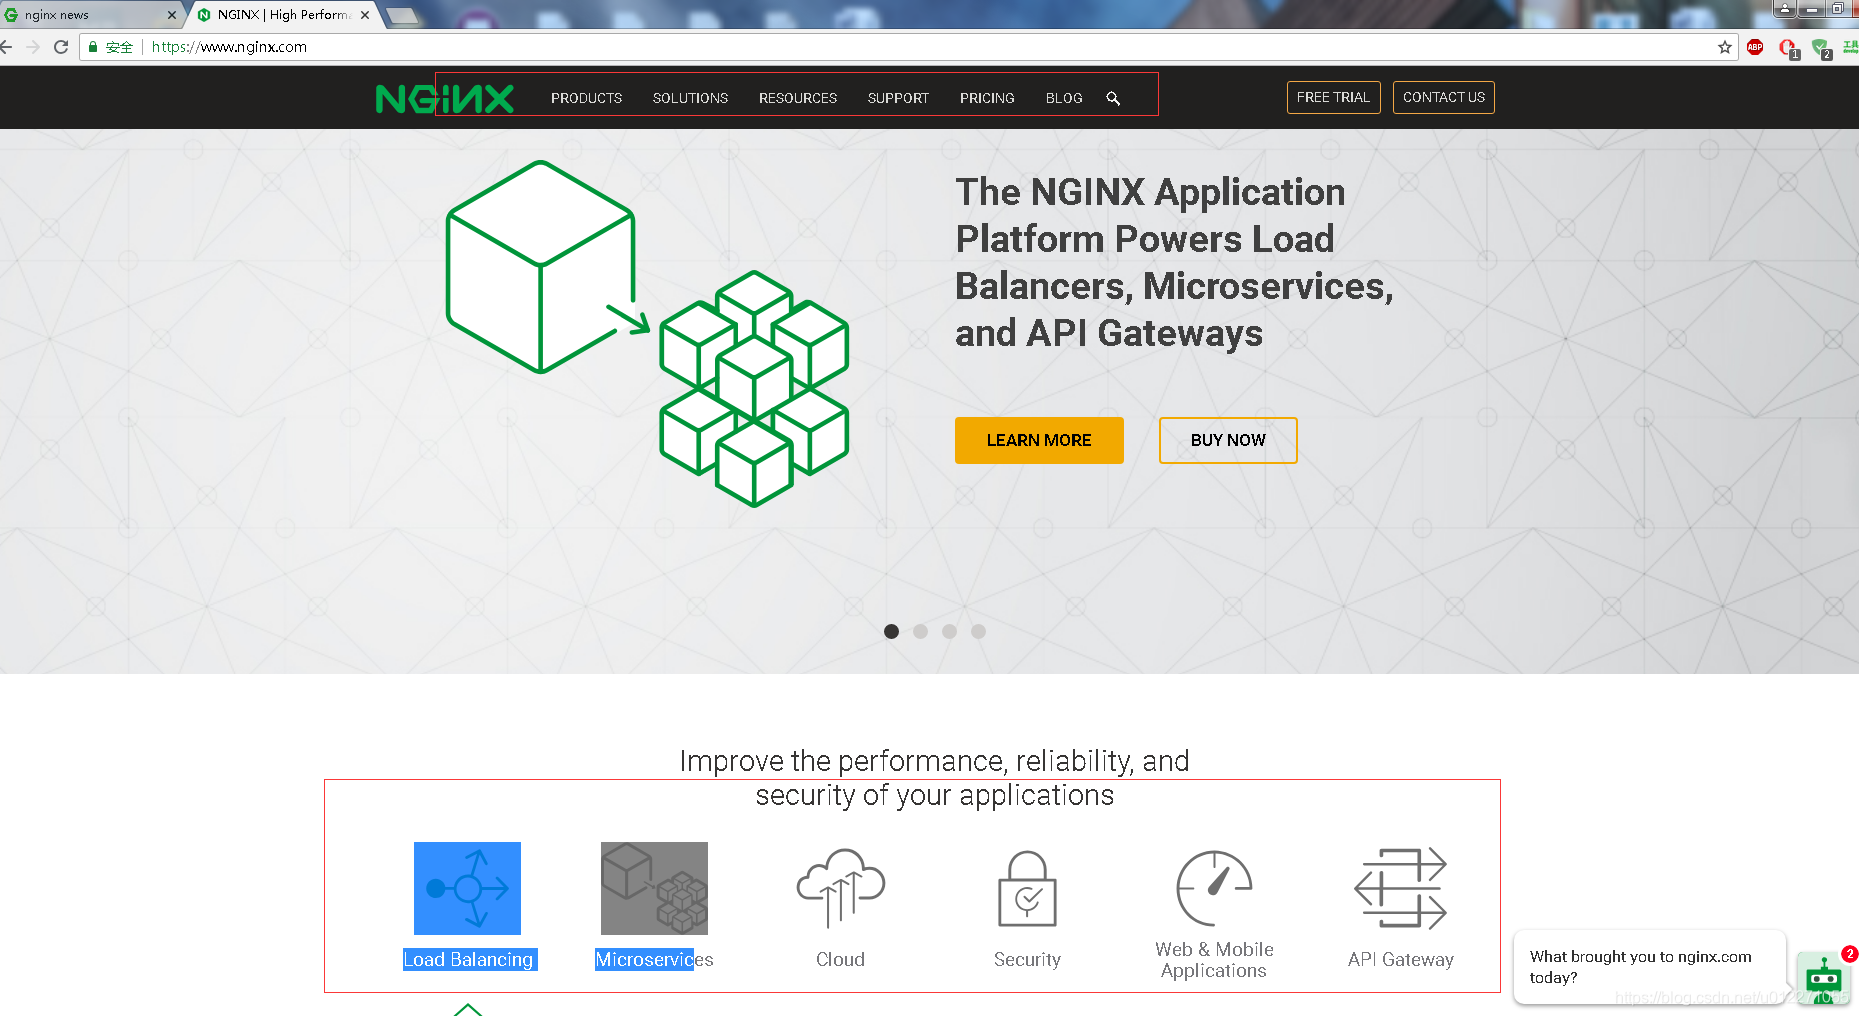
其实呢,nginx的官网总站是:
https://www.nginx.com/
另外一个开源产品以及文档入口官网:
http://nginx.org/
而我们浏览器检索"nginx官网"关键字搜索前几页大部分都是与第二个官网有关的。让我们分别看看这两个官网:
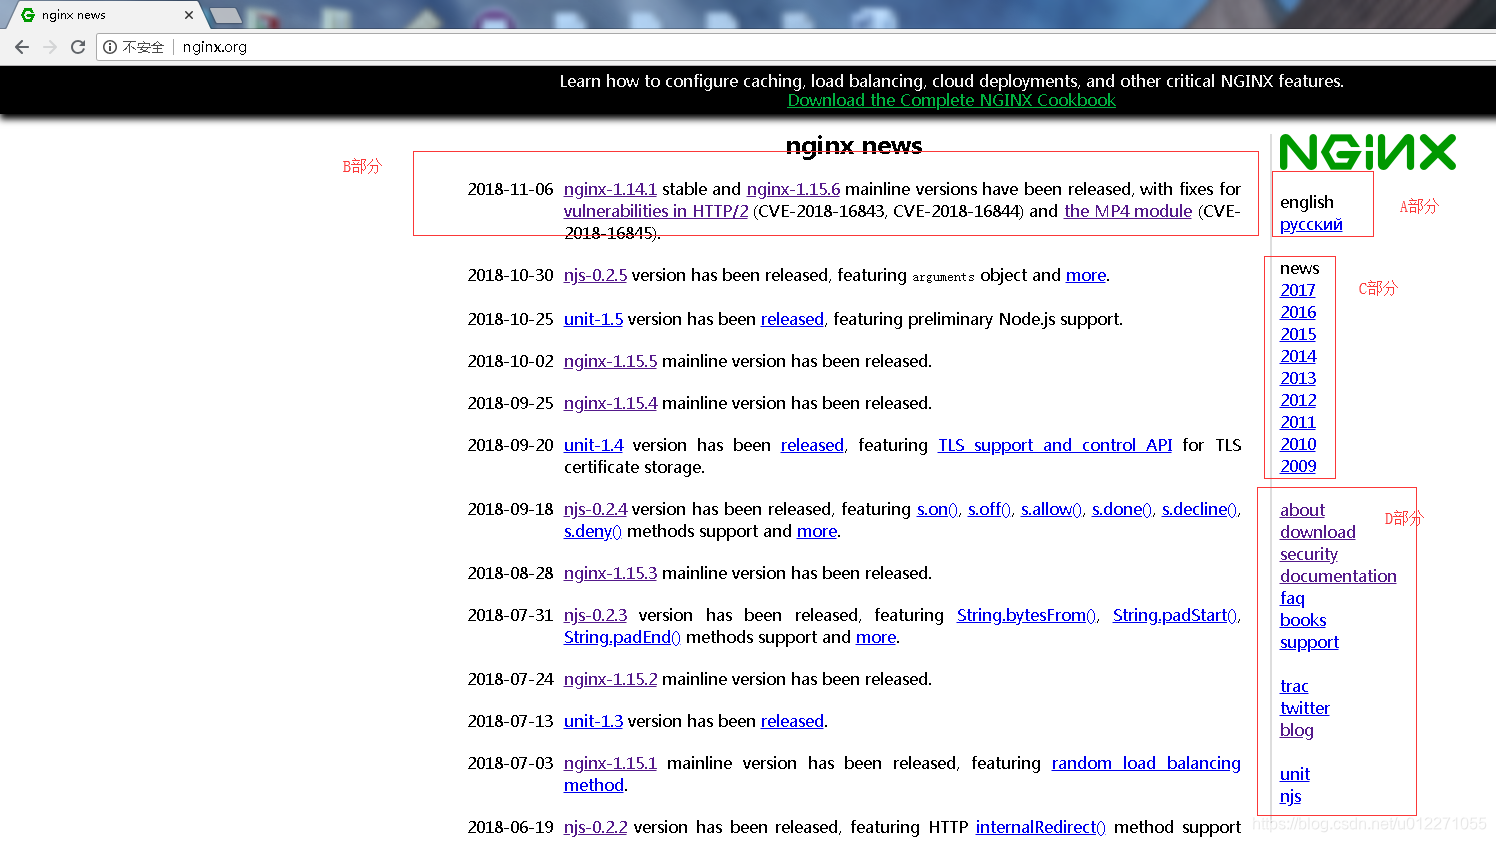
说明:我们工作中如果用到nginx,我个人感觉运维访问最多的是简单的那个官网。比如获取yum仓库,下载源码包,获取相关模块的帮助文档等等。我把截图的部分分为了几个区域(A,B,C,D).A部分可以切换语言,目前支持英文和俄语,毕竟nginx是人家俄罗斯人开发的;B部分是最近一次最新的更新状态(比如我上面截图的就是说nginx的文档版本已经是1.14.1,维护版本是1.15.6.然后会摘要说明固定版本修复的bug等);C部分是nginx近几年的新闻,产品发布信息;D部分是一些链接入口,比如关于nginx的描述,下载入口,安全说明,文档入口,常见问题(faq)入口,nginx官方推荐的书籍,以及支持,还有twitter,blog入口以及nginx的其他产品(比如unit,njs等)。
1.2、从nginx官方站点获取nginx的源码包
找到nginx的简单官网,从nginx的首页,从"download"链接接入。
nginx软件包下载入口

- 源码包:维护版本(Mainline version),稳定版本(Stable version),历史版本(Legacy versions);
- 源代码链接
- 预构建包(rpm包):
也分稳定版本和维护版本;
说明:如果要下载源码包,从界面下载即可。
1.3、配置链接到nginx的官方yum仓库的配置文件
从"download"入口进入,以稳定版本为例:
nginx的稳定版本yum仓库配置说明页
假设,我现在有两台服务器,一台上安装的linux发行版系统为CentOS 6.9 x86_64,另外一台上安装的linux发型版系统为CentOS 7.5 x86_64。我要如何配置yum参考客户端配置,并正确检索与使用。(为了书写方便,我这里实验采用的是虚拟机,本地的测试环境。线上配置也可以如此)
- CentOS 6.x和CentOS 7.x 配置yum仓库客户端简单说明
CentOS 6.x shell接口执行命令:
cd /etc/yum.repos.d/
cat << EOF > nginx.repo
[nginx]
name=nginx repo
baseurl=http://nginx.org/packages/centos/6/\$basearch/
gpgcheck=0
enabled=1
EOF
cat /etc/yum.repos.d/nginx.repo
yum repolist
yum info nginx
yum list|grep '^nginx'
CentOS 7.x shell接口执行命令:
cd /etc/yum.repos.d/
cat << EOF > nginx.repo
[nginx]
name=nginx repo
baseurl=http://nginx.org/packages/centos/7/\$basearch/
gpgcheck=0
enabled=1
EOF
cat /etc/yum.repos.d/nginx.repo
yum repolist
yum info nginx
yum list|grep '^nginx'
说明:上面的执行命令都非常简单,进入yum的配置文件目录,配置一个叫nginx.repo的文件,从官网指定样例配置按照基本说明修改。然后通过yum查看对应的repo是否存在,然后通过info以及list查看nginx的信息。
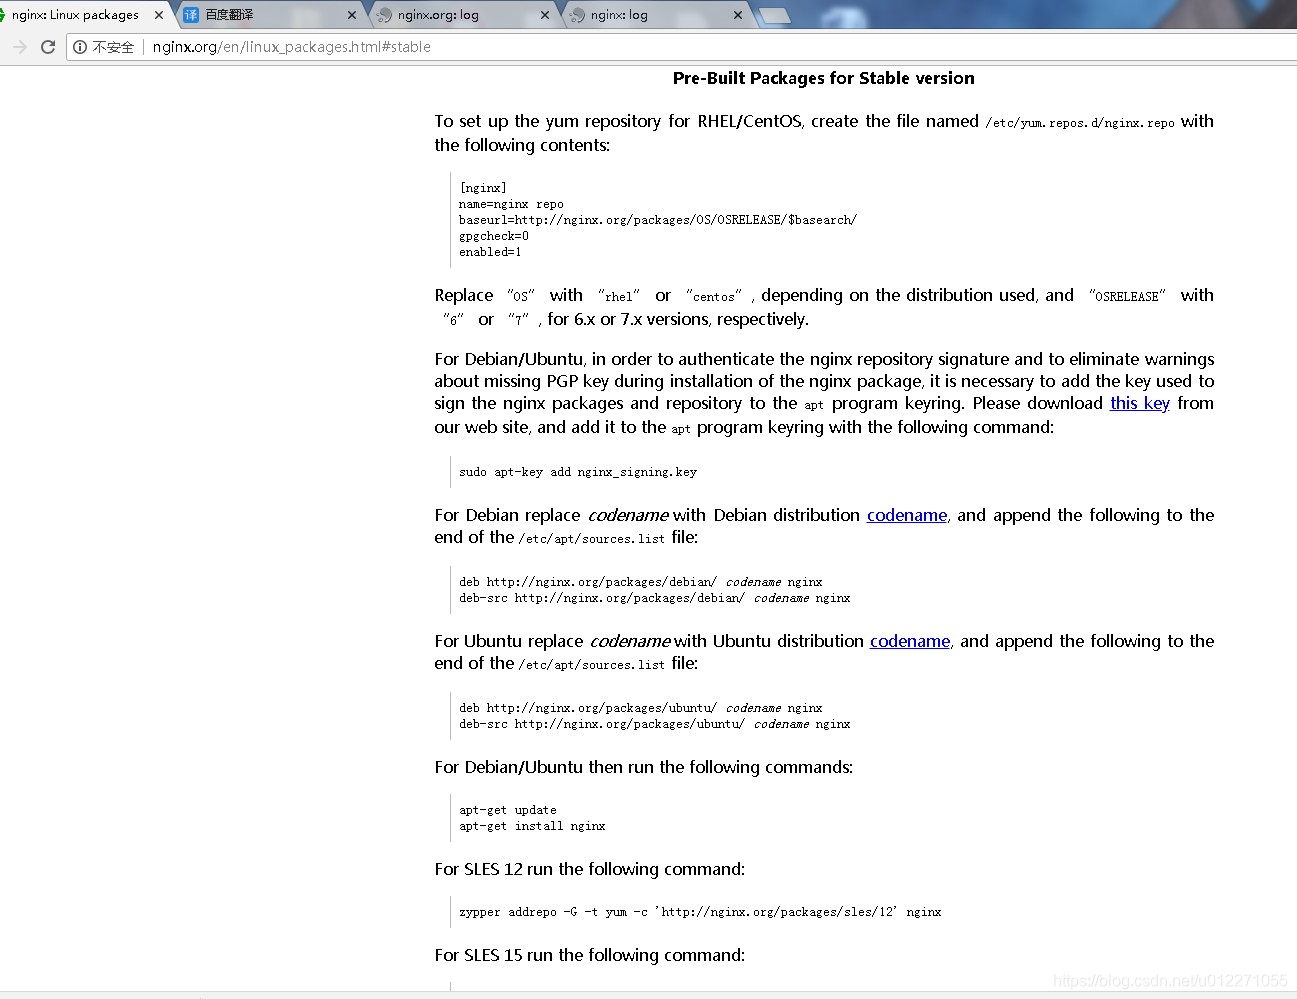
nginx的RHEL/CentOS的仓库配置官网说明:
To set up the yum repository for RHEL/CentOS, create the file named /etc/yum.repos.d/nginx.repo with the following contents:
#为RHEL/CenOS发型版本,建立yum仓库。创建配置文件/etc/yum.repos.d/nginx.repo,内容如下:
[nginx]
name=nginx repo
baseurl=http://nginx.org/packages/OS/OSRELEASE/$basearch/
gpgcheck=0
enabled=1
Replace “OS” with “rhel” or “centos”, depending on the distribution used, and “OSRELEASE” with “6” or “7”, for 6.x or 7.x versions, respectively.
#如果你是rhel,OS替换成rhel字符串;如果你是centos,OS替换成centos字符串;
#OSRELEASE,如果你是6.x(6系列)发行版本,OSRELEASE替换成6;如果你是7.x(7系列),OSRELEASE替换成7;
#关于配置文件语法,请自行参考yum仓库配置知识文档,或者参考我第一节的文章外链。
说明:这样配置的yum仓库,默认安装的nginx版本太高。在生产中,特别是特定业务服务器,如果需要nginx,有可能不会去使用过于新版的nginx,大部分人会以EPEL源版本以及根据特定软件配合需要使用。所以此种方式安装nginx就像把自己的生产服务器当作"小白鼠"。
1.4、从nginx的官方yum仓库获取nginx的rpm包
还是从之前yum仓库的页面,获取那个baseurl指向的链接,我们只截取前边一部分:
http://nginx.org/packages
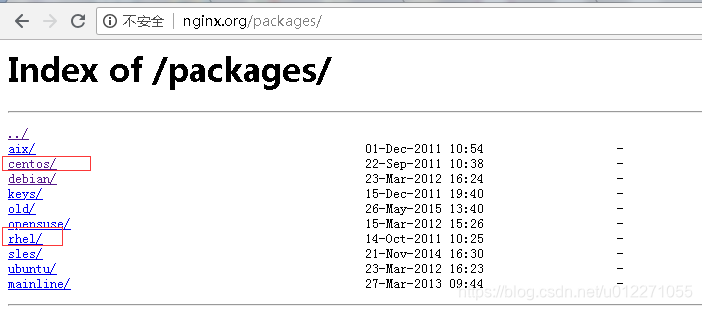
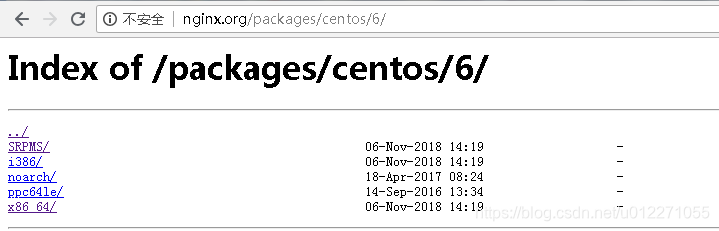
比如centos 6的 x86_64位cpu架构的rpm包就进入x86_64即可:
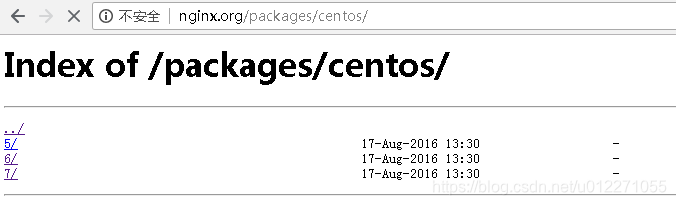
所以CentOS 发型版本的nginx的rpm包链接:
CentOS 6.x:http://nginx.org/packages/centos/6/x86_64/RPMS/
CentOS 7.x:http://nginx.org/packages/centos/7/x86_64/RPMS/
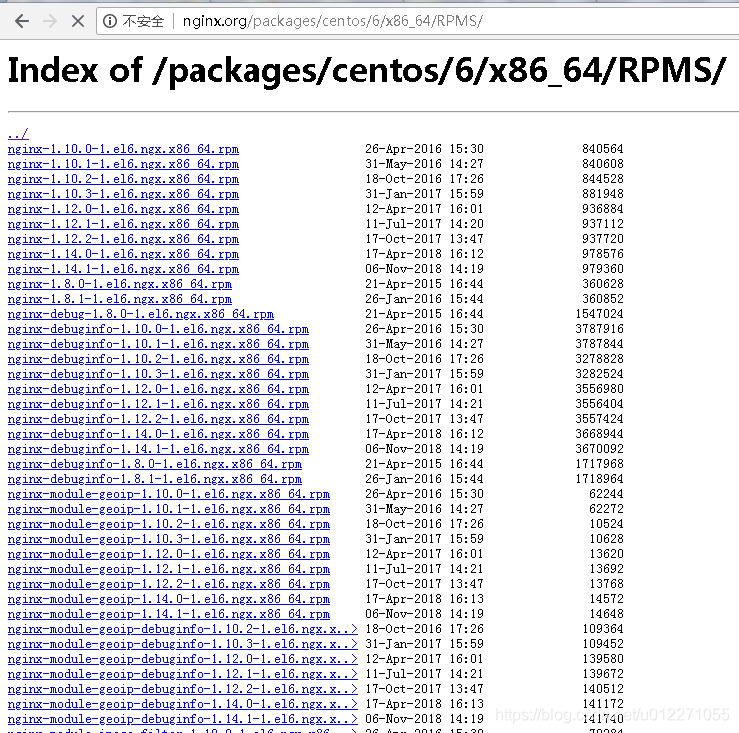
从里面,我们就可以下载我们需要的rpm包啦,大部分最近的版本都有,而且还有对应的常见三方模块的rpm包。
我下载了一些主要的nginx的包,文件列表如下:
[root@vir-rs2 centos6]# ls
nginx-1.10.0-1.el6.ngx.x86_64.rpm  nginx-1.12.0-1.el6.ngx.x86_64.rpm  nginx-1.14.1-1.el6.ngx.x86_64.rpm
nginx-1.10.1-1.el6.ngx.x86_64.rpm  nginx-1.12.1-1.el6.ngx.x86_64.rpm  nginx-1.8.0-1.el6.ngx.x86_64.rpm
nginx-1.10.2-1.el6.ngx.x86_64.rpm  nginx-1.12.2-1.el6.ngx.x86_64.rpm  nginx-1.8.1-1.el6.ngx.x86_64.rpm
nginx-1.10.3-1.el6.ngx.x86_64.rpm  nginx-1.14.0-1.el6.ngx.x86_64.rpm
[root@vir-rs2 centos6]# cd ../centos7
[root@vir-rs2 centos7]# ls
file.txt                           nginx-1.10.3-1.el7.ngx.x86_64.rpm    nginx-1.14.0-1.el7_4.ngx.x86_64.rpm
nginx-1.10.0-1.el7.ngx.x86_64.rpm  nginx-1.12.0-1.el7.ngx.x86_64.rpm    nginx-1.14.1-1.el7_4.ngx.x86_64.rpm
nginx-1.10.1-1.el7.ngx.x86_64.rpm  nginx-1.12.1-1.el7.ngx.x86_64.rpm    nginx-1.8.0-1.el7.ngx.x86_64.rpm
nginx-1.10.2-1.el7.ngx.x86_64.rpm  nginx-1.12.2-1.el7_4.ngx.x86_64.rpm  nginx-1.8.1-1.el7.ngx.x86_64.rpm
1.5、从nginx的官方yum仓库获取srpm包
srpm包是可以用来制作rpm包的一种安装包。如果nginx官网提供的rpm包(yum仓库配置好后直接yum安装的也是最新版的nginx的rpm包。)的一些路径,不符合自己的要求;而且nginx官方也没有提供我们需要的对应模块的,比如使用分布式文件系统开源实现的mogilefs或fastdfs,其中就极有可能要配合nginx一起使用,有些是使用nginx的反向代理功能,利用nginx支持高并发的优点,使用nginx的负载均衡功能等。像此类开源实现产品,可能因为兼容性问题,有专门开发用于nginx的第三方模块。如果我们要想把这些第三方模块也编译进来,nginx官方提供的rpm包是没有集成的,所以nginx官方提供的SRPM包就有用了,如果有能力,可以配合SRPM包中提供的spec文件,做二次开发编辑生成符合我们要求的spec文件,然后利用rpmbuild工具制作rpm包文件。这样的rpm包文件也符合我们特定应用环境,而且利于多台服务器的分发、安装、管理等;
不过,制作rpm包,特别是编写spec文件,对于大部分的人来说,都显得晦涩难懂,所以如果一般的rpm包安装能够满足我们的要求,我们大部分还是使用;如果有需要第三方模块的,可以使用编译安装加入这些第三方模块即可。
CentOS 6.x SRPMS包链接:http://nginx.org/packages/centos/6/SRPMS/
CentOS 7.x SRPMS包链接:http://nginx.org/packages/centos/7/SRPMS/
额外说明(对于有rpm制作基础或兴趣的人可以看一下):
nginx提供的srpm包,如果你要安装制作。建议用普通用户制作rpm包,官方提供的srpm格式,需要创建一个叫builder的用户,然后切换到此用户。执行rpm安装该包,会在普通用户夹目录生成一个rpmbuild的目录。
默认rpmbuild目录下只有两个目录:SOURCES和SPECS,还有三个包(BUILD,RPMS,SRPMS)需要我们手动创建或者配置其他工具生成。
CentOS 7.x简单使用:
[root@node2 ~]# useradd builder
[root@node2 ~]# su - builder
[builder@node2 ~]$ ls
[builder@node2 ~]$ cp /tmp/nginx-1.14.1-1.el7_4.ngx.src.rpm .
[builder@node2 ~]$ rpm -qpl nginx-1.14.1-1.el7_4.ngx.src.rpm
warning: nginx-1.14.1-1.el7_4.ngx.src.rpm: Header V4 RSA/SHA1 Signature, key ID 7bd9bf62: NOKEY
COPYRIGHT
logrotate
nginx-1.14.1.tar.gz
nginx-debug.service
nginx-debug.sysconf
nginx.check-reload.sh
nginx.conf
nginx.init.in
nginx.service
nginx.spec
nginx.suse.logrotate
nginx.sysconf
nginx.upgrade.sh
nginx.vh.default.conf
[builder@node2 ~]$ rpm -qpi nginx-1.14.1-1.el7_4.ngx.src.rpm
warning: nginx-1.14.1-1.el7_4.ngx.src.rpm: Header V4 RSA/SHA1 Signature, key ID 7bd9bf62: NOKEY
Name        : nginx
Epoch       : 1
Version     : 1.14.1
Release     : 1.el7_4.ngx
Architecture: x86_64
Install Date: (not installed)
Group       : System Environment/Daemons
Size        : 1042724
License     : 2-clause BSD-like license
Signature   : RSA/SHA1, Tue 06 Nov 2018 10:19:01 PM CST, Key ID abf5bd827bd9bf62
Source RPM  : (none)
Build Date  : Tue 06 Nov 2018 10:04:53 PM CST
Build Host  : centos74-amd64-builder-builder.gnt.nginx.com
Relocations : (not relocatable)
Vendor      : Nginx, Inc.
URL         : http://nginx.org/
Summary     : High performance web server
Description :
nginx [engine x] is an HTTP and reverse proxy server, as well as
a mail proxy server.

[builder@node2 ~]$ rpm -ivh nginx-1.14.1-1.el7_4.ngx.src.rpm
warning: nginx-1.14.1-1.el7_4.ngx.src.rpm: Header V4 RSA/SHA1 Signature, key ID 7bd9bf62: NOKEY
Updating / installing...
   1:nginx-1:1.14.1-1.el7_4.ngx       ################################# [100%]
[builder@node2 ~]$ ls
nginx-1.14.1-1.el7_4.ngx.src.rpm  rpmbuild
[builder@node2 ~]$ ls -l rpmbuild/
total 4
drwxr-xr-x 2 builder builder 4096 Nov 16 01:32 SOURCES
drwxr-xr-x 2 builder builder   23 Nov 16 01:32 SPECS
[builder@node2 ~]$ tree rpmbuild/
rpmbuild/
├── SOURCES
│   ├── COPYRIGHT
│   ├── logrotate
│   ├── nginx-1.14.1.tar.gz
│   ├── nginx.check-reload.sh
│   ├── nginx.conf
│   ├── nginx-debug.service
│   ├── nginx-debug.sysconf
│   ├── nginx.init.in
│   ├── nginx.service
│   ├── nginx.suse.logrotate
│   ├── nginx.sysconf
│   ├── nginx.upgrade.sh
│   └── nginx.vh.default.conf
└── SPECS
    └── nginx.spec

2 directories, 14 files
[builder@node2 ~]$ mv rpmbuild/ rpmbuild.bak

#有两个包,分别是rpmbuild和rpmdevtools,可以通过yum安装一下。
#利用rpmdevtools包提供的工具rpmdev-newspec生成制作spec模板文件,不过我们这里不需要,nginx的包里面提供了;
#利用rpmdevtools包提供的工具rpmdev-setuptree可以生成制作rpm包的目录树:
[builder@node2 ~]$ rpmdev-setuptree
[builder@node2 ~]$ ls
nginx-1.14.1-1.el7_4.ngx.src.rpm  rpmbuild  rpmbuild.bak
[builder@node2 ~]$ tree rpmbuild
rpmbuild
├── BUILD
├── RPMS
├── SOURCES
├── SPECS
└── SRPMS

5 directories, 0 files
#把我们的之前nginx安装的rpmbuild的备份目录中的SOURCES和SPECS中的内容导入这个rpmbuild下的对应目录
[builder@node2 ~]$ cd rpmbuild
[builder@node2 rpmbuild]$ ls
BUILD  RPMS  SOURCES  SPECS  SRPMS
[builder@node2 rpmbuild]$ cp -ar ../rpmbuild.bak/SOURCES/* SOURCES/
[builder@node2 rpmbuild]$ cp -ar ../rpmbuild.bak/SPECS/* SPECS/

#如果我直接制作,可以测试跑一遍或者直接制作,具体不详解,给出三个命令
#进入SPECS目录
#制作前要保证环境的库文件包都存在,可以安装开发包组:
# yum groupinstall "Development Tools"
# yum install redhat-lsb-core  openssl-devel pcre-devel zlib-devel

#rpmbuild -bi nginx.spec   #bi,不真正制作成文件,测试到install检测会不会有问题;
#rpmbuild -bb nginx.spec #真正制作,只生产二进制的rpm包;

省略....
4
Wrote: /home/builder/rpmbuild/RPMS/x86_64/nginx-1.14.1-1.el7_4.ngx.x86_64.rpm
Wrote: /home/builder/rpmbuild/RPMS/x86_64/nginx-debuginfo-1.14.1-1.el7_4.ngx.x86_64.rpm
Executing(%clean): /bin/sh -e /var/tmp/rpm-tmp.Td4tRP
+ umask 022
+ cd /home/builder/rpmbuild/BUILD
+ cd nginx-1.14.1
+ /usr/bin/rm -rf /home/builder/rpmbuild/BUILDROOT/nginx-1.14.1-1.el7_4.ngx.x86_64
+ exit 0
[builder@node2 SPECS]$ echo $?
0
[builder@node2 SPECS]$ ls -l ../RPMS/
total 0
drwxr-xr-x 2 builder builder 100 Nov 16 02:13 x86_64
[builder@node2 SPECS]$ ls -l ../RPMS/x86_64/
total 3072
-rw-rw-r-- 1 builder builder  767164 Nov 16 02:13 nginx-1.14.1-1.el7_4.ngx.x86_64.rpm
-rw-rw-r-- 1 builder builder 2374996 Nov 16 02:13 nginx-debuginfo-1.14.1-1.el7_4.ngx.x86_64.rpm

#可以查看并安装我们制作的rpm包
[root@node2 ~]# cp /home/builder/rpmbuild/RPMS/x86_64/nginx-1.14.1-1.el7_4.ngx.x86_64.rpm /root/
[root@node2 ~]# rpm -qpi nginx-1.14.1-1.el7_4.ngx.x86_64.rpm
Name        : nginx
Epoch       : 1
Version     : 1.14.1
Release     : 1.el7_4.ngx
Architecture: x86_64
Install Date: (not installed)
Group       : System Environment/Daemons
Size        : 2759878
License     : 2-clause BSD-like license
Signature   : (none)
Source RPM  : nginx-1.14.1-1.el7_4.ngx.src.rpm
Build Date  : Fri 16 Nov 2018 02:13:22 AM CST
Build Host  : node2.yanhui.com
Relocations : (not relocatable)
Vendor      : Nginx, Inc.
URL         : http://nginx.org/
Summary     : High performance web server
Description :
nginx [engine x] is an HTTP and reverse proxy server, as well as
a mail proxy server.

[root@node2 ~]# rpm -qpl nginx-1.14.1-1.el7_4.ngx.x86_64.rpm
/etc/logrotate.d/nginx
/etc/nginx
/etc/nginx/conf.d
/etc/nginx/conf.d/default.conf
/etc/nginx/fastcgi_params
/etc/nginx/koi-utf
/etc/nginx/koi-win
/etc/nginx/mime.types
/etc/nginx/modules
/etc/nginx/nginx.conf
/etc/nginx/scgi_params
/etc/nginx/uwsgi_params
/etc/nginx/win-utf
/etc/sysconfig/nginx
/etc/sysconfig/nginx-debug
/usr/lib/systemd/system/nginx-debug.service
/usr/lib/systemd/system/nginx.service
/usr/lib64/nginx
/usr/lib64/nginx/modules
/usr/libexec/initscripts/legacy-actions/nginx
/usr/libexec/initscripts/legacy-actions/nginx/check-reload
/usr/libexec/initscripts/legacy-actions/nginx/upgrade
/usr/sbin/nginx
/usr/sbin/nginx-debug
/usr/share/doc/nginx-1.14.1
/usr/share/doc/nginx-1.14.1/COPYRIGHT
/usr/share/man/man8/nginx.8.gz
/usr/share/nginx
/usr/share/nginx/html
/usr/share/nginx/html/50x.html
/usr/share/nginx/html/index.html
/var/cache/nginx
/var/log/nginx

[root@node2 ~]# rpm -ivh nginx-1.14.1-1.el7_4.ngx.x86_64.rpm
Preparing...                          ################################# [100%]
Updating / installing...
   1:nginx-1:1.14.1-1.el7_4.ngx       ################################# [100%]
----------------------------------------------------------------------

Thanks for using nginx!

Please find the official documentation for nginx here:
* http://nginx.org/en/docs/

Please subscribe to nginx-announce mailing list to get
the most important news about nginx:
* http://nginx.org/en/support.html

Commercial subscriptions for nginx are available on:
* http://nginx.com/products/

----------------------------------------------------------------------
[root@node2 ~]# rpm -qi nginx
Name        : nginx
Epoch       : 1
Version     : 1.14.1
Release     : 1.el7_4.ngx
Architecture: x86_64
Install Date: Fri 16 Nov 2018 02:19:05 AM CST
Group       : System Environment/Daemons
Size        : 2759878
License     : 2-clause BSD-like license
Signature   : (none)
Source RPM  : nginx-1.14.1-1.el7_4.ngx.src.rpm
Build Date  : Fri 16 Nov 2018 02:13:22 AM CST
Build Host  : node2.yanhui.com
Relocations : (not relocatable)
Vendor      : Nginx, Inc.
URL         : http://nginx.org/
Summary     : High performance web server
Description :
nginx [engine x] is an HTTP and reverse proxy server, as well as
a mail proxy server.
[root@node2 ~]# systemctl daemon-reload
[root@node2 ~]# systemctl status nginx.service
● nginx.service - nginx - high performance web server
   Loaded: loaded (/usr/lib/systemd/system/nginx.service; disabled; vendor preset: disabled)
   Active: inactive (dead)
     Docs: http://nginx.org/en/docs/

Nov 16 00:52:15 node2.yanhui.com systemd[1]: Starting nginx - high performance web server...
Nov 16 00:52:16 node2.yanhui.com systemd[1]: Started nginx - high performance web server.
Nov 16 00:54:47 node2.yanhui.com systemd[1]: Stopping nginx - high performance web server...
Nov 16 00:54:47 node2.yanhui.com systemd[1]: Stopped nginx - high performance web server.
[root@node2 ~]# systemctl start nginx.service
[root@node2 ~]# ss -tnl
State       Recv-Q Send-Q                            Local Address:Port                              Peer Address:Port
LISTEN      0      128                                           *:80                                           *:*
LISTEN      0      128                                           *:22                                           *:*
LISTEN      0      100                                   127.0.0.1:25                                           *:*
LISTEN      0      128                                           *:443                                          *:*
LISTEN      0      128                                          :::22                                          :::*
LISTEN      0      100                                         ::1:25                                          :::*
[root@node2 ~]# ps aux|grep nginx
root      30316  0.0  0.2  46408  1016 ?        Ss   02:20   0:00 nginx: master process /usr/sbin/nginx -c /etc/nginx/nginx.conf
nginx     30317  0.0  0.4  46932  1972 ?        S    02:20   0:00 nginx: worker process
root      30320  0.0  0.1 112704   956 pts/1    R+   02:20   0:00 grep --color=auto nginx
2、从官网获取mysql的软件包
2.1、如何从浏览器检索帮助信息
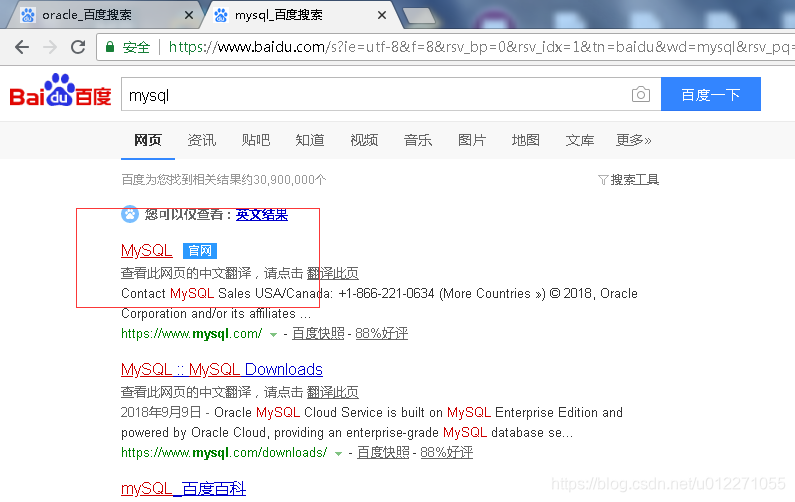
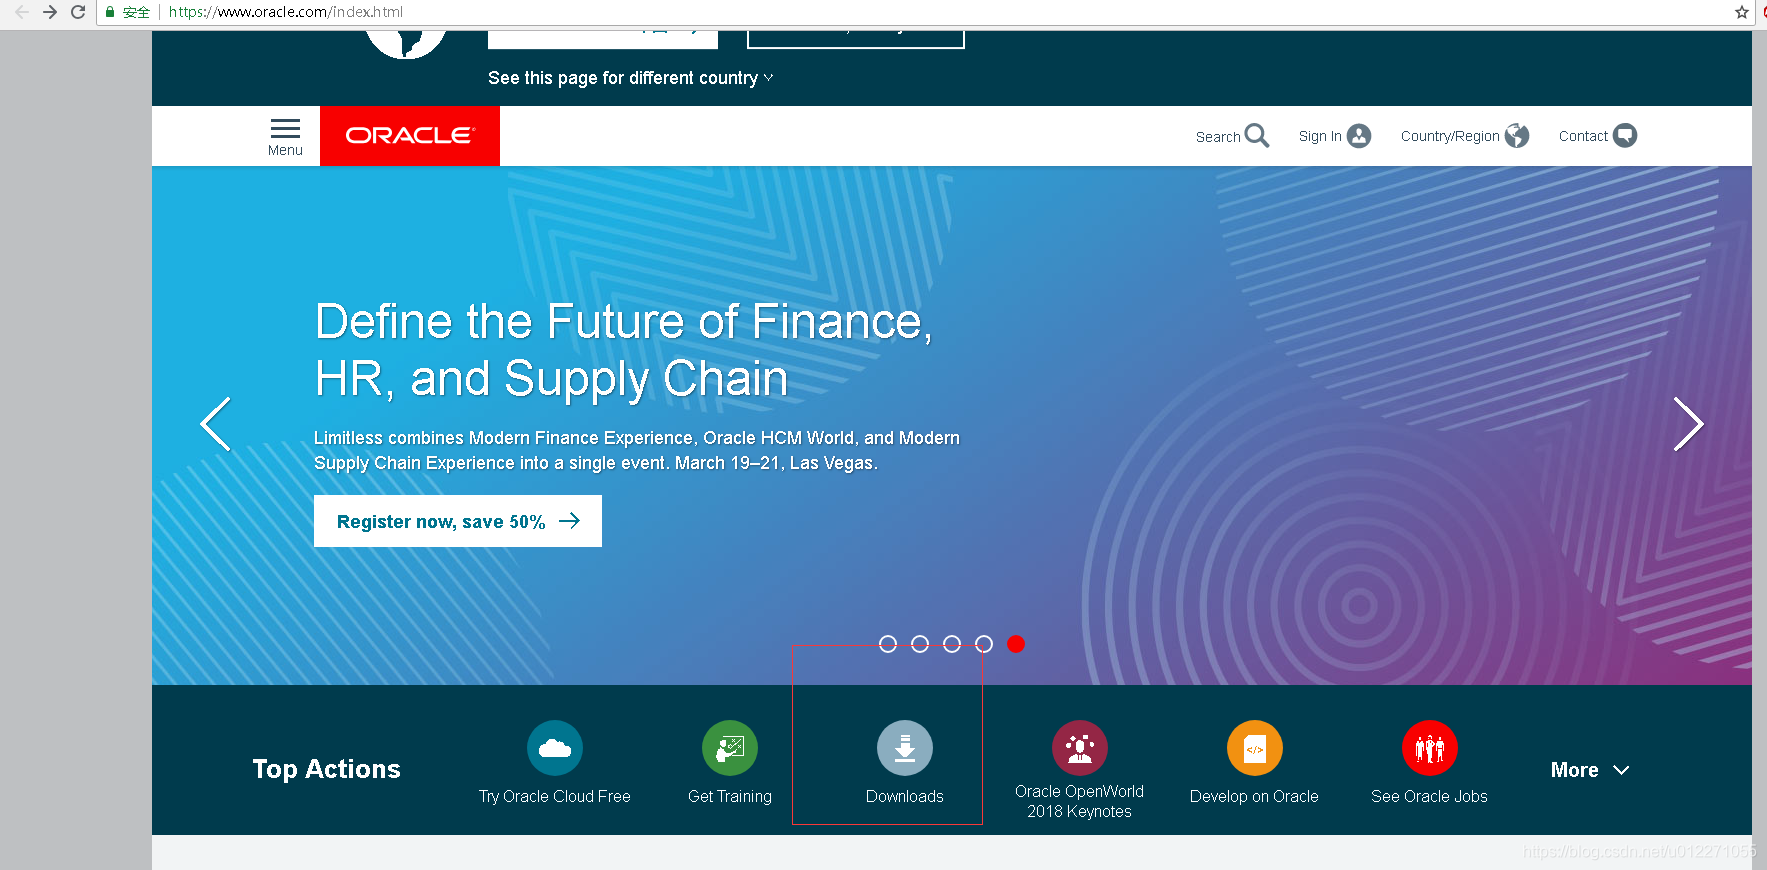
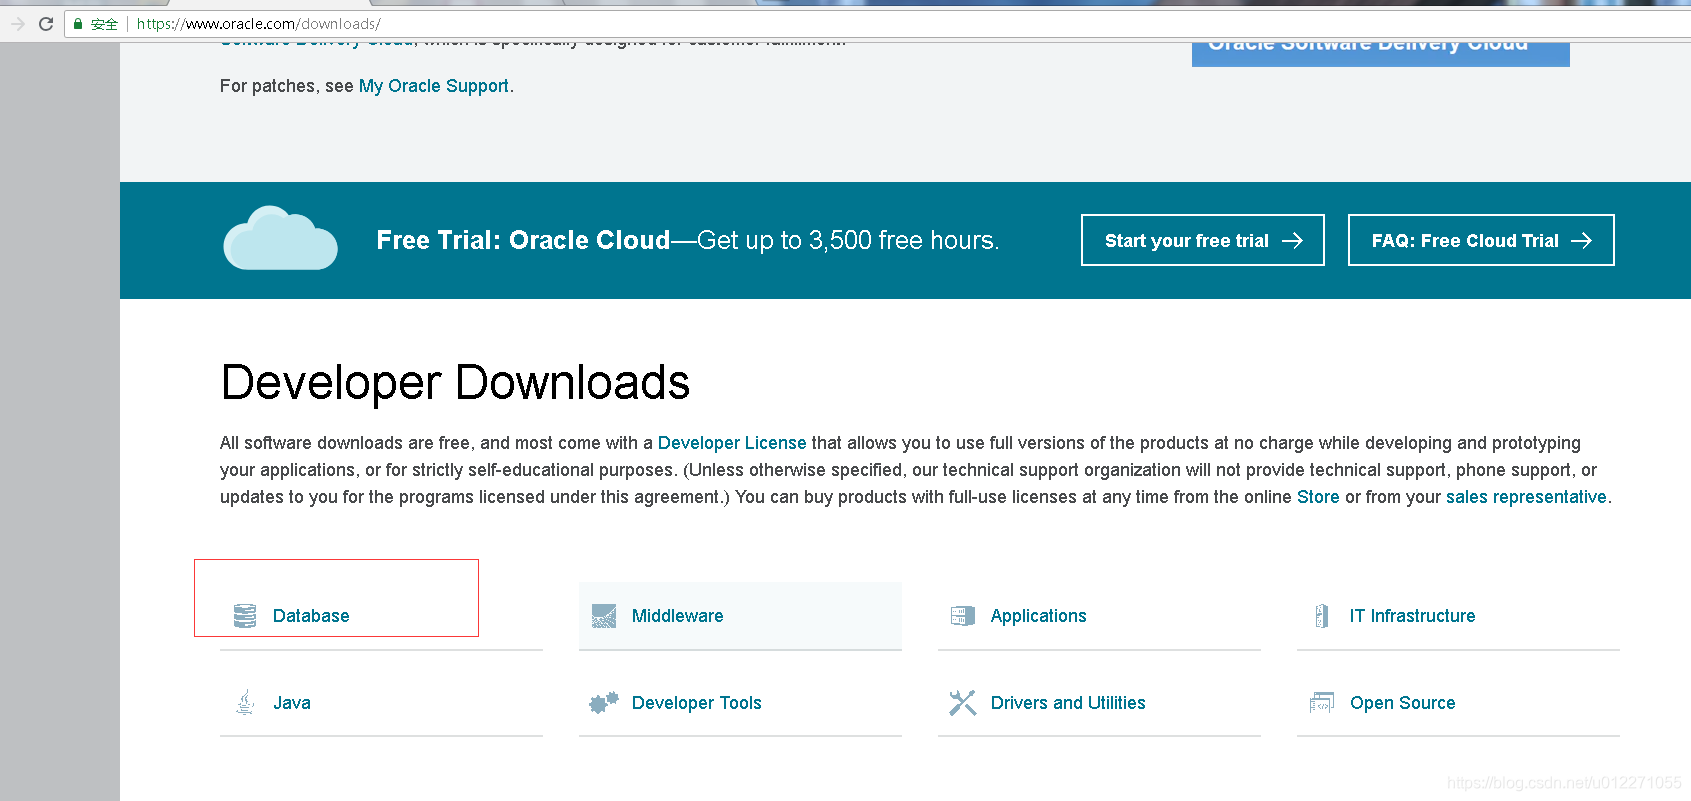
检索mysql的帮助信息和检索nginx很像。如果支持google搜索,就尽量用google搜索。百度也可以。mysql现在属于oracle旗下,所以你可以通过oracle官网找到mysql或者之间在搜索框检索mysql。

2.2、从mysql官方站点获取mysql的源码包
mysql直接官网界面和从oracle官网找到mysql界面:
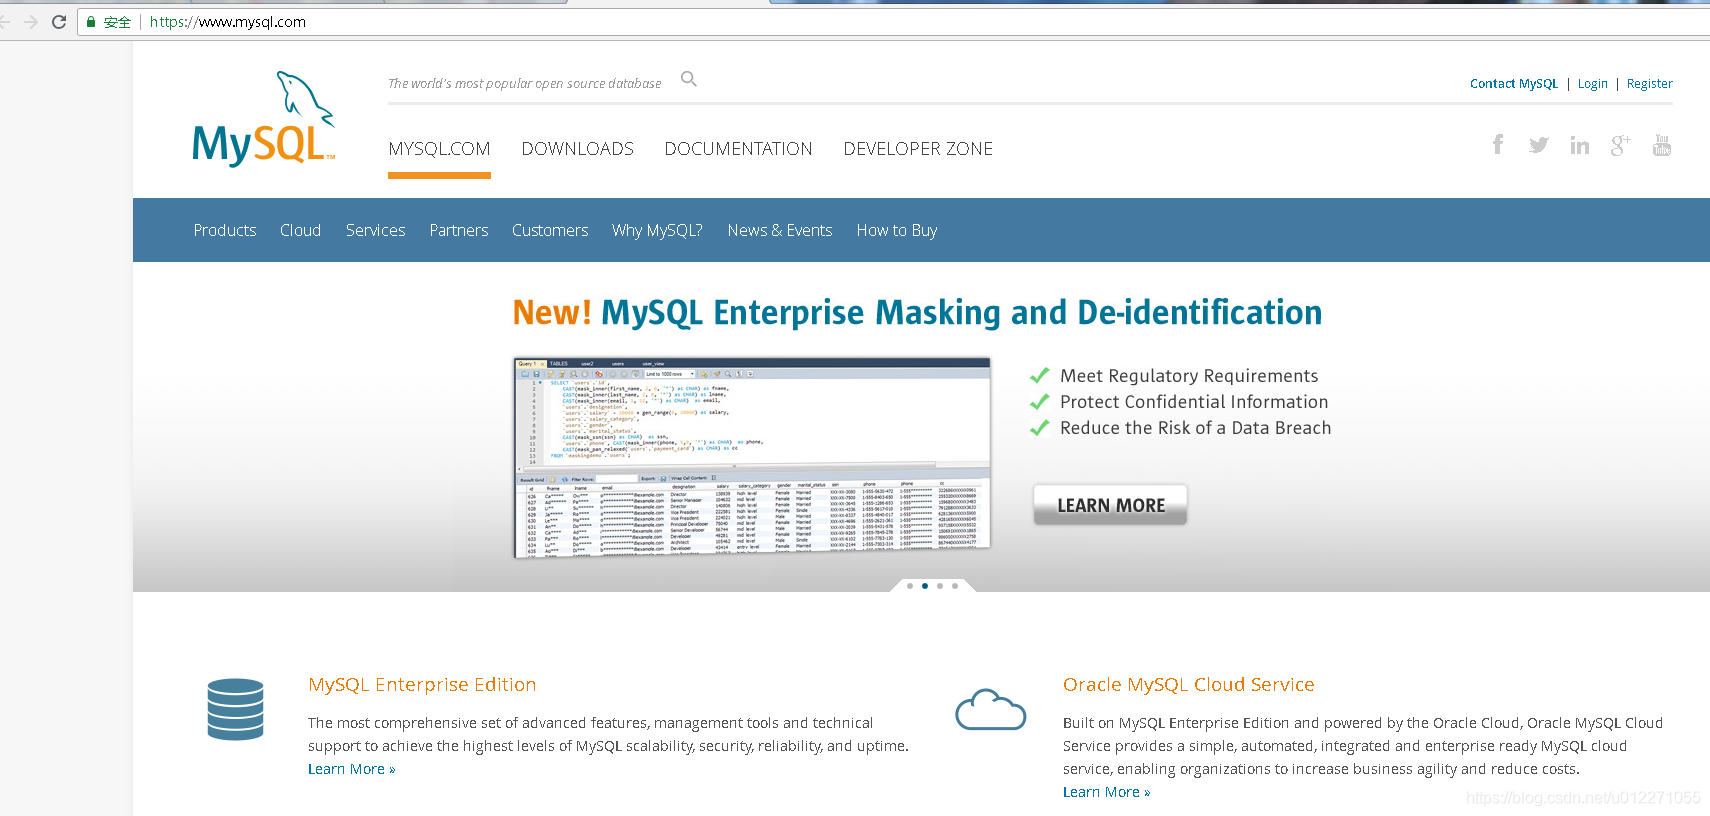

我们以从oracle接入的mysql界面为准。
链接为:
https://www.mysql.com/downloads/
页面往下,找到最下方的"MySQL Community Edition(GPL)",进入:
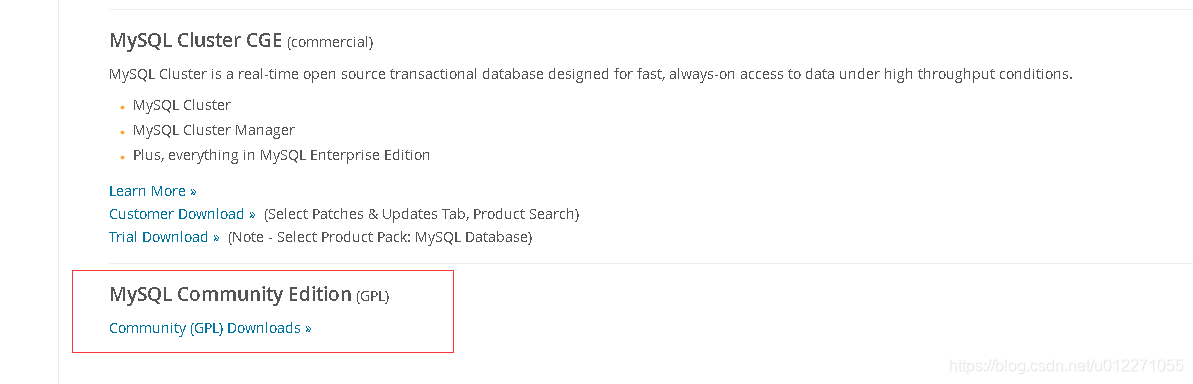
再进入一层:


可以接入对应的版本,5.5,5.6,5.7,下面一个是归档的版本,进入即可。
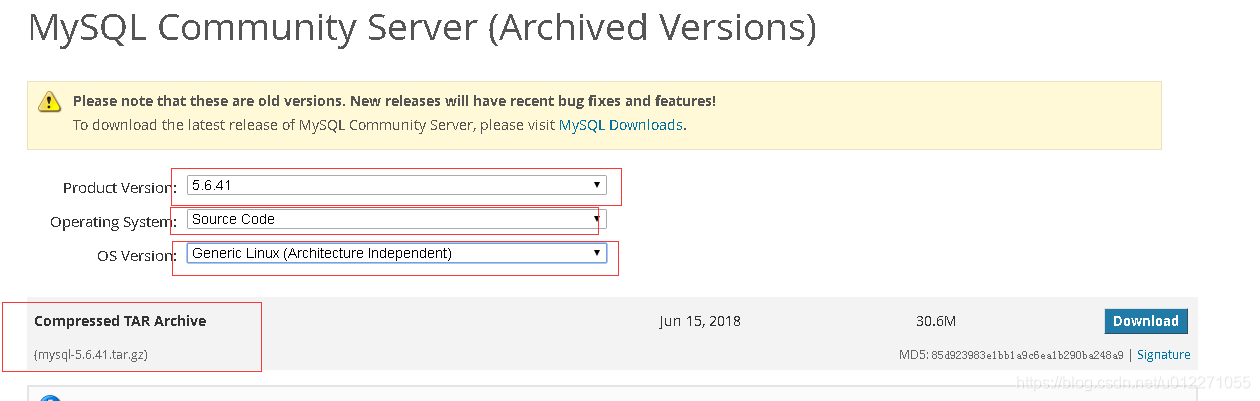
选择归档版本入口后进入社区版本:
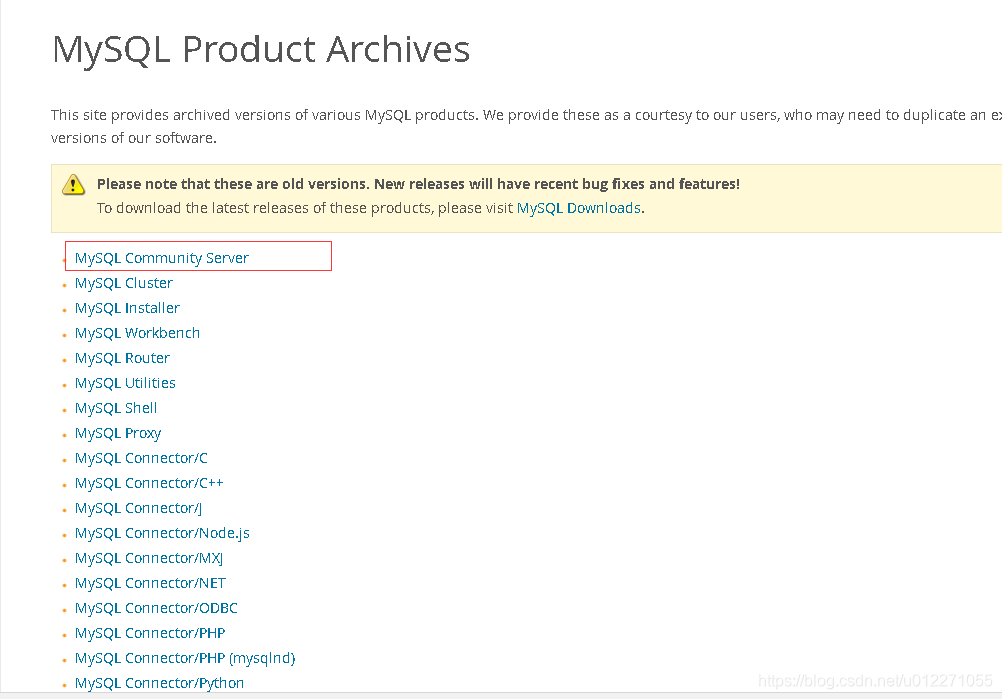
可以选择不同的版本和不同的操作系统,从5.0到8.0,操作系统有"Microsoft Windows",“Source Code”,“Linux - Generic"以及常见的linux发型版本的。我们需要下载的源代码,就选择对应版本后,选择"Source Code”.
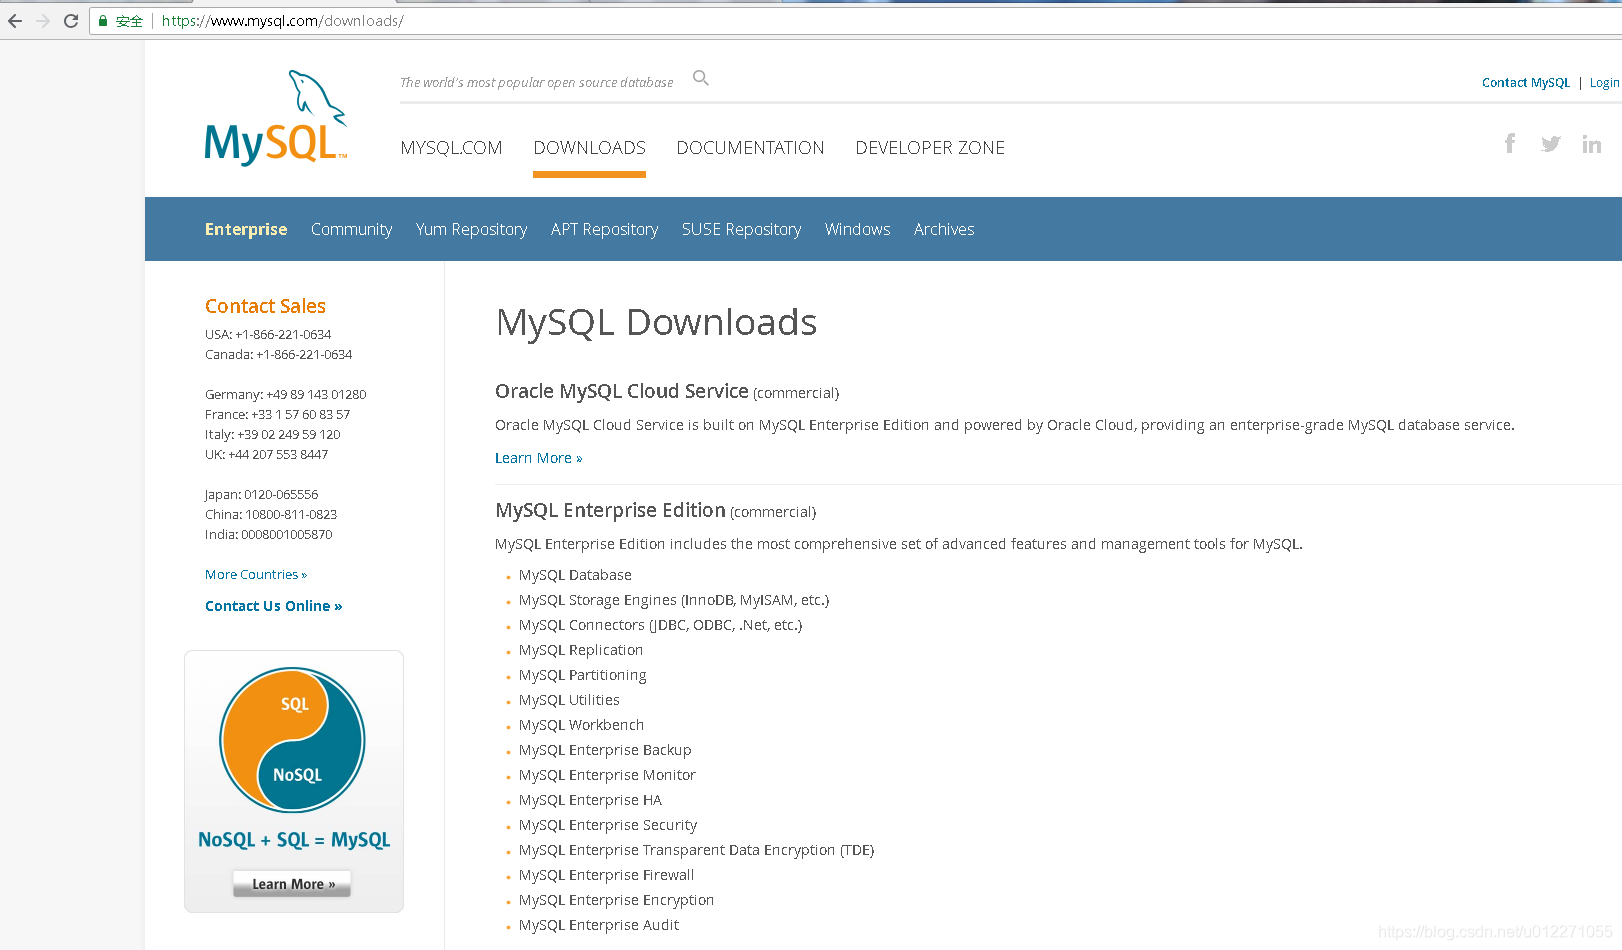
2.3、配置连接到mysql的官方yum仓库的配置文件
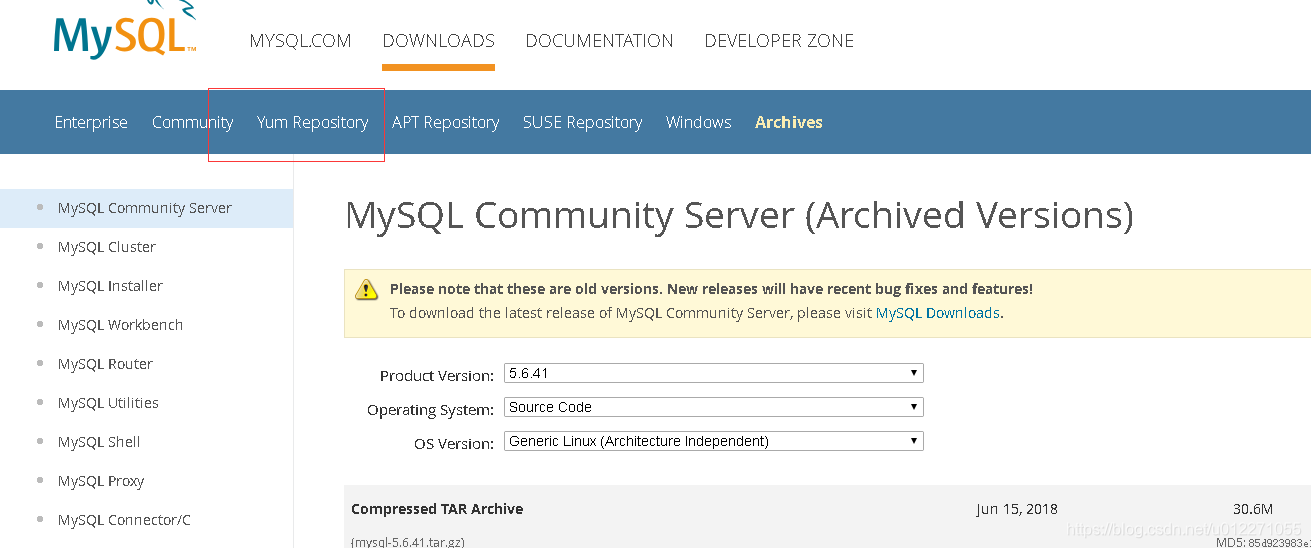
下载页面上方有个"Yum Repository"菜单栏,可以点击进入。
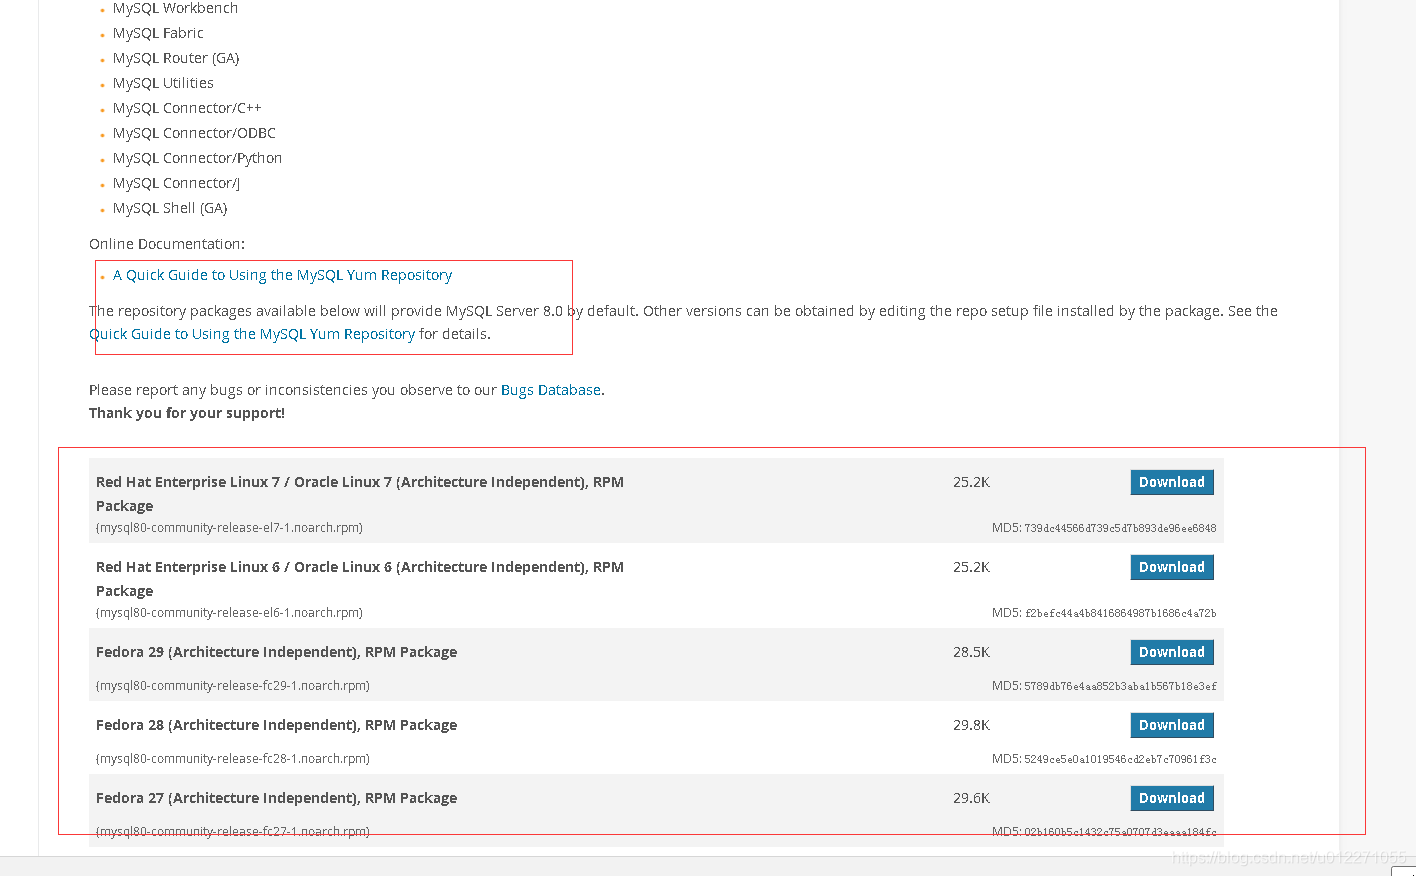
如果想安装mysql 8.0,可以直接下载对应的rpm包,安装后,yum仓库就配置ok,然后下载即可。我们这里以如何配置5.6版本的mysql的yum仓库为例进行说明。上面截图有个文档入口,介绍如何使用mysql的官方的yum仓库:
https://dev.mysql.com/doc/mysql-yum-repo-quick-guide/en/
- 最新yum仓库的rpm包安装
[root@node2 ~]# rpm -qpi mysql80-community-release-el7-1.noarch.rpm
warning: mysql80-community-release-el7-1.noarch.rpm: Header V3 DSA/SHA1 Signature, key ID 5072e1f5: NOKEY
Name        : mysql80-community-release
Version     : el7
Release     : 1
Architecture: noarch
Install Date: (not installed)
Group       : System Environment/Base
Size        : 31589
License     : GPLv2
Signature   : DSA/SHA1, Thu 22 Feb 2018 07:35:00 PM CST, Key ID 8c718d3b5072e1f5
Source RPM  : mysql80-community-release-el7-1.src.rpm
Build Date  : Thu 22 Feb 2018 04:49:25 PM CST
Build Host  : siv27.no.oracle.com
Relocations : (not relocatable)
Packager    : MySQL Release Engineering <[email protected]>
Vendor      : MySQL
URL         : http://dev.mysql.com
Summary     : MySQL repository configuration for yum
Description :
Package for installation of setup/configuration files required for
installation of MySQL packages by yum.
[root@node2 ~]# rpm -qpl mysql80-community-release-el7-1.noarch.rpm
warning: mysql80-community-release-el7-1.noarch.rpm: Header V3 DSA/SHA1 Signature, key ID 5072e1f5: NOKEY
/etc/pki/rpm-gpg/RPM-GPG-KEY-mysql
/etc/yum.repos.d/mysql-community-source.repo
/etc/yum.repos.d/mysql-community.repo
#从上面的查询可以看出,实际是在/etc/yum.repos.d/目录配置了几个repo的配置
#RPM-GPG-KEY-mysql是需要验证的一个key
- 5.6的yum仓库配置
#以下是CentOS 6.x的配置:
[mysql56-community]
name=MySQL 5.6 Community Server
baseurl=http://repo.mysql.com/yum/mysql-5.6-community/el/6/$basearch/
enabled=1
gpgcheck=1
gpgkey=file:///etc/pki/rpm-gpg/RPM-GPG-KEY-mysql
#以下是CentOS 7.x的配置
[mysql56-community]
name=MySQL 5.6 Community Server
baseurl=http://repo.mysql.com/yum/mysql-5.6-community/el/7/$basearch/
enabled=1
gpgcheck=1
gpgkey=file:///etc/pki/rpm-gpg/RPM-GPG-KEY-mysql
- 5.7的yum仓库配置(CentOS 6.x和CentOS 7.x)
#以下是CentOS 6.x的配置:
[mysql57-community]
name=MySQL 5.7 Community Server
baseurl=http://repo.mysql.com/yum/mysql-5.7-community/el/6/$basearch/
enabled=1
gpgcheck=1
gpgkey=file:///etc/pki/rpm-gpg/RPM-GPG-KEY-mysql
#以下是CentOS 7.x的配置
[mysql57-community]
name=MySQL 5.7 Community Server
baseurl=http://repo.mysql.com/yum/mysql-5.7-community/el/7/$basearch/
enabled=1
gpgcheck=1
gpgkey=file:///etc/pki/rpm-gpg/RPM-GPG-KEY-mysql
- 8.0的yum仓库配置
#以下是CentOS 6.x的配置:
[mysql80-community]
name=MySQL 8.0 Community Server
baseurl=http://repo.mysql.com/yum/mysql-8.0-community/el/6/$basearch/
enabled=1
gpgcheck=1
gpgkey=file:///etc/pki/rpm-gpg/RPM-GPG-KEY-mysql
#以下是CentOS 7.x的配置
[mysql80-community]
name=MySQL 8.0 Community Server
baseurl=http://repo.mysql.com/yum/mysql-8.0-community/el/7/$basearch/
enabled=1
gpgcheck=1
gpgkey=file:///etc/pki/rpm-gpg/RPM-GPG-KEY-mysql
-
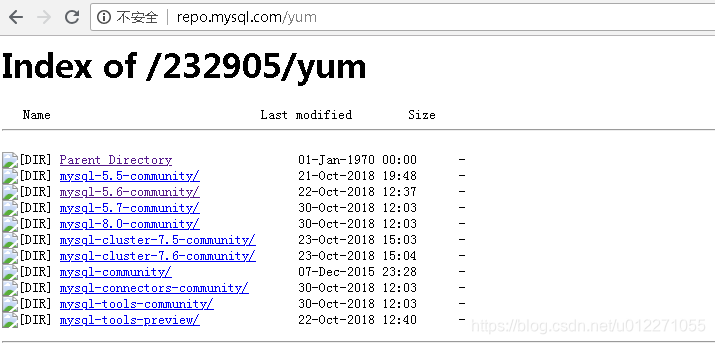
mysql的yum仓库直连地址
http://repo.mysql.com/yum
-
CentOS 7.x 配置mysql5.6的示例
#如果yum仓库的gpgkey启用了,我们要下载这个key,key的地址为:
#http://repo.mysql.com/RPM-GPG-KEY-mysql
#执行下载命令:
wget http://repo.mysql.com/RPM-GPG-KEY-mysql -O /etc/pki/rpm-gpg/RPM-GPG-KEY-mysql

cd /etc/yum.repos.d/
cat <<EOF >mysql56.repo
[mysql56-community]
name=MySQL 5.6 Community Server
baseurl=http://repo.mysql.com/yum/mysql-5.6-community/el/7/\$basearch/
enabled=1
gpgcheck=1
gpgkey=file:///etc/pki/rpm-gpg/RPM-GPG-KEY-mysql
EOF
cat mysql56.repo
yum repolist
yum list|grep '^mysql-community'

#如果要执行安装,执行以下部分:
yum install mysql-community-server
#并输入Y确认安装或者在yum的时候传递-y。
#安装前还会和你确认是否key是ok,输入y即可。

#安装完成后,重载一下systemd的配置:
systemctl daemon-reload
#查看mysql的进程的状态:
systemctl status mysqld.service
#查看包的信息和安装文件列表:
rpm -qi mysql-community
rpm -ql mysql-community
2.4、从mysql的官方yum仓库获取mysql的rpm包
关于获取rpm包并安装,我就不演示了,yum仓库的直连接地址:
http://repo.mysql.com/yum
CentOS 7.x的mysql5.6的rpm包的下载链接地址:
http://repo.mysql.com/yum/mysql-5.6-community/el/7/x86_64/
CentOS 6.x的mysql5.6的rpm包的下载链接地址:
http://repo.mysql.com/yum/mysql-5.6-community/el/6/x86_64/
CentOS 7.x的mysql5.7的rpm包的下载链接地址:
http://repo.mysql.com/yum/mysql-5.7-community/el/7/x86_64/
CentOS 6.x的mysql5.7的rpm包的下载链接地址:
http://repo.mysql.com/yum/mysql-5.7-community/el/6/x86_64/
还有SRPM格式的包,可以自己手动制作rpm包:
CentOS 7.x的mysql5.6的srpm包的下载链接地址:
http://repo.mysql.com/yum/mysql-5.6-community/el/7/SRPMS/
CentOS 6.x的mysql5.6的srpm包的下载链接地址:
http://repo.mysql.com/yum/mysql-5.6-community/el/6/SRPMS/
CentOS 7.x的mysql5.7的srpm包的下载链接地址:
http://repo.mysql.com/yum/mysql-5.7-community/el/7/SRPMS/
CentOS 6.x的mysql5.7的srpm包的下载链接地址:
http://repo.mysql.com/yum/mysql-5.7-community/el/6/SRPMS/
3、从官网获取httpd的软件包
3.1、如何从浏览器检索帮助信息
直接搜索界面搜索apache或httpd;这里不再截图,我直接给出apache主站点链接和apache其下的产品httpd的站点链接:
apache主战链接:http://www.apache.org/
httpd项目官网链接:http://httpd.apache.org/
3.2、从apache的官方站点获取httpd的源码包
httpd的官网比较简单,好像没有找到yum仓库,而且网上的rpm包也比较少。如果找源代码,直接上官网,并找到"Download"按钮即可。

4、利用epel源来安装我们常见的软件包
检索浏览器输入epel,找到wiki入口,里面有介绍何为EPEL:
https://fedoraproject.org/wiki/EPEL
4.1、CentOS 6.x安装epel源
yum install https://dl.fedoraproject.org/pub/epel/epel-release-latest-6.noarch.rpm
4.2、CentOS 7.x安装epel源
yum install https://dl.fedoraproject.org/pub/epel/epel-release-latest-7.noarch.rpm
5、学会从github检索开源程序
gihub官网链接:
https://github.com/
如果要搜索某个项目,可以直接在github的搜索框搜索即可(前提是搜索的关键字所代表的产品有托管到github,大部分互联网的开源解决方案的应用程序,github上收录的挺齐全)。这里以fastDFS为例演示。
-
输入搜索关键字fastDFS,查看搜索的结果

-
进入项目

-
点击最上面的菜单栏的"happyfish100"进入查看

好了,本次的分享就到此为止,谢谢大家!