1.读取数据库的资源文件,创建一个Connection连接
首先加入资源文件,如下图:
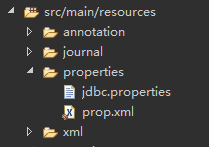
图片里有个prop.xml,里面代码如下:
<?xml version="1.0" encoding="UTF-8"?>
<beans xmlns="http://www.springframework.org/schema/beans"
	xmlns:xsi="http://www.w3.org/2001/XMLSchema-instance"
	xmlns:context="http://www.springframework.org/schema/context"
	xsi:schemaLocation="http://www.springframework.org/schema/beans
        http://www.springframework.org/schema/beans/spring-beans.xsd
        http://www.springframework.org/schema/context
        http://www.springframework.org/schema/context/spring-context.xsd
        ">

    <!--  已经过时的读取资源文件的方法
    	  spring2.5之前

	<bean id="p" class="org.springframework.beans.factory.config.PropertyPlaceholderConfigurer">
		<property name="location" value="classpath:properties/jdbc.properties"></property>
	</bean> -->

	<!-- spring2.5之后 -->
	<context:property-placeholder location="classpath:properties/jdbc.properties"/>

	<bean id="dataSource"
		class="org.apache.commons.dbcp.BasicDataSource" destroy-method="close">
		<property name="driverClassName"
			value="${jdbcDriver}" />
		<property name="url" value="${jdbcUrl}" />
		<property name="username" value="${jdbcUsername}" />
		<property name="password" value="${jdbcPassword}" />
	</bean>
</beans>
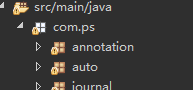
再java包下加入一个链接用的类,
代码如下:
public static void main(String[] args) throws SQLException {
		ApplicationContext ac = new ClassPathXmlApplicationContext("classpath:properties/prop.xml");
		DataSource dataSource= (DataSource) ac.getBean("dataSource");
		System.out.println(dataSource.getConnection());
	}
这样就可以获取一个数据库的链接了
导入的架包:
https://mvnrepository.com/artifact/org.springframework/spring-context-support/4.3.20.RELEASE
https://mvnrepository.com/artifact/mysql/mysql-connector-java/5.1.40
https://mvnrepository.com/artifact/commons-dbcp/commons-dbcp/1.1
2.关于bean的生命周期
在resources 包下建一个lifecycle.xml文件
<?xml version="1.0" encoding="UTF-8"?>
<beans xmlns="http://www.springframework.org/schema/beans"
	xmlns:xsi="http://www.w3.org/2001/XMLSchema-instance"
	xmlns:context="http://www.springframework.org/schema/context"
	xsi:schemaLocation="http://www.springframework.org/schema/beans
        http://www.springframework.org/schema/beans/spring-beans.xsd
        http://www.springframework.org/schema/context
        http://www.springframework.org/schema/context/spring-context.xsd
        ">
    <!-- 第一步:先调用构造方法 -->
    <!-- 第二步:先赋值在进入初始化方法 -->
    <!--
    	根据bean的scope属性来判断是单例还是多例
    	单例bean在容器启动时 实例化调用init方法 销毁调用destroy方法
    	多例bean在获取bean时实例化
     -->
	<bean id="car" class="com.ps.lifecycle.Car" init-method="init" destroy-method="destroy" >
		<property name="name" value="东风"></property>
	</bean>

</beans>
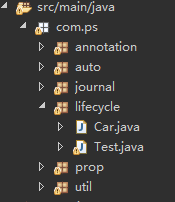
然后在java包下,建一个lifecycle包,如下图:
Car.java里面的代码:
public class Car {
	private String name;

	public Car() {
		System.out.println("这是构造方法" + name);
	}

	public void init() {
		System.out.println("初始化" + name);
	}

	public void destroy() {
		System.out.println("销毁" + name);
	}

	public String getName() {
		return name;
	}

	public void setName(String name) {
		this.name = name;
	}

}
Test.java代码:
public static void main(String[] args) {
		ClassPathXmlApplicationContext ac = new ClassPathXmlApplicationContext("classpath:lifecycle.xml");
		Car bean = ac.getBean(Car.class);
		ac.close();
	}
3.自动装配
不使用注解
首先xml代码如下:
<?xml version="1.0" encoding="UTF-8"?>
<beans xmlns="http://www.springframework.org/schema/beans"
	xmlns:xsi="http://www.w3.org/2001/XMLSchema-instance"
	xsi:schemaLocation="http://www.springframework.org/schema/beans
        http://www.springframework.org/schema/beans/spring-beans.xsd">

     <!--
     	 自动装配

     	 byType:根据类型自动装配*******若 IOC 容器中有多个与目标 Bean 类型一致的 Bean. 在这种情况下, Spring 将无法判定哪个 Bean 最合适该属性, 所以不能执行自动装配.
     	 byName:根据姓名自动装配*******必须将目标 Bean 的名称和属性名设置的完全相同.
      -->

    <bean id="car" class="com.ps.auto.Car" autowire="byName"></bean>
	<bean id="car_1" class="com.ps.auto.Car" autowire="byType"></bean>
	<bean id="cycle" class="com.ps.auto.Cycle">
		<property name="name" value="防砸轮胎"></property>
	</bean>


</beans>
再创建两个实体类
Cay.java
package com.ps.auto;

public class Car {
	private String name;
	private Cycle cycle;

	public Car() {

	}
	public Car(String name, Cycle cycle) {
		super();
		this.name = name;
		this.cycle = cycle;
	}
	public String getName() {
		return name;
	}

	public void setName(String name) {
		this.name = name;
	}

	public Cycle getCycle() {
		return cycle;
	}

	public void setCycle(Cycle cycle) {
		this.cycle = cycle;
	}

}
Cycle.java
package com.ps.auto;

public class Cycle {
	private String name;
	private String brand;
	public String getName() {
		return name;
	}
	public void setName(String name) {
		this.name = name;
	}
	public String getBrand() {
		return brand;
	}
	public void setBrand(String brand) {
		this.brand = brand;
	}

}
最后初建一个main方法来查看效果:
package com.ps.auto;

import org.springframework.context.ApplicationContext;
import org.springframework.context.support.FileSystemXmlApplicationContext;

/**
 * 单例(默认):节省内存 线程安全问题  线程安全留给开发者自己解决 锁
 * 多例:拿内存开销大 无线程安全问题
 * @author
 *
 * 2018年10月30日下午7:34:36
 */
public class TextCar {
	public static void main(String[] args) {
		ApplicationContext ac = new ClassPathXmlApplicationContext("classpath:auto.xml");
		Car car = (Car) ac.getBean("car");
		System.out.println(car.getCycle().getName());

		Car car_1 = (Car) ac.getBean("car_1");
		System.out.println(car_1.getCycle().getName());
	}
}
4.注解
一样的,先配xml文件:
<?xml version="1.0" encoding="UTF-8"?>
<beans xmlns="http://www.springframework.org/schema/beans"
	xmlns:xsi="http://www.w3.org/2001/XMLSchema-instance"
	xmlns:context="http://www.springframework.org/schema/context"
	xsi:schemaLocation="http://www.springframework.org/schema/beans
        http://www.springframework.org/schema/beans/spring-beans.xsd
        http://www.springframework.org/schema/context
        http://www.springframework.org/schema/context/spring-context.xsd
        ">
	<!--
		   自动装配 解决类和类之间地依赖关系
		   自动扫描 扫描所有带注解地类并将它实例化
	 -->

	 <!--
	 	<context:include-filter> 将不会扫描到的注解包含进来
		<context:exclude-filter> 将扫描到的注解去除
	  -->
	  <!-- base-package:要扫描的包的范围 -->
	<context:component-scan base-package="com.ps.annotation" >
		<!-- 当type类型为assignable时,可以扫描并new一个没有注解地bean类-->
		 <context:include-filter type="assignable" expression="com.ps.annotation.NoAnnotation"/>
		<!--
			自定义注解扫描bean
			expression属性扫描的类是带有@的接口类
		--><context:include-filter type="annotation" expression="com.ps.annotation.Custom"/>

		<!-- 这里是指不会扫描关于@Component的注解(也可以是其他注解) -->
		<!-- <context:exclude-filter type="annotation" expression="org.springframework.stereotype.Component"/>	-->
	</context:component-scan>
</beans>
首先看无注解的Class类
package com.ps.annotation;

/**
 * 这里是无注解的
 * @author
 *
 * 2018年11月3日上午9:41:54
 */
public class NoAnnotation {

}
再看自定义注解
package com.ps.annotation;
/**
 * 这里是自定义注解
 * @author
 *
 * 2018年11月3日上午9:40:19
 */
public @interface Custom {

}
package com.ps.annotation;
/**
 * 这里就调用了上面的那个自定义注解
 * @author
 *
 * 2018年11月3日上午9:44:37
 */
@Custom
public class CustomAnnotation {

}
特定注解包括:
@Component: 基本注解, 标识了一个受 Spring 管理的组件
@Respository: 标识持久层组件
@Service: 标识服务层(业务层)组件
@Controller: 标识表现层组件
下列代码演示了@Component注解以及自动装配(重点)
import javax.annotation.Resource;

import org.springframework.beans.factory.annotation.Autowired;
import org.springframework.beans.factory.annotation.Qualifier;
import org.springframework.stereotype.Component;
/**
 * '@Component' 等价于<bean id="car" class="com.ps.annotation.Car"></bean>
 * 默认的命名策略:类名首字母小写
 * 非默认命名:可以在注解中通过 value 属性值标识组件的名称
 *
 * @author
 *
 * 2018年10月31日下午4:18:33
 */
@Component(value="cars")
public class Car {
	/**
	 * 在自动扫描中装配:
	 * '@Autowired'  默认是按照类型来装配
	 * '@Qualifier'  先通过名字装配 如果没有找到对应名字bean 再按照类型装配
	 * '@Resource'   如果不确定名字就按类型来装配,如果确定名字就按名字来装配
	 */
//	@Autowired
//	@Qualifier("cy")
	@Resource(name="cy")
	private Cycle cycle;

	public Cycle getCycle() {
		return cycle;
	}

	public void setCycle(Cycle cycle) {
		this.cycle = cycle;
	}
}
import org.springframework.stereotype.Component;

@Component(value="cy")
public class Cycle {
	private String tyre;

	public String getTyre() {
		return tyre;
	}

	public void setTyre(String tyre) {
		this.tyre = tyre;
	}

}
接下来一个main方法展现效果
public class Test {
	public static void main(String[] args) {
		ApplicationContext ac = new ClassPathXmlApplicationContext("classpath:annotation/annotation.xml");
		// 自定义注解
		CustomAnnotation ca = (CustomAnnotation)ac.getBean("customAnnotation");
		// 无注解
		NoAnnotation noA = (NoAnnotation)ac.getBean("noAnnotation");
		// @Component
		Car car = (Car)ac.getBean("cars");

		System.out.println(ca);
		System.out.println(noA);
		System.out.println(car);
		System.out.println(car.getCycle());
	}
}
注意想要实例成功javaSE要调成1.8版本的