1. 修改nginx的配置文件( 我的配置文件在/usr/local/nginx/conf/nginx.conf)
[root@xxx ~]# find / -iname nginx.conf
/usr/local/nginx/conf/nginx.conf
[root@xxx ~]# vim /usr/local/nginx/conf/nginx.conf
nginx.conf配置文件的大致结构:
...
http{
    server{
    ...    #一个server结构可以对应一个域名
    }
    include vhost/*.conf;
   #增加这一句,以后所有新增的域名都可以放在/usr/local/nginx/conf/vhost/下,便于分开管理
}
2. 在/usr/local/nginx/conf/vhost/目录下,新增新域名的配置文件xincanzhe.conf(这边我要绑定一个www.xincanzhe.top的域名),复制nginx.conf中的server部分到xincanzhe.conf
server {
        listen       80;
        server_name  www.xincanzhe.top;    #新增域名名称

        #charset koi8-r;

        access_log  /data/wwwlogs/www.xincanzhe.top.log  combined;
     #设置访问该域名产生的日志文件,无需创建设置后会自动生成

        location / {
            root   /data/wwwroot/xincanzhe/public/;    #域名指向的根目录
            index  index.html index.php index.htm;
            #隐藏index.php
            if (!-e $request_filename) {
                rewrite  ^(.*)$  /index.php?s=/$1  last;
                break;
            }
        }

        #error_page  404              /404.html;

        # redirect server error pages to the static page /50x.html
        #
        error_page   500 502 503 504  /50x.html;
        location = /50x.html {
            root   html;
        }

        # proxy the PHP scripts to Apache listening on 127.0.0.1:80
        #
        #location ~ \.php$ {
        #    proxy_pass   http://127.0.0.1;
        #}

        # pass the PHP scripts to FastCGI server listening on 127.0.0.1:9000
        #
        location ~ \.php$ {
            root           /data/wwwroot/xincanzhe/public/;    #域名指向的根目录
            fastcgi_pass   127.0.0.1:9000;
            fastcgi_index  index.php;
            #使Nginx支持pathinfo路由
            fastcgi_split_path_info  ^(.+\.php)(.*)$;       #增加这一句
            fastcgi_param PATH_INFO  $fastcgi_path_info;    #增加这一句
            fastcgi_param  SCRIPT_FILENAME  $document_root$fastcgi_script_name;
            include        fastcgi_params;
        }

        # deny access to .htaccess files, if Apache's document root
        # concurs with nginx's one
        #
        #location ~ /\.ht {
        #    deny  all;
        #}
    }
3. 如果需要再次新增域名,只需要在/usr/local/nginx/conf/vhost/新建一个配置文件即可。
4. 修改nginx配置文件记得语句后加上分号;
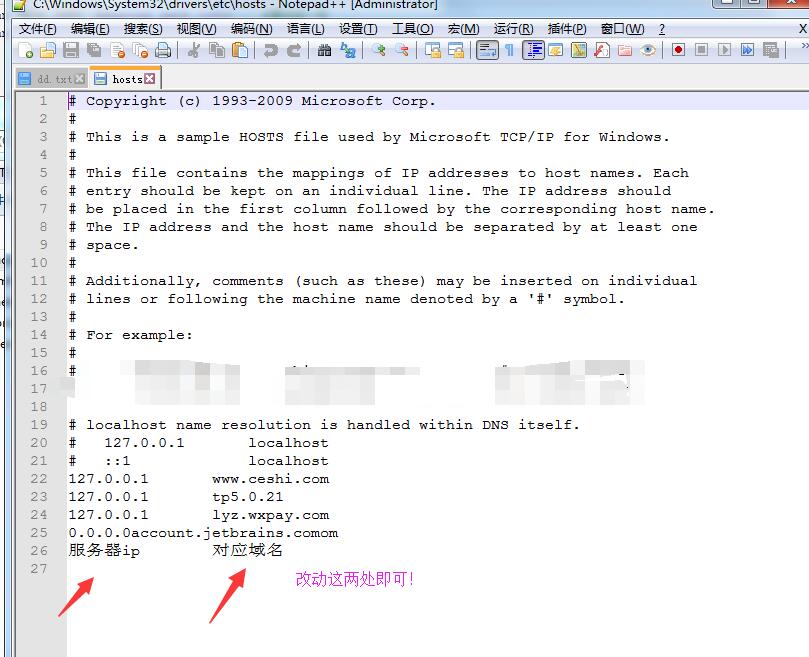
5. 如果配置的是虚拟域名,则还需要本地电脑上面配置信息
windows电脑找到C:\Windows\System32\drivers\etc\文件夹下面的hosts文件,修改保存之后即可在本地电脑访问域名为***的网站