版权声明:本文为博主原创文章,未经博主允许不得转载。 https://blog.csdn.net/Mr__Viking/article/details/80903491
在很多时候我们在项目中需要周期性地执行一些操作,并且这些操作不能通过简单的for循环和while循环来实现,因此我们需要有一个可以实现定时操作的方法,在spring中就有这么一个非常方便的方法,下面就简单记录下@Scheduled注解的使用方法。
1、首先我们需要一个spring项目,这个是前提条件。
首先我们需要在.xml的配置文件中引入
xmlns:task="http://www.springframework.org/schema/task"
http://www.springframework.org/schema/task
http://www.springframework.org/schema/task/spring-task-3.1.xsd
然后需要开启定时器@Scheduled注解的扫描
<!--开启定时器-->
<task:annotation-driven/>
最后需要扫描编写定时器任务的类所在的包
<!--扫描定时器类所在的包-->
<context:component-scan base-package="com.ssm.time"/>
配置文件里就只需要配置这些东西。
2、接下来我们开始编写定时器的类
package com.ssm.time;
import org.apache.log4j.Logger;
import org.springframework.scheduling.annotation.Scheduled;
import org.springframework.stereotype.Component;
import java.text.SimpleDateFormat;
import java.util.Date;
/**
* created by viking on 2018/07/03
* 定时器任务类
*/
@Component
public class TimeTaskContext {
private Logger log = Logger.getLogger(TimeTaskContext.class);
private SimpleDateFormat sdf = new SimpleDateFormat("yyyy-MM-dd HH:mm:ss");
@Scheduled(cron = "0/10 * * * * ?")//cron表达式,10秒执行一次
public void timeTask(){
log.debug("执行定时器任务,时间:"+sdf.format(new Date()));
}
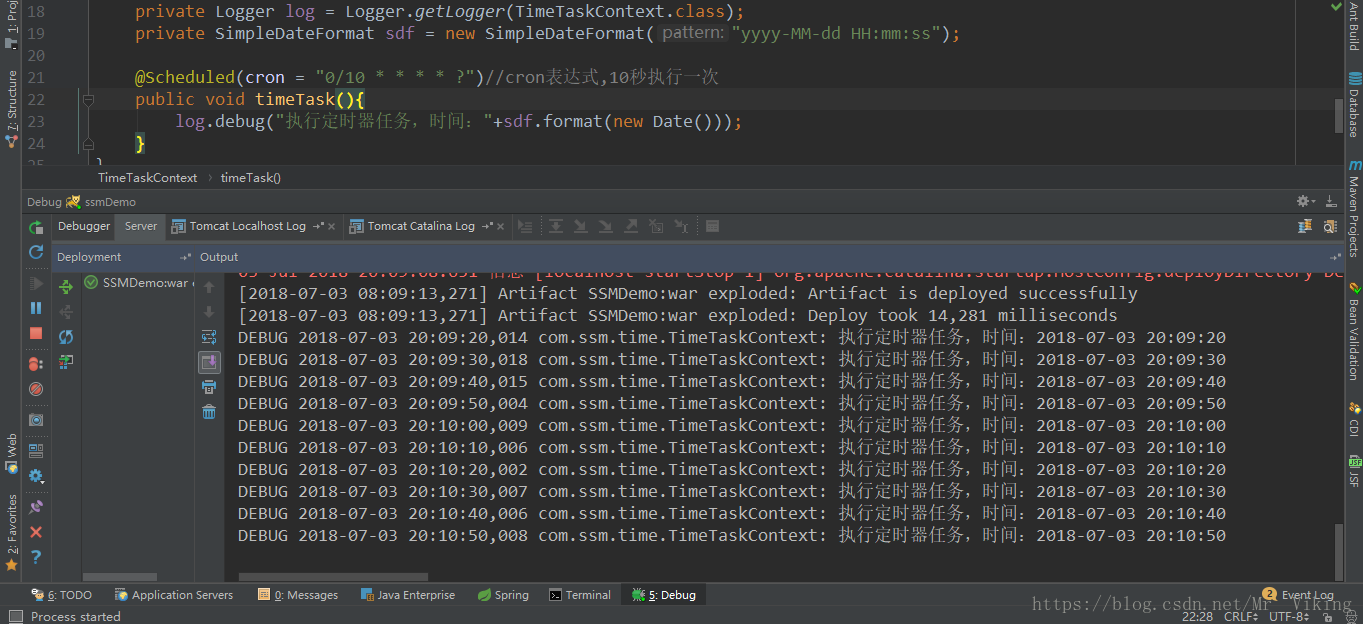
}这就是一个简单的使用案例了,代码不多,配置也不算复杂。然后我们看一下运行效果吧。
如果有不对的地方,欢迎各位大佬指出,有疑问的地方也欢迎大家留言,我们一起讨论~