1、下载安装 subversion
[root@CentOS var]# yum -y install subversion
2、创建 svn 版本库,初始化相关配置文件
-
[root@CentOS var]# mkdir -p /opt/svnrepos -
[root@CentOS var]# svnadmin create /opt/svnrepos
3、查看版本库相关配置文件
-
[root@CentOS var]# cd /opt/svnrepos/ -
[root@CentOS svnrepos]# ll -
总用量 8 -
drwxr-xr-x. 2 root root 54 3月 2 22:49 conf -
drwxr-sr-x. 6 root root 253 3月 2 22:51 db -
-r--r--r--. 1 root root 2 3月 2 22:47 format -
drwxr-xr-x. 2 root root 231 3月 2 22:47 hooks -
drwxr-xr-x. 2 root root 41 3月 2 22:47 locks -
-rw-r--r--. 1 root root 229 3月 2 22:47 README.txt -
[root@CentOS svnrepos]#
4、进入 conf 目录,编辑 passwd 文件
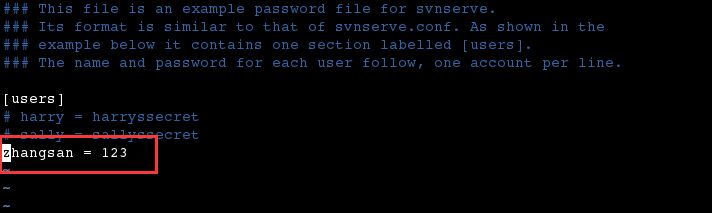
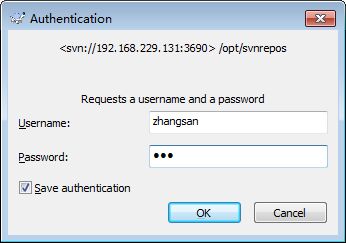
如上所示,用户名为:zhangsan,认证密码为:123
5、然后编辑 authz 文件
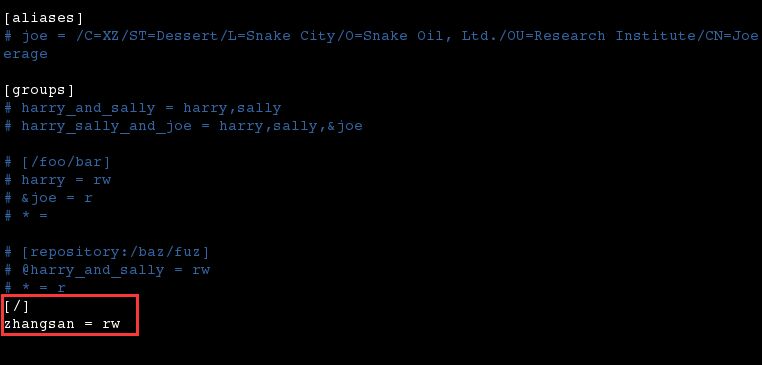
[/]:表示根目录,即 /opt/svnrepos。
zhangsan = rw:表示用户zhangsan对根目录具有读写权限。
6、编辑 svnserve.conf 文件
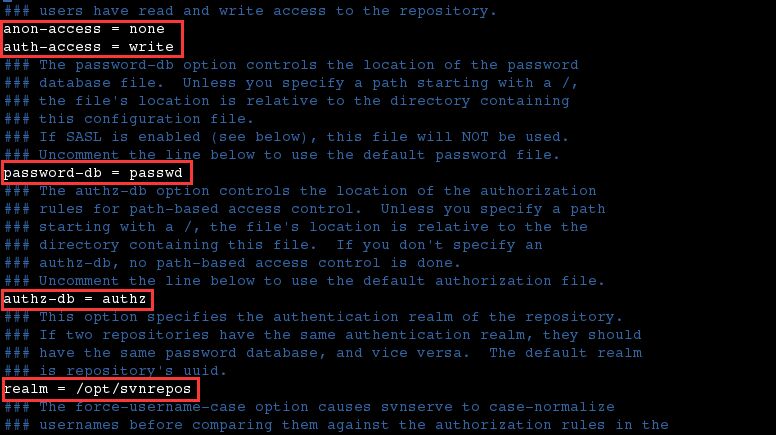
anon-access = none:表示禁止匿名用户访问。
auth-access = write:表示授权用户拥有读写权限。
password-db = passswd:指定用户名口令文件,即 passwd 文件。
authz-db = authz:指定权限配置文件,即 authz 文件。
realm = /opt/svnrepos:指定认证域,即 /opt/svnrepos 目录。
7、在 /etc/init.d 目录下,创建脚本 svnd
-
[root@CentOS init.d]# touch svnd -
[root@CentOS init.d]# chmod u+x svnd
8、编辑后的 svnd 脚本如下所示
-
#!/bin/sh -
# chkconfig: 2345 10 90 -
# description: svn server -
SVN_HOME=/opt/svnrepos -
if [ ! -f "/usr/bin/svnserve" ] -
then -
echo "svnserver startup: cannot start" -
exit -
fi -
case "$1" in -
start) -
echo "Starting svnserve…" -
/usr/bin/svnserve -d --listen-port 3690 -r $SVN_HOME -
echo "Finished!" -
;; -
stop) -
echo "Stoping svnserve…" -
killall svnserve -
echo "Finished!" -
;; -
restart) -
$0 stop -
$0 start -
;; -
*) -
echo "Usage: svn { start | stop | restart } " -
exit 1 -
esac
9、启动 svn 服务
-
[root@CentOS init.d]# service svnd start -
Starting svnserve… -
Finished! -
[root@CentOS init.d]# ps -ef | grep 'svnserve' -
root 4225 1 0 23:33 ? 00:00:00 /usr/bin/svnserve -d --listen-port 3690 -r /opt/svnrepos -
root 4230 3505 0 23:33 pts/0 00:00:00 grep --color=auto svnserve -
[root@CentOS init.d]#
10、开放 3690 端口 (svn服务默认端口)
-
[root@CentOS init.d]# firewall-cmd --zone=public --add-port=3690/tcp --permanent -
success -
[root@CentOS init.d]# firewall-cmd --reload -
success -
[root@CentOS init.d]#
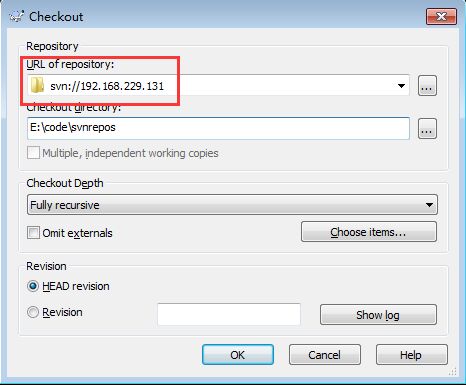
11、在 windows 下使用TortoiseSVN进行测试
12、将 svn 添加为系统服务,并设置为开机启动
-
[root@CentOS init.d]# chkconfig --add svnd -
[root@CentOS init.d]# chkconfig svnd on