一、搭建LNMP
1.安装Nginx
安装Nginx
[root@catyuan ~]# yum -y install nginx
Loaded plugins: fastestmirror
Setting up Install Process
Determining fastest mirrors
base                            | 3.7 kB     00:00
base/primary_db                 | 4.7 MB     00:00
epel                            | 3.2 kB     00:00
epel/primary                    | 3.2 MB     00:00
.........................................................省略中间,直到看到
Complete!
配置/etc/nginx/conf.d/default.conf文件,将文件内容修改如下
[root@catyuan ~]# vim /etc/nginx/conf.d/default.conf

server {
listen       80;
root   /usr/share/nginx/html;
server_name  localhost;


#charset koi8-r;
#access_log  /var/log/nginx/log/host.access.log  main;
location / {
    index index.php index.html index.htm;
}

#error_page  404              /404.html;
#redirect server error pages to the static page /50x.html
#
error_page   500 502 503 504  /50x.html;
location = /50x.html {
root   /usr/share/nginx/html;
}

#pass the PHP scripts to FastCGI server listening on 127.0.0.1:9000
#
location ~ .php$ {
fastcgi_pass   127.0.0.1:9000;
fastcgi_index   index.php;
fastcgi_param  SCRIPT_FILENAME  $document_root$fastcgi_script_name;
include        fastcgi_params;
}
}
启动Nginx
[root@catyuan ~]# service nginx start
Starting nginx:
  [  OK  ]
设置开机自启
[root@catyuan ~]# chkconfig nginx on
测试Nginx是否安装成功,在浏览器中输入服务器IP地址,若显示如下,则代表成功。

2.安装MySQL
使用命令安装MySQL
[root@catyuan ~]# yum -y install mysql-server
..........................................................
Installed:
    mysql-server.x86_64 0:5.1.73-8.el6_8

Dependency Installed:
  mysql.x86_64 0:5.1.73-8.el6_8
  perl-DBD-MySQL.x86_64 0:4.013-3.el6
  perl-DBI.x86_64 0:1.609-4.el6

Complete!
启动MySQL
[root@catyuan ~]# service mysqld start

Initializing MySQL database:  WARNING: The host 'catyuan' could not be looked up with resolveip.
This probably means that your libc libraries are not 100 % compatible
with this binary MySQL version. The MySQL daemon, mysqld, should work
normally with the exception that host name resolving will not work.
This means that you should use IP addresses instead of hostnames
when specifying MySQL privileges !
Installing MySQL system tables...
OK
Filling help tables...
OK

To start mysqld at boot time you have to copy
support-files/mysql.server to the right place for your system

PLEASE REMEMBER TO SET A PASSWORD FOR THE MySQL root USER !
To do so, start the server, then issue the following commands:

/usr/bin/mysqladmin -u root password 'new-password'
/usr/bin/mysqladmin -u root -h catyuan password 'new-password'

Alternatively you can run:
/usr/bin/mysql_secure_installation

which will also give you the option of removing the test
databases and anonymous user created by default.  This is
strongly recommended for production servers.

See the manual for more instructions.

You can start the MySQL daemon with:
cd /usr ; /usr/bin/mysqld_safe &

You can test the MySQL daemon with mysql-test-run.pl
cd /usr/mysql-test ; perl mysql-test-run.pl

Please report any problems with the /usr/bin/mysqlbug script!

                                                      [
OK  ]
Starting mysqld:                                      [
OK  ]
将MySQL设置为开机自启
[root@catyuan ~]# chkconfig mysqld on
设置MySQL用户的root密码为123456。可自己设置。
[root@catyuan ~]# /usr/bin/mysqladmin -u root password '123456'
3.安装PHP
使用命令安装PHP以及相关扩展包
[root@catyuan ~]# yum install php php-fpm php-mysql -y
.....................................
Dependency Installed:
  apr.x86_64 0:1.3.9-5.el6_9.1
  apr-util.x86_64 0:1.3.9-3.el6_0.1
  apr-util-ldap.x86_64 0:1.3.9-3.el6_0.1
  httpd.x86_64 0:2.2.15-69.el6.centos
  httpd-tools.x86_64 0:2.2.15-69.el6.centos
  mailcap.noarch 0:2.1.31-2.el6
  php-cli.x86_64 0:5.3.3-49.el6
  php-common.x86_64 0:5.3.3-49.el6
  php-pdo.x86_64 0:5.3.3-49.el6

Complete!
启动php-fpm进程
[root@catyuan ~]# service php-fpm start
Starting php-fpm:                                     [
OK  ]
将php-fpm设置为开机自启
[root@catyuan ~]# chkconfig php-fpm on
二、安装配置WordPress
1.安装WordPress
a.使用yum命令安装WordPress,使用yum下载的为英文版
[root@catyuan ~]# yum install wordpress -y
b.中文版下载命令为
[root@catyuan ~]# wget https://cn.wordpress.org/wordpress-4.7.4-zh_CN.tar.gz
解压
[root@catyuan ~]# tar zxvf wordpress-4.7.4-zh_CN.tar.gz
2.配置数据库
登录MySQL数据库
[root@catyuan ~]# mysql -uroot -p
Enter password:
输入刚才设置上网MySQL的密码
Welcome to the MySQL monitor.  Commands end with ; or \g.
Your MySQL connection id is 5
Server version: 5.1.73 Source distribution

Copyright (c) 2000, 2013, Oracle and/or its affiliates. All rights reserved.

Oracle is a registered trademark of Oracle Corporation and/or its
affiliates. Other names may be trademarks of their respective
owners.

Type 'help;' or '\h' for help. Type '\c' to clear the current input statement.

mysql>
给WordPress创建一个数据库,数据库名字为wordpress
mysql> create database wordpress;
Query OK, 1 row affected (0.00 sec)
为创建好的数据库创建一个用户user
mysql> create user user@localhost;
Query OK, 0 rows affected (0.00 sec)
给user用户设置密码‘123456’
mysql> set password for user@localhost=password("123456");
Query OK, 0 rows affected (0.00 sec)
给user用户开通数据库wordpress的完全访问权
mysql>  grant all privileges on wordpress.* to user@localhost identified by '123456';
Query OK, 0 rows affected (0.00 sec)
使用下面命令使上一条命令生效
mysql> flush privileges;
Query OK, 0 rows affected (0.00 sec)
退出MySQL
mysql> exit
Bye
3.将数据库信息写入WordPress的配置文件中
切换到wordpress目录下
[root@catyuan wordpress]# cd wordpress
创建新配置文件,将wp-config-sample.php文件复制到名为wp-config.php的文件,使用以下命令创建新的配置文件,并将原先的示例配置文件保留作为备份。
[root@catyuan wordpress]# cp wp-config-sample.php wp-config.php
打开新的配置文件
[root@catyuan wordpress]# vim wp-config.php
在wp-config.php文件里找到以下内容,并填入
// ** MySQL 设置 - 具体信息来自您正在使用的主机 ** //
/** WordPress数据库的名称 */
define('DB_NAME', 'wordpress');

/** MySQL数据库用户名 */
define('DB_USER', 'user');

/** MySQL数据库密码 */
define('DB_PASSWORD', '123456');

/** MySQL主机 */
define('DB_HOST', 'localhost');

/** 创建数据表时默认的文字编码 */
define('DB_CHARSET', 'utf8');

/** 数据库整理类型。如不确定请勿更改 */
define('DB_COLLATE', '');
4.配置WordPress
先删除网站根目录下的index.html文件
[root@catyuan wordpress]# rm /usr/share/nginx/html/index.html
将安装的文件移动到web 服务器的根目录/usr/share/ngnix/html
[root@catyuan wordpress]# mv * /usr/share/nginx/html/
重启Nginx
[root@catyuan ~]# service nginx restart
Stopping nginx:                                            [  OK  ]
Starting nginx:                                            [  OK  ]
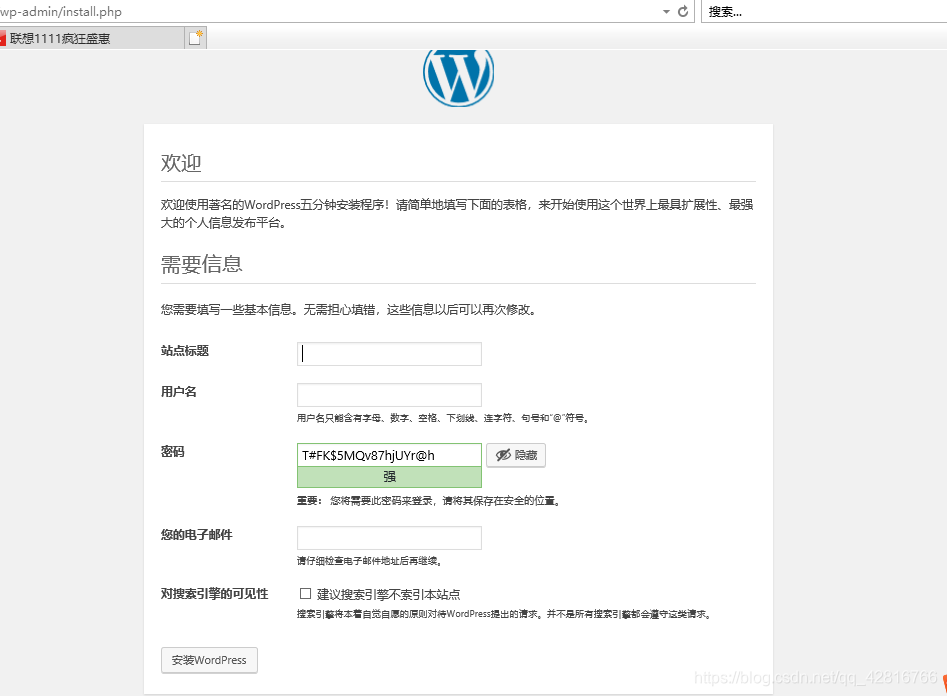
找一个浏览器,输入公网IP地址。填写信息进行注册。
5.配置域名解析
购买一个域名,在云解析上添加解析,用户即可通过域名进行访问
6.关于进入WordPress的登录页面
浏览器导航栏输入 IP/wp-login.php