走进Spring Cloud之二 eureka注册中心(Greenwich版本)
eureka
Eureka 是一个基于 REST 的服务,主要在 AWS 云中使用, 定位服务来进行中间层服务器的负载均衡和故障转移。
Spring Cloud 封装了 Netflix 公司开发的 Eureka 模块来实现服务注册和发现。Eureka 采用了 C-S 的设计架构。Eureka Server 作为服务注册功能的服务器,它是服务注册中心。而系统中的其他微服务,使用 Eureka 的客户端连接到 Eureka Server,并维持心跳连接。这样系统的维护人员就可以通过 Eureka Server 来监控系统中各个微服务是否正常运行。Spring Cloud 的一些其他模块(比如Zuul)就可以通过 Eureka Server 来发现系统中的其他微服务,并执行相关的逻辑。
Eureka由两个组件组成:Eureka server和Eureka client。Eureka server用作服务注册服务器。Eureka client是一个java客户端,用来简化与服务器的交互、作为轮询负载均衡器,并提供服务的故障切换支持。Netflix在其生产环境中使用的是另外的客户端,它提供基于流量、资源利用率以及出错状态的加权负载均衡。
最简单的微服务架构图: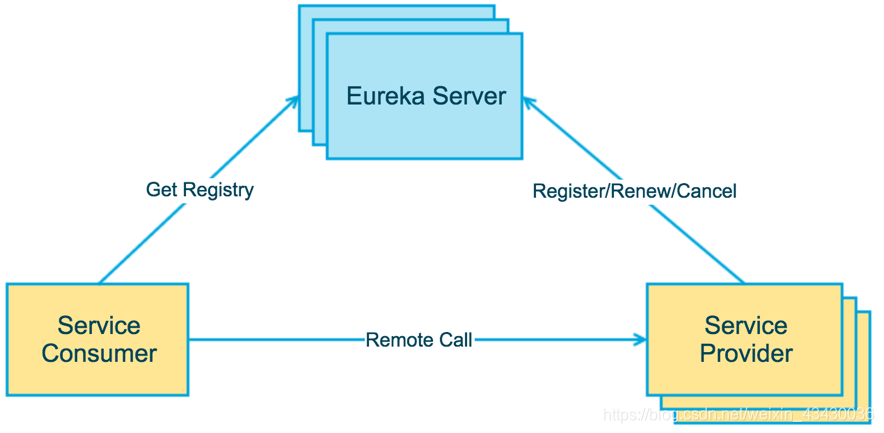
- Eureka Server(注册中心):提供服务注册和发现
- Service Provider(服务提供方):将自身服务注册到Eureka中心,从而使服务消费方能够找到
- Service Consumer(服务消费方):从Eureka注册中心获取注册服务列表,从而能够消费服务
构建SpringCloud 工程
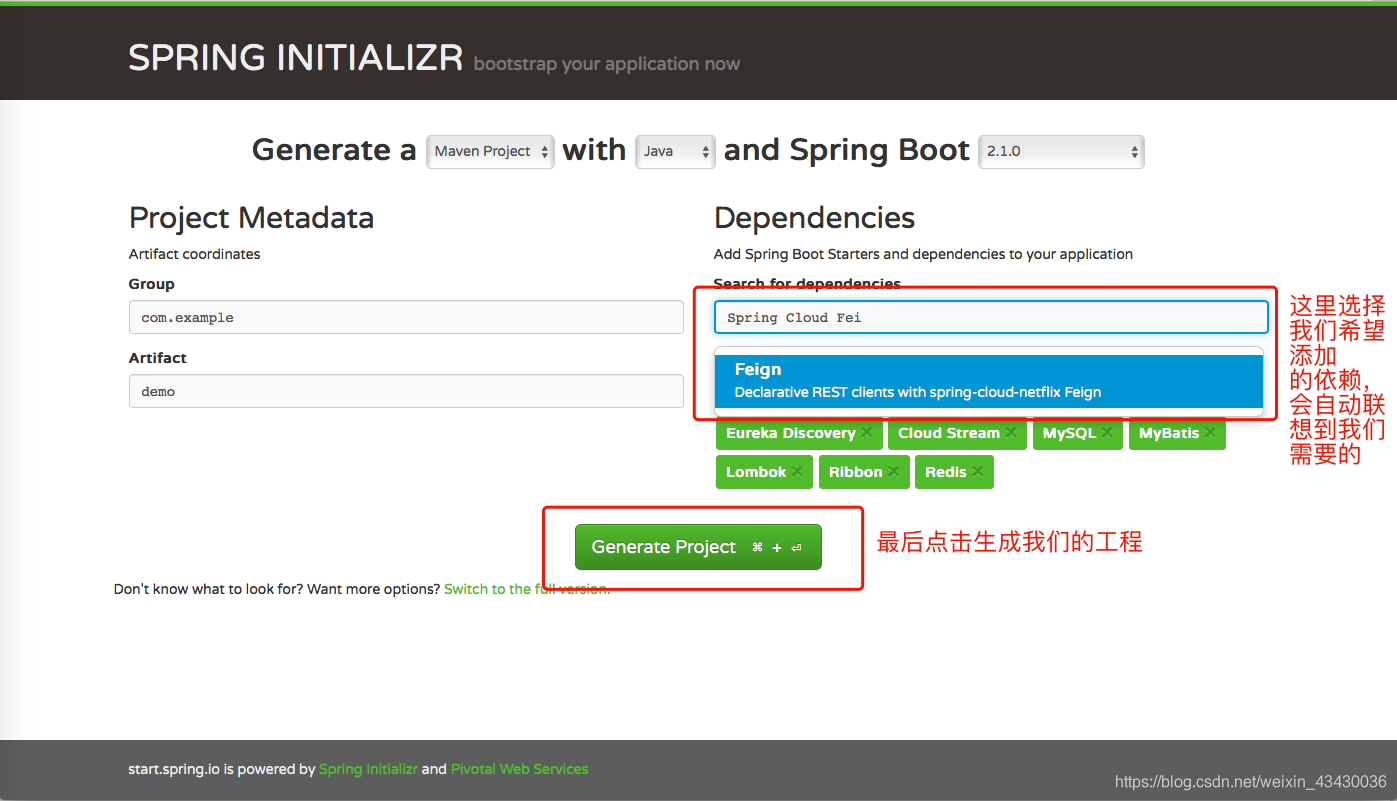
Spring Cloud依赖于Spring Boot,并且2者之间的版本有严重的匹配要求,这次给大家推荐一个官方Spring构建工程(传送门)网址,我们可以利用它轻松构建我们的Spring Boot工程。

例如我们这里选择Spring Cloud的相关依赖,并构建
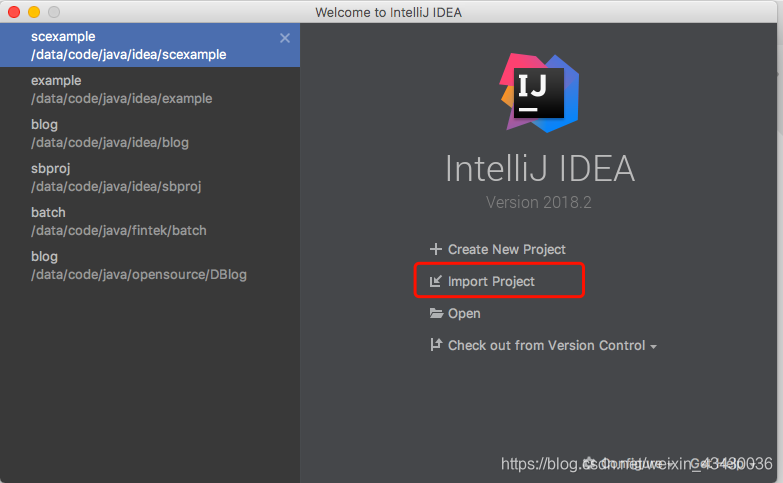
最终网页会构建我们的Spring Boot工程并且下载到本地,我们只需要使用Idea倒入工程即可
这了我们为了给大家演示完整的SpringCloud,我们把我们当前的工程构建为SpringBoot聚合工程,我这里的聚合工程取名为scexample.
本文形成时,工程结构如下:

可以看到我的scexample聚合工程里面有很多子模块对应我们微服务的各种服务系统。这里我们后面再深入。
为了将scexample变为聚合工程,我们将刚刚自动生成的代码pom.xml稍作改动,将打包类型改为pom
<packaging>pom</packaging>
完整案例如下:
<?xml version="1.0" encoding="UTF-8"?>
<project xmlns="http://maven.apache.org/POM/4.0.0" xmlns:xsi="http://www.w3.org/2001/XMLSchema-instance"
	xsi:schemaLocation="http://maven.apache.org/POM/4.0.0 http://maven.apache.org/xsd/maven-4.0.0.xsd">
	<modelVersion>4.0.0</modelVersion>

	<groupId>com.pubutech</groupId>
	<artifactId>scexample</artifactId>
	<version>0.0.1-SNAPSHOT</version>
	<modules>
		<module>eureka-server</module>
        <module>service-producer</module>
        <module>service-consumer</module>
        <module>service-zuul</module>
        <module>service-cosumer-ribbon</module>
    </modules>
	<packaging>pom</packaging>

	<name>scexample</name>
	<description>Demo project for Spring Boot</description>

	<parent>
		<groupId>org.springframework.boot</groupId>
		<artifactId>spring-boot-starter-parent</artifactId>
		<version>2.1.0.RELEASE</version>
		<relativePath/> <!-- lookup parent from repository -->
	</parent>

	<properties>
		<project.build.sourceEncoding>UTF-8</project.build.sourceEncoding>
		<project.reporting.outputEncoding>UTF-8</project.reporting.outputEncoding>
		<java.version>1.8</java.version>
        <spring-boot.version>2.1.0.RELEASE</spring-boot.version>
		<spring-cloud.version>Greenwich.M1</spring-cloud.version>
	</properties>

	<dependencies>
		<dependency>
			<groupId>org.springframework.boot</groupId>
			<artifactId>spring-boot-starter-amqp</artifactId>
		</dependency>
		<dependency>
			<groupId>org.springframework.boot</groupId>
			<artifactId>spring-boot-starter-aop</artifactId>
		</dependency>
		<dependency>
			<groupId>org.springframework.boot</groupId>
			<artifactId>spring-boot-starter-data-redis</artifactId>
		</dependency>
		<dependency>
			<groupId>org.springframework.boot</groupId>
			<artifactId>spring-boot-starter-web</artifactId>
		</dependency>
		<dependency>
			<groupId>org.mybatis.spring.boot</groupId>
			<artifactId>mybatis-spring-boot-starter</artifactId>
			<version>1.3.2</version>
		</dependency>
		<dependency>
			<groupId>org.springframework.cloud</groupId>
			<artifactId>spring-cloud-bus</artifactId>
		</dependency>
		<dependency>
			<groupId>org.springframework.cloud</groupId>
			<artifactId>spring-cloud-starter</artifactId>
		</dependency>
		<dependency>
			<groupId>org.springframework.cloud</groupId>
			<artifactId>spring-cloud-starter-config</artifactId>
		</dependency>
		<dependency>
			<groupId>org.springframework.cloud</groupId>
			<artifactId>spring-cloud-starter-netflix-eureka-client</artifactId>
		</dependency>
		<dependency>
			<groupId>org.springframework.cloud</groupId>
			<artifactId>spring-cloud-stream</artifactId>
		</dependency>
		<dependency>
			<groupId>org.springframework.cloud</groupId>
			<artifactId>spring-cloud-stream-binder-rabbit</artifactId>
		</dependency>

		<dependency>
			<groupId>org.springframework.boot</groupId>
			<artifactId>spring-boot-devtools</artifactId>
			<scope>runtime</scope>
		</dependency>
		<dependency>
			<groupId>mysql</groupId>
			<artifactId>mysql-connector-java</artifactId>
			<scope>runtime</scope>
		</dependency>
		<dependency>
			<groupId>org.projectlombok</groupId>
			<artifactId>lombok</artifactId>
			<optional>true</optional>
		</dependency>
		<dependency>
			<groupId>org.springframework.boot</groupId>
			<artifactId>spring-boot-starter-test</artifactId>
			<scope>test</scope>
		</dependency>
		<dependency>
			<groupId>org.springframework.cloud</groupId>
			<artifactId>spring-cloud-stream-test-support</artifactId>
			<scope>test</scope>
		</dependency>
	</dependencies>

	<dependencyManagement>
		<dependencies>
			<dependency>
				<groupId>org.springframework.cloud</groupId>
				<artifactId>spring-cloud-dependencies</artifactId>
				<version>${spring-cloud.version}</version>
				<type>pom</type>
				<scope>import</scope>
			</dependency>
		</dependencies>
	</dependencyManagement>

	<profiles>
		<profile>
			<id>dev</id>
			<properties>
				<profiles.active>dev</profiles.active>
				<env>dev</env>
			</properties>
			<activation>
				<activeByDefault>true</activeByDefault>
			</activation>
		</profile>
		<profile>
			<id>test</id>
			<properties>
				<profiles.active>test</profiles.active>
				<env>test</env>
			</properties>
		</profile>
		<profile>
			<id>prod</id>
			<properties>
				<profiles.active>prod</profiles.active>
				<env>prod</env>
			</properties>
		</profile>
	</profiles>

	<build>
		<plugins>
			<plugin>
				<groupId>org.springframework.boot</groupId>
				<artifactId>spring-boot-maven-plugin</artifactId>
			</plugin>
		</plugins>
	</build>

	<repositories>
		<repository>
			<id>spring-milestones</id>
			<name>Spring Milestones</name>
			<url>https://repo.spring.io/milestone</url>
			<snapshots>
				<enabled>false</enabled>
			</snapshots>
		</repository>
	</repositories>


</project>
以上依赖项请按需修改,我这里为了演示更多的内容,一开始就导入很多依赖,完全不必要。(子模块目前还没有创建,我已经创建了所以会有,可以对应删掉)。
eureka 注册中心
eureka-server moudle
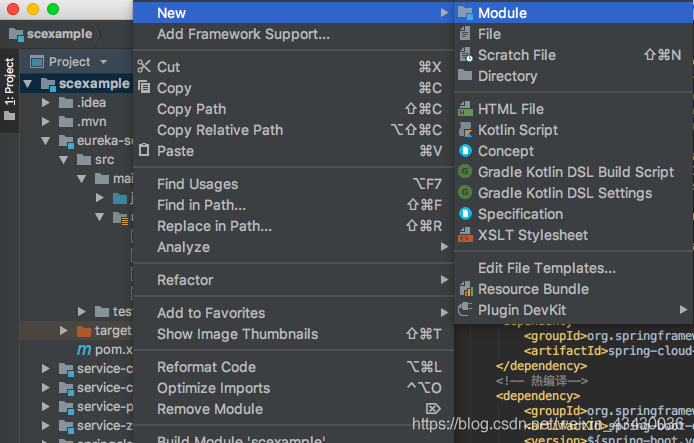
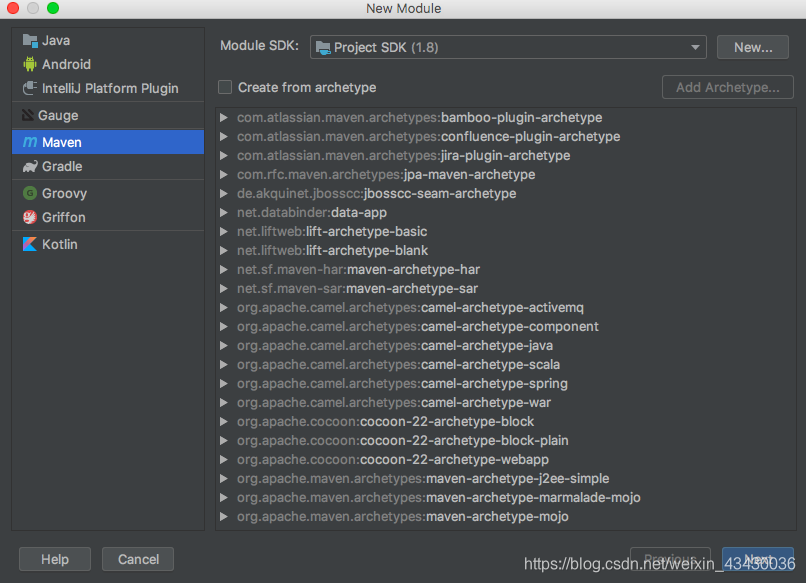
接下来,我们构建eureka-server注册中心
当前聚合工程下选择 new->moudle
接下来 next
然后填写arifactId为eureka-server
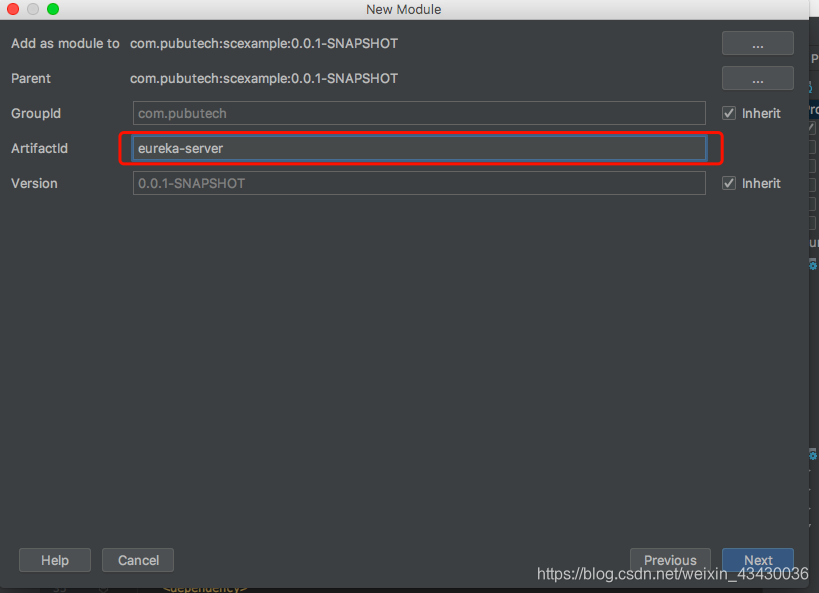
然后一路next到finish.
pom.xml
然后修改eureka-server的pom.xml如下:
<?xml version="1.0" encoding="UTF-8"?>
<project xmlns="http://maven.apache.org/POM/4.0.0"
         xmlns:xsi="http://www.w3.org/2001/XMLSchema-instance"
         xsi:schemaLocation="http://maven.apache.org/POM/4.0.0 http://maven.apache.org/xsd/maven-4.0.0.xsd">
    <parent>
        <artifactId>scexample</artifactId>
        <groupId>com.pubutech</groupId>
        <version>0.0.1-SNAPSHOT</version>
    </parent>
    <modelVersion>4.0.0</modelVersion>

    <artifactId>eureka-server</artifactId>
    <packaging>jar</packaging>


    <dependencies>
        <dependency>
            <groupId>org.springframework.cloud</groupId>
            <artifactId>spring-cloud-starter-netflix-eureka-server</artifactId>
        </dependency>
        <!-- 热编译-->
        <dependency>
            <groupId>org.springframework.boot</groupId>
            <artifactId>spring-boot-devtools</artifactId>
            <version>${spring-boot.version}</version>
            <optional>true</optional>
        </dependency>

        <!-- JAVA 8 JAXB Start按需添加-->
        <dependency>
            <groupId>javax.xml.bind</groupId>
            <artifactId>jaxb-api</artifactId>
            <version>2.3.0</version>
        </dependency>
        <dependency>
            <groupId>com.sun.xml.bind</groupId>
            <artifactId>jaxb-impl</artifactId>
            <version>2.3.0</version>
        </dependency>
        <dependency>
            <groupId>com.sun.xml.bind</groupId>
            <artifactId>jaxb-core</artifactId>
            <version>2.3.0</version>
        </dependency>
        <dependency>
            <groupId>javax.activation</groupId>
            <artifactId>activation</artifactId>
            <version>1.1.1</version>
        </dependency>
	<!-- JAVA 8 JAXB End-->
    </dependencies>

    <dependencyManagement>
        <dependencies>
            <dependency>
                <groupId>org.springframework.cloud</groupId>
                <artifactId>spring-cloud-dependencies</artifactId>
                <version>${spring-cloud.version}</version>
                <type>pom</type>
                <scope>import</scope>
            </dependency>
        </dependencies>
    </dependencyManagement>

	<!-- eureka集群使用 Start-->
    <profiles>
        <profile>
            <id>peer1</id>
            <properties>
                <profiles.active>peer1</profiles.active>
                <env>peer1</env>
            </properties>
            <activation>
                <activeByDefault>true</activeByDefault>
            </activation>
        </profile>
        <profile>
            <id>peer2</id>
            <properties>
                <profiles.active>peer2</profiles.active>
                <env>peer2</env>
            </properties>
        </profile>
        <profile>
            <id>peer3</id>
            <properties>
                <profiles.active>peer3</profiles.active>
                <env>peer3</env>
            </properties>
        </profile>
    </profiles>
	<!-- eureka集群使用 end-->
    <build>
        <plugins>
            <plugin>
                <groupId>org.springframework.boot</groupId>
                <artifactId>spring-boot-maven-plugin</artifactId>
            </plugin>
        </plugins>
    </build>

</project>
application.yml
resource目录下新建application.yml
配置信息如下
server:
  port: 8761

eureka:
  instance:
    hostname: localhost
  client:
    #表示是否将自己注册到Eureka Server,默认为true。
    register-with-eureka: false
    #表示是否从Eureka Server获取注册信息,默认为true。
    fetch-registry: false
    service-url:
      #设置与Eureka Server交互的地址,查询服务和注册服务都需要依赖这个地址。默认是http://localhost:8761/eureka ;多个地址可使用 , 分隔。
      defaultZone: http://${eureka.instance.hostname}:${server.port}/eureka/

spring:
  application:
    name: eureka-server
EurekaServerApplication.java
新建自定SpringApplication的Application文件
@SpringBootApplication(exclude = {DataSourceAutoConfiguration.class})
@EnableEurekaServer
public class EurekaServerApplication {

    public static void main(String[] args) {
        SpringApplication.run(EurekaServerApplication.class, args);
    }

}
那么最简单的eureka-server注册中心已经完成。
启动SpringBoot Application
访问 localhost:8761

eureka集群使用
在一个分布式系统中,服务注册中心是最重要的基础部分,理应随时处于可以提供服务的状态。如果是单点部署,如果注册中心出现故障,将会出现毁灭性的灾难。为了维持其可用性,使用集群是很好的解决方案。Eureka通过互相注册的方式来实现高可用的部署,所以我们只需要将Eureke Server配置其他可用的serviceUrl就能实现高可用部署。
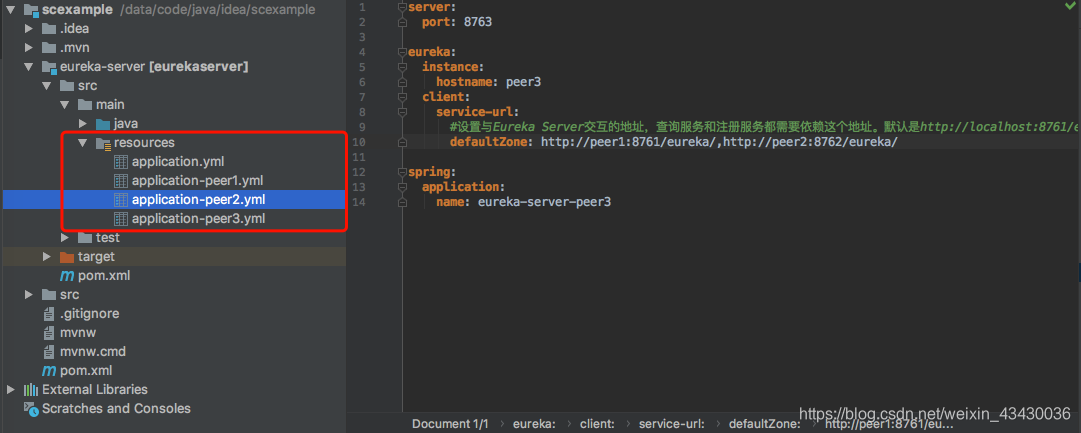
新建集群配置profiles:application-peer1.yml/application-peer2.yml/application-peer3.yml
application-peer1.yml
server:
  port: 8761

eureka:
  instance:
    hostname: peer1
  client:
    service-url:
      #设置与Eureka Server交互的地址,查询服务和注册服务都需要依赖这个地址。默认是http://localhost:8761/eureka ;多个地址可使用 , 分隔。
      defaultZone: http://peer2:8762/eureka/,http://peer3:8763/eureka/

spring:
  application:
    name: eureka-server-peer1
application-peer2.yml
server:
  port: 8762

eureka:
  instance:
    hostname: peer2
  client:
    service-url:
      #设置与Eureka Server交互的地址,查询服务和注册服务都需要依赖这个地址。默认是http://localhost:8761/eureka ;多个地址可使用 , 分隔。
      defaultZone: http://peer1:8761/eureka/,http://peer3:8763/eureka/

spring:
  application:
    name: eureka-server-peer2
application-peer3.yml
server:
  port: 8763

eureka:
  instance:
    hostname: peer3
  client:
    service-url:
      #设置与Eureka Server交互的地址,查询服务和注册服务都需要依赖这个地址。默认是http://localhost:8761/eureka ;多个地址可使用 , 分隔。
      defaultZone: http://peer1:8761/eureka/,http://peer2:8762/eureka/

spring:
  application:
    name: eureka-server-peer3
profiles
上面添加的pom.xml
	<!-- eureka集群使用 Start-->
    <profiles>
        <profile>
            <id>peer1</id>
            <properties>
                <profiles.active>peer1</profiles.active>
                <env>peer1</env>
            </properties>
            <activation>
                <activeByDefault>true</activeByDefault>
            </activation>
        </profile>
        <profile>
            <id>peer2</id>
            <properties>
                <profiles.active>peer2</profiles.active>
                <env>peer2</env>
            </properties>
        </profile>
        <profile>
            <id>peer3</id>
            <properties>
                <profiles.active>peer3</profiles.active>
                <env>peer3</env>
            </properties>
        </profile>
    </profiles>
	<!-- eureka集群使用 end-->
/hosts
本次测试,配置/etc/hosts
127.0.0.1 localhost,peer1,peer2,peer3
编译运行
#打包
mvn clean package
mvn install
运行
java -jar eureka-server-0.0.1-SNAPSHOT.jar --spring.profiles.active=peer1

java -jar eureka-server-0.0.1-SNAPSHOT.jar --spring.profiles.active=peer2

java -jar eureka-server-0.0.1-SNAPSHOT.jar --spring.profiles.active=peer3
再次访问 localhost:8761
