SpringBoot2.0系列–07–热部署
前言
JDK出11了,SpringBoot出2.0了,还没有系统的学习过,刚好最近项目中有使用到,就把一些关键的东西列出来,避免忘记
SpringBoot2.0系列–00–目录
介绍
每次修改的时候都要重新编译,其实是比较麻烦的,SpringBoot自带一个热部署插件。
我们可以直接使用。
总流程
- 先开启idea支持该热部署的方式的功能
- 在项目中添加热部署依赖(pom)
- 在项目中添加热部署插件(pom)
- 按照之前的运行方式即可
具体操作
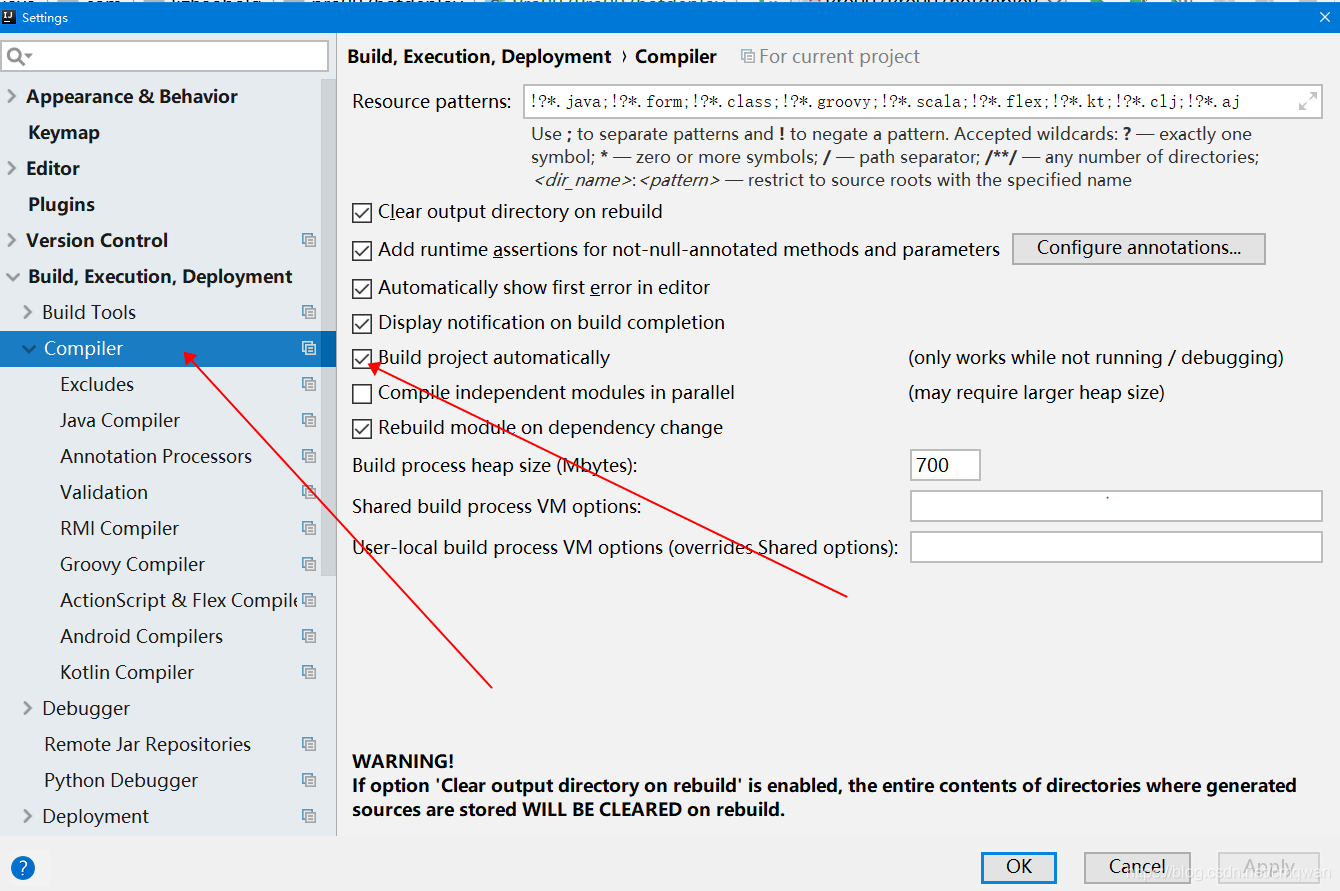
- 先开启idea支持该热部署的方式的功能
“File” -> “Settings” -> “Build,Execution,Deplyment” -> “Compiler”,选中打勾 “Build project automatically” 。
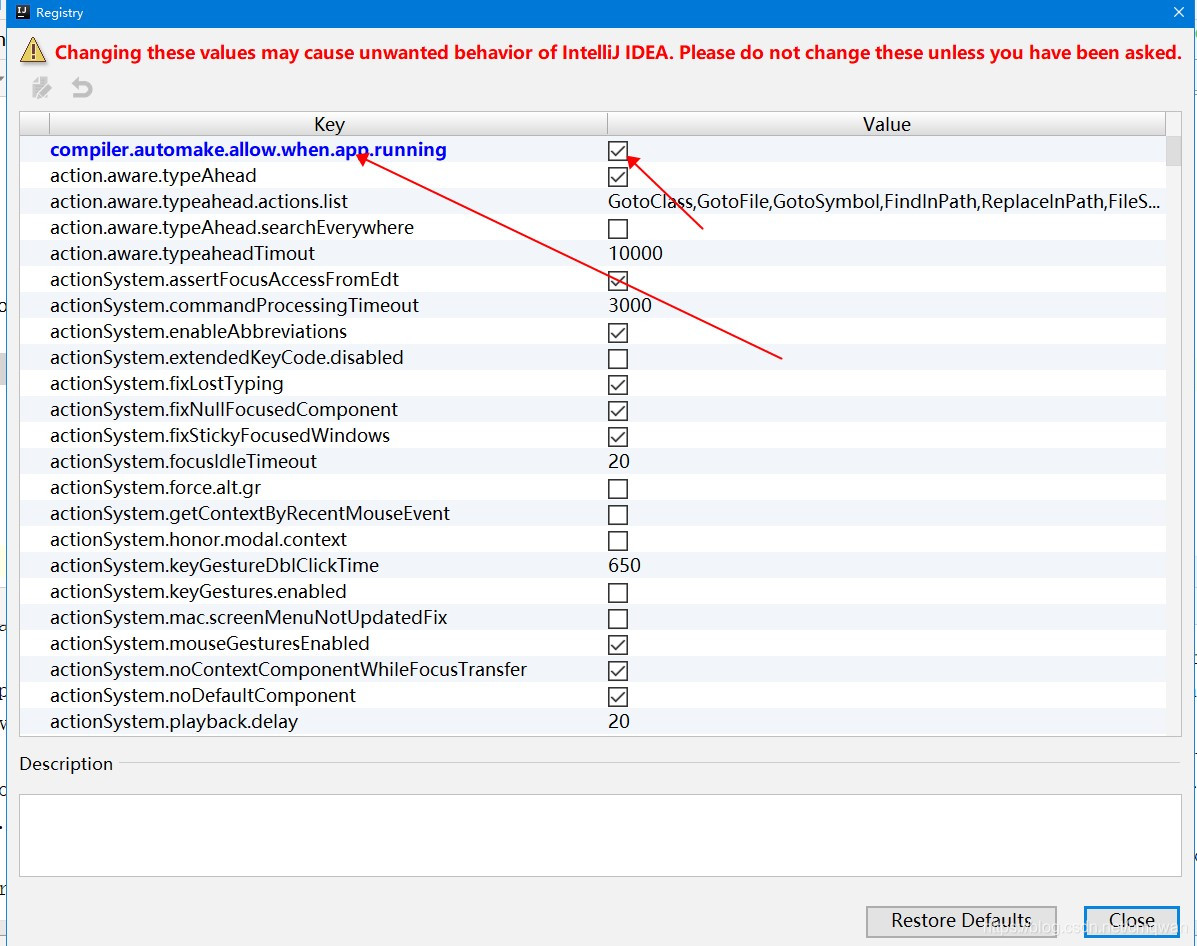
组合键:“Shift+Ctrl+Alt+/” ,选择 “Registry” ,选中打勾 “compiler.automake.allow.when.app.running” 。
“Shift+Ctrl+Alt+/” 是为了打开Maintenance功能的快捷键,如果不是这个快捷键,可以找下这个功能
- 在项目中添加热部署依赖(pom)
   <dependencies>
        <!-- 热部署 -->
        <dependency>
            <groupId>org.springframework.boot</groupId>
            <artifactId>spring-boot-devtools</artifactId>
            <optional>true</optional>
        </dependency>

    </dependencies>
- 在项目中添加热部署插件(pom)
<build>
        <plugins>
            <plugin>
                <groupId>org.springframework.boot</groupId> <artifactId>spring-boot-maven-plugin</artifactId>
                <configuration>
                    <fork>true</fork>
                </configuration>
            </plugin>
        </plugins>
    </build>
- 按照之前的运行方式即可
联系方式
项目代码路径码云:https://gitee.com/lizhaoandroid/Springboot-Learning-lz
联系方式:QQ3060507060
查看下一篇或者其他文章,可点击目录或者专栏查看