zabbix-添加监控项
1.编码安装zabbix添加监控项
添加监控项不需要想安装服务端那么麻烦,只需要启动zabbix-agent服务即可,保证只要有10050端口起来即可,这里可以看看我的上一篇文章
https://blog.csdn.net/Empty_city_dreams/article/details/82977299
2.YUM安装zabbix添加监控项
2.1关闭防火请和selinux
2.1.1关闭SeLinux
临时关闭:setenforce 0
永久关闭:vim /etc/selinux/config
SELINUX=disabled   将这一项的内容改成这样即可
2.1.1关闭防火请
1、临时关闭
systemctl stop firewalld.service


2、永久关闭
systemctl disable firewalld.service
2.2 下载并安装zabbix
[root@localhost ~]# rpm -ivh http://repo.zabbix.com/zabbix/3.4/rhel/7/x86_64/zabbix-release-3.4-2.el7.noarch.rpm
[root@localhost ~]# yum install -y zabbix-server-mysql zabbix-get zabbix-web zabbix-web-mysql zabbix-agent zabbix-sender
2.3配置zabbix agentd配置文件
[root@localhost ~]# cd /etc/zabbix/
[root@localhost zabbix]# ls
web  zabbix_agentd.conf  zabbix_agentd.d  zabbix_server.conf
[root@localhost zabbix]# vim zabbix_agentd.conf   只需要修改下面三项的内容即可
···
# Default:
# Server=

Server=192.168.138.128
···
# Mandatory: no
# Default:
# ServerActive=

ServerActive=192.168.138.128         Server和ServerActive填写zabbix-server端的主机IP地址,这两个ip一样,只不过一个是主动模式,一个是被动模式
···
# Mandatory: no
# Default:
# Hostname=

Hostname=192.168.138.129       这里的Hostname必须和后面再zabbix的网页添加主机时的主机名一样,我这里用的是zabbix agentd的ip地址
···
2.4启动zabbix agentd
[root@localhost ~]# systemctl start zabbix-agent.service
[root@localhost ~]# ss -antl   我这里开启了ipv6,所以会有两个10050端口,只要启动ipv4的10050端口即可,这里不需要想server端启动那么多端口,只需要保证这一个端口的启动即可
State       Recv-Q Send-Q Local Address:Port               Peer Address:Port
LISTEN      0      128         *:10050                   *:*

LISTEN      0      128        :::10050                  :::*
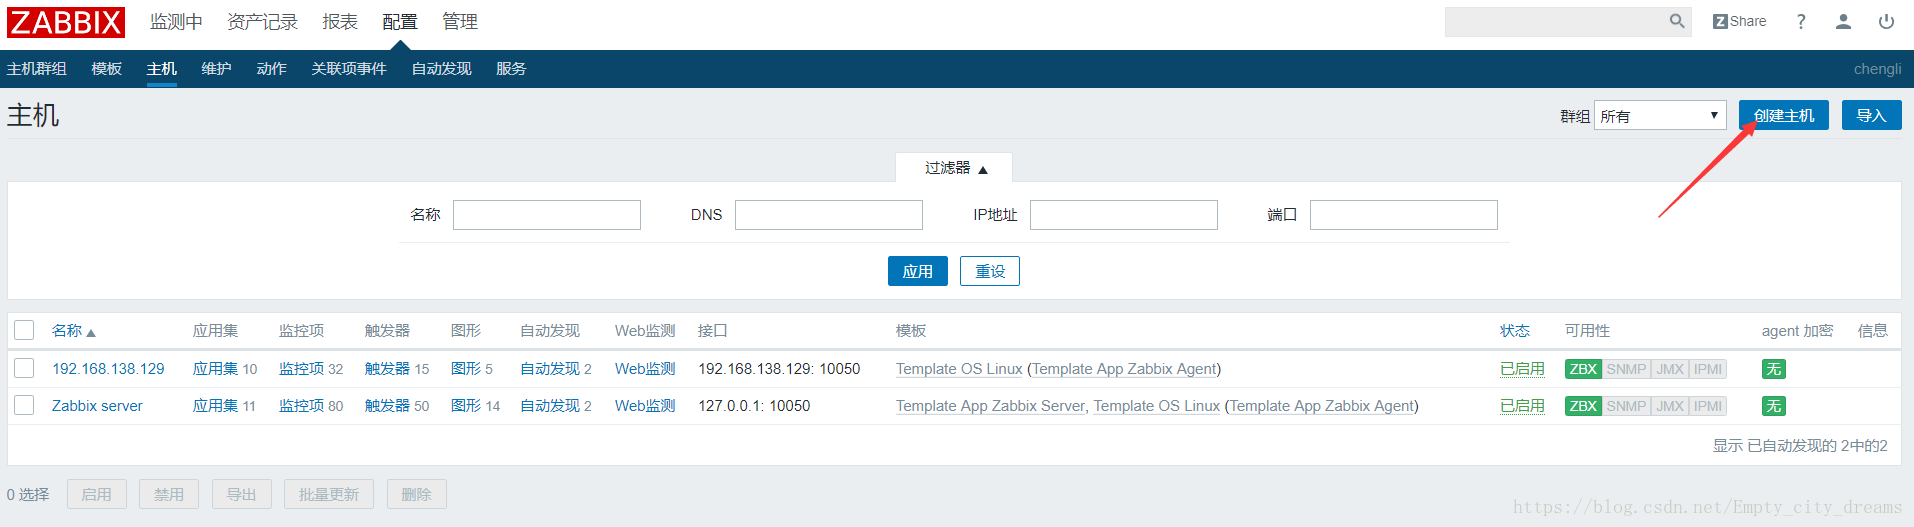
2.5网页端设置
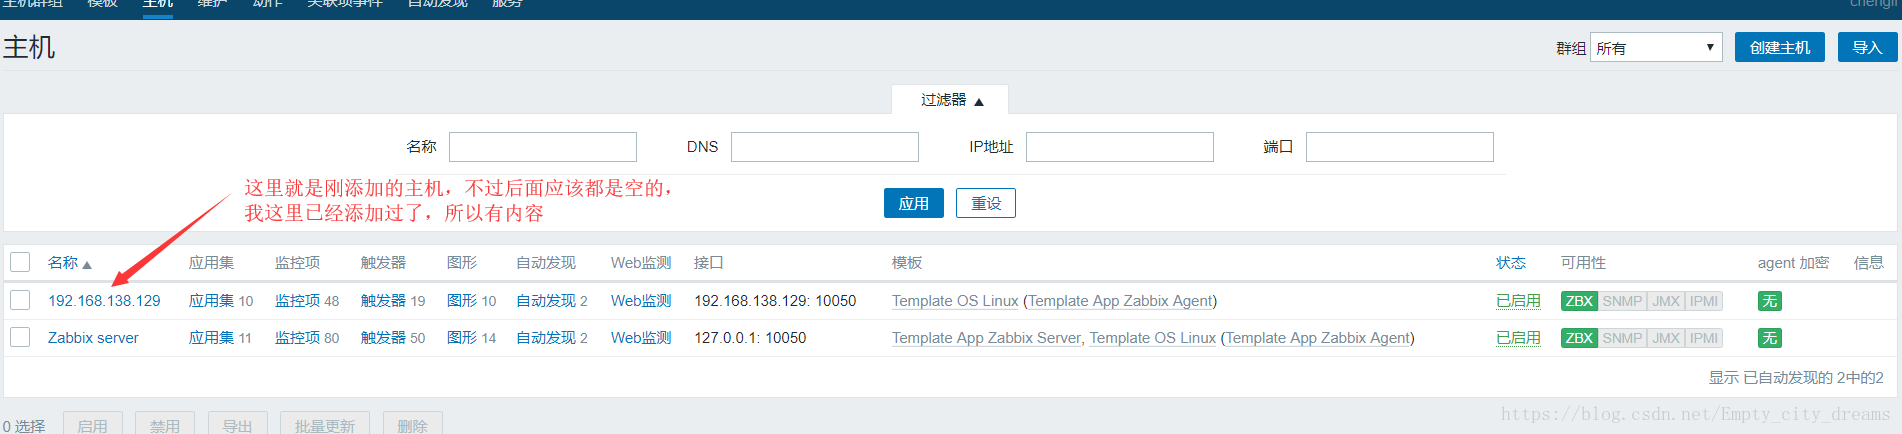
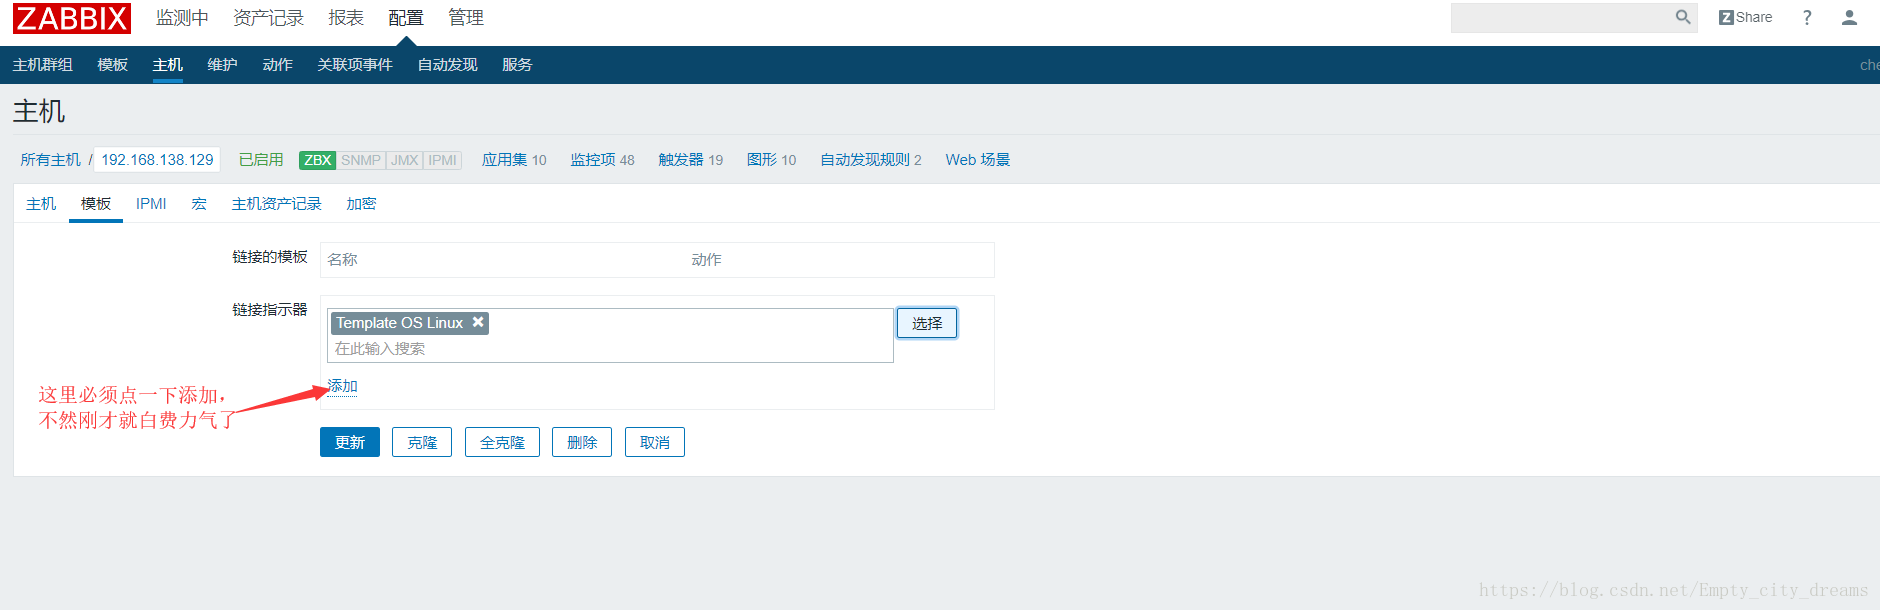
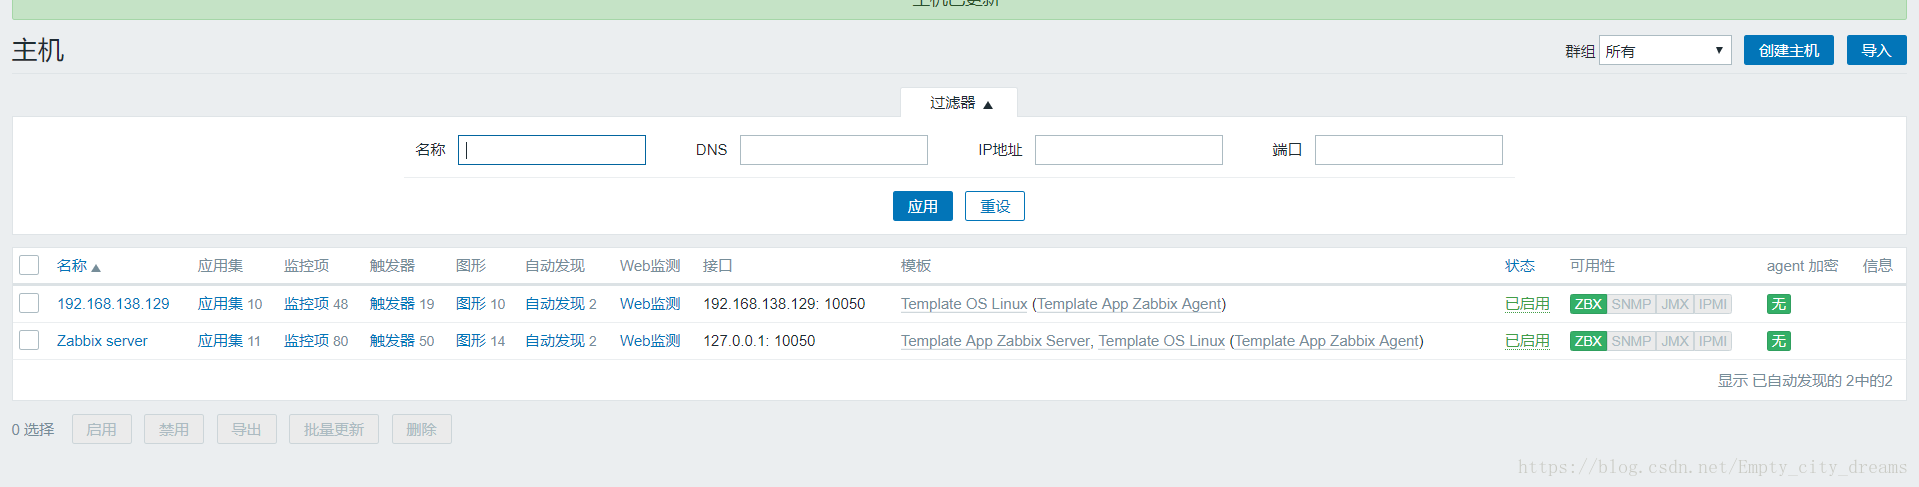
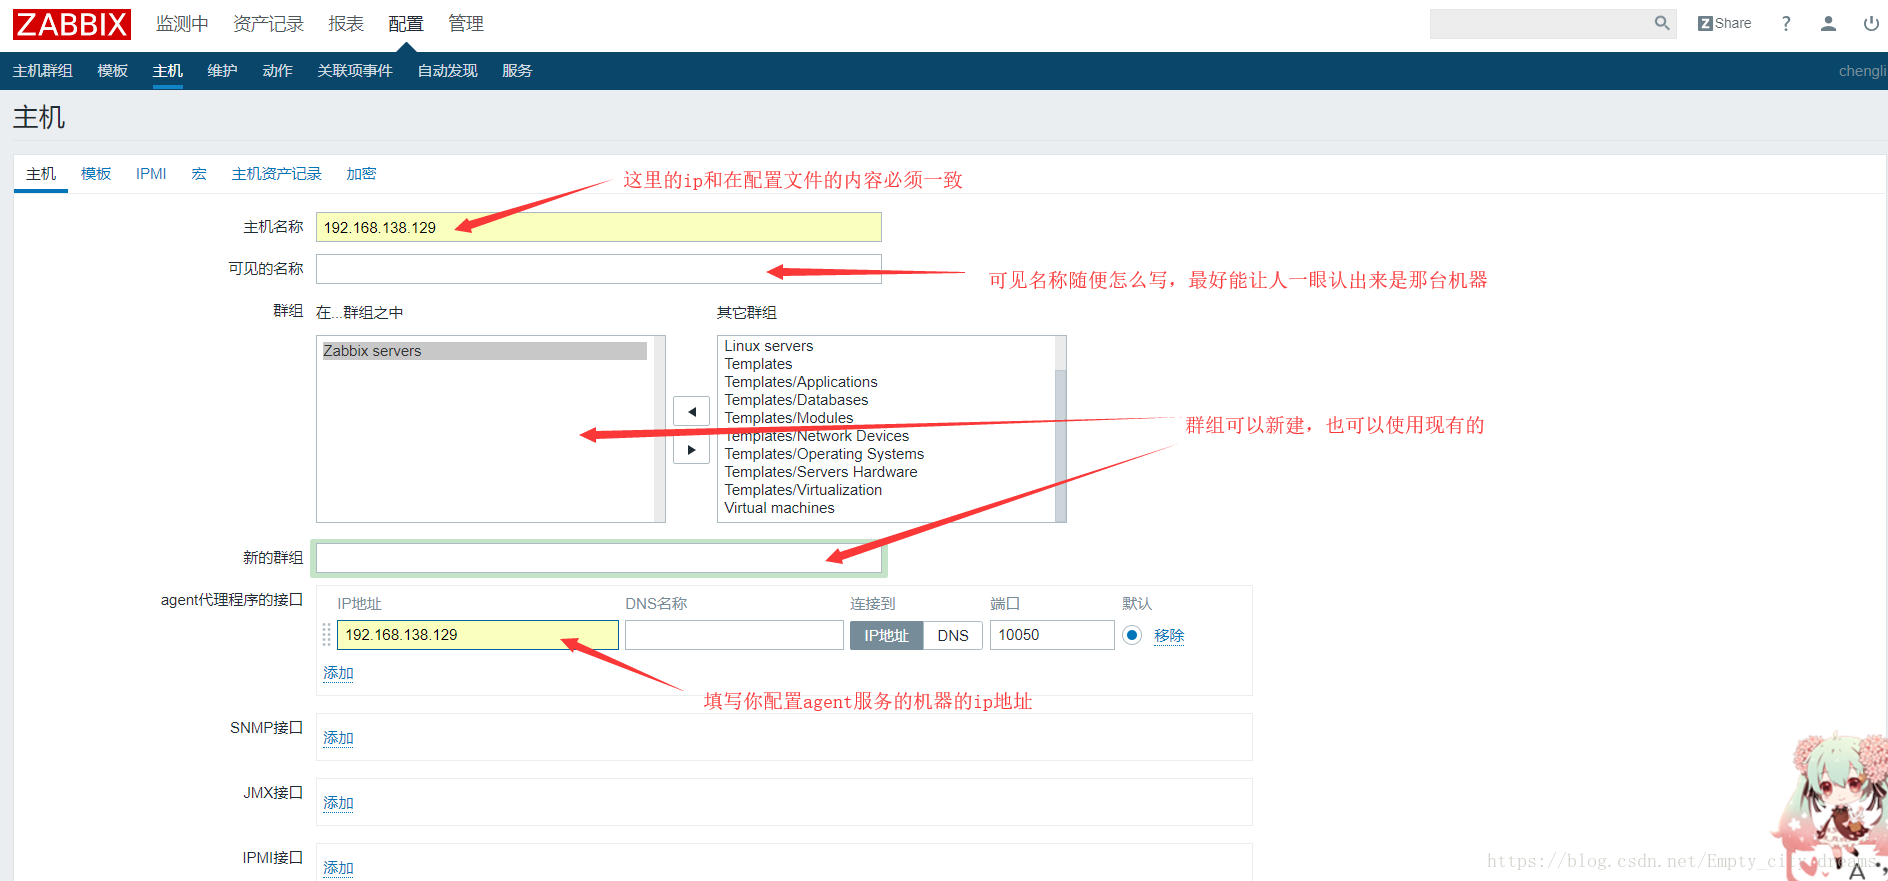
2.5.1添加主机
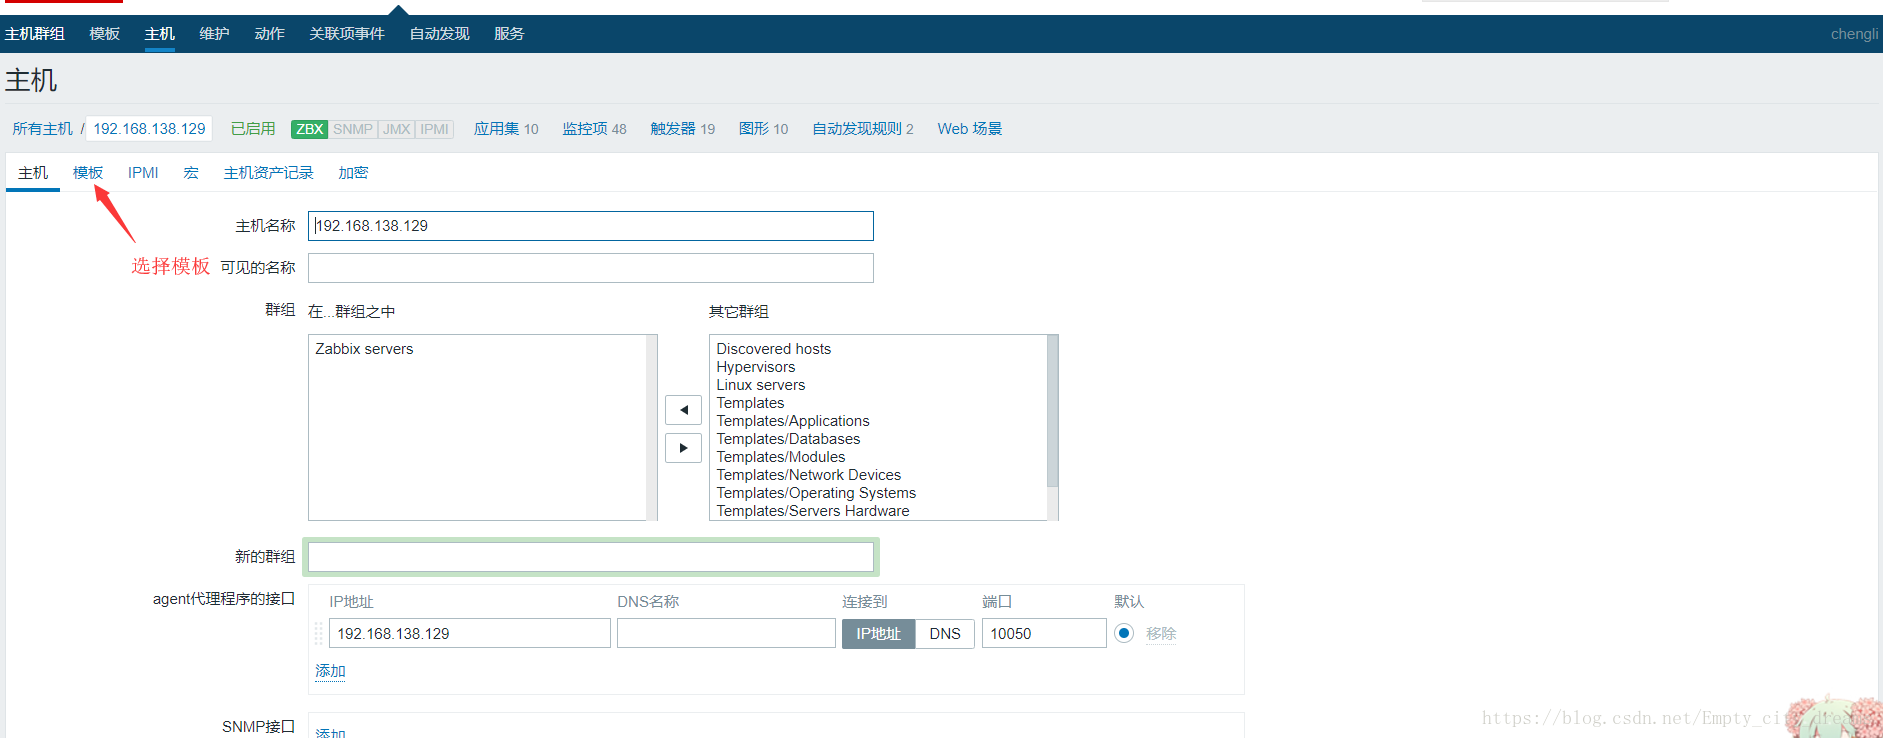
2.5.2添加主机设置
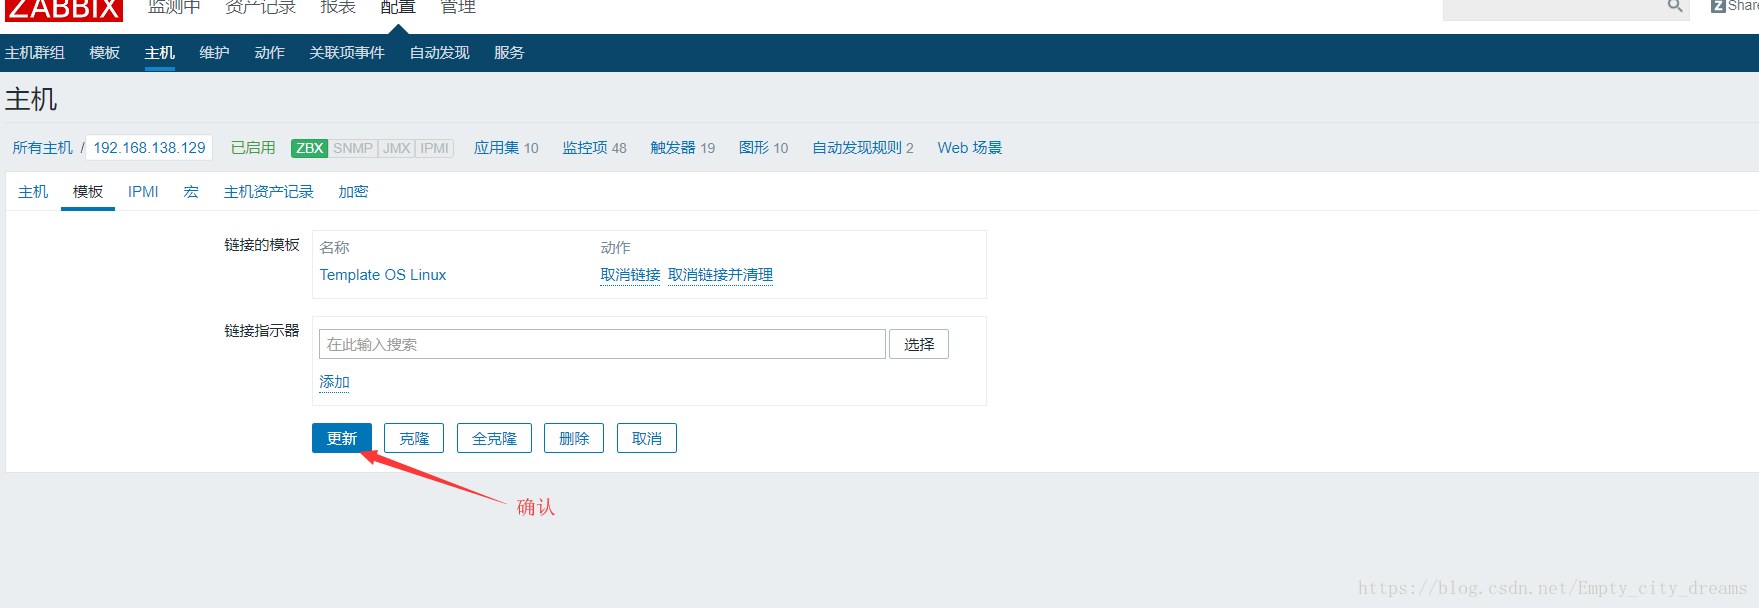
然后拉到最下面,点添加即可
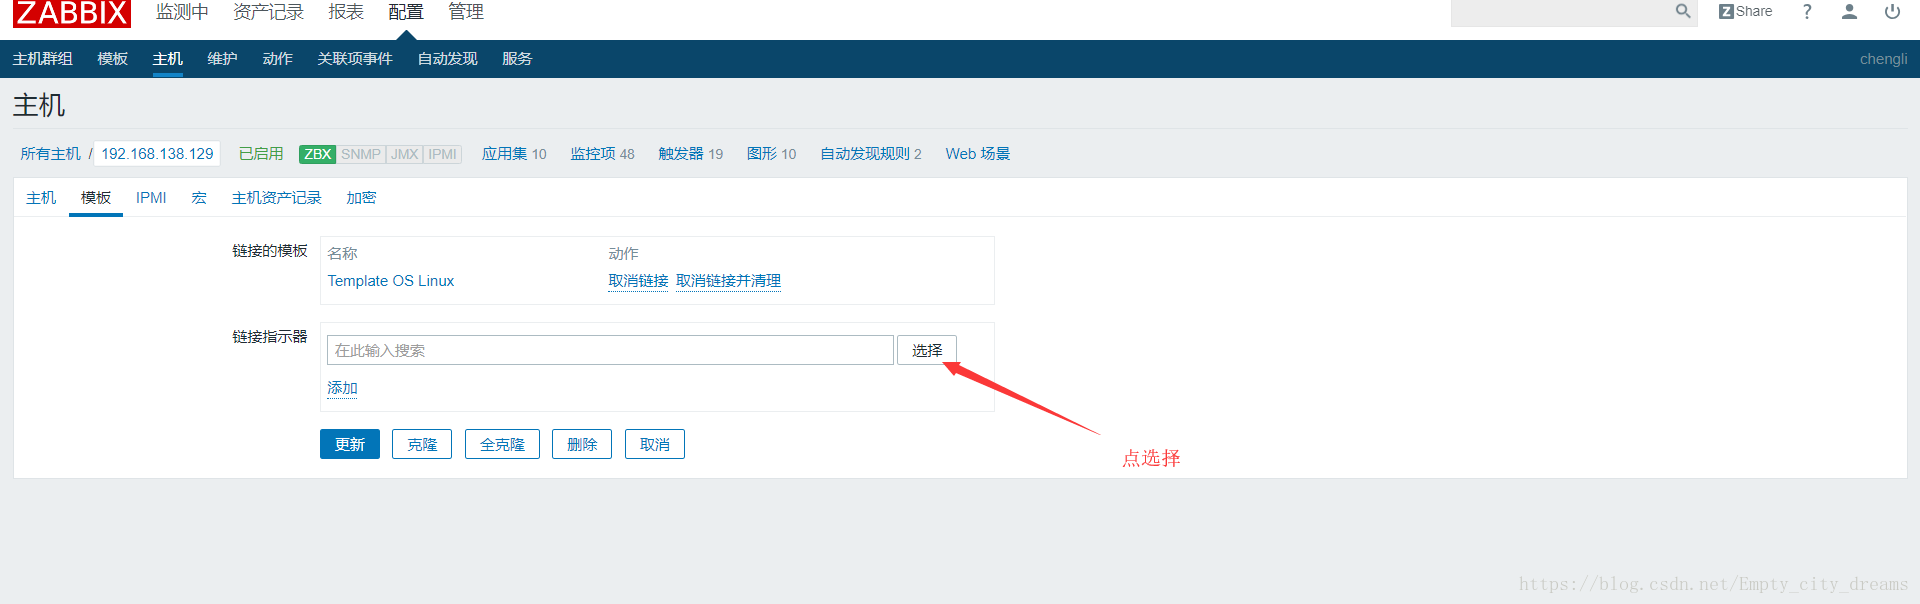
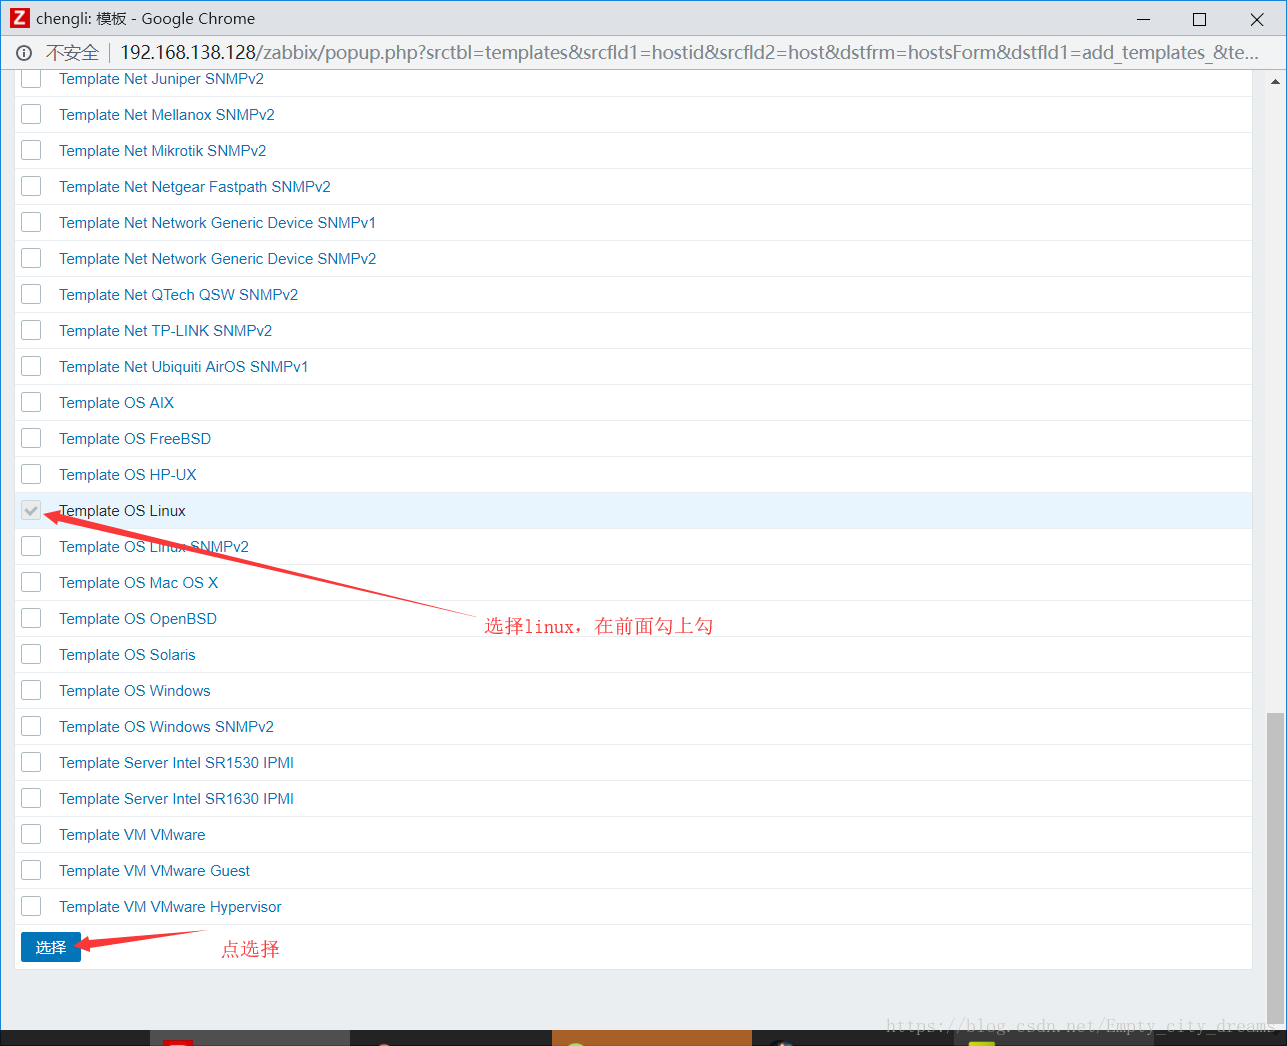
2.5.3添加模板