微服务架构的趋势
随着数据量的不断增大,大数据时代的到来,互联网技术的不断发展和变革,微服务架构和云服务平台以及大数据成为了时下最热门的话题。现在,比较流行的微服务框架也有很多, 比如阿里的Dubbo,基于soringBoot的SpringCloud,Apache的thrift,google的Grpc,这些都提供了很多高并发以及负载均衡等的一系列的解决方案。而我们今天的主角,就是热度最高的SpringCloud,目前只支持java。
什么是SpringCloud
springCloud是基于SpringBoot的一整套实现微服务的框架。他提供了微服务开发所需的配置管理、服务发现、断路器、智能路由、微代理、控制总线、全局锁、决策竞选、分布式会话和集群状态管理等组件。 而SpringCloud之所以又这么完善的解决方案和体系,得益于他兼容了很多优秀的开源的框架,这个之后会具体的一个个温习。今天,我们就先从SpringCloud的启动开始看,学习一下他的启动和加载过程。
SpringCloud的启动方式
相比大家对于SpringBoot或者SpringCloud都不陌生,他的启动方式很简单:
@SpringBootApplication
@EnableFeignClients
@EnableDiscoveryClient
public class EurekaClientApplication {

	public static void main(String[] args) {
		SpringApplication.run(EurekaClientApplication.class, args);
	}
}
当然,也可以分开写,像下面这样:
@SpringBootApplication
@EnableFeignClients
@EnableDiscoveryClient
public class EurekaClientApplication {

	public static void main(String[] args) {
		SpringApplication application = new SpringApplication(EurekaClientApplication.class);
		application.run(args);
	}
}
其实二者的本质是完全一样的。@SpringBootApplication注解就是备注这个服务为SpringBoot服务,关于注解这里就先不详细讲了,之后会单独花时间去详细说明,结合反射一起。今天,先重点弄清楚启动流程以及都做了什么。我们就按照第二种模式,分两个方法进行探索。
初始化SpringApplication
首先看第一行代码,SpringApplication application = new SpringApplication(EurekaClientApplication.class);这个是一个简单的构造方法,大概能够猜测是实例化一个SpringApplication。接下来上代码:
    public SpringApplication(ResourceLoader resourceLoader, Class... primarySources) {
        this.sources = new LinkedHashSet();
        this.bannerMode = Mode.CONSOLE;
        this.logStartupInfo = true;
        this.addCommandLineProperties = true;
        this.headless = true;
        this.registerShutdownHook = true;
        this.additionalProfiles = new HashSet();
        this.resourceLoader = resourceLoader;
        Assert.notNull(primarySources, "PrimarySources must not be null");
        this.primarySources = new LinkedHashSet(Arrays.asList(primarySources));
        this.webApplicationType = this.deduceWebApplicationType();
        this.setInitializers(this.getSpringFactoriesInstances(ApplicationContextInitializer.class));
        this.setListeners(this.getSpringFactoriesInstances(ApplicationListener.class));
        this.mainApplicationClass = this.deduceMainApplicationClass();
    }
重点来了,这里主要做了三件事。
- 1.属性赋值,这个很好理解
- 2.检查服务的类型,web项目还是普通项目,也就是this.webApplicationType = this.deduceWebApplicationType();这行代码。推断当前环境是哪种Web环境(Servlet、Reactive),或者不是Web环境,判断逻辑是Classpath是否有相应环境需要的类,比如DispatcherHandler,.servlet.DispatcherServlet,代码思路比较清晰,源码就不贴了,大家有时间可以去看一下。
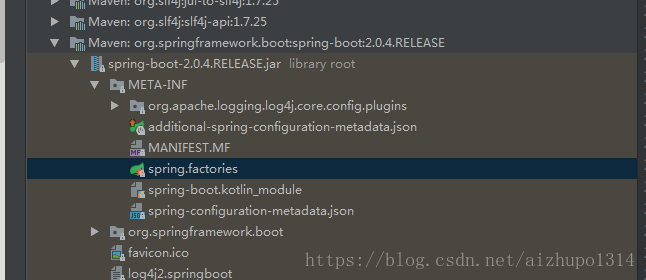
- 3.初始化initializers,它是一个用来存放SpringApplication所需的ApplicationContextInitializer实例的ArrayList,这些实例是用来初始化应用程序的上下文环境的。走读代码发现,这里会加载所有继承 ApplicationContextInitializer的实现类。在Spring中也有一种类似于Java SPI(service provider interface 不了解的可以百度了解一下)的加载机制。它在META-INF/spring.factories文件中配置接口的实现类名称,然后在程序中读取这些配置文件并实例化。这种自定义的SPI机制是Spring Boot Starter实现的基础。
Set<String> names = new LinkedHashSet(SpringFactoriesLoader.loadFactoryNames(type, classLoader));
List<T> instances = this.createSpringFactoriesInstances(type, parameterTypes, classLoader, args, names);
这两行代码就是具体实现,他会加载所有spring包下的META-INF/spring.factories,里面会有类实现接口的描述,这样,通过接口,可以找到所有的实现类,进而初始化这些类的实例对象。
上面有具体的路径,大家可以点进去看一下,具体的接口和实现类的描述和排版,类似于一个键值对的关系。
- 4.初始化listeners,方法和上面雷同,导入所有的ApplicationListener的实现类并创建实例对象。
- 5.deduceMainApplicationClass()推断当前的应用程序的入口类,即我们的EurekaClientApplication.class。因为这里入参可以是多个,维护的是一个set,所以会执行这个操作,对于我们这个来说,mainApplicationClass = EurekaClientApplication.class。
启动 Spring 应用程序
这里,就是我们之前启动SpringCloud的第二行代码,调用SpringApplicaiton的run方法。这里代码模块较复杂,建议debug模式下一步步细看,首先,我们贴出源码:
public ConfigurableApplicationContext run(String... args) {
        StopWatch stopWatch = new StopWatch();
        stopWatch.start();
        ConfigurableApplicationContext context = null;
        Collection<SpringBootExceptionReporter> exceptionReporters = new ArrayList();
        this.configureHeadlessProperty();
        SpringApplicationRunListeners listeners = this.getRunListeners(args);
        listeners.starting();

        Collection exceptionReporters;
        try {
            ApplicationArguments applicationArguments = new DefaultApplicationArguments(args);
            ConfigurableEnvironment environment = this.prepareEnvironment(listeners, applicationArguments);
            this.configureIgnoreBeanInfo(environment);
            Banner printedBanner = this.printBanner(environment);
            context = this.createApplicationContext();
            exceptionReporters = this.getSpringFactoriesInstances(SpringBootExceptionReporter.class, new Class[]{ConfigurableApplicationContext.class}, new Object[]{context});
            this.prepareContext(context, environment, listeners, applicationArguments, printedBanner);
            this.refreshContext(context);
            this.afterRefresh(context, applicationArguments);
            stopWatch.stop();
            if(this.logStartupInfo) {
                (new StartupInfoLogger(this.mainApplicationClass)).logStarted(this.getApplicationLog(), stopWatch);
            }

            listeners.started(context);
            this.callRunners(context, applicationArguments);
        } catch (Throwable var10) {
            this.handleRunFailure(context, var10, exceptionReporters, listeners);
            throw new IllegalStateException(var10);
        }

        try {
            listeners.running(context);
            return context;
        } catch (Throwable var9) {
            this.handleRunFailure(context, var9, exceptionReporters, (SpringApplicationRunListeners)null);
            throw new IllegalStateException(var9);
        }
    }
- 首先,启动监听StopWatch,主要进行响应时间的监听和输出
- 设置java.awt.headless模式,来进行简单的图像处理,无需调用server设备, 很好解决linux环境下可能没有图形处理或者设备工具而带来的报错。这也是前面初始化SpringApplication的时候将java.awt.headless设置为true的原因。
- 加载SpringApplicationRunListeners实现类,还是熟悉的配方,遍历spring.factory,以接口作为key找寻对应的value。并且触发开始的事件。
- 接下来几个就是重头戏了。。首先,准备运行环境,prepareEnvironment,这里会根据之前设置的WebApplicationType和webenvironment来创建对应的运行环境,这里创建的是StandardServletEnvironment。具体代码就不贴出来了,它主要有两个方法,一个是设置一些PropertySources参数的方法,第二个方法是在后面的SpringApplication的refresh方法中调用的。
- configureEnvironment(environment, applicationArguments.getSourceArgs())这个方法不涉及到任何操作,大家可以浏览一下就跳过。
- printBanner就是我们经常说的打印的那个spring的日志,大家可以写一个文件替换它。
- createApplicationContext方法,是根据SpringApplication的webApplicationType来实例化对应的上下文,而webApplicationType就是第一大步里面判断并初始化的;如果webApplicationType的值是SERVLET,那么实例化AnnotationConfigServletWebServerApplicationContext,如果是REACTIVE则实例化AnnotationConfigReactiveWebServerApplicationContext(响应式编程,后续再看),如果既不是SERVLET、也不是REACTIVE,那么则是默认情况(也就是我们所说的非web引用),实例化AnnotationConfigApplicationContext。web应用这里就是实例化了AnnotationConfigServletWebServerApplicationContext。
- prepareContext,这个方法,看名字就能想到是准备上下文,也就是往我们上一步生成的AnnotationConfigServletWebServerApplicationContext上下文中继续填充属性。这里方法较多,主要是将context中的environment替换成SpringApplication中创建的environment,将SpringApplication中的initializers应用到context中,将SpringApplication中的listeners注册到context中,加载两个单例bean到beanFactory中,初始化资源加载器BeanDefinitionLoader,并广播ApplicationPreparedEvent事件。
- refreshContext方法做的事情更多,这里,才是创建了一个真正的Spring上下文容器。由于这里东西较多,涉及代码量较大,明天再从头到尾跟一遍。不漏一个细节,彻底弄清楚加载的流程。之后也会深入挖掘启动tomcat等的原理和流程。希望有兴趣的可以一起探讨。