Boost 1.59.0 编译支持Python3的链接库,生成vc120或vc140
官方编译的Boost中只带了Python2的链接库,Python3的链接库需要自己特别编译,官方编译版下载地址:http://sourceforge.net/projects/boost/files/boost-binaries
1. 将boost_1_59_0源代码解压到D:\Program Files\boost_1_59_0
2. 打开CMD或Visual Studio 2013 command prompt,
1) cd D:\Program Files\boost_1_59_0
2) bootstrap
3.按需要生成vc120或vc140 的win32或x64版本,注意生成的目录,不要搞混
A.如果需要32位的链接库,Python必须为32位;
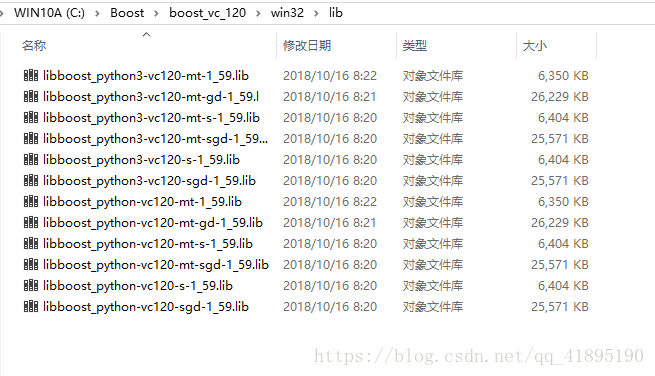
b2 toolset=msvc-12.0 --prefix=c:\boost\boost_vc_120\win32 --build-type=complete --with-python python=3.6 --abbreviate-paths address-model=32 install -j4
b2 toolset=msvc-14.0 --prefix=c:\boost\boost_vc_140\win32 --build-type=complete --with-python python=3.6 --abbreviate-paths address-model=32 install -j4


B.如果需要64位的链接库,Python必须为64位;
b2 toolset=msvc-12.0 --prefix=c:\boost\boost_vc_120\x64 --build-type=complete --with-python python=3.6 --abbreviate-paths address-model=64 install -j4
b2 toolset=msvc-14.0 --prefix=c:\boost\boost_vc_140\x64 --build-type=complete --with-python python=3.6 --abbreviate-paths address-model=64 install -j4


//b2 toolset=msvc-12.0 --build-type=complete --with-python --libdir=C:\Boost159 --abbreviate-paths architecture=x86 address-model=32 install -j4
4. 将C:\Boost\boost_vc_120\x64\lib中生成的python3链接库复制到官方编译版的lib文件夹中。
5. 新建C++工程,复制D:\Program Files\boost_1_59_0\libs\python\example\getting_started2.cpp到工程中,链接上boost_python3-vc120-mt-1_59.lib,编译生成一个dll文件。
6. 将dll文件改成pobject.pyd文件,与boost_python3-vc120-mt-1_59.dll一起拷贝到当前Python工程文件夹,在py文件中直接"import pobject",就能调用C++的函数了。
=================
// 如果要获取动态库:
bjam install stage --toolset=msvc-14.0 --stagedir="c:\boost\boost_vc_140\boost_vc_140A" link=shared runtime-link=shared threading=multi debug release (32位 address-model:如果没有这个参数,是生成32位的平台库,address-model=64是生成x64的平台库)
bjam install stage --toolset=msvc-12.0 --stagedir="C:\Boost\boost_vc_120" link=shared runtime-link=shared threading=multi debug release
bjam install stage --toolset=msvc-12.0 --stagedir="C:\Boost\boost_vc_120" link=shared runtime-link=shared threading=multi debug release

bjam install stage --toolset=msvc-12.0 --stagedir="D:\Program Files\boost_1_59_0\boost_vc_120" link=shared runtime-link=shared threading=multi debug release
// 如果是要获取静态库:
bjam install stage --toolset=msvc-14.0 --stagedir="c:\boost\boost_vc_140\boost_vc_140B" link=static runtime-link=static threading=multi debug release

解释完以上的命令后,再说完全编译的后果。
1.toolset:表示编译器工具,我安装的是VS2013,所以是msvc-12.0;
具体的版本对应关系,可以查看boost_1_59_0\tools\build\src\tools\msvc.jam中的# Version aliases节
# Version aliases.
.version-alias-6 = 6.0 ;
.version-alias-6.5 = 6.0 ;
.version-alias-7 = 7.0 ;
.version-alias-8 = 8.0 ;
.version-alias-9 = 9.0 ;
.version-alias-10 = 10.0 ;
.version-alias-11 = 11.0 ;
.version-alias-12 = 12.0 ;
.version-alias-14 = 14.0 ;
2.architecture:表示架构,也就是你的CPU架构,x86,x64,因为我安装的是win10 64位,所以使用了x64的架构
3.instruction-set:表示指令集,依然是8086指令集
4.address-model:如果没有这个参数,是生成32位的平台库,=x64是生成x64的平台库
5.link:表示生成动态/静态链接库,动态链接库是shared,静态链接库是static,一般都会编译成静态库,因为给出程序的时候打包boost的库会非常庞大
6.variant:表示生成的Debug或者release版本,一般情况下会两种版本都会编译出来的
7.threading:表示单/多线程编译,一般我们的程序都会用到多线程,所以选择了multi
8.runtime-link:表示动态/静态链接C/C++运行时库(C/C++ Runtime),我们选择了动态链接
9.without/with:表示不需要编译/需要编译哪些库,一些自己不用的库可以无需编译
10.stage/install:stage表示只生成库文件(DLL和Lib),install还会生成包含头文件的include目录,推荐使用stage,因为boost_1_62_0\boost中就是boost库完整的头文件,所以无需再拷贝一份出来。编译出来的库会放在stage文件夹中
这样一份完整的boost库就生成了,剩下就是直接使用到项目中了。
x86包含目录:C:\boost\x86\include\boost-1_59
x86库目录:C:\boost\x86\lib
x64包含目录:C:\boost\x64\include\boost-1_59
x64库目录:C:\boost\x64\lib