转自:https://blog.csdn.net/u014209205/article/details/78921870
在阿里云服务器上安装nginx中遇到一些问题,现将步骤罗列下,
环境是:centos7.4 nginx1.12.2
1.安装gcc
yum install gcc-c++
2.PCRE pcre-devel 安装
PCRE(Perl Compatible Regular Expressions) 是一个Perl库,包括 perl 兼容的正则表达式库。nginx 的 http 模块使用 pcre 来解析正则表达式,所以需要在 linux 上安装 pcre 库,pcre-devel 是使用 pcre 开发的一个二次开发库。nginx也需要此库。
命令:
yum install -y pcre pcre-devel
3.zlib 安装
zlib 库提供了很多种压缩和解压缩的方式, nginx 使用 zlib 对 http 包的内容进行 gzip ,所以需要在 Centos 上安装 zlib 库。
命令:
yum install -y zlib zlib-devel
4.OpenSSL 安装
OpenSSL 是一个强大的安全套接字层密码库,囊括主要的密码算法、常用的密钥和证书封装管理功能及 SSL 协议,并提供丰富的应用程序供测试或其它目的使用。
nginx 不仅支持 http 协议,还支持 https(即在ssl协议上传输http),所以需要在 Centos 安装 OpenSSL 库。
yum install -y openssl openssl-devel
5.下载解压
在nignx官网上下载,上传到阿里云服务器后解压
tar -zxvf nginx-1.12.0.tar.gz
6.安装
首先在解压后的文件加下执行
./configure
也可以自定义配置。
然后再在解压后的目录下执行
make install 进行安装
7.启动
默认是安装在/usr/local/nginx
cd /usr/local/nginx/sbin/
./nginx
指定配置文件启动
./nginx -c /usr/local/nginx/conf/nginx..conf
./nginx -s stop
./nginx -s quit
./nginx -s reload
8.重启
先停止再启动(推荐):
对 nginx 进行重启相当于先停止再启动,即先执行停止命令再执行启动命令。如下:
./nginx -s quit
./nginx
重新加载配置文件:
当 nginx的配置文件 nginx.conf 修改后,要想让配置生效需要重启 nginx,使用-s reload不用先停止 ngin x再启动 nginx 即可将配置信息在 nginx 中生效,如下:
./nginx -s reload
9.设置开机自动重启
即在rc.local增加启动代码就可以了。
vi /etc/rc.local
增加一行 /usr/local/nginx/sbin/nginx
设置执行权限:
chmod 755 rc.local
---------------------
作者:时光钟摆
来源:CSDN
原文:https://blog.csdn.net/u014209205/article/details/78921870
版权声明:本文为博主原创文章,转载请附上博文链接!
linux下安装阿里云服务器的nginx
https://blog.csdn.net/dabao87/article/details/80570050
在阿里云服务器上安装nginx中遇到一些问题,现将步骤罗列下,
环境是:centos7.4 nginx1.12.2
1.安装gcc
yum install gcc-c++
2.PCRE pcre-devel 安装
PCRE(Perl Compatible Regular Expressions) 是一个Perl库,包括 perl 兼容的正则表达式库。nginx 的 http 模块使用 pcre 来解析正则表达式,所以需要在 linux 上安装 pcre 库,pcre-devel 是使用 pcre 开发的一个二次开发库。nginx也需要此库。
命令:
yum install -y pcre pcre-devel
3.zlib 安装
zlib 库提供了很多种压缩和解压缩的方式, nginx 使用 zlib 对 http 包的内容进行 gzip ,所以需要在 Centos 上安装 zlib 库。
命令:
yum install -y zlib zlib-devel
4.OpenSSL 安装
OpenSSL 是一个强大的安全套接字层密码库,囊括主要的密码算法、常用的密钥和证书封装管理功能及 SSL 协议,并提供丰富的应用程序供测试或其它目的使用。
nginx 不仅支持 http 协议,还支持 https(即在ssl协议上传输http),所以需要在 Centos 安装 OpenSSL 库。
yum install -y openssl openssl-devel
5.下载解压
在nignx官网上下载,上传到阿里云服务器后解压
tar -zxvf nginx-1.12.0.tar.gz
6.安装
首先执行配置
./configure
也可以自定义配置。
然后在解压后的目录下执行
make install
这个时候如果启动nginx会报错:
在centos下启动nginx出现Failed to start nginx.service:unit not found
按照下面的步骤:
1. vim /etc/init.d/nginx
插入一下代码:
-
#!/bin/sh -
# nginx - this script starts and stops the nginx daemin -
# -
# chkconfig: - 85 15 -
# description: Nginx is an HTTP(S) server, HTTP(S) reverse \ -
# proxy and IMAP/POP3 proxy server -
# processname: nginx -
# config: /usr/local/nginx/conf/nginx.conf -
# pidfile: /usr/local/nginx/logs/nginx.pid -
# Source function library. -
. /etc/rc.d/init.d/functions -
# Source networking configuration. -
. /etc/sysconfig/network -
# Check that networking is up. -
[ "$NETWORKING" = "no" ] && exit 0 -
nginx="/usr/local/nginx/sbin/nginx" -
prog=$(basename $nginx) -
NGINX_CONF_FILE="/usr/local/nginx/conf/nginx.conf" -
lockfile=/var/lock/subsys/nginx -
start() { -
[ -x $nginx ] || exit 5 -
[ -f $NGINX_CONF_FILE ] || exit 6 -
echo -n $"Starting $prog: " -
daemon $nginx -c $NGINX_CONF_FILE -
retval=$? -
echo -
[ $retval -eq 0 ] && touch $lockfile -
return $retval -
} -
stop() { -
echo -n $"Stopping $prog: " -
killproc $prog -QUIT -
retval=$? -
echo -
[ $retval -eq 0 ] && rm -f $lockfile -
return $retval -
} -
restart() { -
configtest || return $? -
stop -
start -
} -
reload() { -
configtest || return $? -
echo -n $"Reloading $prog: " -
killproc $nginx -HUP -
RETVAL=$? -
echo -
} -
force_reload() { -
restart -
} -
configtest() { -
$nginx -t -c $NGINX_CONF_FILE -
} -
rh_status() { -
status $prog -
} -
rh_status_q() { -
rh_status >/dev/null 2>&1 -
} -
case "$1" in -
start) -
rh_status_q && exit 0 -
$1 -
;; -
stop) -
rh_status_q || exit 0 -
$1 -
;; -
restart|configtest) -
$1 -
;; -
reload) -
rh_status_q || exit 7 -
$1 -
;; -
force-reload) -
force_reload -
;; -
status) -
rh_status -
;; -
condrestart|try-restart) -
rh_status_q || exit 0 -
;; -
*) -
echo $"Usage: $0 {start|stop|status|restart|condrestart|try-restart|reload|force-reload|configtest}" -
exit 2 -
esac
用命令
cd /etc/init.d
4. 依此执行以下命令
# chmod 755 /etc/init.d/nginx
# chkconfig --add nginx (注意add前面是两个短横线-)
5. 开启nginx
# service nginx start

这样的之后就表示已经成功。
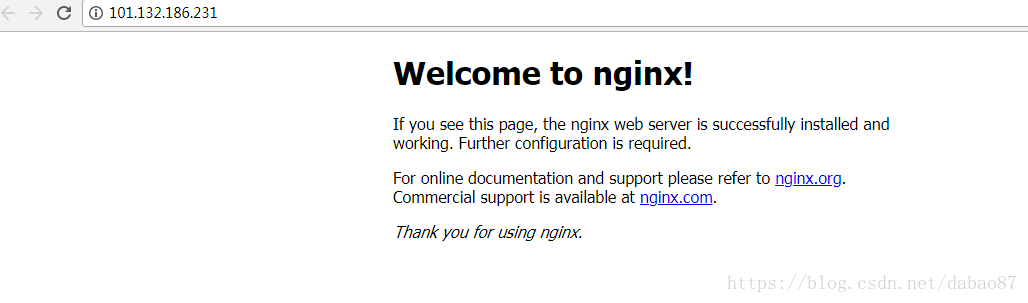
成功!!!
参考:https://blog.csdn.net/u014209205/article/details/78921870
参考:https://www.cnblogs.com/ansibee/p/8087476.html
版权声明:如果此问题解答不清楚,请加QQ群113191612咨询 https://blog.csdn.net/songchuan0201/article/details/62037010
重启服务器后,nginx服务起不来了,用命令 service nginx start,报如下错误:
nginx: [error] open() "/alidata/server/nginx/logs/nginx.pid" failed (2: No such file or directory)
解决办法:在logs目录下手动创建一个 nginx.pid文件
再次启动nginx服务,又报下面错误:
nginx: [emerg] open() "/usr/local/nginx/logs/access.log" failed (21: Is a directory)
看了网上好多解决办法,都是用 -c来指向nginx的配置文件,但是不行,根据错误提示,看到access.log是一个文件夹,来到logs目录下,发现重启完服务器后,access.log确实变成了文件夹,把这文件夹删掉,重新创建一个access.log文件, 命令:touch access.log
再次启动nginx服务,报端口被占用
Nginx [emerg]: bind() to 0.0.0.0:80 failed (98: Address already in use)
解决办法:使用命令关闭占用80端口的程序
sudo fuser -k 80/tcp
再次启动nginx服务,成功,解决了两个半小时。。。
---------------------
作者:小桥流水人家007
来源:CSDN
原文:https://blog.csdn.net/songchuan0201/article/details/62037010
版权声明:本文为博主原创文章,转载请附上博文链接!