参考Guest Guide文档"Deploying a Windows Guest with the Root OS Kernel"及"Deploying VxWorks Guests with the Root OS Kernel[x86_64]"。
在Workbench中新建ROMFS文件系统,命名为romfs:


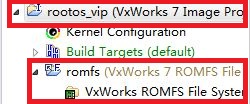
拖动新建的romfs工程至rootos_vip:
然后点击Add Extenal...,添加rootos_vip工程的vmbios文件:


点击Add Extenal...,添加vx_vip工程的镜像文件vxWorks:


新建系统模板vxworks7_t及windows10_t:


注:此处的vm configure $vmName device add rtc_dev在运行时无法添加,导致其后边的vnic2 vmem1.1 vmem4.1均无法添加,因此需要暂时用#注掉。
新建hvconfig脚本文件vxworks7_hvconfig.txt及windows10_hvconfig.txt:

注:此处似乎应该用#注掉pciEthernet_1:0及pciEthernet_2:0,因为RootOS启动时占用了,因此无法分配给GuestOS。注掉后重新编译rootos_vip工程。注意


点击Add Extenal...,添加配置系统的hvconfig脚本及系统模板:


再次编译rootos_vip工程,得到新的RootOS镜像:


在RootOS的VIP工程中创建romfs文件系统,将VIP工程目录下的itl_hv/vmbios/vmbios文件添加进romfs里,将GuestOS VxWorks的镜像文件添加进romfs里,将配置系统的hvconfig脚本及系统模板加进romfs,之后Build RootOS的VIP工程,将VxWorks镜像复制到另一个U盘。