1)制作环境为CentOS7(就借用上面的计算节点了),并准备好64位win7安装iso;
2)验证安装CentOS7的硬件设备是否这次虚拟化:
[root@compute ~]# egrep '(vmx|svm)' -o /proc/cpuinfo
vmx
vmx
vmx
vmx
...
出现VMX说明支持;
3)安装虚拟化软件:[root@compute ~]# yum install -y qemu-kvm qemu-img virt-manager libvirt libvirt-python python-virtinst libvirt-clientvirt-install virt-viewer bridge-utils
4)创建链接:[root@compute ~]# ln -s /usr/libexec/qemu-kvm /usr/bin/kvm # ln -s /usr/bin/qemu-img /usr/bin/kvm-img

5)创建目录并配置权限:
[root@compute ~]# mkdir win7
[root@compute ~]# cd win7
[root@compute win7]# qemu-img create -f qcow2 win7.qcow2 20G
Formatting 'win7.qcow2', fmt=qcow2 size=21474836480 cluster_size=65536 lazy_refcounts=off refcount_bits=16
[root@compute win7]# cd
[root@compute ~]# chown -R qemu:qemu /root/win7/
6)将win7的安装iso,磁盘驱动virtio-win-0.1.160_amd64.vfd和网卡驱动virtio-win-0.1.160.iso(下载地址:https://docs.fedoraproject.org/en-US/quick-docs/creating-windows-virtual-machines-using-virtio-drivers/index.html)拷贝到这个目录下,并将iso改名为win7.ios,完成后如下:
[root@compute win7]# ll
总用量 3660860
-rw-r--r-- 1 root root 2949120 11月 3 10:38 virtio-win-0.1.160_amd64.vfd
-rw-r--r-- 1 root root 322842624 11月 4 13:32 virtio-win-0.1.160.iso
-rw-r--r-- 1 root root 3419052032 11月 3 10:45 win7.iso
-rwxrwxrwx 1 root root 196928 11月 3 10:13 win7.qcow2
7)启动基于windows7的kvm虚拟机,映射驱动器到vfd软盘:
[root@compute ]# kvm -name win-lh -m 2048 -cdrom /root/win7/win7.iso -drive file=/root/win7/virtio-win-0.1.160.iso,media=cdrom,index=1 -drive file=win7.qcow2,media=disk,index=1,if=virtio,format=qcow2 -fda /root/win7/virtio-win-0.1.160_amd64.vfd -boot order=dc,once=d -net nic,model=virtio -net user -boot c -balloon virtio -display vnc=:3
8)PC上用vnc viewer访问:10.47.181.27:3
安装win7过程中注意如下截图:
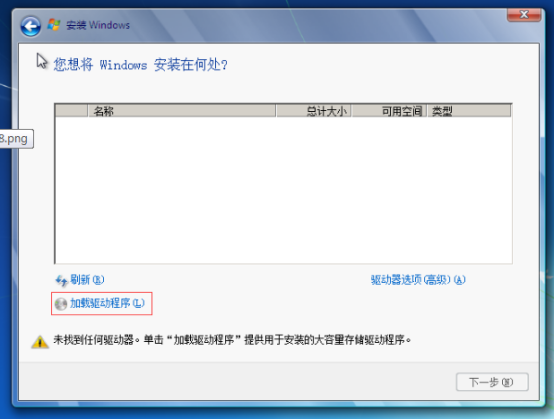
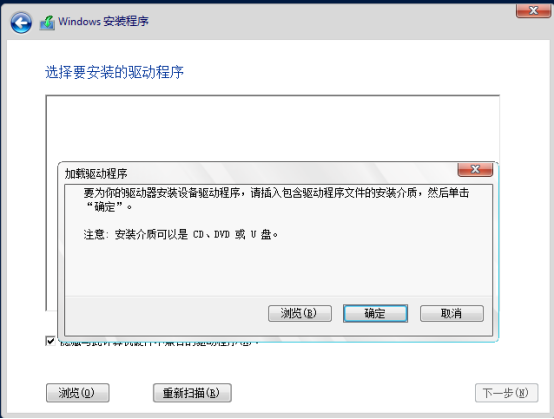
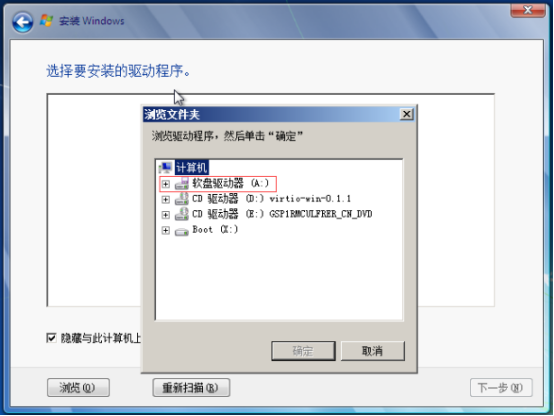
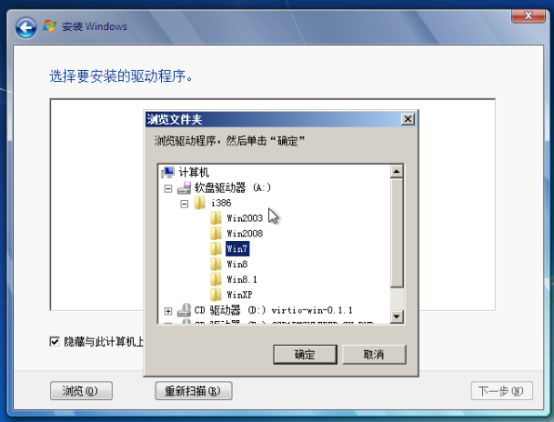
此时就能看到磁盘,并进行新建、格式化、安装等操作了。
9)安装完成后,需要再驱动网卡和PCI设备,如下:

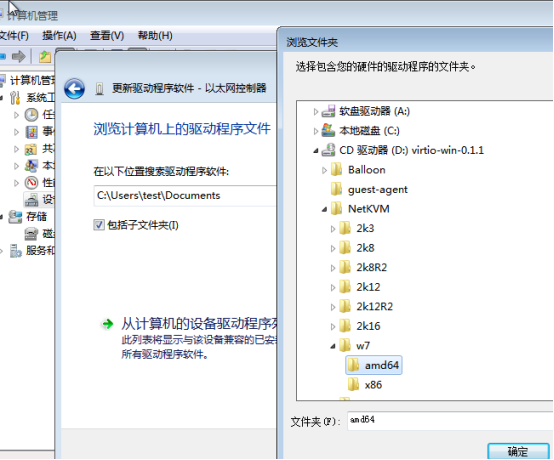
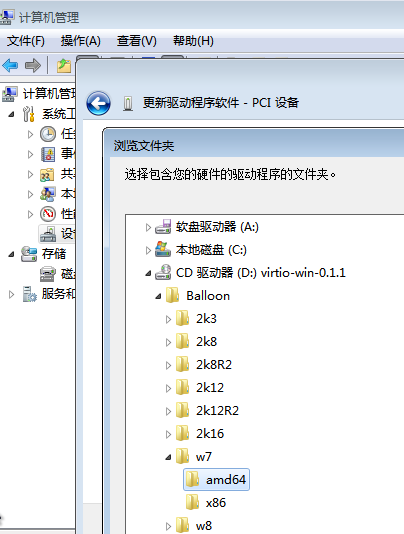
上面驱动了网卡,下面驱动PCI设备:
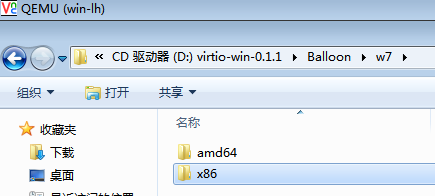
下面手工安装balloon服务:
拷贝下面这个x86文件夹到C盘根目录:
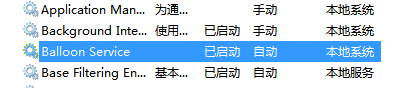
然后以管理员身份运行命令行并执行如下blnsvr.exe -i命令:

检查balloon服务是否已运行并自启动:
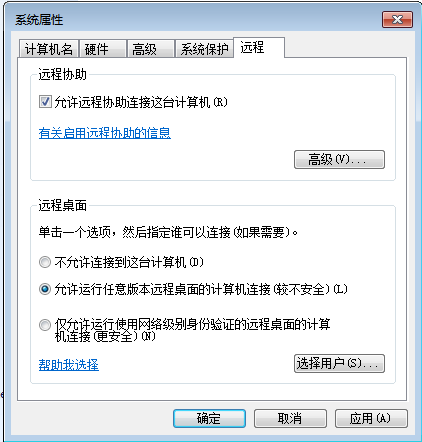
然后关闭防火墙并开启远程访问:

10)先关机,然后进行镜像格式转换并上传:
[root@compute win7]# qemu-img info win7.qcow2
[root@compute win7]# qemu-img convert -f qcow2 -O qcow2 win7.qcow2 window7_64.qcow2
[root@compute win7]# source /root/admin-openrc.sh
[root@compute win7]# openstack image create "windows7_64" --file window7_64.qcow2 --disk-format qcow2 --container-format bare --public
[root@compute win7]# openstack image list
+--------------------------------------+--------------+--------+
| ID | Name | Status |
+--------------------------------------+--------------+--------+
| ab77d7cc-b86e-485a-a237-f8aae5734266 | centos7 | active |
| b50f92a7-f49b-4908-9144-568f98dbbb8f | cirros | active |
| 3bb2a110-e040-4e3d-81bd-9606ce71fbff | cirros-0.3.4 | active |
| 58046458-f0f9-4084-8e12-63786ccc83d2 | ubuntu14.04 | active |
| c804661a-cb66-4f74-a14e-cec8ae3a1139 | windows7_64 | active |
+--------------------------------------+--------------+--------+
