前言
本文心得包括案例基于《重新定义》,动态扩容Eureka是为了不影响已运行服务的情况下进行扩容。
正文
利用了config进行统一管理了eureka服务的配置,首先创建一个父module,主要就是把web工程依赖的jar包含在内,pom如下
<groupId>cn.springcloud.book</groupId>
	<artifactId>ch3-1</artifactId>
	<version>0.0.1-SNAPSHOT</version>
	<packaging>pom</packaging>

	<name>ch3-1</name>
	<description>ch3-1</description>

	<modules>
		<module>ch3-1-config-server</module>
		<module>ch3-1-eureka-server</module>
		<module>ch3-1-eureka-client</module>
	</modules>

	<parent>
		<groupId>org.springframework.boot</groupId>
		<artifactId>spring-boot-starter-parent</artifactId>
		<version>2.0.3.RELEASE</version>
		<relativePath/> <!-- lookup parent from repository -->
	</parent>

	<properties>
		<project.build.sourceEncoding>UTF-8</project.build.sourceEncoding>
		<project.reporting.outputEncoding>UTF-8</project.reporting.outputEncoding>
		<java.version>1.8</java.version>
		<spring-cloud.version>Finchley.RELEASE</spring-cloud.version>
	</properties>

	<dependencyManagement>
		<dependencies>
			<dependency>
				<groupId>org.springframework.cloud</groupId>
				<artifactId>spring-cloud-dependencies</artifactId>
				<version>${spring-cloud.version}</version>
				<type>pom</type>
				<scope>import</scope>
			</dependency>
		</dependencies>
	</dependencyManagement>

	<dependencies>
		<dependency>
			<groupId>org.springframework.boot</groupId>
			<artifactId>spring-boot-starter-actuator</artifactId>
		</dependency>
		<dependency>
			<groupId>org.springframework.boot</groupId>
			<artifactId>spring-boot-starter-web</artifactId>
		</dependency>
		<dependency>
			<groupId>org.springframework.boot</groupId>
			<artifactId>spring-boot-starter-test</artifactId>
			<scope>test</scope>
		</dependency>
	</dependencies>
然后在这个父module下创建ConfigServer 名为:ch3-1-config-server,pom如下
<parent>
        <groupId>cn.springcloud.book</groupId>
        <artifactId>ch3-1</artifactId>
        <version>0.0.1-SNAPSHOT</version>
        <relativePath>../pom.xml</relativePath> <!-- lookup parent from repository -->
    </parent>

    <properties>
        <project.build.sourceEncoding>UTF-8</project.build.sourceEncoding>
        <project.reporting.outputEncoding>UTF-8</project.reporting.outputEncoding>
        <java.version>1.8</java.version>
    </properties>

    <dependencies>
        <dependency>
            <groupId>org.springframework.cloud</groupId>
            <artifactId>spring-cloud-config-server</artifactId>
        </dependency>
    </dependencies>
当前configserver的main方法及配置文件
@SpringBootApplication
@EnableConfigServer
public class Ch31ConfigServerApplication {

    public static void main(String[] args) {
        SpringApplication.run(Ch31ConfigServerApplication.class, args);
    }
}
spring:
application:
name: config-server
profiles:
active: native
server:
port: 8888在resources下创建一个目录叫 config,里面创建三个yml文件,这里为了方便,我建了三个配置文件。代码如下
第一个是eureka的客户端配置文件
server:
port: 8081
spring:
application:
name: eureka-client1
eureka:
client:
serviceUrl:
# defaultZone: http://localhost:8761/eureka/ # one eureka server
# defaultZone: http://localhost:8761/eureka/,http://localhost:8762/eureka/ # two eureka server
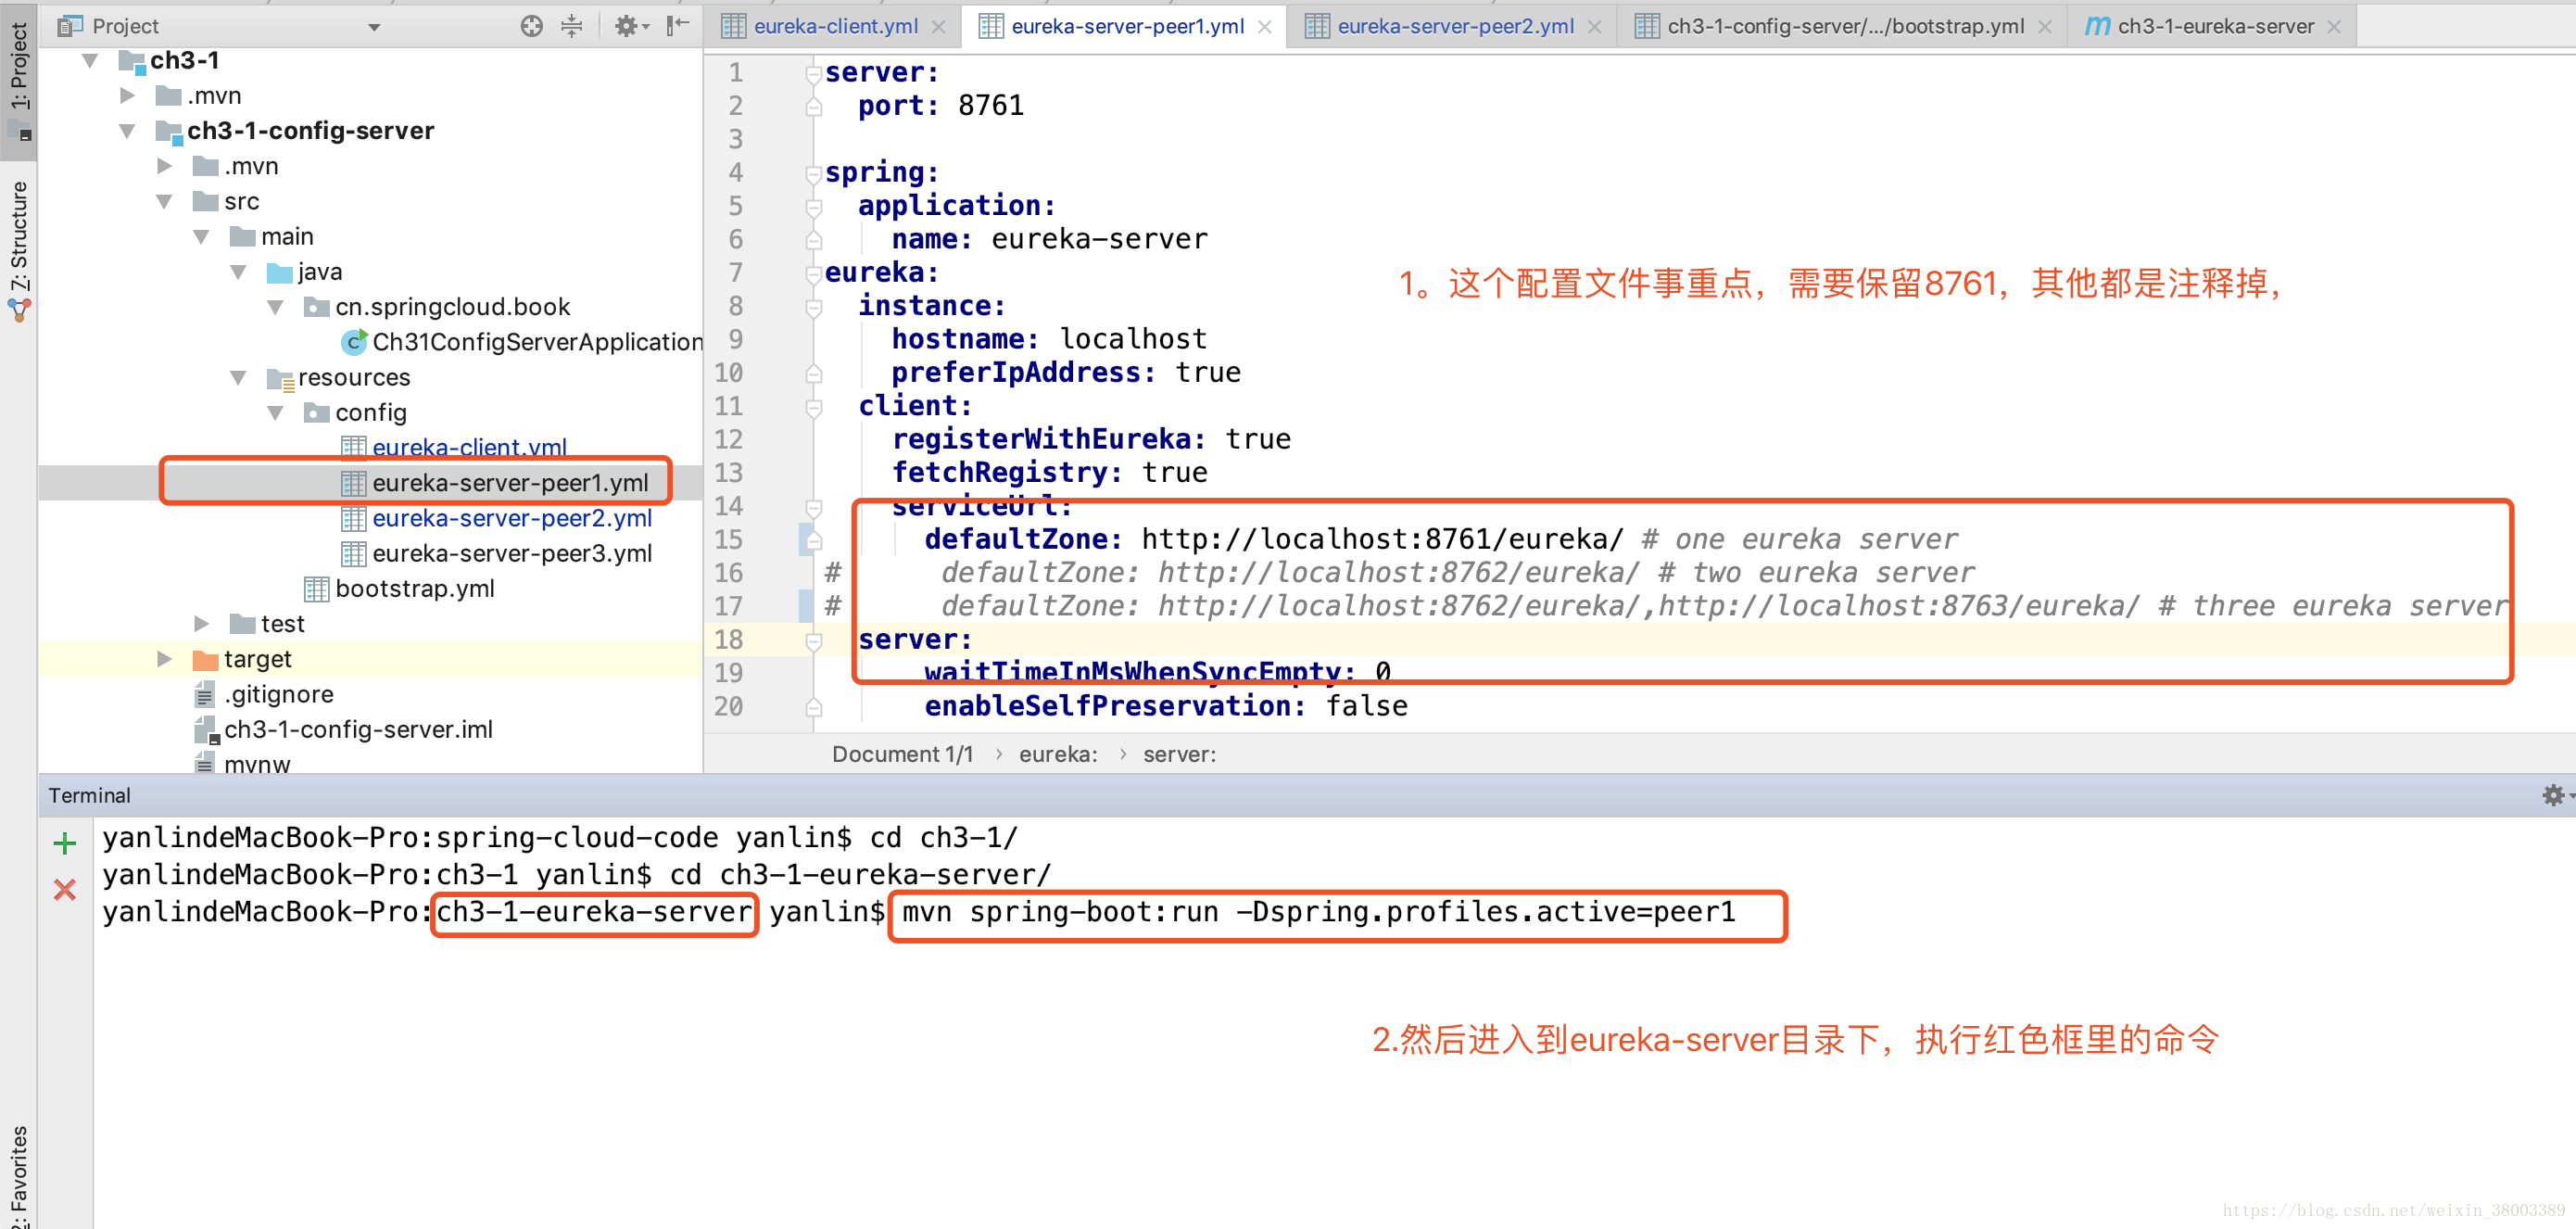
defaultZone: http://localhost:8761/eureka/,http://localhost:8762/eureka/,http://localhost:8763/eureka/ # three eureka server第二个是eureka服务的peer1文件
server:
  port: 8761

spring:
  application:
    name: eureka-server
eureka:
  instance:
    hostname: localhost
    preferIpAddress: true
  client:
    registerWithEureka: true
    fetchRegistry: true
    serviceUrl:
#      defaultZone: http://localhost:8761/eureka/ # one eureka server
#      defaultZone: http://localhost:8762/eureka/ # two eureka server
      defaultZone: http://localhost:8762/eureka/,http://localhost:8763/eureka/ # three eureka server
  server:
      waitTimeInMsWhenSyncEmpty: 0
      enableSelfPreservation: false
第三个是eureka服务的peer2文件
server:
  port: 8762

eureka:
  instance:
    hostname: localhost
    preferIpAddress: true
  client:
    registerWithEureka: true
    fetchRegistry: true
    serviceUrl:
#      defaultZone: http://localhost:8761/eureka/ # two eureka server
      defaultZone: http://localhost:8761/eureka/,http://localhost:8763/eureka/ # three eureka server
  server:
      waitTimeInMsWhenSyncEmpty: 0
      enableSelfPreservation: false
创建EurekaServer 工程名:ch3-1-eureka-server
pom文件
<groupId>cn.springcloud.book</groupId>
    <artifactId>ch3-1-eureka-server</artifactId>
    <version>0.0.1-SNAPSHOT</version>
    <packaging>jar</packaging>

    <name>ch3-1-eureka-server</name>
    <description>ch3-1-eureka-server</description>

    <parent>
        <groupId>cn.springcloud.book</groupId>
        <artifactId>ch3-1</artifactId>
        <version>0.0.1-SNAPSHOT</version>
        <relativePath>../pom.xml</relativePath> <!-- lookup parent from repository -->
    </parent>

    <properties>
        <project.build.sourceEncoding>UTF-8</project.build.sourceEncoding>
        <project.reporting.outputEncoding>UTF-8</project.reporting.outputEncoding>
        <java.version>1.8</java.version>
    </properties>

    <dependencies>
        <dependency>
            <groupId>org.springframework.cloud</groupId>
            <artifactId>spring-cloud-starter-netflix-eureka-server</artifactId>
        </dependency>
        <dependency>
            <groupId>org.springframework.cloud</groupId>
            <artifactId>spring-cloud-starter-config</artifactId>
        </dependency>
    </dependencies>
eureka服务的两个配置文件如下,分别是bootstrap.yml 和application.yml
spring:
  application:
    name: eureka-server
  cloud:
    config:
      uri: http://localhost:8888
management:
  endpoints:
    web:
      exposure:
        include: '*'
eureka:
server:
peer-eureka-nodes-update-interval-ms: 10000 #默认是10分钟即600000,这里为了验证改为10秒main方法启动类
@SpringBootApplication
@EnableEurekaServer
public class Ch31EurekaServerApplication {

    public static void main(String[] args) {
        SpringApplication.run(Ch31EurekaServerApplication.class, args);
    }
}
最后一个就是创建eurakaClient
他的配置文件和eureka服务的两个配置文件都一样分别是bootstrap.yml 和application.yml ,区别是
spring:
  application:
    name: eureka-client
eurekaClient 的启动类
@SpringBootApplication
@EnableDiscoveryClient
public class Ch31EurekaClientApplication {

    public static void main(String[] args) {
        SpringApplication.run(Ch31EurekaClientApplication.class, args);
    }
}
现在所有代码都准备好了,我们来首先启动configServer
然后,下面的操作很关键,大家一定跟上,我会说的很清楚的
启动时会有报错信息,不要管,最后的结果是启动成功就ok

访问 http://localhost:8761/,可以看到注册成功

下面就开始进行对eureka-server进行动态扩容了
我们来修改peer1文件

然后修改peer2文件


然后我们重启config-server,使配置生效。然后用如下命令分别刷新eureka-client以及eureka-server-peer1
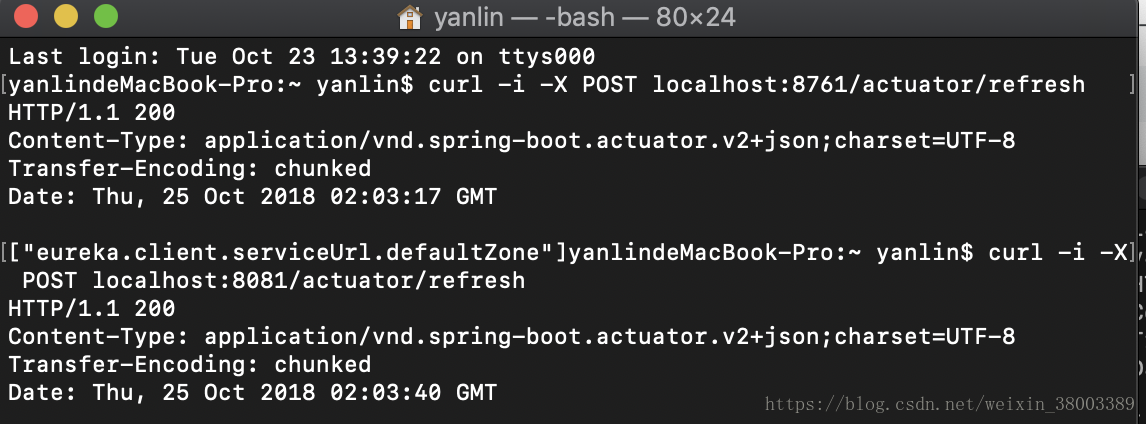
分别访问http://localhost:8761/ ,和http://localhost:8762/,这里只截一个图了。

动态扩容成功
注:对本文有异议或不明白的地方微信探讨,wx:15524579896