目前想要自己搭建一个个人博客,在这记录博客搭建的过程。
博客采用Django框架搭建。该框架可以快速搭建出一个网站,并且是一个开源框架,由python编写。
1、目前的博客想法比较简单。主要对博客的功能有如下几个方面:

暂时先想着实现这些功能,等搭建好之后在完善其他模块。
2、需要哪些技能

3、搭建虚拟环境
个人开发环境是Ubuntu系统,python3.6,pycharm。windows环境下也类似。
今天想着先把环境搭建好。
首先搭建虚拟环境:
选定一个目录作为开发目录,我选择了MyBlogs文件夹。
进入MyBlogs。
felix@felix-computer:~/PycharmProjects$ mkdir MyBlogs
felix@felix-computer:~/PycharmProjects$ cd MyBlogs
felix@felix-computer:~/PycharmProjects/MyBlogs$
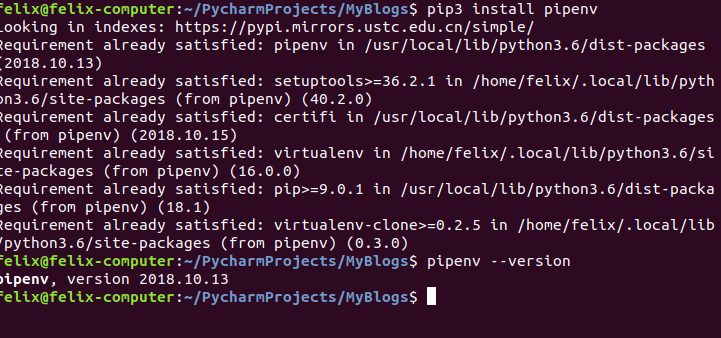
搭建pipenv环境,首先要安装pipenv。执行如下命令。
pip3 install pipenv
初始化虚拟环境:pipenv install

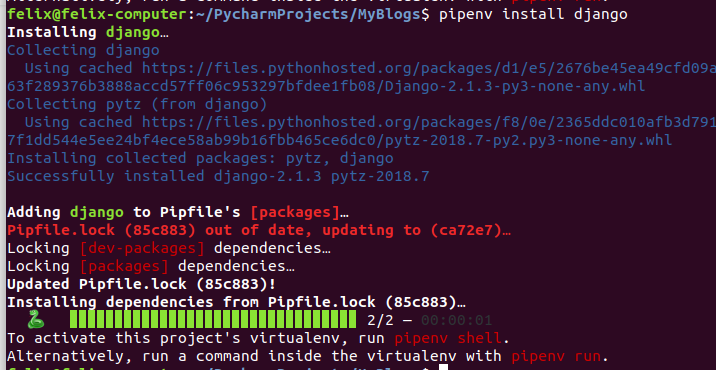
安装django:pipenv install django
然后初始化包管理:git init

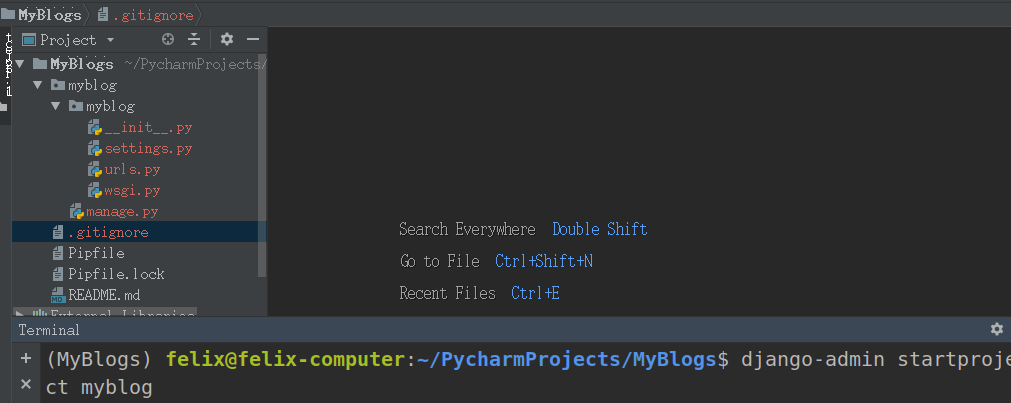
然后使用pycharm打开刚才创建的目录。打开会发现多了两个文件,一个是Pipfile,一个是Pipfile.lock文件,并且下面的terminal,已经进入了虚拟环境

创建.gitignore文件。


# python的
# Byte-compiled / optimized / DLL files
__pycache__/
*.py[cod]
*$py.class

# C extensions
*.so

# Distribution / packaging
.Python
build/
develop-eggs/
dist/
downloads/
eggs/
.eggs/
lib/
lib64/
parts/
sdist/
var/
wheels/
*.egg-info/
.installed.cfg
*.egg
MANIFEST

# PyInstaller
#  Usually these files are written by a python script from a template
#  before PyInstaller builds the exe, so as to inject date/other infos into it.
*.manifest
*.spec

# Installer logs
pip-log.txt
pip-delete-this-directory.txt

# Unit test / coverage reports
htmlcov/
.tox/
.nox/
.coverage
.coverage.*
.cache
nosetests.xml
coverage.xml
*.cover
.hypothesis/
.pytest_cache/

# Translations
*.mo
*.pot

# Django stuff:
*.log
local_settings.py
db.sqlite3

# Flask stuff:
instance/
.webassets-cache

# Scrapy stuff:
.scrapy

# Sphinx documentation
docs/_build/

# PyBuilder
target/

# Jupyter Notebook
.ipynb_checkpoints

# IPython
profile_default/
ipython_config.py

# pyenv
.python-version

# celery beat schedule file
celerybeat-schedule

# SageMath parsed files
*.sage.py

# Environments
.env
.venv
env/
venv/
ENV/
env.bak/
venv.bak/

# Spyder project settings
.spyderproject
.spyproject

# Rope project settings
.ropeproject

# mkdocs documentation
/site

# mypy
.mypy_cache/
.dmypy.json
dmypy.json

# Pyre type checker
.pyre/


# pycharm的
# Covers JetBrains IDEs: IntelliJ, RubyMine, PhpStorm, AppCode, PyCharm, CLion, Android Studio and WebStorm
# Reference: https://intellij-support.jetbrains.com/hc/en-us/articles/206544839

# User-specific stuff
.idea/**/workspace.xml
.idea/**/tasks.xml
.idea/**/usage.statistics.xml
.idea/**/dictionaries
.idea/**/shelf

# Generated files
.idea/**/contentModel.xml

# Sensitive or high-churn files
.idea/**/dataSources/
.idea/**/dataSources.ids
.idea/**/dataSources.local.xml
.idea/**/sqlDataSources.xml
.idea/**/dynamic.xml
.idea/**/uiDesigner.xml
.idea/**/dbnavigator.xml

# Gradle
.idea/**/gradle.xml
.idea/**/libraries

# Gradle and Maven with auto-import
# When using Gradle or Maven with auto-import, you should exclude module files,
# since they will be recreated, and may cause churn.  Uncomment if using
# auto-import.
# .idea/modules.xml
# .idea/*.iml
# .idea/modules

# CMake
cmake-build-*/

# Mongo Explorer plugin
.idea/**/mongoSettings.xml

# File-based project format
*.iws

# IntelliJ
out/

# mpeltonen/sbt-idea plugin
.idea_modules/

# JIRA plugin
atlassian-ide-plugin.xml

# Cursive Clojure plugin
.idea/replstate.xml

# Crashlytics plugin (for Android Studio and IntelliJ)
com_crashlytics_export_strings.xml
crashlytics.properties
crashlytics-build.properties
fabric.properties

# Editor-based Rest Client
.idea/httpRequests

# Android studio 3.1+ serialized cache file
.idea/caches/build_file_checksums.ser
创建README.md文件,用来写描述文件
最后的目录结构。

4、创建django项目。
在命令行执行下面命令创建django项目:
django-admin startproject myblog
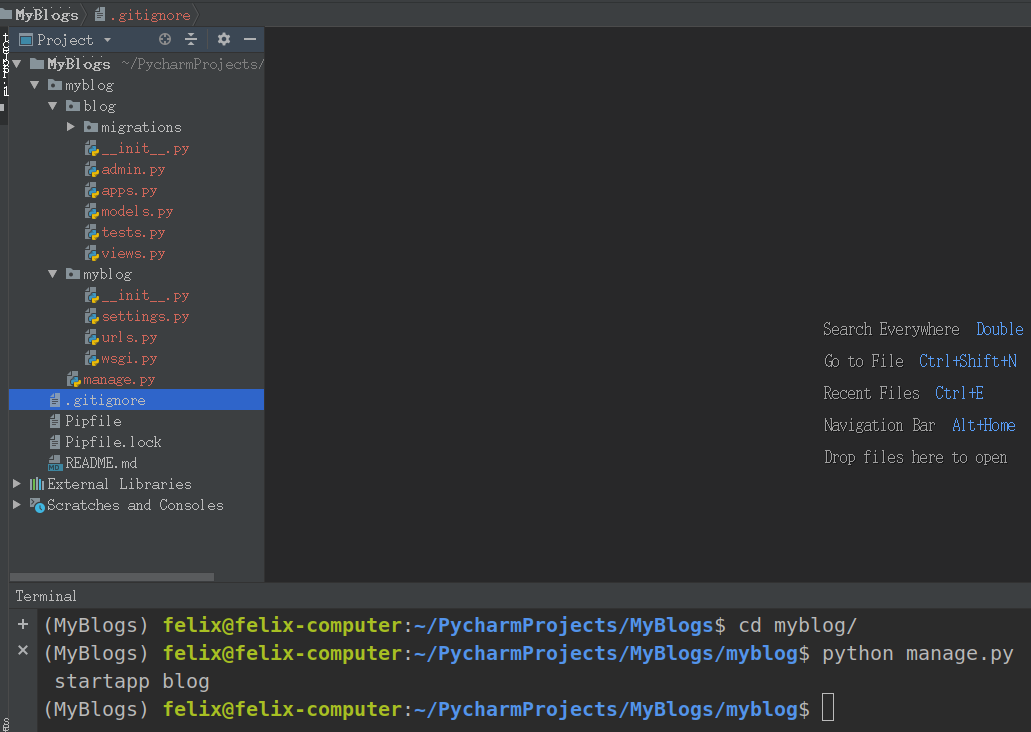
可以看到多了myblog文件夹,这个就是简单的创建了django项目。
然后创建博客app
执行如下命令:
cd myblog/  # 进入
python manage.py startapp blog  # 创建博客app
效果如下:(myblog目录下多了刚才创建的blog文件夹)
创建完后,pycharm可能无法识别我们的django目录,设置一下。

然后设置django的服务以及端口:
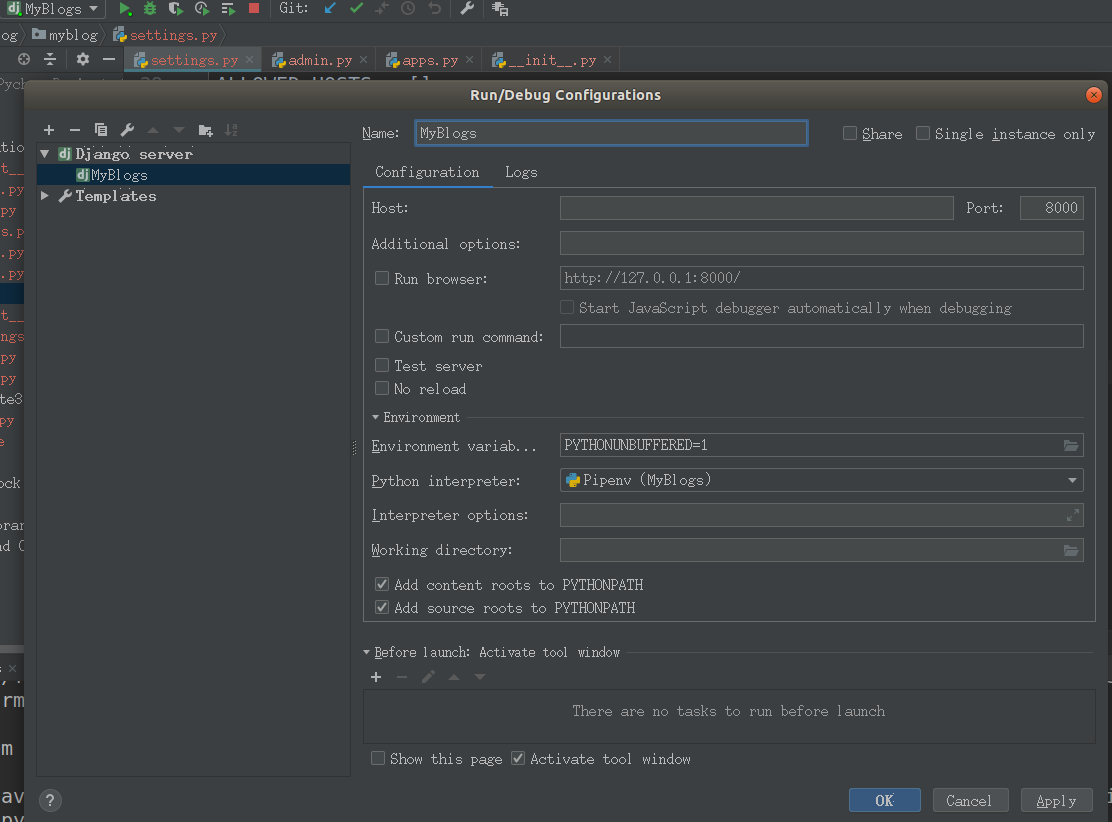
接下来打开django的settings文件,修改一些设置。
# LANGUAGE_CODE = 'en-us'
LANGUAGE_CODE = 'zh-hans' # 语言设置成简体中文

# TIME_ZONE = 'UTC'
TIME_ZONE = 'Asia/Shanghai' # 时区设置成东八区

INSTALLED_APPS = [
    'django.contrib.admin',
    'django.contrib.auth',
    'django.contrib.contenttypes',
    'django.contrib.sessions',
    'django.contrib.messages',
    'django.contrib.staticfiles',
    'blog.apps.BlogConfig',  # 将自己创建的app添加到设置中
]

# 需要使用mysql,更改django默认数据库引擎
DATABASES = {
    # 'default': {
    #     'ENGINE': 'django.db.backends.sqlite3',
    #     'NAME': os.path.join(BASE_DIR, 'db.sqlite3'),
    # }
    'default': {
        'ENGINE': 'django.db.backends.mysql',
        'NAME': 'myblogs',  # 要连接的数据库,连接前需要创建好
        'USER': 'root',  # 连接数据库的用户名
        'PASSWORD': 'felixwang',  # 连接数据库的密码
        'HOST': '127.0.0.1',  # 连接主机,默认本级
        'PORT': 3306  # 端口 默认3306
    }
}
因为使用数据库是mysql,所以要在myblog文件夹中的__init__.py中指定:
# 将mysql当做默认数据库
import pymysql   # 通过pipenv install pymysql  安装
pymysql.install_as_MySQLdb()
最后运行django 服务
python manage.py runserver

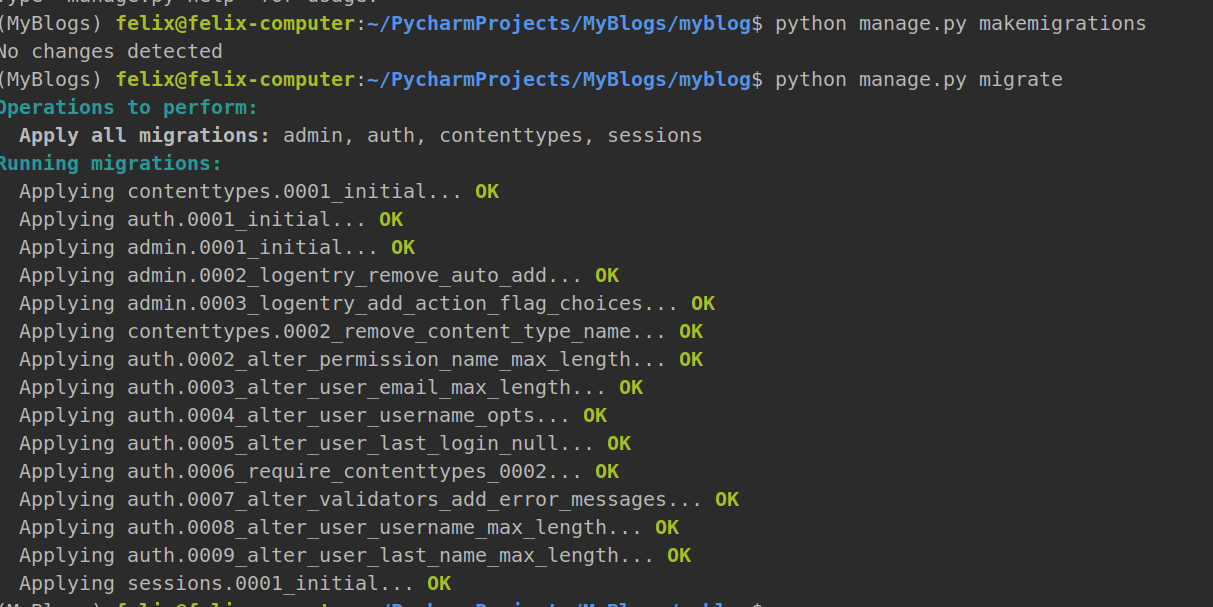
飘红的地方说我们没有做数据库迁移。停掉服务,执行如下两条命令:
python manage.py makemigrations # 数据库迁移
python manage.py migrate
最后我们运行服务:
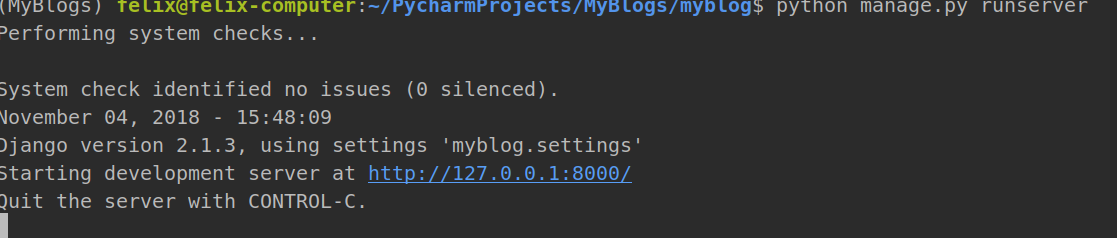
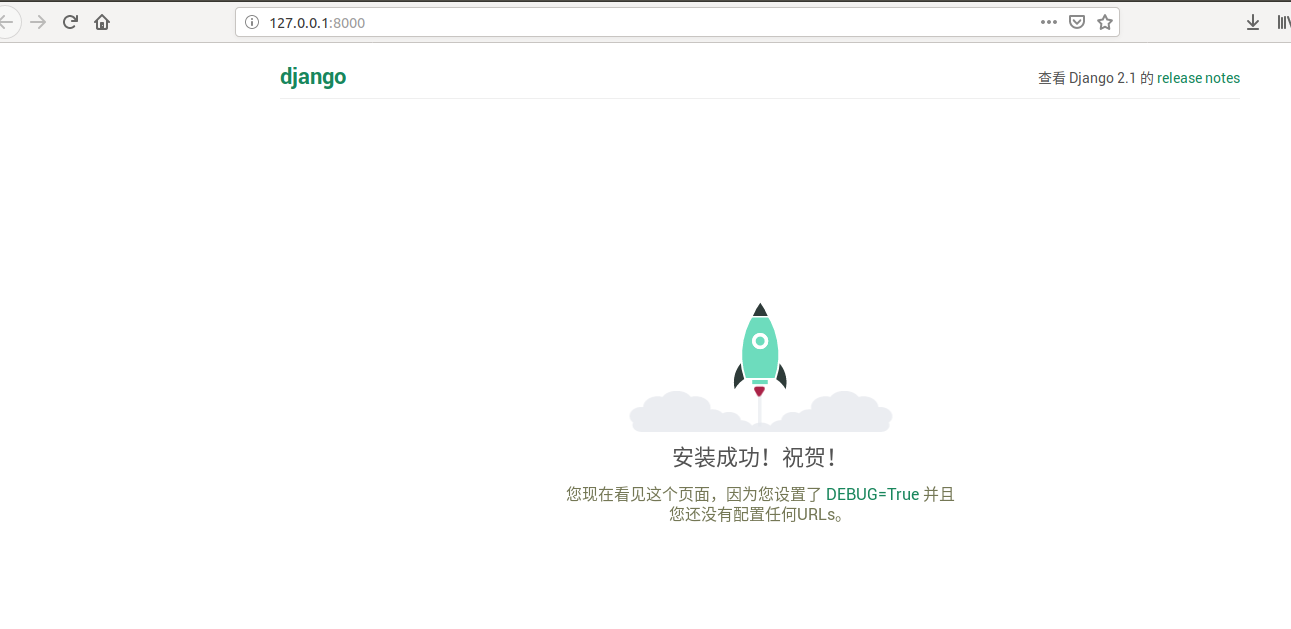
这次没有飘红。我们打开浏览器,运行上图中的地址。
至此我们的环境就搭建好了。不知不觉花了将近两个多小时写博客。恩,等有空继续。记得git add 和 git commit 用git保存我们的进度。