版权声明:本文为博主原创文章,未经博主允许不得转载。 https://blog.csdn.net/sinat_21742529/article/details/83586431
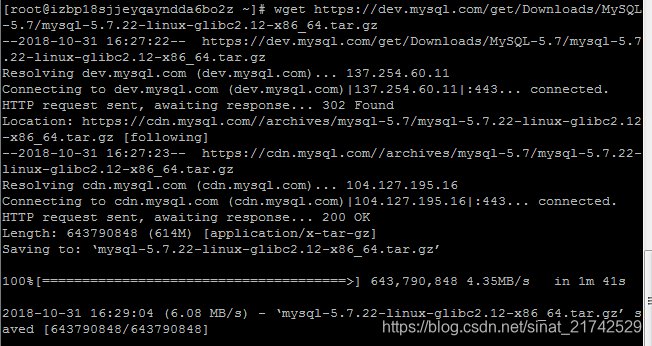
使用wget从官网下载tar包
wget https://dev.mysql.com/get/Downloads/MySQL-5.7/mysql-5.7.22-linux-glibc2.12-x86_64.tar.gz
将MySql安装至/usr/local/mysql目录
解压安装包
tar -xvf mysql-5.7.22-linux-glibc2.12-x86_64.tar.gz
移动
mv mysql-5.7.22-linux-glibc2.12-x86_64 /usr/local/


重命名
mv /usr/local/mysql-5.7.22-linux-glibc2.12-x86_64 /usr/local/mysql

新建data目录
mkdir /usr/local/mysql/data

新建mysql用户、mysql用户组
mysql用户组
groupadd mysql
mysql用户
useradd mysql -g mysql
- 将/usr/local/mysql的所有者及所属组改为mysql
chown -R mysql.mysql /usr/local/mysql
-
配置
/usr/local/mysql/bin/mysql_install_db --user=mysql --basedir=/usr/local/mysql/ --datadir=/usr/local/mysql/data
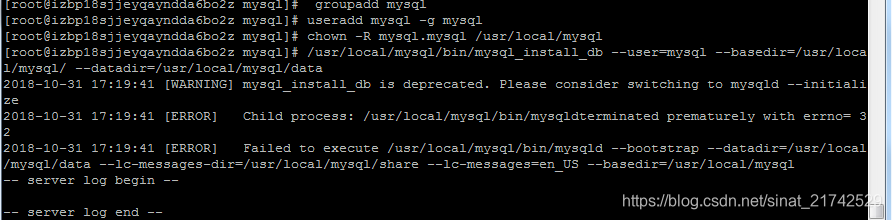
出现如上图所示错误
则输入如下命令
/usr/local/mysql/bin/mysqld --user=mysql --basedir=/usr/local/mysql/ --datadir=/usr/local/mysql/data --initialize
出现如下所示错误
/usr/local/mysql/bin/mysqld: error while loading shared libraries: libaio.so.1: cannot open shared object file: No such file or directory
则执行以下命令:
yum -y install numactl
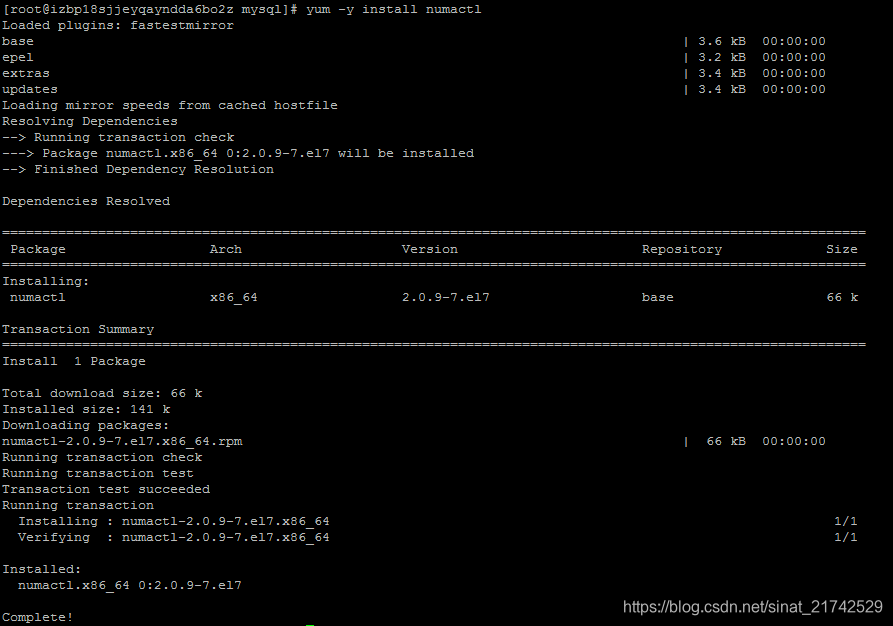
得出如下结果后继续安装,输入如下命令
/usr/local/mysql/bin/mysqld --user=mysql --basedir=/usr/local/mysql/ --datadir=/usr/local/mysql/data --initialize
继续出现如下所示错误
/usr/local/mysql/bin/mysqld: error while loading shared libraries: libaio.so.1: cannot open shared object file: No such file or directory
则执行以下命令:
yum install -y libaio
完成后继续执行
/usr/local/mysql/bin/mysqld --user=mysql --basedir=/usr/local/mysql/ --datadir=/usr/local/mysql/data --initialize

编辑配置文件
vi /etc/my.cnf
修改前
datadir=/var/lib/mysql
socket=/var/lib/mysql/mysql.sock
# Disabling symbolic-links is recommended to prevent assorted security risks
symbolic-links=0
# Settings user and group are ignored when systemd is used.
# If you need to run mysqld under a different user or group,
# customize your systemd unit file for mariadb according to the
# instructions in http://fedoraproject.org/wiki/Systemd

[mysqld_safe]
log-error=/var/log/mariadb/mariadb.log
pid-file=/var/run/mariadb/mariadb.pid

#
# include all files from the config directory
#
!includedir /etc/my.cnf.d
修改后
[mysqld]
datadir=/usr/local/mysql/data
basedir=/usr/local/mysql
socket=/tmp/mysql.sock
user=mysql
port=3306
character-set-server=utf8
# 取消密码验证
skip-grant-tables
# Disabling symbolic-links is recommended to prevent assorted security risks
symbolic-links=0
# Settings user and group are ignored when systemd is used.
# If you need to run mysqld under a different user or group,
# customize your systemd unit file for mariadb according to the
# instructions in http://fedoraproject.org/wiki/Systemd

[mysqld_safe]
log-error=/var/log/mysqld.log
pid-file=/var/run/mysqld/mysqld.pid

#
# include all files from the config directory
#
开启服务
将mysql加入服务
cp /usr/local/mysql/support-files/mysql.server /etc/init.d/mysql
开机自启
chkconfig mysql on
开启
service mysql start
- 设置密码
登录(由于/etc/my.cnf中设置了取消密码验证,所以此处密码任意)
/usr/local/mysql/bin/mysql -u root -p
操作mysql数据库
>>use mysql;
修改密码
    >>update user set authentication_string=password('你的密码') where user='root';

    >>flush privileges;

    >>exit;
将/etc/my.cnf中的skip-grant-tables删除
登录再次设置密码
如果出现操作不了数据库的状况,就再次设置skip-grant-tables,再次设置密码
   /usr/local/mysql/bin/mysql -u root -p


    >>ALTER USER 'root'@'localhost' IDENTIFIED BY '修改后的密码';

    >>exit;
允许远程连接
    /usr/local/mysql/bin/mysql -u root -p

    >>use mysql;

    >>update user set host='%' where user = 'root';

    >>flush privileges;

    >>eixt;
添加快捷方式
ln -s /usr/local/mysql/bin/mysql /usr/bin
注意:本Linux服务器是在阿里云的服务器,远程访问数据库时,需要在阿里云上开放端口