本文主要说一下百度AI的人脸检测
首先进入百度AI官网 登录帐号 点击控制台

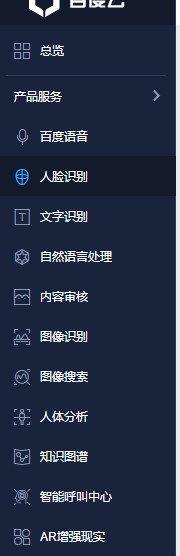
进入控制台后 点击左侧导航栏 人脸识别
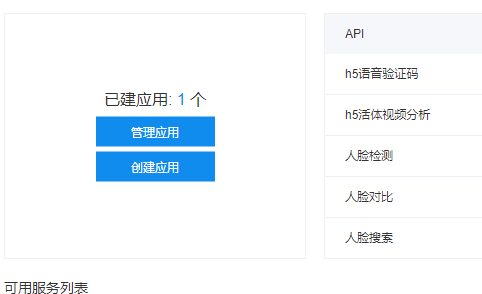
右侧创建应用

随便起个名字 立即创建
回到刚才的菜单 点击管理应用
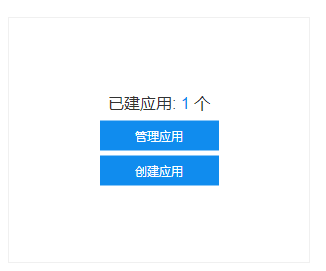
点击管理应用 可以看到你刚才创建的应用详情

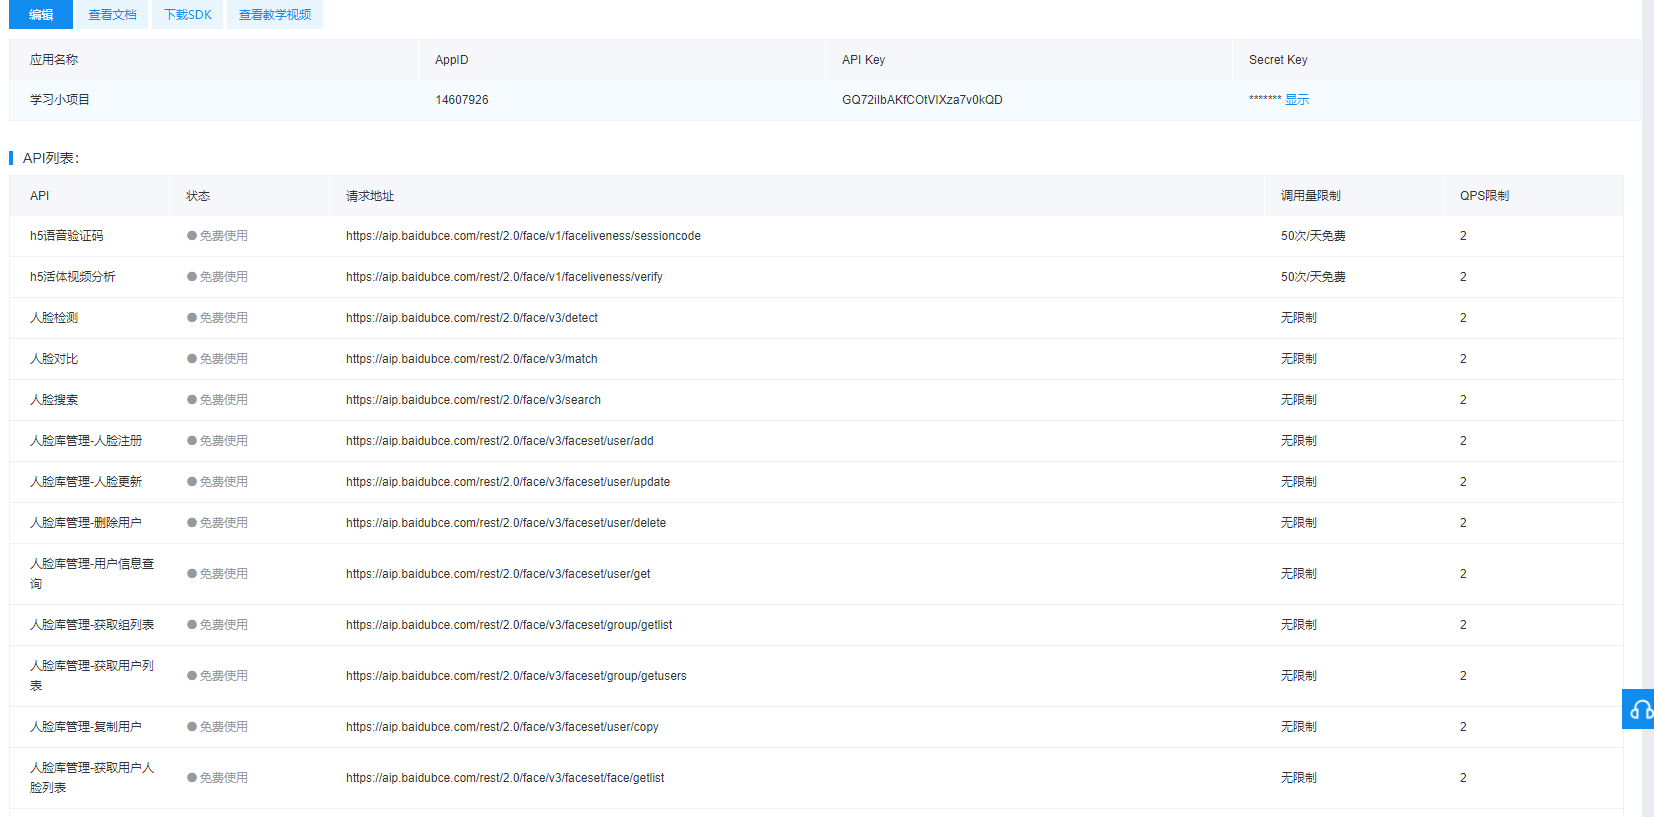
点击右边操作栏的管理 可以看到你所有应用的访问链接 我这个是v3版本的 人脸检测 因为访问链接里面有v3这个字眼 这个是百度定的 疑惑的话请看API 引用自百度AI帮助文档 https://ai.baidu.com/docs#/Face-Detect-V3/top
重点说明 :
注意下图中 你创建的应用详情 的关键数据
第一个 :API key 第二个:secret key
这两个很重要 是用来获取官网验证 access_token 没有这个 你的人脸检测程序是无法执行的
第三个是下面的API列表 你用到的所有应用的访问接口的url 都在这里
前期工作做好以后下面说下具体细节
所谓人脸检测就是你把一张人物图片提交给百度人脸检测的API(接口) 百度AI会智能的帮你检测出这张人物照片里面人物的年龄 颜值 性别 种族 表情 等一系列数据 当然现在的AI检测的真实性是相对的 种族 性别是非常准确的
至于年龄 颜值 是否带眼睛 表情 脸型 等其他数值 都是相对准确 这个很好理解 就拿颜值来说 怎么可能有一种算法能够绝对的衡量一个人的美与丑呢 这个美丑都是相对的 就算是数学家 生物学家 他也没有办法绝对衡量 所以
算法也就是相对的 希望大家能够明白
因为我申请到的是V3版本的人脸识别 所以下文中的代码结构只适用于V3版本
下面看一下我门需要完成的类
因为我是一个springboot项目 先说service层

一共七个类 全部都有用 一会我会一个个附上代码和说明
先说utils包下面的6个工具类
第一个Auth 这个就是获得官网认证 access_token的类 以下是代码
public class Auth {
    /**
     * 获取权限token
     *
     */
    public static String getAccessToken() {
        // 官网获取的 API Key 更新为你注册的
        String clientId = "xxxxxxxxxxx";
        // 官网获取的 Secret Key 更新为你注册的
        String clientSecret = "xxxxxxxxxxxxxxx ";
        return getAuth(clientId, clientSecret);
    }

    /**
     * 获取API访问token
     * 该token有效期30天,需要自行管理,当失效时需重新获取.
     *
     * @param ak - 百度云官网获取的 API Key
     * @param sk - 百度云官网获取的 Securet Key
     *
     */
    public static String getAuth(String ak, String sk) {
        // 获取token地址
        String authHost = "https://aip.baidubce.com/oauth/2.0/token?";
        String getAccessTokenUrl = authHost
                // 1. grant_type为固定参数
                + "grant_type=client_credentials"
                // 2. 官网获取的 API Key
                + "&client_id=" + ak
                // 3. 官网获取的 Secret Key
                + "&client_secret=" + sk;
        try {
            URL realUrl = new URL(getAccessTokenUrl);
            // 打开和URL之间的连接
            HttpURLConnection connection = (HttpURLConnection) realUrl.openConnection();
            connection.setRequestMethod("GET");
            connection.connect();
            // 获取所有响应头字段
            Map<String, List<String>> map = connection.getHeaderFields();
            // 遍历所有的响应头字段
            for (String key : map.keySet()) {
                System.err.println(key + "--->" + map.get(key));
            }
            // 定义 BufferedReader输入流来读取URL的响应
            BufferedReader in = new BufferedReader(new InputStreamReader(connection.getInputStream()));
            String result = "";
            String line;
            while ((line = in.readLine()) != null) {
                result += line;
            }
            /**
             * 返回结果示例
             */
            System.err.println("result:" + result);
            JSONObject jsonObject = new JSONObject(result);
            String access_token = jsonObject.getString("access_token");
            return access_token;
        } catch (Exception e) {
            System.err.printf("获取token失败!");
            e.printStackTrace(System.err);
        }
        return null;
    }

    public static void main(String[] args) {
        getAccessToken();
    }
}
通过你创建应用的API key 和 secret key 可以得到access_token 而且说的很明白这个token的生命周期是30天 所以我们在使用他的时候完全可以把
这个token变成一个常量使用 所以上面这个类的代码你只需要运行一次 控制台输出token后 复制一下 再写一个类用来保存常量 我创建的这个类就是utils包下的Constant
constant
public class Constant {
    /* POST_URL参数
    * 你在百度AI官网控制台创建的应用里有相关接口的访问地址
    * 自己打开看上文中截图也有说明
    * 此处用到人脸检测那就把人脸检测的访问地址复制过来
    *
    * */
    public static final String POST_URL = "";
    //官网认证的token
    public static final String ACCESS_TOKEN =
            "此处是你通过上面的类运行获得的access_token的值";
}
Base64Util
public class Base64Util {
    private static final char last2byte = (char) Integer.parseInt("00000011", 2);
    private static final char last4byte = (char) Integer.parseInt("00001111", 2);
    private static final char last6byte = (char) Integer.parseInt("00111111", 2);
    private static final char lead6byte = (char) Integer.parseInt("11111100", 2);
    private static final char lead4byte = (char) Integer.parseInt("11110000", 2);
    private static final char lead2byte = (char) Integer.parseInt("11000000", 2);
    private static final char[] encodeTable = new char[]{'A', 'B', 'C', 'D', 'E', 'F', 'G', 'H', 'I', 'J', 'K', 'L', 'M', 'N', 'O', 'P', 'Q', 'R', 'S', 'T', 'U', 'V', 'W', 'X', 'Y', 'Z', 'a', 'b', 'c', 'd', 'e', 'f', 'g', 'h', 'i', 'j', 'k', 'l', 'm', 'n', 'o', 'p', 'q', 'r', 's', 't', 'u', 'v', 'w', 'x', 'y', 'z', '0', '1', '2', '3', '4', '5', '6', '7', '8', '9', '+', '/'};

    public Base64Util() {
    }
    //通过文件信息的字节数据转换成base64数据
    public static String encode(byte[] from) {
        StringBuilder to = new StringBuilder((int) ((double) from.length * 1.34D) + 3);
        int num = 0;
        char currentByte = 0;

        int i;
        for (i = 0; i < from.length; ++i) {
            for (num %= 8; num < 8; num += 6) {
                switch (num) {
                    case 0:
                        currentByte = (char) (from[i] & lead6byte);
                        currentByte = (char) (currentByte >>> 2);
                    case 1:
                    case 3:
                    case 5:
                    default:
                        break;
                    case 2:
                        currentByte = (char) (from[i] & last6byte);
                        break;
                    case 4:
                        currentByte = (char) (from[i] & last4byte);
                        currentByte = (char) (currentByte << 2);
                        if (i + 1 < from.length) {
                            currentByte = (char) (currentByte | (from[i + 1] & lead2byte) >>> 6);
                        }
                        break;
                    case 6:
                        currentByte = (char) (from[i] & last2byte);
                        currentByte = (char) (currentByte << 4);
                        if (i + 1 < from.length) {
                            currentByte = (char) (currentByte | (from[i + 1] & lead4byte) >>> 4);
                        }
                }

                to.append(encodeTable[currentByte]);
            }
        }

        if (to.length() % 4 != 0) {
            for (i = 4 - to.length() % 4; i > 0; --i) {
                to.append("=");
            }
        }

        return to.toString();
    }
}
这个类其实就干一件事 把你识别图片的字节信息转换成一个base64值 不懂base64的可以百度一下 很简单 我在这里就不多费口舌了 希望理解
那既然他是把图片信息的字节转换成base64 那么图片的信息怎么转换成字节呢 大家都知道 我们首先获得的文件信息 不管是在服务器上还是前端给我们传送过来的 其实都是一个file file其实是一个bolb对象 大家可以理解成“流”信息
所以我们要通过IO 把他解析成字节对象 也就是byte对象 那下面这个类就是干这个事情的
FileUtil
public class FileUtil {

    /**
     * 读取文件内容,作为字符串返回
     */
    public static String readFileAsString(String filePath) throws IOException {
        File file = new File(filePath);
        if (!file.exists()) {
            throw new FileNotFoundException(filePath);
        }

        if (file.length() > 1024 * 1024 * 1024) {
            throw new IOException("File is too large");
        }

        StringBuilder sb = new StringBuilder((int) (file.length()));
        // 创建字节输入流
        FileInputStream fis = new FileInputStream(filePath);
        // 创建一个长度为10240的Buffer
        byte[] bbuf = new byte[10240];
        // 用于保存实际读取的字节数
        int hasRead = 0;
        while ( (hasRead = fis.read(bbuf)) > 0 ) {
            sb.append(new String(bbuf, 0, hasRead));
        }
        fis.close();
        return sb.toString();
    }

    /**
     * 根据文件路径读取byte[] 数组
     */
    public static byte[] readFileByBytes(String filePath) throws IOException {
        File file = new File(filePath);
        if (!file.exists()) {
            throw new FileNotFoundException(filePath);
        } else {
            ByteArrayOutputStream bos = new ByteArrayOutputStream((int) file.length());
            BufferedInputStream in = null;

            try {
                in = new BufferedInputStream(new FileInputStream(file));
                short bufSize = 1024;
                byte[] buffer = new byte[bufSize];
                int len1;
                while (-1 != (len1 = in.read(buffer, 0, bufSize))) {
                    bos.write(buffer, 0, len1);
                }

                byte[] var7 = bos.toByteArray();
                return var7;
            } finally {
                try {
                    if (in != null) {
                        in.close();
                    }
                } catch (IOException var14) {
                    var14.printStackTrace();
                }

                bos.close();
            }
        }
    }
}
两个方法 一个读取文件 也就是你文件上传后在服务器的路径地址 通过这个路径地址 把文件转成string另一个方法转换成byte数组
GsonUtil
/**
 * Json工具类.gson是谷歌提供的一个工具类 很强大 号称可以解决所有对象之间的转换
 */
public class GsonUtils {
    private static Gson gson = new GsonBuilder().create();
    //对象转json
    public static String toJson(Object value) {
        return gson.toJson(value);
    }
    //json对象转实体类
    public static <T> T fromJson(String json, Class<T> classOfT) throws JsonParseException {
        return gson.fromJson(json, classOfT);
    }
    //json对象转各种数据类型 例如 map list
    public static <T> T fromJson(String json, Type typeOfT) throws JsonParseException {
        return (T) gson.fromJson(json, typeOfT);
    }
}
HttpUtil
/**
 * http 工具类
 */
public class HttpUtil {

    public static String post(String requestUrl, String accessToken, String params)
            throws Exception {
        String contentType = "application/x-www-form-urlencoded";
        return HttpUtil.post(requestUrl, accessToken, contentType, params);
    }

    public static String post(String requestUrl, String accessToken, String contentType, String params)
            throws Exception {
        String encoding = "UTF-8";
        if (requestUrl.contains("nlp")) {
            encoding = "GBK";
        }
        return HttpUtil.post(requestUrl, accessToken, contentType, params, encoding);
    }

    public static String post(String requestUrl, String accessToken, String contentType, String params, String encoding)
            throws Exception {
        String url = requestUrl + "?access_token=" + accessToken;
        return HttpUtil.postGeneralUrl(url, contentType, params, encoding);
    }

    public static String postGeneralUrl(String generalUrl, String contentType, String params, String encoding)
            throws Exception {
        URL url = new URL(generalUrl);
        // 打开和URL之间的连接
        HttpURLConnection connection = (HttpURLConnection) url.openConnection();
        connection.setRequestMethod("POST");
        // 设置通用的请求属性
        connection.setRequestProperty("Content-Type", contentType);
        connection.setRequestProperty("Connection", "Keep-Alive");
        connection.setUseCaches(false);
        connection.setDoOutput(true);
        connection.setDoInput(true);

        // 得到请求的输出流对象
        DataOutputStream out = new DataOutputStream(connection.getOutputStream());
        out.write(params.getBytes(encoding));
        out.flush();
        out.close();

        // 建立实际的连接
        connection.connect();
        // 获取所有响应头字段
        Map<String, List<String>> headers = connection.getHeaderFields();
        // 遍历所有的响应头字段
        for (String key : headers.keySet()) {
            System.err.println(key + "--->" + headers.get(key));
        }
        // 定义 BufferedReader输入流来读取URL的响应
        BufferedReader in = null;
        in = new BufferedReader(
                new InputStreamReader(connection.getInputStream(), encoding));
        String result = "";
        String getLine;
        while ((getLine = in.readLine()) != null) {
            result += getLine;
        }
        in.close();
        System.err.println("result:" + result);
        return result;
    }
}
这个类我就不多说了 主要是用在提交请求的 因为你是java程序 你最终的人脸检测是通过百度AI提供的API进行检测的 所以就意味着你一定会向百度提交http请求 当然你还有附带相应的参数 那就肯定是post请求了
6个工具类说完 下面说 业务类 这个业务类和我们平时写的service层的业务类还是有区别的 因为他的方法必须是static 也就是单线程的 也就意味着你不需要通过接口实现 看代码
FaceDetect
public class FaceDetect {
    public static FaceDetectVo detect(String url,String imageUrl,String accessToken) {
        try {
            //通过图片路径 把图片数据转成字节
            byte [] imageDate = FileUtil.readFileByBytes(imageUrl);
            //把字节转成base64格式
            String imageBase64 = Base64Util.encode(imageDate);
            Map<String, Object> map = new HashMap<>();
            /* image 参数 图片的BASE64值 上面我通过工具类“Base64Util”转好了
             *  官网给出的API中说image的参数还可以是其他两种
             *  URL:图片的 URL地址( 可能由于网络等原因导致下载图片时间过长);
             *  FACE_TOKEN: 人脸图片的唯一标识,调用人脸检测接口时,
             *  会为每个人脸图片赋予一个唯一的FACE_TOKEN,同一张图片多次检测得到的FACE_TOKEN是同一个。
             *  也就是说map集合中 “image”这个key的值 如果是图片的base64值的话 你添加的“image_type”这个
             *  参数的值应该是“BASE64”。
             *  如果“iamge”的值是一个地址例如:你图片存放的服务器地址“http://xxx.com/xxx.jpg”
             *  那"image_type"的值就应该是“URL”
             *  如果“iamge”的值是一个FACE_TOKEN例如:“027d8308a2ec665acb1bdf63e513bcb9”
             *  那"image_type"的值就应该是“FACE_TOKEN”
             *  image_type这个参数的值是固定的写法 只能三个选一个“BASE64”,“URL”,“FACE_TOKEN”
             **/
            map.put("image", imageBase64);
            map.put("image_type", "BASE64");
            /*
             *  第三个参数“face_field”,也就是返回值
             *  这个参数的值string类型 以逗号隔开
             *  可以选择返回aga 年龄 beauty 颜值 等 具体返回参数
             *  可以参照官方API https://ai.baidu.com/docs#/Face-Detect-V3/top
             *
             **/
            map.put("face_field", "age,beauty,expression,gender,glasses,race,face_type");
            //GsonUtils map转json 用于请求入参
            String param = GsonUtils.toJson(map);
            /*
              post请求 url官网控制台自己创建应用关于人脸检测的访问链接地址
              accessToken 这个是官网给你的一个认证标识
              contentType 请求头
              param 参数
            */

            String result = HttpUtil.post(url, accessToken, "application/json", param);
            //返回值“result”是String类型的,其实就是一个json串 我自己写了一个vo 通过GsonUtils把json串转成对映实体类
            FaceDetectVo faceDetectVo = new FaceDetectVo();
            faceDetectVo = GsonUtils.fromJson(result,faceDetectVo.getClass());
            return faceDetectVo;
        } catch (Exception e) {
            e.printStackTrace();
        }
        return null;
    }

}
注释很详细 只说一块代码
faceDetectVo = GsonUtils.fromJson(result,faceDetectVo.getClass());
这个是我通过GsonUtil 把官网检测的返回结果转换成了实体类对象 所以我要写一个实体类
FaceDetectVo
public class FaceDetectVo {


    private int error_code;
    private String error_msg;
    private ResultBean result;

    public int getError_code() {
        return error_code;
    }

    public void setError_code(int error_code) {
        this.error_code = error_code;
    }

    public String getError_msg() {
        return error_msg;
    }

    public void setError_msg(String error_msg) {
        this.error_msg = error_msg;
    }

    public ResultBean getResult() {
        return result;
    }

    public void setResult(ResultBean result) {
        this.result = result;
    }

    public FaceDetectVo() {
    }

    public FaceDetectVo(int error_code, String error_msg, ResultBean result) {
        this.error_code = error_code;
        this.error_msg = error_msg;
        this.result = result;
    }

    @Override
    public String toString() {
        return "FaceDetectVo{" +
                "error_code=" + error_code +
                ", error_msg='" + error_msg + '\'' +
                ", result=" + result +
                '}';
    }

    public static class ResultBean {

        private List<FaceListBean> face_list;

        public List<FaceListBean> getFace_list() {
            return face_list;
        }

        public void setFace_list(List<FaceListBean> face_list) {
            this.face_list = face_list;
        }

        public ResultBean() {
        }

        public static class FaceListBean {

            private int age;
            private double beauty;
            private ExpressionBean expression;
            private GenderBean gender;
            private GlassesBean glasses;
            private RaceBean race;
            private FaceTypeBean face_type;

            public int getAge() {
                return age;
            }

            public void setAge(int age) {
                this.age = age;
            }

            public double getBeauty() {
                return beauty;
            }

            public void setBeauty(double beauty) {
                this.beauty = beauty;
            }

            public ExpressionBean getExpression() {
                return expression;
            }

            public void setExpression(ExpressionBean expression) {
                this.expression = expression;
            }

            public GenderBean getGender() {
                return gender;
            }

            public void setGender(GenderBean gender) {
                this.gender = gender;
            }

            public GlassesBean getGlasses() {
                return glasses;
            }

            public void setGlasses(GlassesBean glasses) {
                this.glasses = glasses;
            }

            public RaceBean getRace() {
                return race;
            }

            public void setRace(RaceBean race) {
                this.race = race;
            }

            public FaceTypeBean getFace_type() {
                return face_type;
            }

            public void setFace_type(FaceTypeBean face_type) {
                this.face_type = face_type;
            }

            public FaceListBean() {
            }


            public static class ExpressionBean {

                private String type;
                private double probability;

                public String getType() {
                    return type;
                }

                public void setType(String type) {
                    this.type = type;
                }

                public double getProbability() {
                    return probability;
                }

                public void setProbability(double probability) {
                    this.probability = probability;
                }

                public ExpressionBean() {
                }
            }

            public static class GenderBean {

                private String type;
                private double probability;

                public String getType() {
                    return type;
                }

                public void setType(String type) {
                    this.type = type;
                }

                public double getProbability() {
                    return probability;
                }

                public void setProbability(double probability) {
                    this.probability = probability;
                }

                public GenderBean() {
                }
            }

            public static class GlassesBean {

                private String type;
                private double probability;

                public String getType() {
                    return type;
                }

                public void setType(String type) {
                    this.type = type;
                }

                public double getProbability() {
                    return probability;
                }

                public void setProbability(double probability) {
                    this.probability = probability;
                }

                public GlassesBean() {
                }
            }

            public static class RaceBean {

                private String type;
                private double probability;

                public String getType() {
                    return type;
                }

                public void setType(String type) {
                    this.type = type;
                }

                public double getProbability() {
                    return probability;
                }

                public void setProbability(double probability) {
                    this.probability = probability;
                }

                public RaceBean() {
                }
            }

            public static class FaceTypeBean {

                private String type;
                private double probability;

                public String getType() {
                    return type;
                }

                public void setType(String type) {
                    this.type = type;
                }

                public double getProbability() {
                    return probability;
                }

                public void setProbability(double probability) {
                    this.probability = probability;
                }

                public FaceTypeBean() {
                }
            }
        }
    }
}
这个vo有很多内部类 都应该有无参构造 和 封装 看一下官网的返回值
result:{"error_code":0,"error_msg":"SUCCESS","log_id":3584051565053,
     "timestamp":1541095172,"cached":0,
     "result":{"face_num":1,
               "face_list":[{
               "face_token":"c7352123456456454c1971a66986fcc",
               "location":{"left":206.3209229,"top":280.6053467,
                            "width":279,"height":272,"rotation":-14},
                            "face_probability":0.9146046638,
                            "angle":{"yaw":6.934440613,
                                     "pitch":15.56725311,"roll":-14.03364563},
                                     "age":45,"beauty":48.68906021,
                                     "expression":{"type":"none",
                                    "probability":0.857055068},
                                    "gender":{"type":"male",
                                    "probability":0.9945344925},
                                    "glasses":{"type":"common",
                                    "probability":0.9993425012},
                                    "race":{"type":"black","probability":0.9982160926},
               "face_type":{"type":"human","probability":0.9997557402}}]}}
这是一个复杂的json串 也是好几层 所以我的vo 里面有好多内部类对映json串里面的层次 通过GsonUtil可以把这个复杂的json串转换赋值于我的vo 用于controller层返回给前端使用
下面看controller层
@RestController
@RequestMapping("api/recognition")
public class FaceDetectController {
    @Autowired
    UploadService uploadService;
    @RequestMapping("/faceDetect")
    public FaceDetectVo faceDetect(@RequestParam("file") MultipartFile file){
        FaceDetectVo faceDetectVo = new FaceDetectVo();
        try {
            System.out.println(file);
            //文件上传至服务器
            UploadVo uploadVo = uploadService.upload(file);
            if(StringUtils.isNotBlank(uploadVo.getUploadUrl())){
                //调用service层的人脸检测方法
              faceDetectVo =  FaceDetect.detect(Constant.POST_URL,uploadVo.getUploadUrl(),Constant.ACCESS_TOKEN);
            }
            return  faceDetectVo;
        } catch (Exception e) {
            e.printStackTrace();
        }
        return  faceDetectVo;
    }
}
很正常的controller写法 里面有一个方法要说一下
uoloadService.upload方法 这就是个上传方法 我下面贴代码:
UploadService
public interface UploadService {
    UploadVo upload(MultipartFile file) throws Exception;
}
UploadServiceImpl
@Service
public class UploadServiceImpl implements UploadService {
    /*
     * @Author huyuqiang
     * @Description 文件上传
     * @Date 11:09
     * @Param file上传文件流
     * @return
     **/
    @Override
    public UploadVo upload(MultipartFile file) throws Exception {
        UploadVo uploadVo = new UploadVo();
        if (!file.isEmpty()) {
            String fileName = file.getOriginalFilename();
            String fileType = fileName.substring(fileName.lastIndexOf(".")+1);
            long fileSize = file.getSize();
            String Path = "D:/javaspace/tomcatPath";
            File packageFile = new File(Path);
            if (!packageFile.exists()) {
                packageFile.mkdir();
            }
            File targetFile = new File(Path + "/" + fileName);
            file.transferTo(targetFile);
            uploadVo.setBeginFileName(fileName);
            uploadVo.setLastFileName(fileName);
            uploadVo.setFileType(fileType);
            uploadVo.setFileSize(BytesUtils.getPrintSize(fileSize));
            uploadVo.setUploadUrl(targetFile.toString());
            uploadVo.setResult("上传成功");
            return uploadVo;
        } else {
            uploadVo.setResult(String.valueOf(ErrorMessageConstant.ERROR_CODE_10004));
            return uploadVo;
        }
    }


}
UploadVo
public class UploadVo {
    //上传结果
    private String result;
    //后端获得文件名
    private String beginFileName;
    //最终上传文件名
    private String lastFileName;
    //文件类型
    private String FileType;
    //文件大小
    private String fileSize;
    //文件上传的地址
    private String uploadUrl;

    public UploadVo() {
    }

    public UploadVo(String result, String beginFileName, String lastFileName, String fileType, String fileSize, String uploadUrl) {
        this.result = result;
        this.beginFileName = beginFileName;
        this.lastFileName = lastFileName;
        FileType = fileType;
        this.fileSize = fileSize;
        this.uploadUrl = uploadUrl;
    }

    public String getResult() {
        return result;
    }

    public void setResult(String result) {
        this.result = result;
    }

    public String getBeginFileName() {
        return beginFileName;
    }

    public void setBeginFileName(String beginFileName) {
        this.beginFileName = beginFileName;
    }

    public String getLastFileName() {
        return lastFileName;
    }

    public void setLastFileName(String lastFileName) {
        this.lastFileName = lastFileName;
    }

    public String getFileType() {
        return FileType;
    }

    public void setFileType(String fileType) {
        FileType = fileType;
    }

    public String getFileSize() {
        return fileSize;
    }

    public void setFileSize(String fileSize) {
        this.fileSize = fileSize;
    }

    public String getUploadUrl() {
        return uploadUrl;
    }

    public void setUploadUrl(String uploadUrl) {
        this.uploadUrl = uploadUrl;
    }

    @Override
    public String toString() {
        return "UploadVo{" +
                "result='" + result + '\'' +
                ", beginFileName='" + beginFileName + '\'' +
                ", lastFileName='" + lastFileName + '\'' +
                ", FileType='" + FileType + '\'' +
                ", fileSize='" + fileSize + '\'' +
                ", uploadUrl='" + uploadUrl + '\'' +
                '}';
    }
}
下面是前端代码:vue写的 一个是上传图片识别 一个是调用摄像头识别
<template>
    <div>
        <div class="crumbs">
            <el-breadcrumb separator="/">
                <el-breadcrumb-item><i class="el-icon-date"></i> 智能识别</el-breadcrumb-item>
                <el-breadcrumb-item>照片识别</el-breadcrumb-item>
            </el-breadcrumb>
        </div>
        <div class="container">
            <div class="container-left">
                <el-upload
                class="avatar-uploader"
                action="http://localhost:8080/api/recognition/faceDetect"
                :show-file-list="false"
                :on-success="onSuccess"
                :before-upload="beforeAvatarUpload">
                <img v-if="imageUrl" :src="imageUrl" class="avatar">
                <i v-else class="el-icon-plus avatar-uploader-icon"></i>
              </el-upload>
            </div>
            <div class="container-right">
                <el-form :model="resultForm" status-icon  ref="resultForm" label-width="100px" class="demo-ruleForm">
                    <el-form-item label="人物类型" prop="faceType">
                        <el-input type="text" v-if="resultForm.faceType=='human'" value="真实人物"></el-input>
                        <el-input type="text" v-if="resultForm.faceType=='cartoon'" value="卡通人物"></el-input>
                    </el-form-item>
                    <el-form-item label="年龄" prop="age">
                        <el-input type="text" v-if="resultForm.age!=''" v-model="resultForm.age"></el-input>
                    </el-form-item>
                    <el-form-item label="性别" prop="gender">
                        <el-input type="text" v-if="resultForm.gender=='male'" value="男"></el-input>
                        <el-input type="text" v-if="resultForm.gender=='female'" value="女"></el-input>
                    </el-form-item>
                    <el-form-item label="人种" prop="race">
                            <el-input type="text" v-if="resultForm.race=='yellow'" value="黄种人"></el-input>
                            <el-input type="text" v-if="resultForm.race=='white'" value="白种人"></el-input>
                            <el-input type="text" v-if="resultForm.race=='black'" value="黑种人"></el-input>
                            <el-input type="text" v-if="resultForm.race=='arabs'" value="阿拉伯人"></el-input>
                    </el-form-item>
                    <el-form-item label="戴眼镜" prop="glasses">
                            <el-input type="text" v-if="resultForm.glasses=='none'" value="无眼镜"></el-input>
                            <el-input type="text" v-if="resultForm.glasses=='common'" value="普通眼镜"></el-input>
                            <el-input type="text" v-if="resultForm.glasses=='sun'" value="墨镜"></el-input>
                    </el-form-item>
                    <el-form-item label="表情" prop="expression">
                        <el-input type="text" v-if="resultForm.expression=='none'" value="不笑"></el-input>
                        <el-input type="text" v-if="resultForm.expression=='smile'" value="微笑"></el-input>
                        <el-input type="text" v-if="resultForm.expression=='laugh'" value="大笑"></el-input>
                    </el-form-item>
                    <el-form-item label="颜值" prop="beauty">
                        <el-input type="text" v-if="resultForm.beauty<=20&&resultForm.beauty>0" value="奇丑无比"></el-input>
                        <el-input type="text" v-if="resultForm.beauty>20&&resultForm.beauty<=40" value="丑陋"></el-input>
                        <el-input type="text" v-if="resultForm.beauty>40&&resultForm.beauty<=70" value="俊美"></el-input>
                        <el-input type="text" v-if="resultForm.beauty>70" value="绝美无比"></el-input>
                    </el-form-item>
                </el-form>
            </div>
        </div>
    </div>
</template>

<script>
    import VueCropper  from 'vue-cropperjs';
    import axios from 'axios';
    export default {
        name: 'upload',
        data() {
            return {
                imageUrl: '',
                resultForm:{
                    //人物类型
                    faceType:'',
                    //年龄
                    age:'',
                    //性别
                    gender:'',
                    //人种
                    race:'',
                    //戴眼镜
                    glasses:'',
                    //表情
                    expression:'',
                    //颜值
                    beauty:''
                }
            };
        },
        methods: {
            onSuccess(response, file) {
            this.imageUrl = URL.createObjectURL(file.raw);
            console.log(response);
            if(response.error_code==0){
                let faceDetect = response.result.face_list;
                if(faceDetect!=null){
                    for(let i =0;i<faceDetect.length;i++){
                        this.resultForm.faceType = faceDetect[i].face_type.type;
                        this.resultForm.age = faceDetect[i].age;
                        this.resultForm.gender = faceDetect[i].gender.type;
                        this.resultForm.race = faceDetect[i].race.type;
                        this.resultForm.glasses = faceDetect[i].glasses.type;
                        this.resultForm.expression = faceDetect[i].expression.type;
                        this.resultForm.beauty = faceDetect[i].beauty;
                    }
                }
            }else{
                this.$message("图片人物形象不明显,无法分辨");
            }

            },
            beforeAvatarUpload(file) {
                const isJPG = file.type === 'image/jpeg';
                const isLt2M = file.size / 1024 / 1024 < 2;
                if (!isJPG) {
                    this.$message.error('上传头像图片只能是 JPG 格式!');
                }
                if (!isLt2M) {
                    this.$message.error('上传头像图片大小不能超过 2MB!');
                }
                return isJPG && isLt2M;
            }
        }
    }
</script>
<style>
        .avatar-uploader .el-upload {
          border: 1px dashed #d9d9d9;
          border-radius: 6px;
          width: 600px;
          height: 600px;
          cursor: pointer;
          position: relative;
          overflow: hidden;
        }
        .avatar-uploader .el-upload:hover {
          border-color: #409EFF;
        }
        .avatar-uploader-icon {
          font-size: 28px;
          color: #8c939d;
          width: 178px;
          height: 178px;
          line-height: 600px;
          text-align: center;
        }
        .avatar {
          width: 600px;
          height: 600px;
          display: block;
        }
</style>
摄像头开启识别:
<template>
<div>
    <div class="crumbs">
        <el-breadcrumb separator="/">
            <el-breadcrumb-item><i class="el-icon-date"></i> 智能识别</el-breadcrumb-item>
            <el-breadcrumb-item>相机识别</el-breadcrumb-item>
        </el-breadcrumb>
    </div>
    <div class="container">
            <div class="container-left">
                <video ref="video" width="600" height="600" autoplay></video>
                <button ref="capture" @click="faceDetect">智能辨别</button>
                <canvas ref="canvas" id="convas" width="320" height="320" style="visibility:hidden">
                </canvas>
            </div>
            <div class="container-right">
                <el-form :model="resultForm" status-icon  ref="resultForm" label-width="100px" class="demo-ruleForm">
                    <el-form-item label="人物类型" prop="faceType">
                        <el-input type="text" v-if="resultForm.faceType=='human'" value="真实人物"></el-input>
                        <el-input type="text" v-if="resultForm.faceType=='cartoon'" value="卡通人物"></el-input>
                    </el-form-item>
                    <el-form-item label="年龄" prop="age">
                        <el-input type="text" v-if="resultForm.age!=''" v-model="resultForm.age"></el-input>
                    </el-form-item>
                    <el-form-item label="性别" prop="gender">
                        <el-input type="text" v-if="resultForm.gender=='male'" value="男"></el-input>
                        <el-input type="text" v-if="resultForm.gender=='female'" value="女"></el-input>
                    </el-form-item>
                    <el-form-item label="人种" prop="race">
                            <el-input type="text" v-if="resultForm.race=='yellow'" value="黄种人"></el-input>
                            <el-input type="text" v-if="resultForm.race=='white'" value="白种人"></el-input>
                            <el-input type="text" v-if="resultForm.race=='black'" value="黑种人"></el-input>
                            <el-input type="text" v-if="resultForm.race=='arabs'" value="阿拉伯人"></el-input>
                    </el-form-item>
                    <el-form-item label="戴眼镜" prop="glasses">
                            <el-input type="text" v-if="resultForm.glasses=='none'" value="无眼镜"></el-input>
                            <el-input type="text" v-if="resultForm.glasses=='common'" value="普通眼镜"></el-input>
                            <el-input type="text" v-if="resultForm.glasses=='sun'" value="墨镜"></el-input>
                    </el-form-item>
                    <el-form-item label="表情" prop="expression">
                        <el-input type="text" v-if="resultForm.expression=='none'" value="不笑"></el-input>
                        <el-input type="text" v-if="resultForm.expression=='smile'" value="微笑"></el-input>
                        <el-input type="text" v-if="resultForm.expression=='laugh'" value="大笑"></el-input>
                    </el-form-item>
                    <el-form-item label="颜值" prop="beauty">
                        <el-input type="text" v-if="resultForm.beauty<=20&&resultForm.beauty>0" value="奇丑无比"></el-input>
                        <el-input type="text" v-if="resultForm.beauty>20&&resultForm.beauty<=40" value="丑陋"></el-input>
                        <el-input type="text" v-if="resultForm.beauty>40&&resultForm.beauty<=70" value="俊美"></el-input>
                        <el-input type="text" v-if="resultForm.beauty>70" value="绝美无比"></el-input>
                    </el-form-item>
                </el-form>
            </div>
    </div>
</div>
 </template>
<script>
import axios from 'axios'
    export default{
        data(){
            return{
                resultForm:{
                    //人物类型
                    faceType:'',
                    //年龄
                    age:'',
                    //性别
                    gender:'',
                    //人种
                    race:'',
                    //戴眼镜
                    glasses:'',
                    //表情
                    expression:'',
                    //颜值
                    beauty:''
                }
            }
        },mounted() {
            this.useCamera();
        },
        methods:{
            //访问用户媒体设备的兼容方法
            getUserMedia(constraints, success, error) {
                if (navigator.mediaDevices.getUserMedia) {
                    //最新的标准API
                    navigator.mediaDevices.getUserMedia(constraints).then(success).catch(error);
                } else if (navigator.webkitGetUserMedia) {
                    //webkit核心浏览器
                    navigator.webkitGetUserMedia(constraints,success, error)
                } else if (navigator.mozGetUserMedia) {
                    //firfox浏览器
                    navigator.mozGetUserMedia(constraints, success, error);
                } else if (navigator.getUserMedia) {
                    //旧版API
                    navigator.getUserMedia(constraints, success, error);
                }
            },
            //摄像头访问成功
            success(stream) {
                //兼容webkit核心浏览器
                let CompatibleURL = window.URL || window.webkitURL;
                //将视频流设置为video元素的源
                console.log(stream);
                //video.src = CompatibleURL.createObjectURL(stream);
                let video = this.$refs.video;
                video.srcObject = stream;
                video.play();
            },
            //摄像头访问失败
            error(error) {
                 console.log(`访问用户媒体设备失败${error.name}, ${error.message}`);
            },
            //调用摄像头进行访问
            useCamera(){
                let video = this.$refs.video;
                if (navigator.mediaDevices.getUserMedia || navigator.getUserMedia || navigator.webkitGetUserMedia
                || navigator.mozGetUserMedia) {
                    //调用用户媒体设备, 访问摄像头
                    this.getUserMedia({video : {width: 600, height: 600}}, this.success, this.error);
                    } else {
                    alert('不支持访问用户媒体');
                    }
            },
            //获取摄像头图片提交后台验证
            faceDetect(){
                let canvas = this.$refs.canvas;
                let context = canvas.getContext('2d');
                let video = this.$refs.video;
                context.drawImage(video, 0, 0, 480, 320);
                let base64Data = convas.toDataURL('image/jpeg');
                let blob = this.getDataURItoBlob(base64Data,'abcd.jpg');
                let params = new FormData();
                params.append('file',blob);
                axios.post('http://localhost:8080/api/recognition/faceDetect',params,
                    {
                        headers:{
                        'Content-Type':'multipart/form-data'
                        }
                    }
                    ).then((response)=>{
                        console.log(response);
                        if(response.data.error_code==0){
                            let faceDetect = response.data.result.face_list;
                            if(faceDetect!=null){
                                for(let i =0;i<faceDetect.length;i++){
                                    this.resultForm.faceType = faceDetect[i].face_type.type;
                                    this.resultForm.age = faceDetect[i].age;
                                    this.resultForm.gender = faceDetect[i].gender.type;
                                    this.resultForm.race = faceDetect[i].race.type;
                                    this.resultForm.glasses = faceDetect[i].glasses.type;
                                    this.resultForm.expression = faceDetect[i].expression.type;
                                    this.resultForm.beauty = faceDetect[i].beauty;
                                }
                            }
                        }else{
                             this.$message("图片人物形象不明显,无法分辨");
                        }
                    }).catch((response)=>{
                            this.$message("图片人物形象不明显,无法分辨");
                    });
            },
            //把canvas标签获取的base64对象转换成bolb对象 也就是file对象
            getDataURItoBlob (base64Data,fileName) {
                let arr = base64Data.split(','), mime = arr[0].match(/:(.*?);/)[1],
                    bstr = atob(arr[1]), n = bstr.length, u8arr = new Uint8Array(n);
                while(n--){
                    u8arr[n] = bstr.charCodeAt(n);
                }
                return new File([u8arr], fileName, {type:mime});
            }
        }
    }
</script>
运行结果:
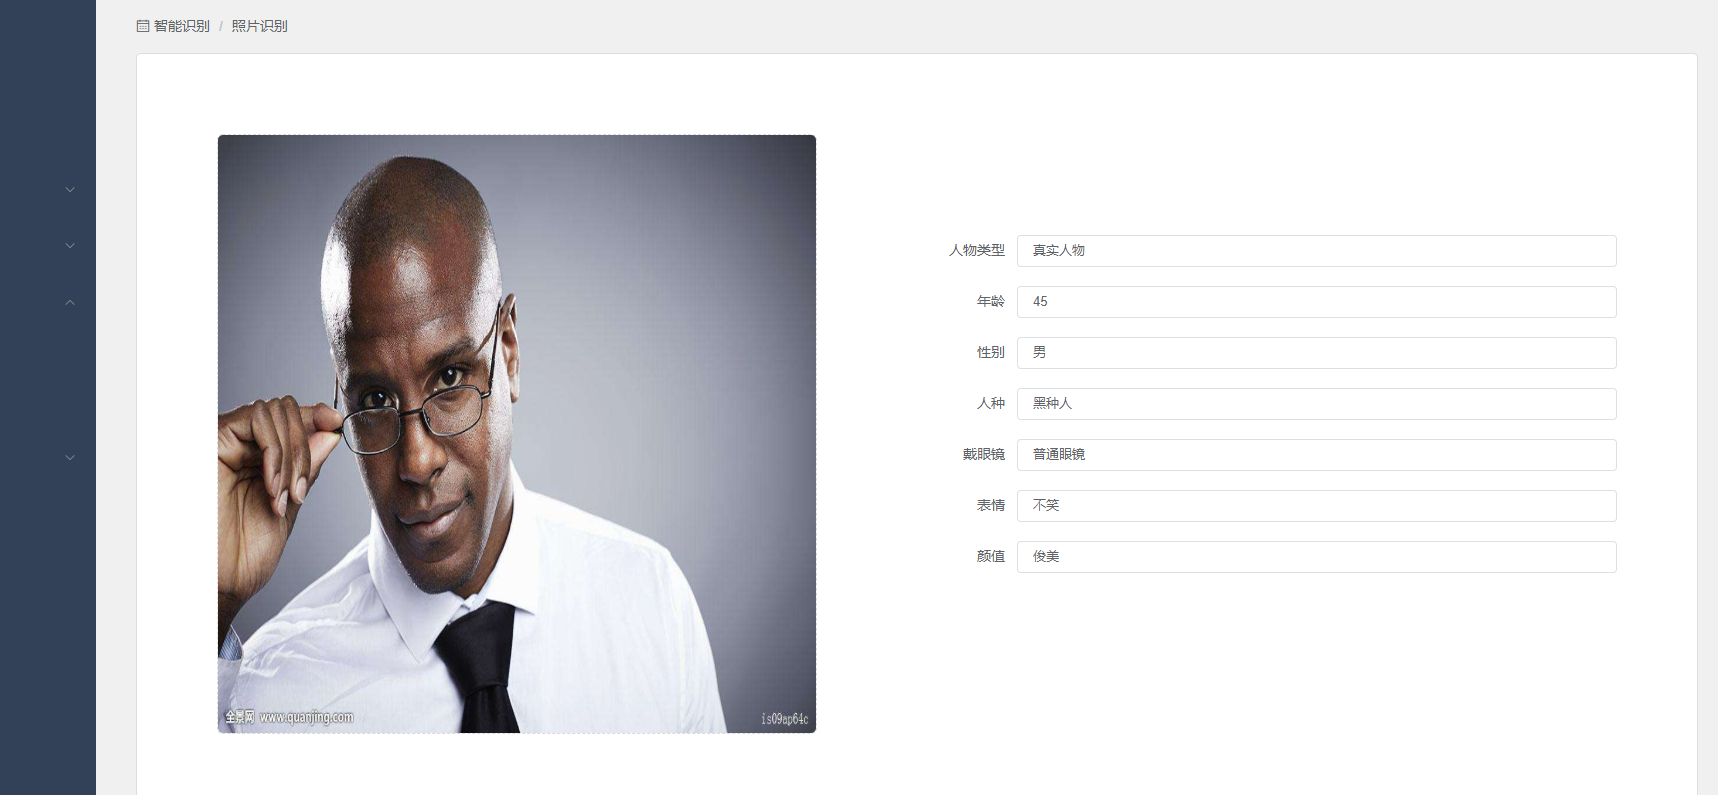

关于人脸检测 就暂时说这么多 后续我会做一些实物识别 同声翻译之类的 当然这都建立在百度AI的基础上 感谢百度 !!!!