一、springboot下引入websocket依赖
		<dependency>
			<groupId>org.springframework.boot</groupId>
			<artifactId>spring-boot-starter-websocket</artifactId>
		</dependency>
		<dependency>
			<groupId>org.webjars</groupId>
			<artifactId>webjars-locator</artifactId>
		</dependency>
		<dependency>
			<groupId>org.webjars</groupId>
			<artifactId>sockjs-client</artifactId>
			<version>1.0.2</version>
		</dependency>
		<dependency>
			<groupId>org.webjars</groupId>
			<artifactId>stomp-websocket</artifactId>
			<version>2.3.3</version>
		</dependency>
	</dependencies>
二、编写WebSocketConfig (websocket配置文件)
import org.springframework.context.annotation.Configuration;
import org.springframework.messaging.simp.config.MessageBrokerRegistry;
import org.springframework.web.socket.config.annotation.AbstractWebSocketMessageBrokerConfigurer;
import org.springframework.web.socket.config.annotation.EnableWebSocketMessageBroker;
import org.springframework.web.socket.config.annotation.StompEndpointRegistry;

@Configuration
@EnableWebSocketMessageBroker // 開啟使用STOMP協議來傳輸基於代理的消息,Broker就是代理的意思
public class WebSocketConfig extends AbstractWebSocketMessageBrokerConfigurer{

    /**
     *
     * @param registry
     */
    @Override
    public void configureMessageBroker(MessageBrokerRegistry registry) {
        //註冊STOMP協議的節點,並指定映射的URL 发送消息前缀
        registry.enableSimpleBroker("/topic");
        //註冊接收消息的節點 接收消息前缀
        registry.setApplicationDestinationPrefixes("/server");
    }

    @Override
    public void registerStompEndpoints(StompEndpointRegistry registry) {
        //注册STOMP协议节点,同时指定使用SockJS协议
        registry.addEndpoint("/websocket-server").setAllowedOrigins("*").withSockJS();
    }
}
三、SocketController 用于接收客户的消息,和返回客户端消息
import org.springframework.beans.factory.annotation.Autowired;
import org.springframework.messaging.handler.annotation.MessageMapping;
import org.springframework.messaging.simp.SimpMessagingTemplate;
import org.springframework.stereotype.Controller;
import org.springframework.web.bind.annotation.CrossOrigin;
import org.springframework.web.bind.annotation.GetMapping;
import org.springframework.web.bind.annotation.ResponseBody;
@Controller
@CrossOrigin
public class SocketController {
@Autowired
private SimpMessagingTemplate messagingTemplate;
/**
* @MessageMapping 接收客户端通过 /server/send 发送的消息
* messagingTemplate.convertAndSend 给客户端发送消息 客户端通过 /topic/message 接收
*
* @param name
*/
@MessageMapping("/send")
public void pushMessage(String name) {
System.out.println(name);
messagingTemplate.convertAndSend("/topic/message", "123");
}
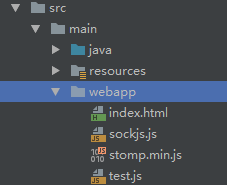
}四、在src/main 下创建webapp目录 编写前端代码
五、index.html
<!DOCTYPE html>
<html lang="en">
<head>
    <meta charset="UTF-8">
    <title>Title</title>
</head>

<!-- 没有本地sockjs 和 stompjs 可以使用下面两行代码 -->
<!--<script src="http://cdn.bootcss.com/sockjs-client/1.1.1/sockjs.min.js"></script>-->
<!--<script src="http://cdn.bootcss.com/stomp.js/2.3.3/stomp.js"></script>-->

<button onclick="send(new Date())">Send</button>
<script type="application/javascript" src="sockjs.js"></script>
<script type="application/javascript" src="stomp.min.js"></script>
<script src="test.js"></script>
</html>
六、test.js
var socket = new SockJS('/websocket-server');
var stompClient = Stomp.over(socket);
stompClient.connect({}, function (frame) {
    stompClient.subscribe('/topic/message', function (txt) {
        var res = JSON.parse(txt.body);
        console.log(res);
        alert(res);
    });
});

function send(txt) {
    stompClient.send("/server/send", {}, txt);
}
七、启动项目,访问localhost:8080 点击按钮测试