上一篇中我们简单的介绍了如何使用视图动画Animation API的基本使用,今天就来介绍一下功能更为强大的属性动画Animator API的基本使用,首先我们来看一看Animator的继承结构:
Animator
public abstract class Animator extends Object implements Cloneable
| java.lang.Object | |
| ↳ | android.animation.Animator |
| Known direct subclasses |
| Known indirect subclasses |
上面是官方API给出的解答,下面是我简单绘制的关系图:

其中,使用最多的就是ObjectAnimator以及ObjectAnimator配合AnimatorSet使用,下面就来看一看具体的用法。
1,ObjectAnimator基本使用
1.1 创建方法
(1)通过它的静态工厂类获取,比如:
ObjectAnimator animator1= (ObjectAnimator) ObjectAnimator.ofFloat(imageView,"alpha",1,0,1);(2)通过资源文件配合AnimatorInflater获取,比如:
ObjectAnimator animator9= (ObjectAnimator) AnimatorInflater.loadAnimator(this,R.animator.animator1);1.2 动画属性参数
和视图动画类似,这里分的更加细致了,主要有以下几个:
- alpha
ObjectAnimator animator1= (ObjectAnimator) ObjectAnimator.ofFloat(imageView,"alpha",1,0,1); - scaleX
ObjectAnimator animator2= (ObjectAnimator) ObjectAnimator.ofFloat(imageView,"scaleX",1,0,1); - scaleY
ObjectAnimator animator3= (ObjectAnimator) ObjectAnimator.ofFloat(imageView,"scaleY",1,0,1); - rotationX
ObjectAnimator animator4= (ObjectAnimator) ObjectAnimator.ofFloat(imageView,"rotationX",0,180,0); - rotationY
ObjectAnimator animator5= (ObjectAnimator) ObjectAnimator.ofFloat(imageView,"rotationY",0,240,0); - rotation
ObjectAnimator animator6= (ObjectAnimator) ObjectAnimator.ofFloat(imageView,"rotation",0,360,0); - translationX
ObjectAnimator animator7= (ObjectAnimator) ObjectAnimator.ofFloat(imageView,"translationX",10,100,200,400); - translationY
ObjectAnimator animator8= (ObjectAnimator) ObjectAnimator.ofFloat(imageView,"translationY",10,100,200,400);
上面的属性都是默认自带的属性,我们也可以通过自定义属性的方式来添加新的属性,比如给一个ImageView对象添加宽度属性,首先需要定义各一个包装类WrapperView,在其中实现getXXX和setXXX即可(该部分代码直接源于《Android群英传》):
package com.hfut.operationanimator;

import android.widget.ImageView;

/**
 * author:why
 * created on: 2018/9/8 23:18
 * description:
 */
public class WrapperView {
    ImageView mImageView;
    public WrapperView(ImageView imageView){
        this.mImageView=imageView;
    }

    public int getWidth(){
        return mImageView.getLayoutParams().width;
    }

    public void setWidth(int width){
        mImageView.getLayoutParams().width=width;
        mImageView.requestLayout();
    }
}
应用(自定义width属性):
        WrapperView wrapperView=new WrapperView(imageView);
        ObjectAnimator objectAnimator10=ObjectAnimator.ofInt(wrapperView,"width",100);
1.3 ObjectAnimator示例
下面就来看一下ObjectAnimator配合AnimatorSet的示例:
activity_main.xml代码:
<?xml version="1.0" encoding="utf-8"?>
<android.support.constraint.ConstraintLayout xmlns:android="http://schemas.android.com/apk/res/android"
    xmlns:app="http://schemas.android.com/apk/res-auto"
    xmlns:tools="http://schemas.android.com/tools"
    android:layout_width="match_parent"
    android:layout_height="match_parent"
    tools:context="com.hfut.operationanimator.MainActivity">

    <Button
        android:id="@+id/control_text_button"
        android:text="文本动画"
        android:onClick="textAnimator"
        android:textSize="30sp"
        android:layout_marginTop="20dp"
        app:layout_constraintLeft_toLeftOf="parent"
        app:layout_constraintRight_toRightOf="parent"
        app:layout_constraintTop_toTopOf="parent"
        android:layout_width="wrap_content"
        android:layout_height="wrap_content" />

    <ImageView
        android:layout_marginTop="45px"
        android:id="@+id/test_image"
        app:layout_constraintTop_toBottomOf="@id/control_text_button"
        android:src="@mipmap/image"
        app:layout_constraintLeft_toLeftOf="parent"
        app:layout_constraintRight_toRightOf="parent"
        android:layout_width="500dp"
        android:layout_height="420dp" />

</android.support.constraint.ConstraintLayout>
MainActivity代码:
package com.hfut.operationanimator;

import android.animation.Animator;
import android.animation.AnimatorInflater;
import android.animation.AnimatorListenerAdapter;
import android.animation.AnimatorSet;
import android.animation.ObjectAnimator;
import android.animation.ValueAnimator;
import android.os.Handler;
import android.os.Message;
import android.support.v7.app.AppCompatActivity;
import android.os.Bundle;
import android.util.Log;
import android.view.View;
import android.widget.ImageView;
import android.widget.TextView;
import android.widget.Toast;

/**
 * @author why
 * @date 2018-9-6 20:55:46
 */
public class MainActivity extends AppCompatActivity {
    private static final String TAG = "MainActivity";

    TextView textView;
    ImageView imageView;

//    Handler handler=new Handler(){
//        @Override
//        public void handleMessage(Message msg) {
//            Toast.makeText(MainActivity.this,"透明度在0.3左右了,开始同步旋转",Toast.LENGTH_SHORT).show();
//            //animator2.start();
//            ObjectAnimator animator3= (ObjectAnimator) ObjectAnimator.ofFloat(imageView,"alpha",0.3f,1);
//            ObjectAnimator animator2=(ObjectAnimator) ObjectAnimator.ofFloat(imageView,"rotation",0,90);
//            animator2.addListener(new AnimatorListenerAdapter() {
//                @Override
//                public void onAnimationCancel(Animator animation) {
//                    super.onAnimationCancel(animation);
//                }
//
//                @Override
//                public void onAnimationStart(Animator animation) {
//                    super.onAnimationStart(animation);
//                }
//
//                @Override
//                public void onAnimationEnd(Animator animation) {
//                    super.onAnimationEnd(animation);
//                    Toast.makeText(MainActivity.this,"动画结束,好好欣赏妹子吧",Toast.LENGTH_SHORT).show();
//                }
//            });
//            animator2.setDuration(4000);
//            animator3.setDuration(4000);
//            AnimatorSet animatorSet=new AnimatorSet();
//            animatorSet.playTogether(animator2,animator3);
//            animatorSet.start();
//        }
//    };
    @Override
    protected void onCreate(Bundle savedInstanceState) {
        super.onCreate(savedInstanceState);
        setContentView(R.layout.activity_main);
        imageView=findViewById(R.id.test_image);
        imageView.setImageDrawable(getResources().getDrawable(R.mipmap.image));
    }


    public void textAnimator(View view){
//
        ObjectAnimator animator1= (ObjectAnimator) ObjectAnimator.ofFloat(imageView,"alpha",0,1);
        ObjectAnimator animator2= (ObjectAnimator) ObjectAnimator.ofFloat(imageView,"scaleX",1,0,1);
        ObjectAnimator animator3= (ObjectAnimator) ObjectAnimator.ofFloat(imageView,"scaleY",1,0,1);
        ObjectAnimator animator4= (ObjectAnimator) ObjectAnimator.ofFloat(imageView,"rotationX",0,180,0);
        ObjectAnimator animator5= (ObjectAnimator) ObjectAnimator.ofFloat(imageView,"rotationY",0,240,0);
        ObjectAnimator animator6= (ObjectAnimator) ObjectAnimator.ofFloat(imageView,"rotation",0,450);
        ObjectAnimator animator7= (ObjectAnimator) ObjectAnimator.ofFloat(imageView,"translationX",imageView.getX()-45,100);
        ObjectAnimator animator8= (ObjectAnimator) ObjectAnimator.ofFloat(imageView,"translationY",imageView.getY(),300);

        ObjectAnimator animator9= (ObjectAnimator) ObjectAnimator.ofFloat(imageView,"translationX",100,10);
        ObjectAnimator animator10= (ObjectAnimator) ObjectAnimator.ofFloat(imageView,"scaleX",1,1.2f);
        ObjectAnimator animator11= (ObjectAnimator) ObjectAnimator.ofFloat(imageView,"scaleY",1,1.2f);
        ObjectAnimator animator12= (ObjectAnimator) ObjectAnimator.ofFloat(imageView,"translationY",300,200);


        // ObjectAnimator animator9= (ObjectAnimator) AnimatorInflater.loadAnimator(this,R.animator.animator1);

         animator1.setDuration(1000);
         animator1.start();

        animator2.setDuration(1000);
        animator2.setStartDelay(300);

        animator3.setDuration(1000);
        animator3.setStartDelay(300);

        animator4.setDuration(1000);
        animator4.setStartDelay(300);

        animator5.setDuration(1000);
        animator5.setStartDelay(300);

        animator6.setDuration(1000);
        animator6.setStartDelay(300);

        animator7.setDuration(1000);
        animator7.setStartDelay(300);

        animator8.setDuration(1000);
        animator8.setStartDelay(300);

        animator9.setDuration(2000);
        animator9.setStartDelay(300);
        animator10.setDuration(2000);
        animator10.setStartDelay(300);
        animator11.setDuration(2000);
        animator11.setStartDelay(300);
        animator12.setDuration(2000);
        animator12.setStartDelay(300);

        AnimatorSet animatorSet1=new AnimatorSet();
        animatorSet1.playTogether(animator10,animator11,animator12);


        AnimatorSet set=new AnimatorSet();
        set.playSequentially(animator1,animator2,animator3,animator4,animator5,animator6,animator7,animator8,animator9,animatorSet1);
        //set.playSequentially(animator1,animator2,animator3,animator4,animator5,animator6,animator7,animator8,animator9,animator10,animator11);
        set.start();


//        WrapperView wrapperView=new WrapperView(imageView);
//        ObjectAnimator objectAnimator10=ObjectAnimator.ofInt(wrapperView,"width",100);


//        final ValueAnimator valueAnimator=ValueAnimator.ofFloat(0,1.0f);
//       // valueAnimator.setTarget(imageView);
//        valueAnimator.setDuration(6000);
//        valueAnimator.addUpdateListener(new ValueAnimator.AnimatorUpdateListener() {
//            @Override
//            public void onAnimationUpdate(ValueAnimator animation) {
//                float endAlpha= (float) animation.getAnimatedValue();
//                Log.d(TAG, "onAnimationUpdate: "+endAlpha);
//                if(endAlpha>=0.29f&&endAlpha<=0.31f){
//                    valueAnimator.cancel();
//                    //Toast.makeText(MainActivity.this,"透明度在0.5左右了",Toast.LENGTH_SHORT).show();
//                    Message message=new Message();
//                    handler.sendMessage(message);
//                }
//            }
//        });
//        valueAnimator.start();
    }
}
上面的代码注意几点:
(1)每一个Animator可以单独作用到一个View上
(2)多个Animator可以通过ANimatorSet作用到View上
(3)AnimatorSet中可以嵌套AnimatorSet
(4)AnimatorSet中添加的多个动画有以上两种播放模式(不考虑参数类型):
- set.playTogether()
- set.playSequentially()
(5)AnimatorSet播放动画时长可以自己设置,也可以通过其添加的动画自己设置,比如:
AnimatorSet set=new AnimatorSet();
set.setDuration(2000);
也可以通过上例中来设置。
2 ,ValueAnimator基本使用
2.1 基础理解
从最开始的继承关系图可以看出,它是ObjectAnimator的父类,它本身不产生任何动画效果,但是我们可以通过它实现对我们动画更加精确的控制,这里面我们可以通过对其添加更新监听实时获取动画的相关参数数值,从而实现对动画的精确控制,下面我就来提一个需求:
实现当一个View 的透明度在0.3的时候开启同步旋转放大动画?下面就来看看具体实现
2.2 示例实现
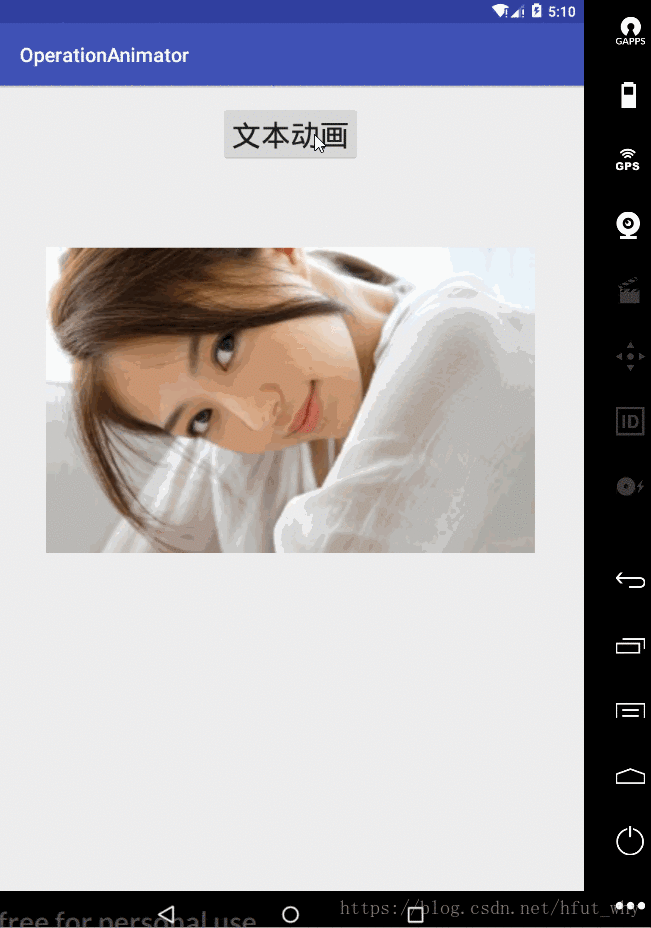
效果图如下:

activity_main.xml代码:
<?xml version="1.0" encoding="utf-8"?>
<android.support.constraint.ConstraintLayout xmlns:android="http://schemas.android.com/apk/res/android"
    xmlns:app="http://schemas.android.com/apk/res-auto"
    xmlns:tools="http://schemas.android.com/tools"
    android:layout_width="match_parent"
    android:layout_height="match_parent"
    tools:context="com.hfut.operationanimator.MainActivity">

    <Button
        android:id="@+id/control_text_button"
        android:text="文本动画"
        android:onClick="textAnimator"
        android:textSize="30sp"
        android:layout_marginTop="20dp"
        app:layout_constraintLeft_toLeftOf="parent"
        app:layout_constraintRight_toRightOf="parent"
        app:layout_constraintTop_toTopOf="parent"
        android:layout_width="wrap_content"
        android:layout_height="wrap_content" />

    <ImageView
        android:layout_marginTop="150px"
        android:id="@+id/test_image"
        app:layout_constraintTop_toBottomOf="@id/control_text_button"
        android:src="@mipmap/image"
        app:layout_constraintLeft_toLeftOf="parent"
        app:layout_constraintRight_toRightOf="parent"
        android:layout_width="500dp"
        android:layout_height="420dp" />

</android.support.constraint.ConstraintLayout>
Mainactivity代码:
package com.hfut.operationanimator;

import android.animation.Animator;
import android.animation.AnimatorInflater;
import android.animation.AnimatorListenerAdapter;
import android.animation.AnimatorSet;
import android.animation.ObjectAnimator;
import android.animation.ValueAnimator;
import android.os.Handler;
import android.os.Message;
import android.support.v7.app.AppCompatActivity;
import android.os.Bundle;
import android.util.Log;
import android.view.View;
import android.widget.ImageView;
import android.widget.TextView;
import android.widget.Toast;

/**
 * @author why
 * @date 2018-9-6 20:55:46
 */
public class MainActivity extends AppCompatActivity {
    private static final String TAG = "MainActivity";
    ImageView imageView;

    Handler handler=new Handler(){
        @Override
        public void handleMessage(Message msg) {
            Toast.makeText(MainActivity.this,"透明度在0.3左右了,开始同步旋转",Toast.LENGTH_SHORT).show();
            //animator2.start();
            ObjectAnimator animator1=(ObjectAnimator) ObjectAnimator.ofFloat(imageView,"scaleX",1,1.3f);
            ObjectAnimator animator2=(ObjectAnimator) ObjectAnimator.ofFloat(imageView,"scaleY",1,1.3f);
            ObjectAnimator animator3=(ObjectAnimator) ObjectAnimator.ofFloat(imageView,"rotation",0,90);
            animator2.addListener(new AnimatorListenerAdapter() {
                @Override
                public void onAnimationCancel(Animator animation) {
                    super.onAnimationCancel(animation);
                }

                @Override
                public void onAnimationStart(Animator animation) {
                    super.onAnimationStart(animation);
                }

                @Override
                public void onAnimationEnd(Animator animation) {
                    super.onAnimationEnd(animation);
                    Toast.makeText(MainActivity.this,"动画结束,好好欣赏妹子吧",Toast.LENGTH_SHORT).show();
                }
            });
            animator1.setDuration(5000);
            animator2.setDuration(5000);
            animator3.setDuration(5000);

            AnimatorSet animatorSet=new AnimatorSet();
            animatorSet.playTogether(animator1,animator2,animator3);
            animatorSet.start();
        }
    };
    @Override
    protected void onCreate(Bundle savedInstanceState) {
        super.onCreate(savedInstanceState);
        setContentView(R.layout.activity_main);
        imageView=findViewById(R.id.test_image);
        imageView.setImageDrawable(getResources().getDrawable(R.mipmap.image));
    }


    public void textAnimator(View view){
//
//        ObjectAnimator animator1= (ObjectAnimator) ObjectAnimator.ofFloat(imageView,"alpha",0,1);
//        ObjectAnimator animator2= (ObjectAnimator) ObjectAnimator.ofFloat(imageView,"scaleX",1,0,1);
//        ObjectAnimator animator3= (ObjectAnimator) ObjectAnimator.ofFloat(imageView,"scaleY",1,0,1);
//        ObjectAnimator animator4= (ObjectAnimator) ObjectAnimator.ofFloat(imageView,"rotationX",0,180,0);
//        ObjectAnimator animator5= (ObjectAnimator) ObjectAnimator.ofFloat(imageView,"rotationY",0,240,0);
//        ObjectAnimator animator6= (ObjectAnimator) ObjectAnimator.ofFloat(imageView,"rotation",0,450);
//        ObjectAnimator animator7= (ObjectAnimator) ObjectAnimator.ofFloat(imageView,"translationX",imageView.getX()-45,100);
//        ObjectAnimator animator8= (ObjectAnimator) ObjectAnimator.ofFloat(imageView,"translationY",imageView.getY(),300);
//
//        ObjectAnimator animator9= (ObjectAnimator) ObjectAnimator.ofFloat(imageView,"translationX",100,10);
//        ObjectAnimator animator10= (ObjectAnimator) ObjectAnimator.ofFloat(imageView,"scaleX",1,1.2f);
//        ObjectAnimator animator11= (ObjectAnimator) ObjectAnimator.ofFloat(imageView,"scaleY",1,1.2f);
//        ObjectAnimator animator12= (ObjectAnimator) ObjectAnimator.ofFloat(imageView,"translationY",300,200);
//
//
//        // ObjectAnimator animator9= (ObjectAnimator) AnimatorInflater.loadAnimator(this,R.animator.animator1);
//
//         animator1.setDuration(1000);
//         animator1.start();
//
//        animator2.setDuration(1000);
//        animator2.setStartDelay(300);
//
//        animator3.setDuration(1000);
//        animator3.setStartDelay(300);
//
//        animator4.setDuration(1000);
//        animator4.setStartDelay(300);
//
//        animator5.setDuration(1000);
//        animator5.setStartDelay(300);
//
//        animator6.setDuration(1000);
//        animator6.setStartDelay(300);
//
//        animator7.setDuration(1000);
//        animator7.setStartDelay(300);
//
//        animator8.setDuration(1000);
//        animator8.setStartDelay(300);
//
//        animator9.setDuration(2000);
//        animator9.setStartDelay(300);
//        animator10.setDuration(2000);
//        animator10.setStartDelay(300);
//        animator11.setDuration(2000);
//        animator11.setStartDelay(300);
//        animator12.setDuration(2000);
//        animator12.setStartDelay(300);
//
//        AnimatorSet animatorSet1=new AnimatorSet();
//        animatorSet1.playTogether(animator10,animator11,animator12);


       // AnimatorSet set=new AnimatorSet();
        //set.setDuration(2000);
        //set.playSequentially(animator1,animator2,animator3,animator4,animator5,animator6,animator7,animator8,animator9,animatorSet1);
        //set.playSequentially(animator1,animator2,animator3,animator4,animator5,animator6,animator7,animator8,animator9,animator10,animator11);
        //set.start();


//        WrapperView wrapperView=new WrapperView(imageView);
//        ObjectAnimator objectAnimator10=ObjectAnimator.ofInt(wrapperView,"width",100);
        ObjectAnimator animator3= (ObjectAnimator) ObjectAnimator.ofFloat(imageView,"alpha",0,1);
        animator3.setDuration(8000);
        animator3.start();
        final ValueAnimator valueAnimator=ValueAnimator.ofFloat(0,1.0f);
       // valueAnimator.setTarget(imageView);
        valueAnimator.setDuration(8000);
        valueAnimator.addUpdateListener(new ValueAnimator.AnimatorUpdateListener() {
            @Override
            public void onAnimationUpdate(ValueAnimator animation) {
                float processAlpha= (float) animation.getAnimatedValue();
                Log.d(TAG, "onAnimationUpdate: "+processAlpha);
                if(processAlpha>=0.29f&&processAlpha<=0.31f){
                    valueAnimator.cancel();
                    //Toast.makeText(MainActivity.this,"透明度在0.5左右了",Toast.LENGTH_SHORT).show();
                    Message message=new Message();
                    handler.sendMessage(message);
                }
            }
        });
        valueAnimator.start();
    }
}
下面是日志信息:

可见,此API可以实时获取动画属性值,可以帮助我们做更为精确的控制。
3, PropertyValuesHolder的基本使用
其功能和AnimatorSet中的playTogether()接口类似,用于定义一个View多个动画同时播放,下面给出简单的演示代码,效果示例就不完整写了:
PropertyValuesHolder valuesHolder1=PropertyValuesHolder.ofFloat("scaleX",1,1.1f);
PropertyValuesHolder valuesHolder2=PropertyValuesHolder.ofFloat("scaleY",1,1.1f);
PropertyValuesHolder valuesHolder3=PropertyValuesHolder.ofFloat("alpha",0.5f,1.0f);
ObjectAnimator.ofPropertyValuesHolder(imageView,valuesHolder1,valuesHolder2,valuesHolder3).setDuration(3000).start();
4,xml实现属性动画
4.1 单个属性动画实现
这个在上面已经介绍过了
4.2 多个属性动画实现
说到这里,我们就需要先看一下官方API了:
【
从api 23开始,可以使用PropertyValuesHolder和Keyframe在资源文件中创建更复杂的动画。使用PropertyValuesHolders允许Animator并行地动画几个属性,如本示例所示:
<objectAnimator xmlns:android="http://schemas.android.com/apk/res/android"
android:duration="1000"
android:repeatCount="1"
android:repeatMode="reverse">
<propertyValuesHolder
    android:propertyName="x"
    android:valueTo="400" />
<propertyValuesHolder
    android:propertyName="y"
    android:valueTo="200" />
</objectAnimator>
使用关键帧允许动画遵循更复杂的路径从开始到结束值。请注意,您可以为每个关键帧指定显式小数值(从0到1),以确定动画在总体持续时间内何时应该达到该值。或者,您可以离开分数,关键帧将在整个持续时间内平均分布。此外,当动画器启动时,没有值的关键帧将从目标对象中派生出它的值,就像只指定一个值的动画师一样。此外,还可以指定一个可选的内插器。内插器将应用于内插器设置的关键帧与前一个关键帧之间的间隔上。如果没有提供内插器,则默认AccelerateDecelerateInterpolator会被使用。
<propertyValuesHolder android:propertyName="x">
<keyframe
    android:fraction="0"
    android:value="800" />
<keyframe
    android:fraction=".2"
    android:interpolator="@android:anim/accelerate_interpolator"
    android:value="1000" />
<keyframe
    android:fraction="1"
    android:interpolator="@android:anim/accelerate_interpolator"
    android:value="400" />
</propertyValuesHolder> <propertyValuesHolder android:propertyName="y">
<keyframe />
<keyframe
    android:fraction=".2"
    android:interpolator="@android:anim/accelerate_interpolator"
    android:value="300" />
<keyframe
    android:interpolator="@android:anim/accelerate_interpolator"
    android:value="1000" />
</propertyValuesHolder>
】
说白了,就是可以通过<objectAnimator>标签下的<propertyValuesHolder>子标签同时定义多个动画作用于一个View,具体的应用和单个xml属性动画一样。这里就不在累述了。
5,View的animate方法
这个API也是伴随属性动画产生而产生的,下面是其主要使用方法的关键代码:
imageView.animate().translationX(100).translationY(200)
        .alpha(0.2f).rotation(90).setDuration(8000).withStartAction(
        new Runnable() {
            @Override
            public void run() {
                Toast.makeText(MainActivity.this,"动画开始",Toast.LENGTH_SHORT).show();
            }
        }
).withEndAction(new Runnable() {
    @Override
    public void run() {
        Toast.makeText(MainActivity.this,"动画结束",Toast.LENGTH_SHORT).show();
    }
}).start();
效果图如下:

由结果可知:
- 这是一种动画集合效果的简易书写方式
- 可以动画集合结束和开始处做相应的逻辑操作
- 其实就是对动画的API做了一些封装
- 里面的参数不是增量,是最终值,具体请看下面,我们拿translationX(float value)举例,其源码为:
/**
 * This method will cause the View's <code>translationX</code> property to be animated to the
 * specified value. Animations already running on the property will be canceled.
 *
 * @param value The value to be animated to.
 * @see View#setTranslationX(float)
 * @return This object, allowing calls to methods in this class to be chained.
 */
public ViewPropertyAnimator translationX(float value) {
    animateProperty(TRANSLATION_X, value);
    return this;
}
关于参数的解释:
@param value The value to be animated to. 所以这个是目标值,不是增量值。
总结:好的,到这里,关于这一块的内容就介绍完了,前前后后也写了不少时间。整体的内容不难,多动手操作一下,会体会很多,这里面我关于xml实现属性动画结束的比较少,但其实和接口实现一样,就是属性的组合而已。