操作指南
以下操作在Mac系统上完成
1. 创建React-Native项目
$ react-native init testApp (testApp为项目名称)2. 安装code-push-cli
$ npm install -g code-push-cli 3. 注册code-push帐号
$ code-push register
Please login to Mobile Center in the browser window we've just opened.

Enter your token from the browser:
#会弹出一个浏览器,让你注册,可以使用github帐号对其进行授权,授权成功会给一串Token,点击复制,在控制进行粘贴回车(或者使用code-push login命令)。
Enter your token from the browser: $ b0c9ba1f91dd232xxxxxxxxxxxxxxxxx
#成功提示如下方
Successfully logged-in. Your session file was written to /Users/huanghuanlai/.code-push.config. You can run the code-push logout command at any time to delete this file and terminate your session.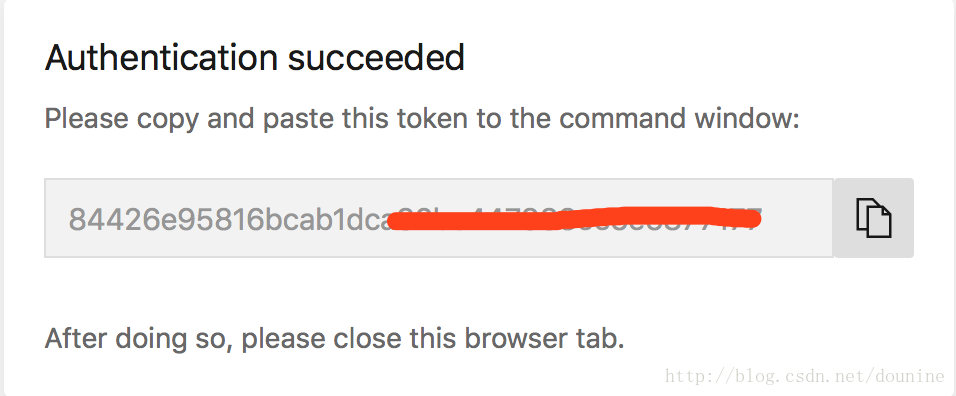
4. 在code-push添加一个ios的app
$ code-push app add testApp-ios ios react-native
#成功提示如下方
Successfully added the "testApp-ios" app, along with the following default deployments:
┌────────────┬──────────────────────────────────────────────────────────────────┐
│ Name       │ Deployment Key                                                   │
├────────────┼──────────────────────────────────────────────────────────────────┤
│ Production │ yMAPMAjXpfXoTfxCd0Su9c4-U4lU6dec4087-57cf-4c9d-b0dc-ad38ce431e1d │
├────────────┼──────────────────────────────────────────────────────────────────┤
│ Staging    │ IjC3_iRGEZE8-9ikmBZ4ITJTz9wn6dec4087-57cf-4c9d-b0dc-ad38ce431e1d │
└────────────┴──────────────────────────────────────────────────────────────────┘
5. 继续在code-push添加一个android的app
$ code-push app add testApp-android android react-native
#成功提示如下方
Successfully added the "testApp-android" app, along with the following default deployments:
┌────────────┬──────────────────────────────────────────────────────────────────┐
│ Name       │ Deployment Key                                                   │
├────────────┼──────────────────────────────────────────────────────────────────┤
│ Production │ PZVCGLlVW-0FtdoCF-3ZDWLcX58L6dec4087-57cf-4c9d-b0dc-ad38ce431e1d │
├────────────┼──────────────────────────────────────────────────────────────────┤
│ Staging    │ T0NshYi9X8nRkIe_cIRZGbAut90a6dec4087-57cf-4c9d-b0dc-ad38ce431e1d │
└────────────┴──────────────────────────────────────────────────────────────────┘
6. 在项目根目录添加react-native-code-push
$ npm install react-native-code-push --save
#或者
$ yarn add react-native-code-push
7. link react-native-code-push
$ react-native link (建议使用react-native link react-native-code-push)
Scanning folders for symlinks in /Users/huanghuanlai/dounine/oschina/dounineApp/node_modules (8ms)
? What is your CodePush deployment key for Android (hit <ENTER> to ignore) T0NshYi9X8nRkIe_cIRZGbAut90a6dec4087-57cf-4c9d-b0dc-ad38ce431e1d

#将刚才添加的Android App的Deployment Key复制粘贴到这里,复制名为Staging测试Deployment Key。

rnpm-install info Linking react-native-code-push android dependency
rnpm-install info Android module react-native-code-push has been successfully linked
rnpm-install info Linking react-native-code-push ios dependency
rnpm-install WARN ERRGROUP Group 'Frameworks' does not exist in your Xcode project. We have created it automatically for you.
rnpm-install info iOS module react-native-code-push has been successfully linked
Running ios postlink script
? What is your CodePush deployment key for iOS (hit <ENTER> to ignore) IjC3_iRGEZE8-9ikmBZ4ITJTz9wn6dec4087-57cf-4c9d-b0dc-ad38ce431e1d

#继续复制Ios的Deployment Key

Running android postlink script
8. 在react-native的App.js文件添加自动更新代码
...
import codePush from "react-native-code-push";
const codePushOptions = { checkFrequency: codePush.CheckFrequency.MANUAL };
export default class App extends Component<{}> {

  componentDidMount(){
    codePush.sync({
      updateDialog: true,
      installMode: codePush.InstallMode.IMMEDIATE,
      mandatoryInstallMode:codePush.InstallMode.IMMEDIATE,
      //deploymentKey为刚才生成的,打包哪个平台的App就使用哪个Key,这里用IOS的打包测试
      deploymentKey: 'IjC3_iRGEZE8-9ikmBZ4ITJTz9wn6dec4087-57cf-4c9d-b0dc-ad38ce431e1d',
      });
  }
  ...
9. 运行项目在ios模拟器上
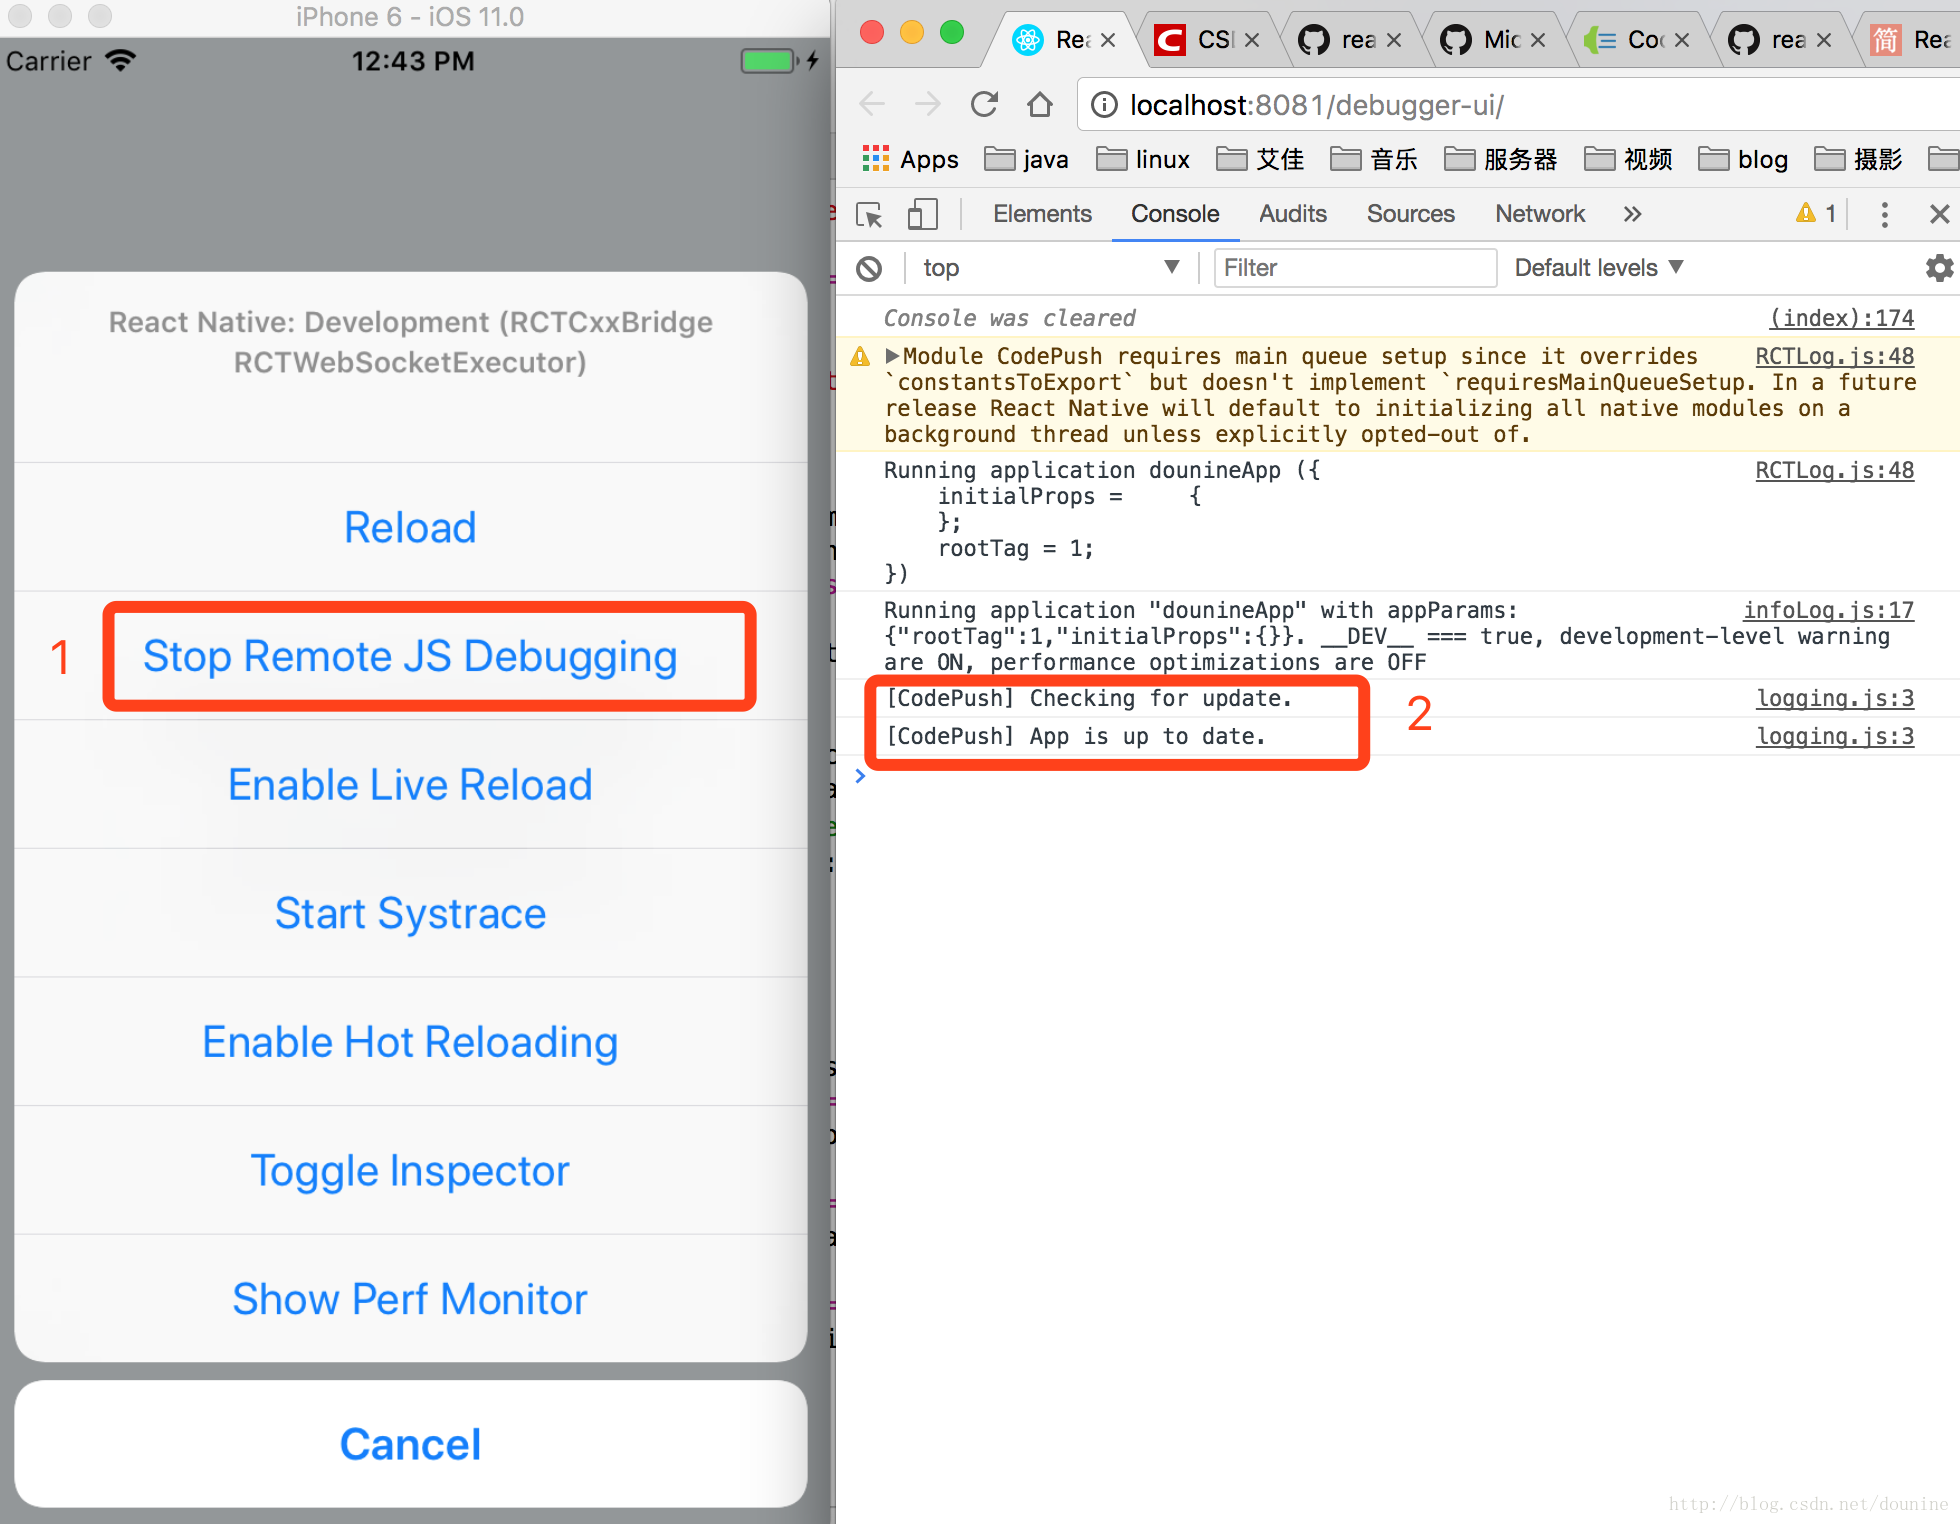
react-native run-ios如图下所显
1:开启debug调试
2:CodePush已经成功运行
目前App已经是最新版本
10. 发布一个ios新版本
$ code-push release-react testApp-ios ios
#发布成功如图下
Detecting ios app version:
Using the target binary version value "1.0" from "ios/dounineApp/Info.plist".
Running "react-native bundle" command:
node node_modules/react-native/local-cli/cli.js bundle --assets-dest /var/folders/m_/xcdff0xd62j4l2xbn_nfz00w0000gn/T/CodePush --bundle-output /var/folders/m_/xcdff0xd62j4l2xbn_nfz00w0000gn/T/CodePush/main.jsbundle --dev false --entry-file index.js --platform ios
Scanning folders for symlinks in /Users/huanghuanlai/dounine/oschina/dounineApp/node_modules (10ms)
Scanning folders for symlinks in /Users/huanghuanlai/dounine/oschina/dounineApp/node_modules (10ms)
Loading dependency graph, done.
bundle: start
bundle: finish
bundle: Writing bundle output to: /var/folders/m_/xcdff0xd62j4l2xbn_nfz00w0000gn/T/CodePush/main.jsbundle
bundle: Done writing bundle output
Releasing update contents to CodePush:
Upload progress:[==================================================] 100% 0.0s
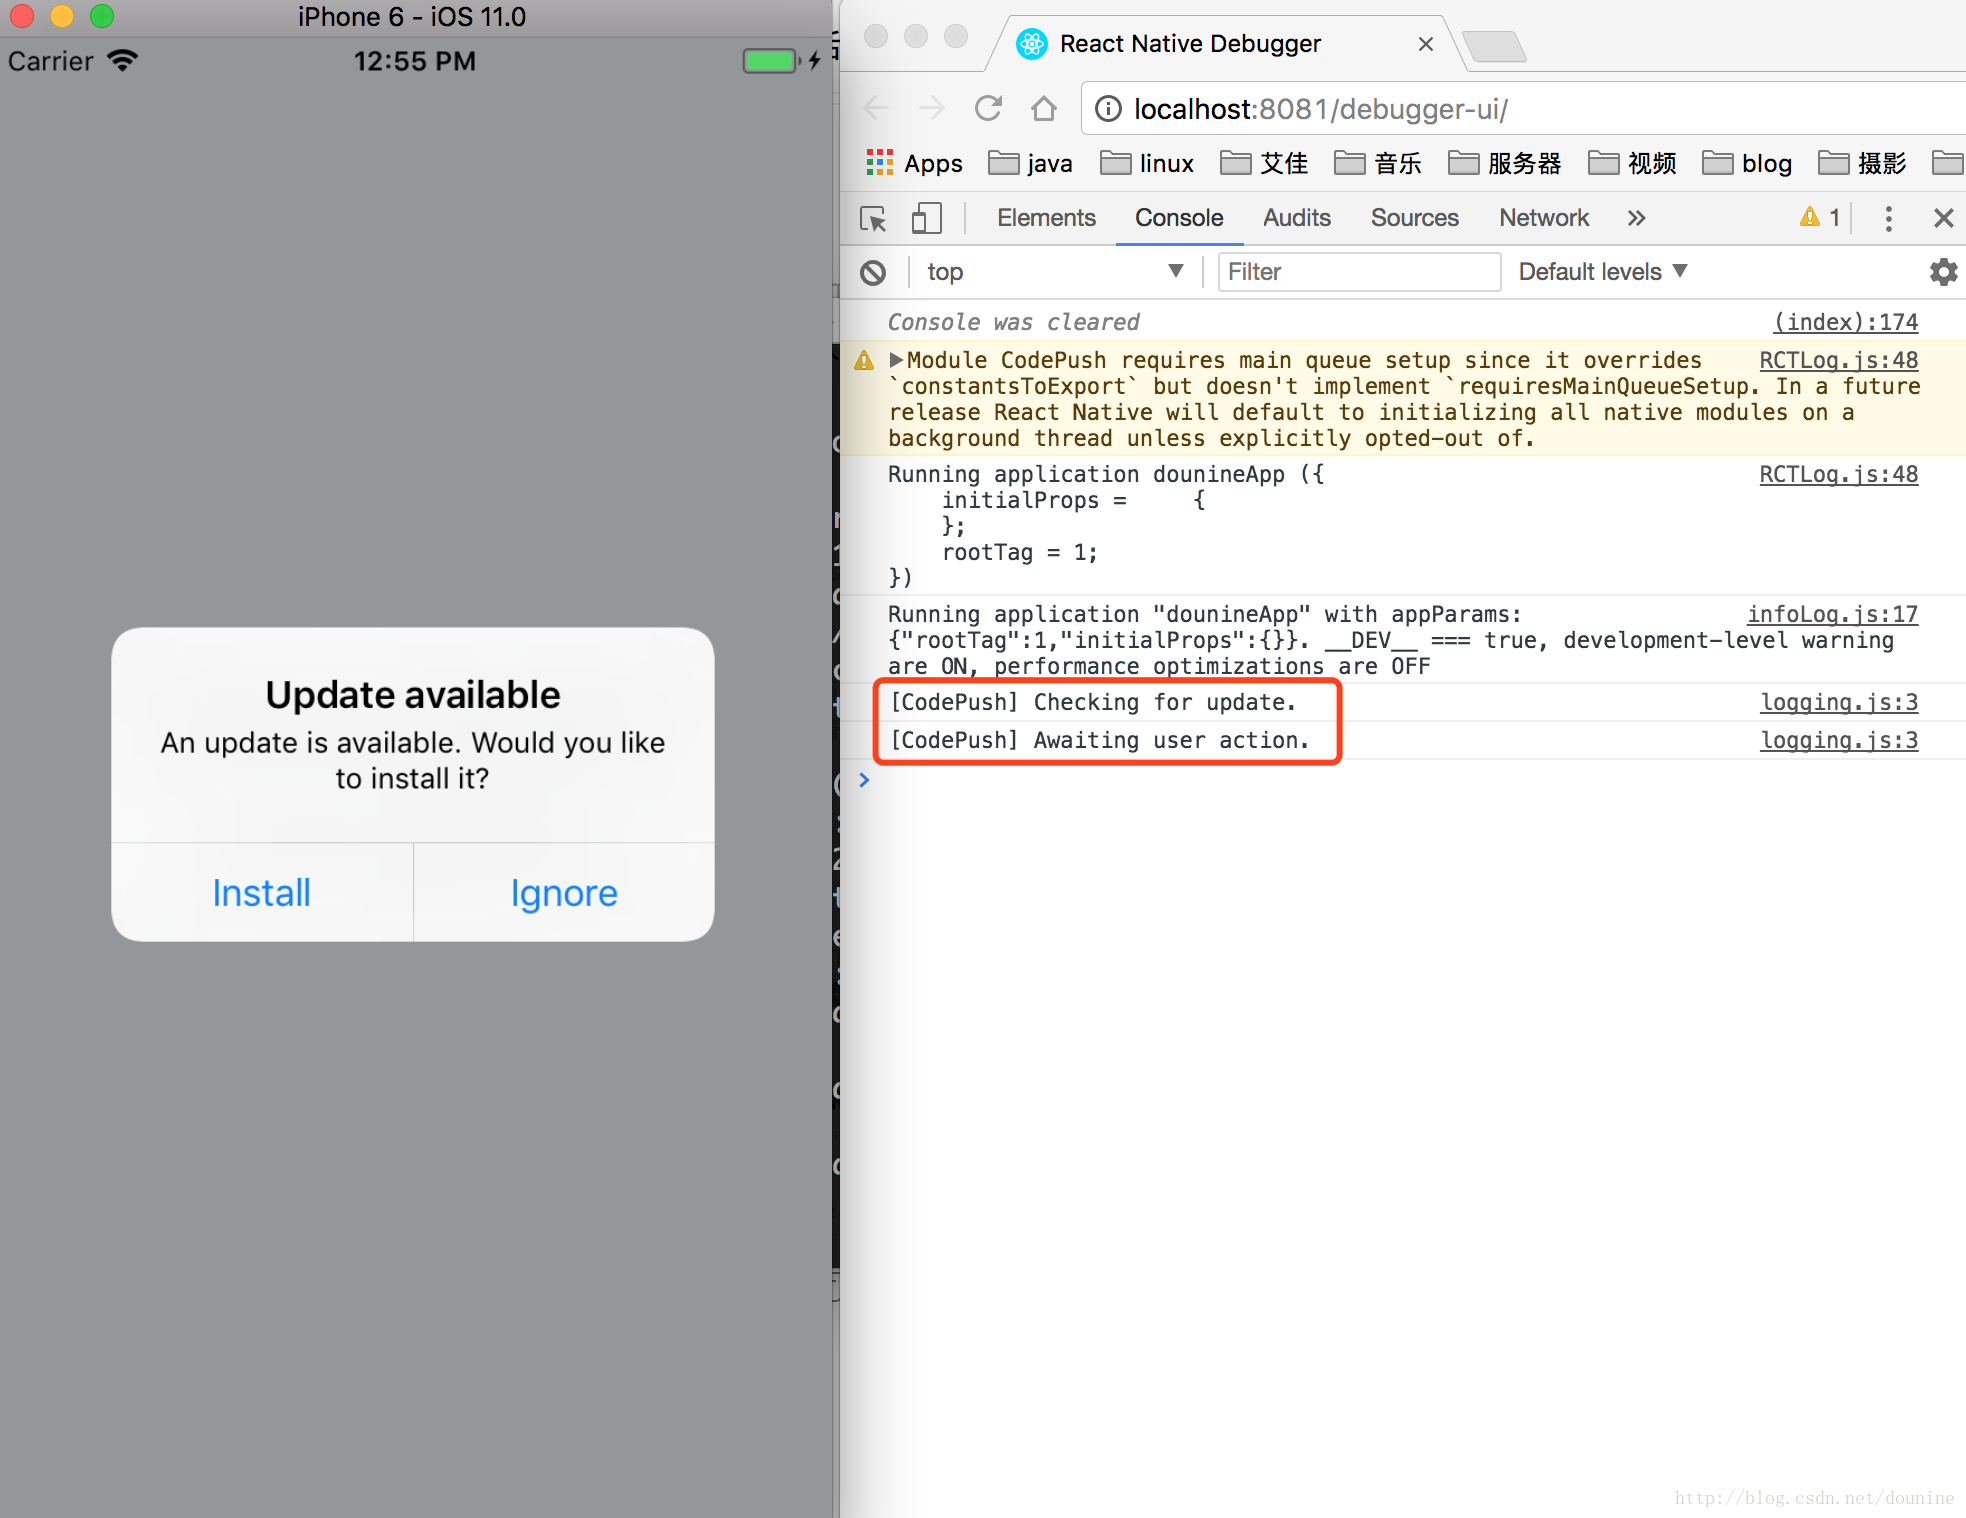
Successfully released an update containing the "/var/folders/m_/xcdff0xd62j4l2xbn_nfz00w0000gn/T/CodePush" directory to the "Staging" deployment of the "dounineApp-ios" app.11. 重新Load刷新应用
12. 安卓发布
与上面9~11步骤是一样的,命令改成Android对应的,以下命令结果简化
$  code-push release-react testApp-android android

#1.修改App.js的deploymentKey为安卓的
...
deploymentKey:'T0NshYi9X8nRkIe_cIRZGbAut90a6dec4087-57cf-4c9d-b0dc-ad38ce431e1d'
...
#2.运行
react-native run-android
#3.发布
code-push release-react dounineApp-android android
#4.刷新应用,如下图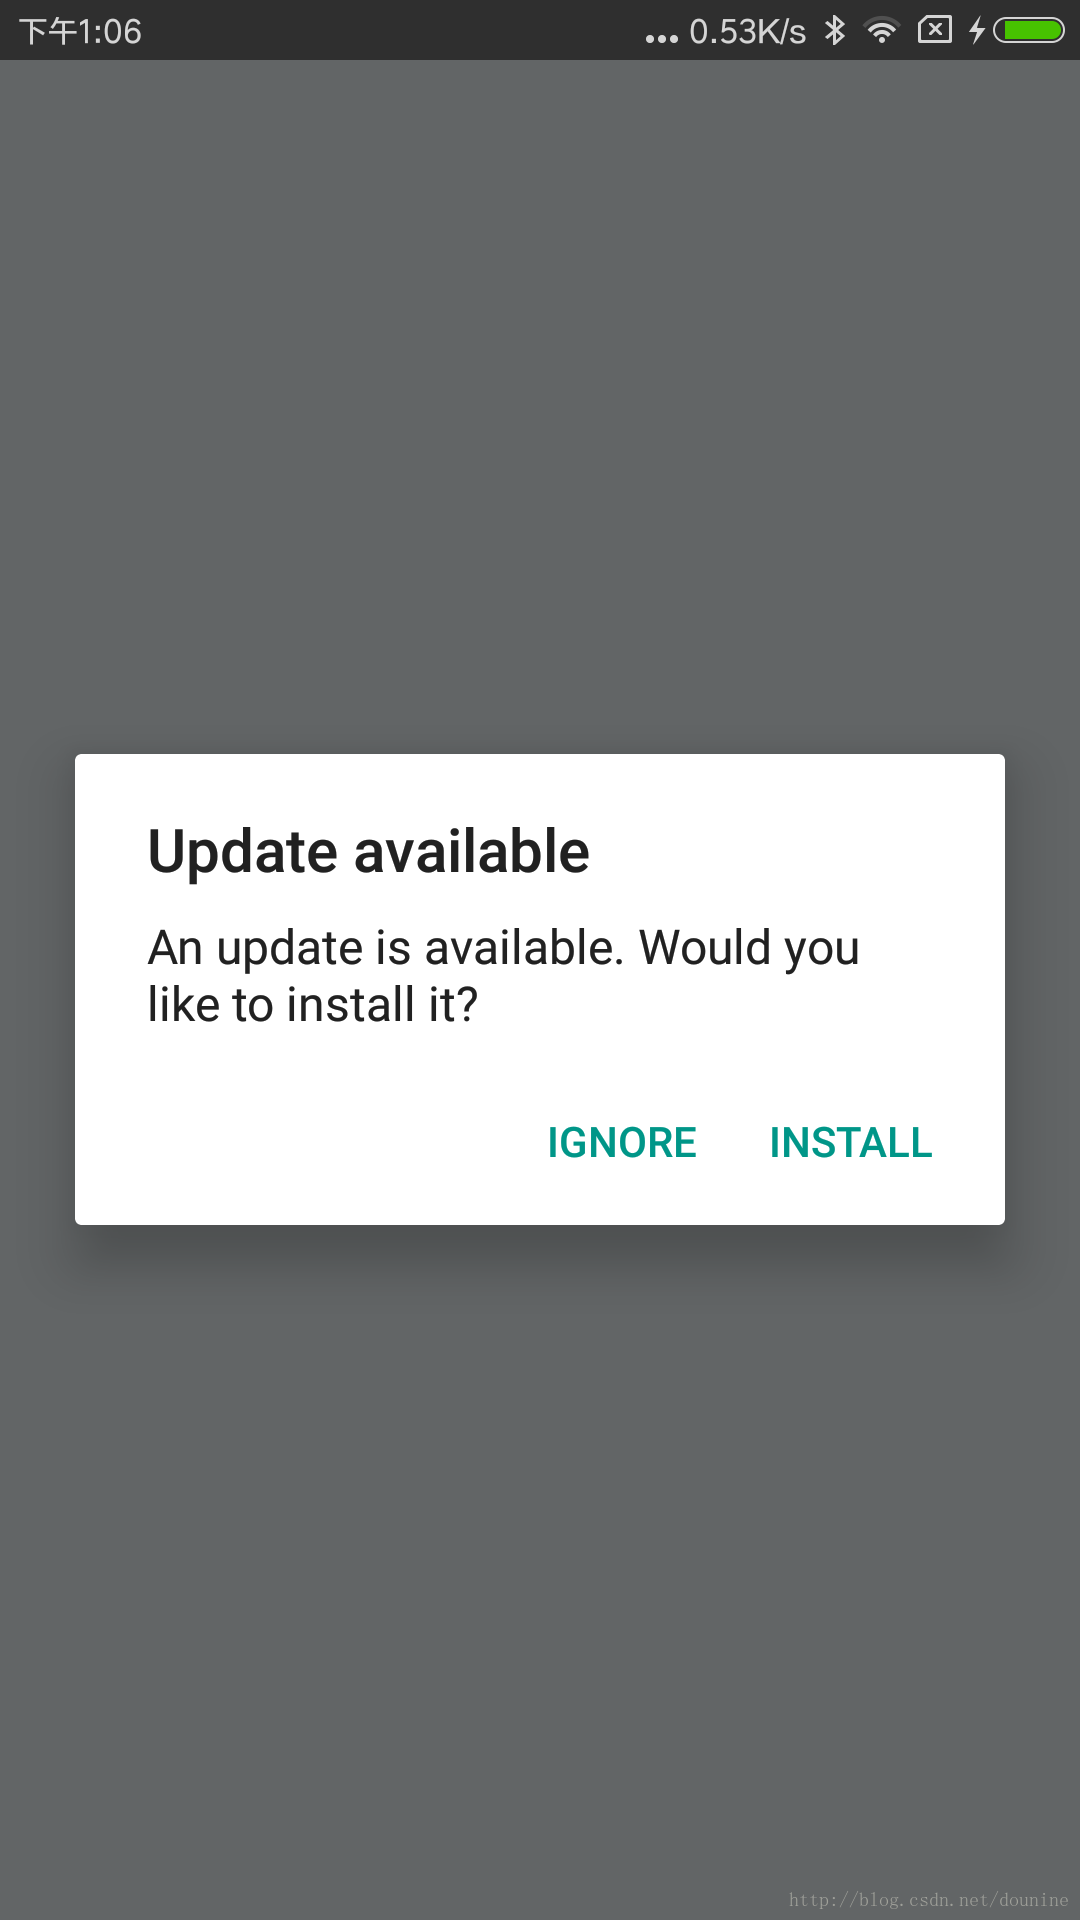
13、使用promote将Staging推到Production
使用场景:当你在指定的部署环境下测试更新时,例如
使用场景:当你在指定的部署环境下测试更新时,例如
Staging,测试通过后,想把这个更新发布到正式生产环境
Production中,则可以使用
code-push promote testApp-android Staging Production ( testApp-android 为在code-push服务器自己创建的名称 ios的话也是如此,此文设置的名称为testApp-ios)
14、使用rollback回滚
使用场景:当你发布的更新测试没通过时,可以回滚到之前的某个版本。
使用场景:当你发布的更新测试没通过时,可以回滚到之前的某个版本。
code-push rollback testApp-android Production,当执行这个命令时它会在
testApp-android上的Production部署上再次发布一个release,这个release的代码和元属性与Production上倒数第二个版本一致。也可以通过可选参数
--targetRelease来指定
rollback到的版本,例如
code-push rollback testApp-android Production --targetRelase v2,则会新建一个release,这个release的代码和元属性与
v2相同。
注意:这个回滚是主动回滚,与自动回滚不一样
15 更多使用方法请自行百度