版权声明:本文为博主原创文章,未经博主允许不得转载。 https://blog.csdn.net/yehuohan/article/details/52166678
新博客: yhhx.tech 或者 http://yehuohan.oschina.io/
giflib
giflib是一个gif图片的处理库,可用于gif格式图片的生成与解码,在http://giflib.sourceforge.net/有详细的介绍。
在http://download.csdn.net/detail/yehuohan/9599378下载已经编译的giflib库文件。下面是使用giflib生成gif图片过程.
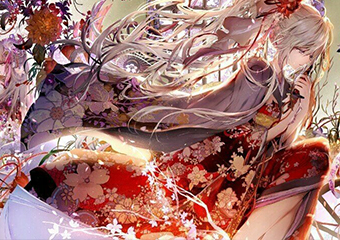
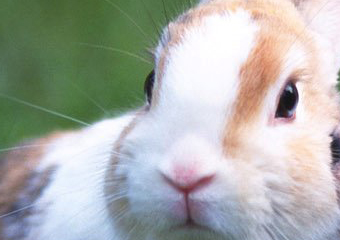
两张jpg原图
现在要将这两个图片合成一张可以gif动画图片。图片尺寸:340 x 240。生成gif代码
【1】读取原图信息,这里使用FreeImage库来读取jpg图片数据
    // 首先是gif图片的基参数:由2张图片生成一张x.gif动画图片,尺寸为240*240,动画时间参数40*0.01s。
    // inputPics为二级指针,用于读取并保存两个jpg原图的RGB数据
    char        *outputFile = "x.gif";
    int32_t     gNum = 2;
    int32_t     gDelay = 40;
    int32_t     gWidth = 340;
    int32_t     gHeight = 240;
    uint8_t     **inputPics;
    inputPics = new uint8_t*[gNum];

    // 使用FreeImage库读取jpg原图数据
    FreeImage_Initialise(0);
    for (n = 0; n < gNum; ++n)
    {
        char str[20];
        sprintf(str, "olr%d.jpg", n + 1);

        FIBITMAP *pfImg = FreeImage_Load(FIF_JPEG, str);
        if (pfImg)
        {
            gWidth = FreeImage_GetWidth(pfImg);
            gHeight = FreeImage_GetHeight(pfImg);

            // GetLine: 图像宽,字节
            // GetWidth: 图像宽,像素
            int byteStep = FreeImage_GetLine(pfImg) / FreeImage_GetWidth(pfImg);

            // save color to inputPics in RGB-format
            *(inputPics + n) = new uint8_t[gWidth * gHeight * 3];
            for (i = 0; i < gHeight; ++i)
            {
                // !!!attention: FreeImage倒置了
                BYTE *bytes = FreeImage_GetScanLine(pfImg, i);
                int pos = 0;
                for (j = 0; j < gWidth; ++j)
                {
                    pos = 3 * ((gHeight - i - 1)*gWidth + j);
                    *(*(inputPics + n) + pos + 0) = bytes[FI_RGBA_RED];
                    *(*(inputPics + n) + pos + 1) = bytes[FI_RGBA_GREEN];
                    *(*(inputPics + n) + pos + 2) = bytes[FI_RGBA_BLUE];
                    bytes += byteStep;
                }
            }
            FreeImage_Unload(pfImg);
        }
    }
    FreeImage_DeInitialise();
【2】使用giflib生成不过图片
    // giflib基本参数
    GifFileType*            pGifFile;           // gif file struct
    int                     errorStatus;        // 返回状态值
    static const uint8_t    cr = 8;             // color位数, 0~8
    static const int        cc = 1 << cr;       // color数量,这里使用256
    ColorMapObject*         pColorMap;          // 全局颜色表
    ColorMapObject**        ppColorMap;         // 局部颜色表
    // 全局颜色表和局部颜色表一般只选用一种即可,颜色表即gif总共能使用的颜色,这里有256种
    // 全局颜色表:即gif动画中的每张图片均用同一个颜色表,这样图片占用空间小,但画面就差点
// 局部颜色表:即gif动画中的每张图片有各自的颜色表,这样图片占用空间大,但画面好下面是生成gif图片的过程,最好先在http://giflib.sourceforge.net/whatsinagif/index.html看下gif图片的格式
gif基本格内容如下:
    // (1)打开gif图片
    pGifFile = EGifOpenFileName(outputFile, false, &errorStatus);
    if (pGifFile == nullptr)
        return 0;
    EGifSetGifVersion(pGifFile, true);

    //(2)写入logical screen descriptor块,这里使用全局颜色表
    pColorMap = GifMakeMapObject(cc, nullptr);
    // 创建颜色表
    PalGenP pGen = CreatePalGen(nullptr);
    for (n = 0; n < gNum; ++n)
    {
        for (k = 0; k < gWidth*gHeight; k++)
        {
            ColorVal R = *(*(inputPics + n) + k * 3 + 0);
            ColorVal G = *(*(inputPics + n) + k * 3 + 1);
            ColorVal B = *(*(inputPics + n) + k * 3 + 2);
            AddColor(pGen, R, G, B);

            while (pGen->NbLeaf > cc)
            {
                ReduceColor(pGen);
            }
        }
    }
    pColorMap->ColorCount = 0;
    GenPalette(pGen,
        [](ColorVal R, ColorVal G, ColorVal B, void *pUserData)->void{
        ColorMapObject *pCm = (ColorMapObject*)pUserData;
        pCm->Colors[pCm->ColorCount].Red = R;
        pCm->Colors[pCm->ColorCount].Green = G;
        pCm->Colors[pCm->ColorCount++].Blue = B;        // lambda expression
    },
        pColorMap);
    DestroyPalGen(pGen);

    // write logical screen
EGifPutScreenDesc(pGifFile, gWidth, gHeight, cr, 0, pColorMap);上面生成颜色表的算法是使用,使用https://www.0xaa55.com/forum.php?mod=viewthread&tid=1214&highlight=%E5%85%AB%E5%8F%89%E6%A0%91里面的库。
    // (3)写入graphic control extension块,此块可以设定动画速度和透明色
    static const GraphicsControlBlock gcb(DISPOSE_DO_NOT, false, gDelay, NO_TRANSPARENT_COLOR);
    static const GifByteType gcbLen = 4;
    static GifByteType gcbBytes[gcbLen];
    EGifGCBToExtension(&gcb, gcbBytes);
    EGifPutExtension(pGifFile, GRAPHICS_EXT_FUNC_CODE, gcbLen, gcbBytes);
// [4].写入application extension块,此块可以设定gif动画循环次数
// 注意,此块有 子块sub-block,写入调用的函数有所不同
static const GifByteType aeLen = 11;
static const char *aeBytes = { "NETSCAPE2.0" };
static const GifByteType aeSubLen = 3;
static GifByteType aeSubBytes[aeSubLen];
aeSubBytes[0] = 0x01;
aeSubBytes[1] = 0x00; //byte[1]是低位,byte[2]是高位,组成一个无符号16位数,决定动画循环次数
aeSubBytes[2] = 0x00;
EGifPutExtensionLeader(pGifFile, APPLICATION_EXT_FUNC_CODE);
EGifPutExtensionBlock(pGifFile, aeLen, aeBytes);
EGifPutExtensionBlock(pGifFile, aeSubLen, aeSubBytes);
EGifPutExtensionTrailer(pGifFile); // 接下来写入图片数据
for (n = 0; n < gNum; ++n)
{
// (5)写入image descriptor块,因为不使用局部颜色表,传入nullptr,而不传pColorMap
EGifPutImageDesc(pGifFile, 0, 0, gWidth, gHeight, false, nullptr);
GifColorType *pCm = pColorMap->Colors; // color map
// (6)写入image data
for (k = 0; k < gWidth*gHeight; ++k)
{
uint8_t index = 0;
int mindis = 1 << 30;
uint8_t rr = *(*(inputPics + n) + k * 3 + 0);
uint8_t gg = *(*(inputPics + n) + k * 3 + 1);
uint8_t bb = *(*(inputPics + n) + k * 3 + 2);
// 将颜色匹配到颜色表的索引颜色
for (i = 0; i < cc; i++)
{
int dis =
(rr - (*(pCm+i)).Red)*(rr - (*(pCm+i)).Red) +
(gg - (*(pCm+i)).Green)*(gg - (*(pCm+i)).Green) +
(bb - (*(pCm+i)).Blue)*(bb - (*(pCm+i)).Blue);
if (dis < mindis)
{
mindis = dis;
index = i;
}
if (dis == 0)
{
index = i;
break;
}
}
EGifPutPixel(pGifFile, (uint8_t)index);
}
}
// (7)数据写入完毕,关闭gif文件
GifFreeMapObject(pColorMap);
EGifCloseFile(pGifFile, &errorStatus);生成gif图片如下:
下面是使用局部颜色表生成的gif图片,画面质量好些

gif.h
gif.h是一个小巧的gif图片生成库,不能解码gif图片,使用简单,不需要了解gif格式就能使用,在http://download.csdn.net/detail/yehuohan/9599407下载。
还是使用上面的jpg原图来生成一张gif图片,代码如下:
    GifWriter   gw;
    GifBegin(&gw,outputFile, gWidth, gHeight, gDelay);
    for (n = 0; n < gNum; ++n)
    {
        // 写入gw的图片数据为rgba8888格式
        uint8_t *imgFrame = new uint8_t[4 * gWidth*gHeight];
        for (k = 0; k < gWidth*gHeight; k++)
        {
            *(imgFrame + k*4 + 0) = *(*(inputPics + n) + k*3 + 0);
            *(imgFrame + k*4 + 1) = *(*(inputPics + n) + k*3 + 1);
            *(imgFrame + k*4 + 2) = *(*(inputPics + n) + k*3 + 2);
            //*(imgFrame + k * 4 + 3) = 0xff;
            // rgba中的a不起作用,赋不赋值不影响
        }
        GifWriteFrame(&gw, imgFrame, gWidth, gHeight, gDelay);
        delete imgFrame;
    }
    GifEnd(&gw);
用gif.h生成gif图片如下: