版权声明:本文为博主原创文章,未经博主允许不得转载。 https://blog.csdn.net/u012848709/article/details/83002747
楔子
指定一个目录存放图片,现在需要将其指定给Nginx,使用Nginx作为服务器来访问。
Nginx配置
配置参考 位置B 。其实如果仅仅作为图片访问,Nginx 不配置其他,直接修改位置A的目录即可。
#user nobody;
worker_processes 1;
#error_log logs/error.log;
#error_log logs/error.log notice;
#error_log logs/error.log info;
#pid logs/nginx.pid;
events {
worker_connections 1024;
}
http {
include mime.types;
default_type application/octet-stream;
#log_format main '$remote_addr - $remote_user [$time_local] "$request" '
# '$status $body_bytes_sent "$http_referer" '
# '"$http_user_agent" "$http_x_forwarded_for"';
#access_log logs/access.log main;
sendfile on;
#tcp_nopush on;
#keepalive_timeout 0;
keepalive_timeout 65;
#gzip on;
server {
listen 8088;
server_name localhost;
# 开启文件目录后,编码需要按照操作系统来设置,否则中文名显示乱码(window上一般是gbk,Linux一般是utf-8或者不设置)
charset gbk;
#开启文件目录 nginx.conf
#autoindex on;
autoindex_exact_size off;#off 以KB,MB,GB显示文件大小;on 以 bytes显示文件大小;
autoindex_localtime on; #on
#access_log logs/host.access.log main;
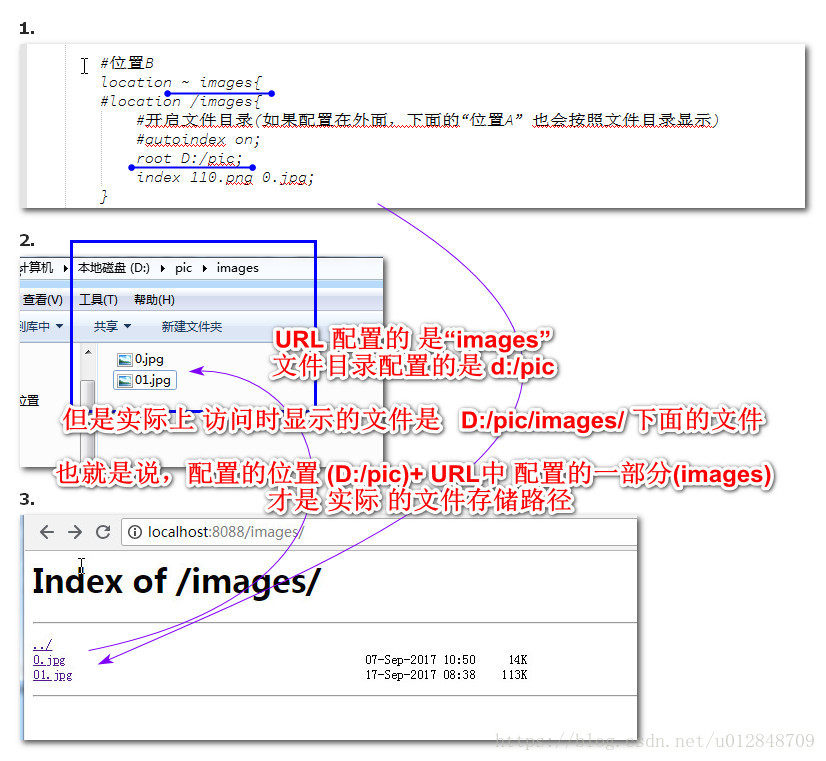
#位置B
location ~ images{
#位置B 也可以下面这种写法
#location /images/{
#开启文件目录(如果配置在外面,下面的“位置A” 也会按照文件目录显示)
#autoindex on;
root D:/pic;
index 110.png 0.jpg;
}
#位置B 结束
# 位置A
location / {
root html;
index index.html index.htm;
}
}
server {
listen 81;
server_name 127.0.0.1;
location / {
proxy_pass http://ym;
}
}
# 反向代理
upstream ym{
server 127.0.0.1:80;
}
}
开启文件目录 的效果
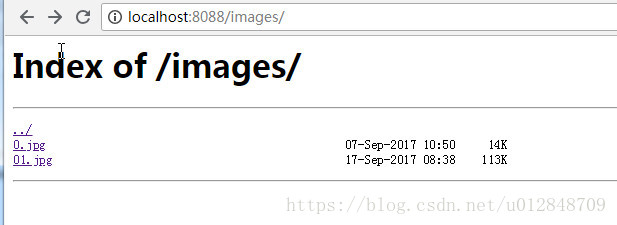
需要注意的是
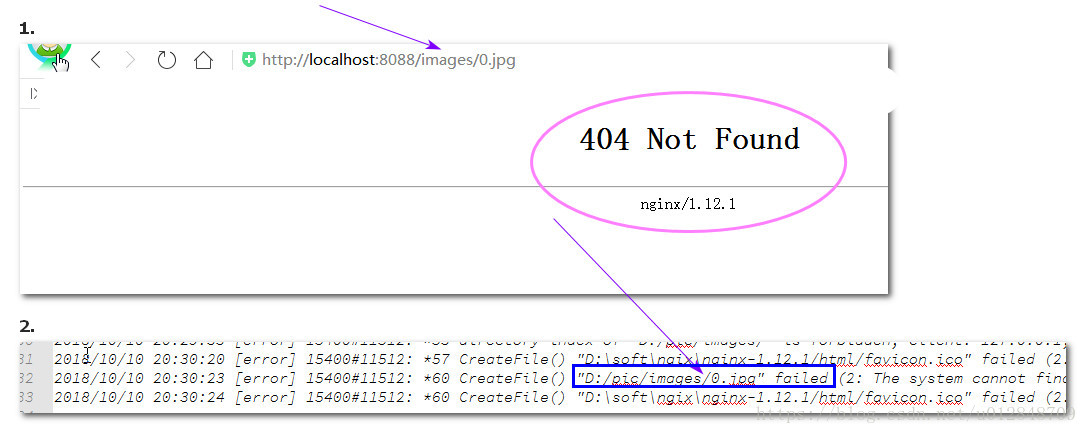
错误
如果配置好出现错误,多半是路劲的问题。如下图
如果出现上图错误,去查看 %Nginx_home%\logs\error.log,提示的实际路劲问题,对照本地路劲分析。
总结
主要是涉及到
location匹配的配置,可以学习燕十八Nginx视频
Nginx 命令
nginx -h 查看帮助命令
D:\soft\ngix\nginx-1.12.1>nginx.exe -h
nginx version: nginx/1.12.1
Usage: nginx [-?hvVtTq] [-s signal] [-c filename] [-p prefix] [-g directives]

Options:
  -?,-h         : this help
  -v            : show version and exit
  -V            : show version and configure options then exit
  -t            : test configuration and exit # 测试配置文件nginx.conf 是否正确
  -T            : test configuration, dump it and exit
  -q            : suppress non-error messages during configuration testing
  -s signal     : send signal to a master process: stop, quit, reopen, reload
  -p prefix     : set prefix path (default: NONE)
  -c filename   : set configuration file (default: conf/nginx.conf)
  -g directives : set global directives out of configuration file
nginx -s{ stop(停止Nginx), quit(完整有序的停止Nginx), reopen(重新打开配置文件), reload(重新加载配置文件)}
Nginx 日志文件切割
- 把旧文件A拷贝到 指定目录(这时 Nginx还会继续在旧文件A中写日志)
- 调用
nginx -s reopen,nginx日志就会写入新的文件中
动态演示图如下