实际上为了有效地创造黑白素描图,你真正需要的是一些模糊和两张图片的混合技术,叫做dodging and burning.
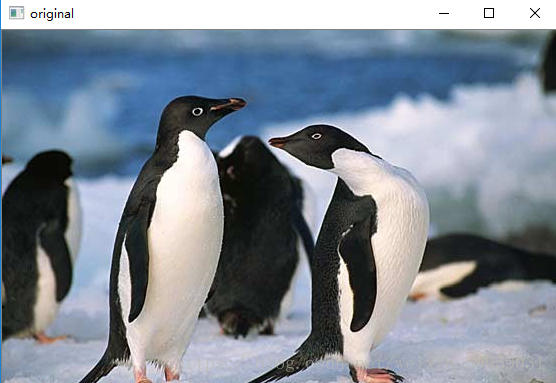
用OpenCV、Python一张RGB颜色的图像经过下面四个步骤就能够生成出一张素描图:
- 将RGB图转化为灰度图。
- 灰度图进行反色操作。
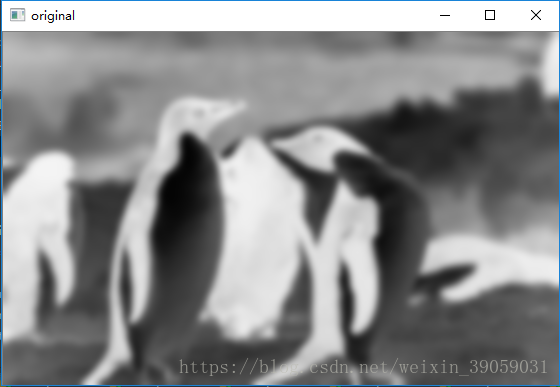
- 对步骤2中的图片进行高斯模糊Gaussian blur。
- 将步骤1中的灰度图像和步骤三中的模糊反色图像混合,这里就用到亮化(Dodging)和暗化(burning)的技术。
前三步使用Opencv都是直接可以做到的,我也看到其他的有些博客在尝试解决第四步的问题,因为Opencv内部不提供亮化和暗化的技术。但是,我们采取一些技巧的话,我们将会实现这个功能,最终看起来也会非常地简单。
Step 1: 将图像转化为灰度图
This should be really easy to do even for an OpenCV novice. Images can be opened with cv2.imread and can be converted between color spaces with cv2.cvtColor. Alternatively, you can pass an additional argument to cv2.imread that specifies the color mode in which to open the image.
在Opencv中的话,这个功能将会非常简单,图像的打开可以通过cv2.imread代码打开,cv2.cvtColor可以将图片转化为灰度图。你也可以在读取图片的时候增加一个额外的参数使得图像直接转化为灰度图:
import cv2
img_rgb = cv2.imread('example.jpg')
img_gray = cv2.cvtColor(img_rgb, cv2.COLOR_BGR2GRAY)
cv2.imshow('original', img_gray)
cv2.waitKey(0)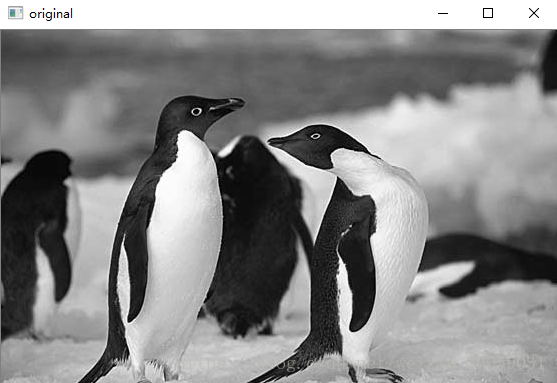
上面的代码是读取图片后,再通过调用cv2.cvtColor函数将图片转换成灰度图,实际上我们可以直接在读取图片时候就直接转换图片,即:
img_gray = cv2.imread('example.jpg', cv2.IMREAD_GRAYSCALE)这里调用cv2.imread函数时,设置了cv2.IMREAD_GRAYSCALE的标志,表示加载灰度图。在imread函数中是设置了三种标志,分别是
-
cv2.IMREAD_COLOR : 默认使用该种标识。加载一张彩色图片,忽视它的透明度。
-
cv2.IMREAD_GRAYSCALE : 加载一张灰度图。
-
cv2.IMREAD_UNCHANGED : 加载图像,包括它的Alpha 通道(Alpha 表示图片的透明度)。
另外,如果觉得以上标志太长,可以简单使用 1,0,-1 代替,效果是相同的。
Step 2: 灰度反色操作
灰度图反色图像可以通过将灰度图每个像素点取反得到,由于灰度图的像素点的在0-255之间,将其取反的话就是255-当前像素点。
img_gray_inv = 255 - img_gray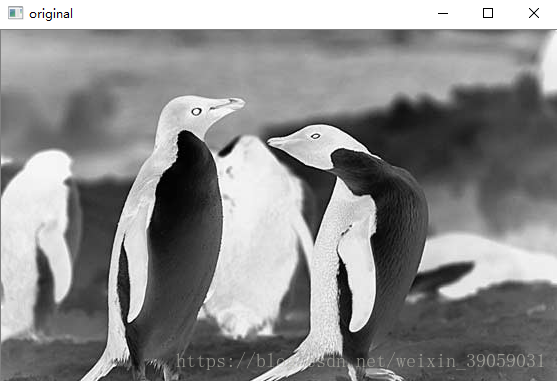
其实就是暗的地方变亮了,亮的地方变暗了。
Step 3: 高斯模糊
Gaussian blur能够很有效地减少图像中的噪声,能够将图像变得更加平滑一点,在数学上等价于用高斯核来对图像进行卷积操作。我们可以通过cv2.GaussianBlur来实现高斯模糊操作,参数ksize表示高斯核的大小。sigmaX和sigmaY分别表示高斯核在 X 和 Y 方向上的标准差。
Step 4: 灰度图与高斯模糊底片的融合
这一步骤自然就是需要得到最终的素描图结果了。在传统照相技术中,当需要对图片某个区域变得更亮或者变暗,可以通过控制它的曝光时间,这里就用到亮化(Dodging)和暗化(burning)的技术。
在现代图像编辑工具,比如 PS 可以实现上述说的两种技术。比如对于颜色亮化技术,给定一张图片 A 和 蒙版 B,那么实现做法如下所示:
(B[idx] == 255)?B[idx]:min(255, ((A[idx] << 8) / (255-B[idx])))This is essentially dividing the grayscale (or channel) value of an image pixel A[idx] by the inverse of the mask pixel value B[idx], while making sure that the resulting pixel value will be in the range [0,255] and that we do not divide by zero. We could translate this into a naïve Python function that accepts two OpenCV matrices (an image and a mask) and returns the blended mage:
import cv2
import numpy as np

def dodgeNaive(image, mask):
    # determine the shape of the input image
    width, height = image.shape[:2]

    # prepare output argument with same size as image
    blend = np.zeros((width, height), np.uint8)

    for col in range(width):
        for row in range(height):
            # do for every pixel
            if mask[col, row] == 255:
                # avoid division by zero
                blend[col, row] = 255
            else:
                # shift image pixel value by 8 bits
                # divide by the inverse of the mask
                tmp = (image[col, row] << 8) / (255 - mask)

                # make sure resulting value stays within bounds
                if tmp > 255:
                    tmp = 255
                    blend[col, row] = tmp

    return blend
上述代码虽然实现了这个功能,但是很明显会非常耗时(我拿自己破电脑试了一下确实蛮久的,不建议跑),中间采用了一个两层循环,计算复杂度是 O(w*h) ,也就是如果图片的宽和高的乘积越大,耗时就越长,所以就有了升级版的代码版本:
def dodgeV2(image, mask):
    return cv2.divide(image, 255 - mask, scale=256)
另一种技术---暗化操作的代码如下所示:
def burnV2(image, mask):
    return 255 - cv2.divide(255 - image, 255 - mask, scale=256)
完整版代码如下所示:
import cv2
import numpy as np


def dodgeNaive(image, mask):
    # determine the shape of the input image
    width, height = image.shape[:2]

    # prepare output argument with same size as image
    blend = np.zeros((width, height), np.uint8)

    for col in range(width):
        for row in range(height):
            # do for every pixel
            if mask[col, row] == 255:
                # avoid division by zero
                blend[col, row] = 255
            else:
                # shift image pixel value by 8 bits
                # divide by the inverse of the mask
                tmp = (image[col, row] << 8) / (255 - mask)
                # print('tmp={}'.format(tmp.shape))
                # make sure resulting value stays within bounds
                if tmp.any() > 255:
                    tmp = 255
                    blend[col, row] = tmp

    return blend


def dodgeV2(image, mask):
    return cv2.divide(image, 255 - mask, scale=256)


def burnV2(image, mask):
    return 255 - cv2.divide(255 - image, 255 - mask, scale=256)


def rgb_to_sketch(src_image_name, dst_image_name):
    img_rgb = cv2.imread(src_image_name)
    img_gray = cv2.cvtColor(img_rgb, cv2.COLOR_BGR2GRAY)
    # 读取图片时直接转换操作
    # img_gray = cv2.imread('example.jpg', cv2.IMREAD_GRAYSCALE)

    img_gray_inv = 255 - img_gray
    img_blur = cv2.GaussianBlur(img_gray_inv, ksize=(21, 21),
                                sigmaX=0, sigmaY=0)
    img_blend = dodgeV2(img_gray, img_blur)

    cv2.imshow('original', img_rgb)
    cv2.imshow('gray', img_gray)
    cv2.imshow('gray_inv', img_gray_inv)
    cv2.imshow('gray_blur', img_blur)
    cv2.imshow("pencil sketch", img_blend)
    cv2.waitKey(0)
    cv2.destroyAllWindows()
    cv2.imwrite(dst_image_name, img_blend)


if __name__ == '__main__':
    src_image_name = 'example.jpg'
    dst_image_name = 'sketch_example.jpg'
    rgb_to_sketch(src_image_name, dst_image_name)
上面是我盗的图,嘻嘻,那个企鹅转化出来的效果实在太差了。
原文链接:http://www.askaswiss.com/2016/01/how-to-create-pencil-sketch-opencv-python.html