版权声明:本文为博主原创文章,欢迎转载,转载请贴上博客地址 http://blog.csdn.net/xdg_blog https://blog.csdn.net/xdg_blog/article/details/52853056
基于OpenCV的条形码区域检测(三)
根据 基于OpenCV的条形码区域检测(二) 中的测试结果可以得知,基于形态学的条形码区域检测是十分不可靠的。所以就考虑到了不使用形态学的方法,改为利用条形码的方向信息
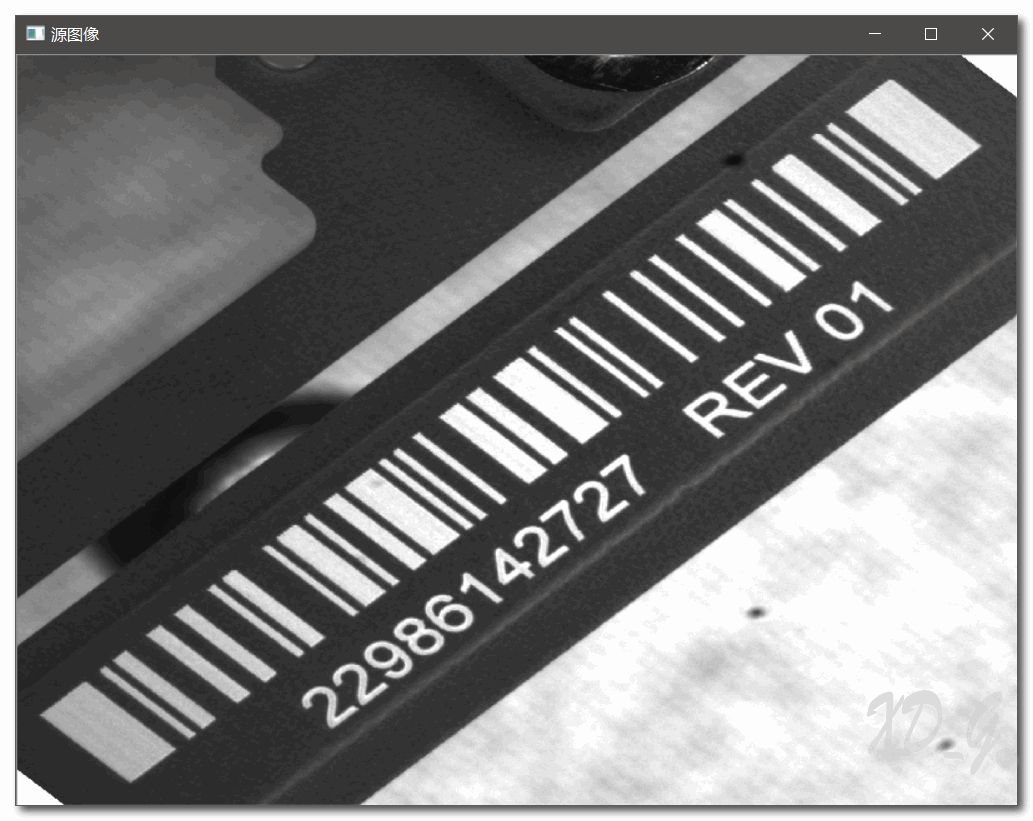

上图是一张Code128码的图像(白底黑码),根据它的梯度图可以看到它在条码条带边缘的强度特别高(根据Sobel算子得到的X方向的梯度gx,Y方向的梯度gy,那么该像素点上的强度就是 sqrt(gx^2 + gy^2) ,再通过对其进行归一化于[0,255]的灰度值的区间内的表现就为强度越高就越亮,在图像上的表现就为白色)。
根据这个想法,如果我们将一张图片分成特别多的小区块,然后再观察每个区块内的方向信息,如果区块尺寸合适,那么将会出现条码区域完全充满一个区块内,如果我们能够得知那些小的区块是条码区域的话,只要将这些小区块合并起来,那么得到的区域就是条码区域了!

上图就是将一张500W像素的图像以200×200的区块大小分割的效果,已经可以看到想要的效果了,这里为了展示故而将区块尺寸设置的偏大,在实际运用中并不需要设置的这么大。
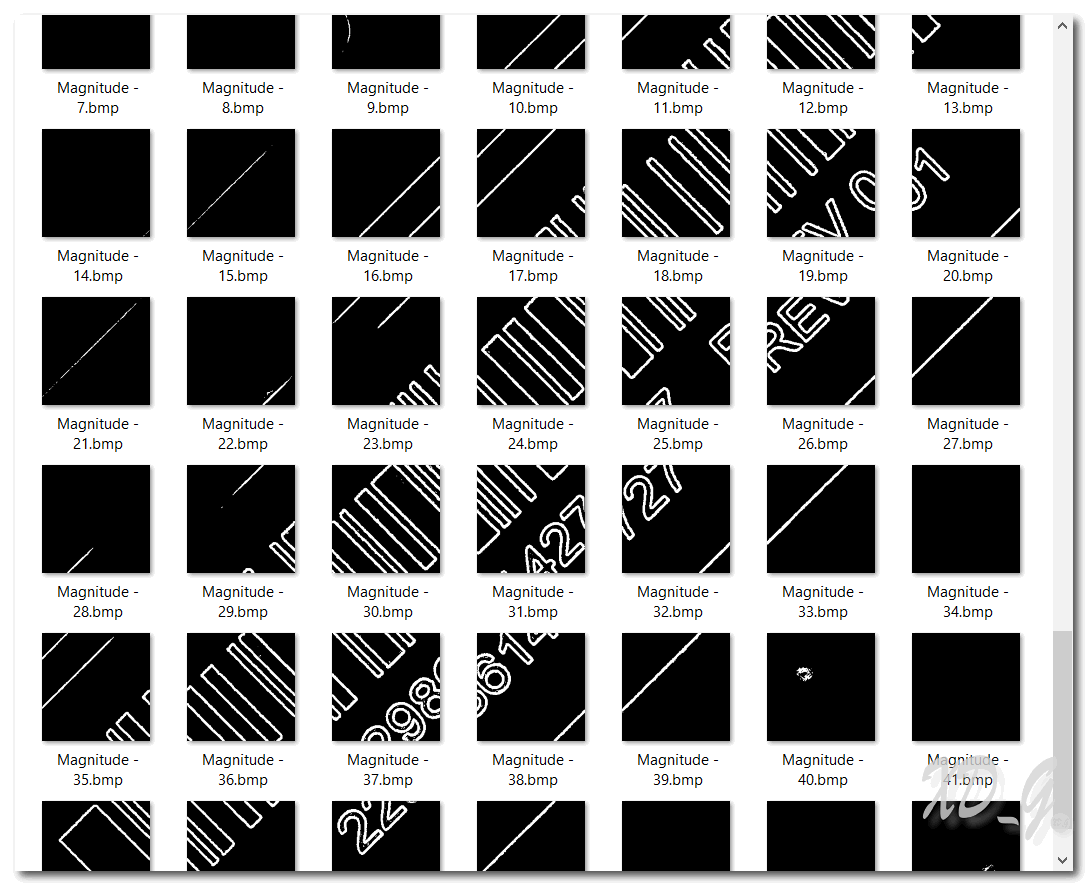
上图可以看到条码区域的效果非常的好,当然上图并不是简单地将将分块后的图进行Sobel强度计算然后再Threshold那么直接,具体的操作在后面会详细地解释。
区域分块代码:
//#define WHOLE_IMG

vector<Mat>  division(Mat &image, int width, int height) {
    int m, n;
    float fm, fn;
    fm = image.rows*1.0 / height*1.0;
    fn = image.cols*1.0 / width*1.0;

    m = (int)fm;
    n = (int)fn;

    if (fm - (float)m > 0) {
        m++;
    }
    if (fn - (float)n > 0) {
        n++;
    }

    int index = 0;

    vector<Mat> imgOut;
    for (int j = 0; j < m; j++)
    {
        if (j < m - 1) {
            int i;
            for (i = 0; i < n; i++)
            {
                if (i < n - 1) {
                    BlockInfo temBlock;
                    temBlock.index = index++;
                    Mat temImage(height, width, CV_8U, Scalar(0, 0, 0));
                    Mat imageROI = image(Rect(i*width, j*height, temImage.cols, temImage.rows));
                    addWeighted(temImage, 1.0, imageROI, 1.0, 0., temImage);

                    temBlock.width = width;
                    temBlock.height = height;
                    temBlock.leftTop = Point(i*width, j*height);

                    g_blockSet.push_back(temBlock);
                    imgOut.push_back(temImage);
                }
#ifdef WHOLE_IMG
                else {
                    Mat temImage(height, width, CV_8U, Scalar(0, 0, 0));
                    Mat imageROI = image(Rect(i*width, j*height, image.cols - i*width - 1, temImage.rows));
                    for (size_t y = 0; y < imageROI.rows; ++y) {
                        unsigned char* ps = imageROI.ptr<unsigned char>(y);
                        unsigned char* pp = temImage.ptr<unsigned char>(y);
                        for (size_t x = 0; x < imageROI.cols; ++x) {
                            pp[x] = ps[x];
                        }
                    }
                    imgOut.push_back(temImage);
                }
#endif
            }
        }
#ifdef WHOLE_IMG
        else {
            int i;
            for (i = 0; i < n; i++)
            {
                if (i < n - 1) {
                    Mat temImage(height, width, CV_8U, Scalar(0, 0, 0));
                    Mat imageROI = image(Rect(i*width, j*height, temImage.cols, image.rows - j*height - 1));
                    for (size_t y = 0; y < imageROI.rows; ++y) {
                        unsigned char* ps = imageROI.ptr<unsigned char>(y);
                        unsigned char* pp = temImage.ptr<unsigned char>(y);
                        for (size_t x = 0; x < imageROI.cols; ++x) {
                            pp[x] = ps[x];
                        }
                    }
                    imgOut.push_back(temImage);
                }
                else {
                    Mat temImage(height, width, CV_8U, Scalar(0, 0, 0));
                    Mat imageROI = image(Rect(i*width, j*height, image.cols - i*width - 1, image.rows - j*height - 1));
                    for (size_t y = 0; y < imageROI.rows; ++y) {
                        unsigned char* ps = imageROI.ptr<unsigned char>(y);
                        unsigned char* pp = temImage.ptr<unsigned char>(y);
                        for (size_t x = 0; x < imageROI.cols; ++x) {
                            pp[x] = ps[x];
                        }
                    }
                    imgOut.push_back(temImage);
                }
            }
        }
#endif
    }
    return imgOut;
}