SpringMVC简介
第一节:SpringMVC 简介
Spring MVC属于SpringFrameWork的后续产品,已经融合在Spring Web Flow里面。Spring 框架提供了构建 Web 应用程序的全功能 MVC 模块。使用 Spring 可插入的 MVC 架构,从而在使用Spring进行WEB开发时,可以选择使用Spring的SpringMVC框架或集成其他MVC开发框架,如Struts1(现在一般不用),Struts2(一般老项目使用)等。
通过策略接口,Spring 框架是高度可配置的,而且包含多种视图技术,例如 JavaServer Pages(JSP)技术、Velocity、Tiles、iText和POI。Spring MVC 框架并不知道使用的视图,所以不会强迫开发者只使用 JSP 技术。Spring MVC 分离了控制器、模型对象、过滤器以及处理程序对象的角色,这种分离让它们更容易进行定制。
MVC已经是现代Web开发中的一个很重要的部分,下面介绍一下Spring MVC的一些使用心得。
之前的项目比较简单,多是用JSP 、Servlet + JDBC 直接搞定,在项目中尝试用 Struts(Struts MVC)+Spring+Hibernate, 严格按照分层概念驱动项目开发,因项目需求一直不断变化,功能不断扩充、增强,技术构建也几经改变到目前有个稳定的应用,体会了很多感受,这次先对 Spring MVC 层进行一些个人总结。
MVC作为WEB项目开发的核心环节,正如三个单词的分解那样,C(控制器)将V(视图、用户客户端)与M(javaBean:封装数据)分开构成了MVC ,这边不去讨论项目中是否应用MVC ,也不针对MVC的实现原理进行讲解,而是探讨实践中如何从应用SSH, 到Struts(Struts MVC)+Spring+Hibernate的演化过程。
先看 Struts 如何与 Spring 结合处理一次简单的请求响应代码,前台可以设为用 AJAX 调用:
- 在 struts-config.xml 文件中加入
2.在 applicationContext.xml 文件中加入
3.cn.base.GetPersonListAction 实现请求响应代码
可以看出一次请求需求如此多的步骤,在加上一个项目下来有很多这样的请求响应,将给配置文件管理带来很大的麻烦。
经过对 Spring 的深入应用, Spring 本身提供的 URL 请求控制,对其天然支持可以让我们不需要 applicationContext.xml 再次声明一次 URL 请求 Bean ,即减少了 Struts 的声明 URL ,达到减少些繁琐的配置。但只是少了一些而已,同样也会面临着配置文件的管理问题。
Spring 注解将给我们的工作带来些轻松,利用反射机制原理出现的注解就是为了解决配置大量的配置问题。请看下处理一次简单的请求响应代码
@Controller --声明控制器
@RequestMapping("/person") –声明URL
public class PersonControl extends BaseController {
@Autowired –业务接口注入
private personServices personServices;/*** 获得人员列表*@param request* @param response* @throws Exception*/
@RequestMapping(params = “method=geList”) --即处理/person.do? method=geList方法
public void getnodeList(HttpServletRequest request,HttpServletResponse response) throws Exception { //处理请求//处理响应}}
可以看出,在代码上加入注解可以省去我们上面说的多个配置文件的工作,达到简便的 MVC 处理请求响应。
再配上简单的配置文件声明,即可轻松处理项目的全部请求控制工作。
Spring MVC乱码问题
在使用Spring MVC 做java Web 项目时,乱码问题时常都会出现,解决方法也不尽相同,有简单也有复杂的;如果加入了Spring框架之后就不一样了,可以采用Spring框架自带的过滤器CharacterEncodingFilter,这样可以大大减轻了我们的工作量,即简单方便又容易理解,配置方式如下:在web.xml文件中filter的位置加上如下内容:
encodingFilter
org.springframework.web.filter.CharacterEncodingFilter
encoding
UTF-8
forceEncoding
true
encodingFilter
*.htm
springmvc实现上传文件代码片段
@Controller
@RequestMapping("/common")
public class CommonController {
@RequestMapping(value = “/upload”)
public @ResponseBody String upload(@RequestParam(“file”) MultipartFile file, HttpSession session) throws Exception {
File localFile = new File(“c:/test/a.rar”);
file.transferTo(localFile);
return “success”;
}
}
第二节:SpringMVC 版 HelloWorld 实现
新建项目SpringMVC01
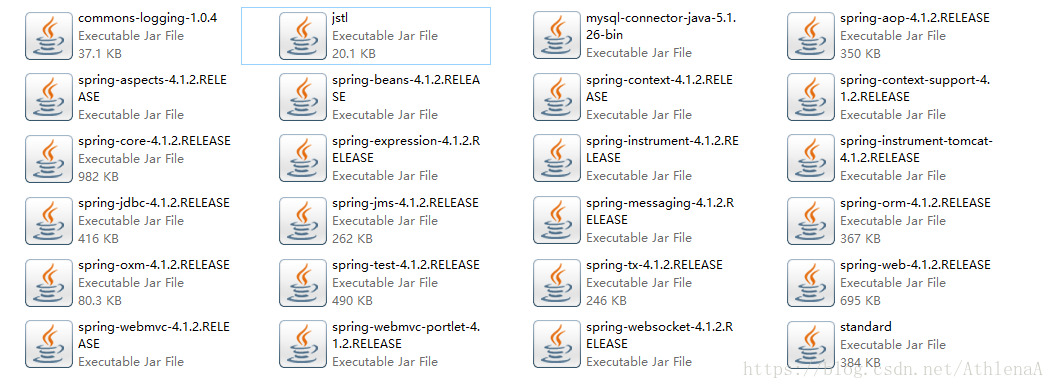
->添加jar包
->web.xml
 <?xml version="1.0" encoding="UTF-8"?>
<web-app xmlns:xsi="http://www.w3.org/2001/XMLSchema-instance"
	xmlns="http://java.sun.com/xml/ns/javaee"
	xsi:schemaLocation="http://java.sun.com/xml/ns/javaee http://java.sun.com/xml/ns/javaee/web-app_2_5.xsd"
	id="WebApp_ID" version="2.5">
	<display-name>SpringMvc01</display-name>
	<welcome-file-list>
		<welcome-file>index.html</welcome-file>
	</welcome-file-list>

	<servlet>
		<servlet-name>springmvc</servlet-name>
		<servlet-class>org.springframework.web.servlet.DispatcherServlet</servlet-class>
		<init-param>
			<param-name>contextConfigLocation</param-name>
			<param-value>classpath:spring-mvc.xml</param-value>
		</init-param>
	</servlet>
	<servlet-mapping>
		<servlet-name>springmvc</servlet-name>
		<url-pattern>*.do</url-pattern>
	</servlet-mapping>
</web-app>
->spring-mvc.xml
<?xml version="1.0" encoding="UTF-8"?>
<beans xmlns="http://www.springframework.org/schema/beans"
    xmlns:xsi="http://www.w3.org/2001/XMLSchema-instance"
    xmlns:p="http://www.springframework.org/schema/p"
    xmlns:context="http://www.springframework.org/schema/context"
    xsi:schemaLocation="
        http://www.springframework.org/schema/beans
        http://www.springframework.org/schema/beans/spring-beans.xsd
        http://www.springframework.org/schema/context
        http://www.springframework.org/schema/context/spring-context.xsd">

	<!-- 使用注解的包,包括子集 -->
	//等会写写@controller
    <context:component-scan base-package="com.java1234"/>

    <!-- 视图解析器 -->
	<bean id="viewResolver"
		class="org.springframework.web.servlet.view.InternalResourceViewResolver">
		<property name="prefix" value="/WEB-INF/jsp/" />
		<property name="suffix" value=".jsp"></property>
	</bean>

</beans>
->com.java1234.controller
HelloWorldController.java
package com.java1234.controller;

import org.springframework.stereotype.Controller;
import org.springframework.ui.Model;
import org.springframework.web.bind.annotation.RequestMapping;

@Controller
public class HelloWorldController {

	@RequestMapping("/helloWorld")
	public String helloWorld(Model model){
		model.addAttribute("message", "StringMVC你好!");
		return "helloWorld";
	}
}
->index.html
<!DOCTYPE html>
<html>
<head>
<meta charset="UTF-8">
<title>Insert title here</title>
</head>
<body>
<a href="helloWorld.do">问候SpringMvc他大爷</a>
</body>
</html>
->jsp
helloworld.jsp
<%@ page language="java" contentType="text/html; charset=UTF-8"
    pageEncoding="UTF-8"%>
<!DOCTYPE html PUBLIC "-//W3C//DTD HTML 4.01 Transitional//EN" "http://www.w3.org/TR/html4/loose.dtd">
<html>
<head>
<meta http-equiv="Content-Type" content="text/html; charset=UTF-8">
<title>Insert title here</title>
</head>
<body>
${message }
</body>
</html>
->执行结果
http://localhost:8080/SpringMVC
把请求获取到,分发处理到contronller
第二章 SpringMVC 控制器
第一节:@RequestMapping 请求映射
第二节:@RequestParam 请求参数
第三节:ModelAndView 返回模型和视图
新建项目SpringMVC02 做一个学生信息的管理
->com.java1234.model
Student.java
package com.java1234.model;

public class Student {

	private int id;
	private String name;
	private int age;

	public Student() {
		super();
		// TODO Auto-generated constructor stub
	}
	public Student(int id, String name, int age) {
		super();
		this.id = id;
		this.name = name;
		this.age = age;
	}
	public int getId() {
		return id;
	}
	public void setId(int id) {
		this.id = id;
	}
	public String getName() {
		return name;
	}
	public void setName(String name) {
		this.name = name;
	}
	public int getAge() {
		return age;
	}
	public void setAge(int age) {
		this.age = age;
	}
}
->com.java1234.controller
StudentController.java
package com.java1234.controller;

import java.util.ArrayList;
import java.util.List;

import org.springframework.stereotype.Controller;
import org.springframework.web.bind.annotation.RequestMapping;
import org.springframework.web.bind.annotation.RequestParam;
import org.springframework.web.servlet.ModelAndView;

import com.java1234.model.Student;

@Controller
@RequestMapping("/student")
//这个是用来区分模块
public class StudentController {

	private static List<Student> studentList=new ArrayList<Student>();

	//这里为了简单起见不用service了,只用一个静态数据
	static{
		studentList.add(new Student(1,"张三",11));
		studentList.add(new Student(2,"李四",12));
		studentList.add(new Student(3,"王五",13));
	}

	@RequestMapping("/list")
	public ModelAndView list(){
		ModelAndView mav=new ModelAndView();
		mav.addObject("studentList", studentList);
		mav.setViewName("student/list");
		return mav;
	}

	@RequestMapping("/preSave")
	//ModelAndView 添加的时候不需要,但修改的时候需要
	//@RequestParam请求参数,然后要修改哪个数据,就会把它的参数传递过来
	public ModelAndView preSave(@RequestParam(value="id",required=false) String id){
		ModelAndView mav=new ModelAndView();
		if(id!=null){//这是要修改数据,因为传递过来要修改的那个数据id
			mav.addObject("student", studentList.get(Integer.parseInt(id)-1));
			mav.setViewName("student/update");
		}else{//这里是要添加
			mav.setViewName("student/add");
		}
		return mav;
	}
}
->spring-mvc.jsp
<?xml version="1.0" encoding="UTF-8"?>
<beans xmlns="http://www.springframework.org/schema/beans"
    xmlns:xsi="http://www.w3.org/2001/XMLSchema-instance"
    xmlns:p="http://www.springframework.org/schema/p"
    xmlns:context="http://www.springframework.org/schema/context"
    xsi:schemaLocation="
        http://www.springframework.org/schema/beans
        http://www.springframework.org/schema/beans/spring-beans.xsd
        http://www.springframework.org/schema/context
        http://www.springframework.org/schema/context/spring-context.xsd">

	<!-- 使用注解的包,包括子集 -->
    <context:component-scan base-package="com.java1234"/>

    <!-- 视图解析器 -->
	<bean id="viewResolver"
		class="org.springframework.web.servlet.view.InternalResourceViewResolver">
		<property name="prefix" value="/WEB-INF/jsp/" />
		<property name="suffix" value=".jsp"></property>
	</bean>

</beans>
->index.jsp
<%@ page language="java" contentType="text/html; charset=ISO-8859-1"
    pageEncoding="ISO-8859-1"%>
<% response.sendRedirect("student/list.do"); %>
//要返回给首页的话,要重定向后台
->WebContent\WEB-INF->web.xml
<?xml version="1.0" encoding="UTF-8"?>
<web-app xmlns:xsi="http://www.w3.org/2001/XMLSchema-instance"
	xmlns="http://java.sun.com/xml/ns/javaee"
	xsi:schemaLocation="http://java.sun.com/xml/ns/javaee http://java.sun.com/xml/ns/javaee/web-app_2_5.xsd"
	id="WebApp_ID" version="2.5">
	<display-name>SpringMvc01</display-name>
	<welcome-file-list>
		<welcome-file>index.jsp</welcome-file>
	</welcome-file-list>

	<servlet>
		<servlet-name>springmvc</servlet-name>
		<servlet-class>org.springframework.web.servlet.DispatcherServlet</servlet-class>
		<init-param>
			<param-name>contextConfigLocation</param-name>
			<param-value>classpath:spring-mvc.xml</param-value>
		</init-param>
	</servlet>
	<servlet-mapping>
		<servlet-name>springmvc</servlet-name>
		<url-pattern>*.do</url-pattern>
	</servlet-mapping>
</web-app>
->新建文件夹WEB-INF->jsp->student
list.jsp
<%@ page language="java" contentType="text/html; charset=UTF-8"
    pageEncoding="UTF-8"%>
<%@ taglib prefix="c" uri="http://java.sun.com/jsp/jstl/core"%>
//遍历要用到jstl
<!DOCTYPE html PUBLIC "-//W3C//DTD HTML 4.01 Transitional//EN" "http://www.w3.org/TR/html4/loose.dtd">
<html>
<head>
<meta http-equiv="Content-Type" content="text/html; charset=UTF-8">
<title>Insert title here</title>
</head>
<body>
<a href="${pageContext.request.contextPath}/student/preSave.do">添加学生</a>
<table>
	<tr>
		<th>编号</th>
		<th>姓名</th>
		<th>年龄</th>
		<th>操作</th>
	</tr>
	<c:forEach var="student" items="${studentList }">
	<tr>
		<td>${student.id }</td>
		<td>${student.name }</td>
		<td>${student.age }</td>
		<td><a href="${pageContext.request.contextPath}/student/preSave.do?id=${student.id}">修改</a></td>
	</tr>
	</c:forEach>
</table>

</body>
</html>
->启动程序
http://loclahost:8080/SpringMVC02
显示出list.jsp页面
编号 姓名 年龄
1 张三 11
2 李四 12
3 王五 13
执行顺序
我们通过list.do,先到达了controller层的/list,放上数据,返回到视图list.jsp,
->add.jsp
<%@ page language="java" contentType="text/html; charset=UTF-8"
    pageEncoding="UTF-8"%>
<!DOCTYPE html PUBLIC "-//W3C//DTD HTML 4.01 Transitional//EN" "http://www.w3.org/TR/html4/loose.dtd">
<html>
<head>
<meta http-equiv="Content-Type" content="text/html; charset=UTF-8">
<title>Insert title here</title>
</head>
<body>
<form action="student/save.do" method="post">
<table>
	<tr>
		<th colspan="2">学生添加</th>
	</tr>
	<tr>
		<td>姓名</td>
		<td><input type="text" name="name"/></td>
	</tr>
	<tr>
		<td>年龄</td>
		<td><input type="text" name="age"/></td>
	</tr>
	<tr>
		<td colspan="2">
			<input type="submit" value="提交"/>
		</td>
	</tr>
</table>
</form>
</body>
</html>
->执行结果:
点击添加,到达了add.jsp页面
->update.jsp
<%@ page language="java" contentType="text/html; charset=UTF-8"
    pageEncoding="UTF-8"%>
<!DOCTYPE html PUBLIC "-//W3C//DTD HTML 4.01 Transitional//EN" "http://www.w3.org/TR/html4/loose.dtd">
<html>
<head>
<meta http-equiv="Content-Type" content="text/html; charset=UTF-8">
<title>Insert title here</title>
</head>
<body>
<form action="student/save.do" method="post">
<table>
	<tr>
		<th colspan="2">学生修改</th>
	</tr>
	<tr>
		<td>姓名</td>
		<td><input type="text" name="name" value="${student.name }"/></td>
	</tr>
	<tr>
		<td>年龄</td>
		<td><input type="text" name="age" value="${student.age }"/></td>
	</tr>
	<tr>
		<td colspan="2">
			<input type="hidden" name="id" value="${student.id }"/>
			<input type="submit" value="提交"/>
		</td>
	</tr>
</table>
</form>
</body>
</html>
->执行结果:
点击修改哪个学生的数据,到达了相应的update.jsp页面
第四节:SpringMVC 对象属性自动封装
第五节:SpringMVCPOST 请求乱码解决
第六节:Controller 内部转发和重定向
接着项目SpringMVC02
->StudentController.java中新加下面两个方法
@RequestMapping("/save")
public String save(Student student){
	if(student.getId()!=0){     //这是修改,因为id获取到了
		Student s=studentList.get(student.getId()-1);
		s.setName(student.getName());
		s.setAge(student.getAge());
	}else{
		studentList.add(student);			//这是添加
	}
	// return "redirect:/student/list.do";//这是重定向list.do,地址栏会变化
	return "forward:/student/list.do";//转发是可以带一些数据过去的,地址栏不会变化
}

@RequestMapping("/delete")
public String delete(@RequestParam("id") int id){
	studentList.remove(id-1);
	return "redirect:/student/list.do";
}
->add.jsp
<form action="${pageContext.request.contextPath}/student/save.do" method="post">
->执行结果
点击添加学生,赵六21,到controller层/save开始执行,重定向到/list
发现展出数据了,但是是乱码的
->web.xml中加一个过滤器
	<filter>
		<filter-name>characterEncodingFilter</filter-name>
		<filter-class>org.springframework.web.filter.CharacterEncodingFilter</filter-class>
		<init-param>
			<param-name>encoding</param-name>
			<param-value>utf-8</param-value>
		</init-param>
	</filter>
	<filter-mapping>
		<filter-name>characterEncodingFilter</filter-name>
		<url-pattern>*.do</url-pattern>//对所有的controller都做过滤处理
	</filter-mapping>
->这下不乱吗了
删除操作也可以了
第七节:SpringMvc 对 ServletAPI 的支持
第八节:SpringMvc 对 Json 的支持
接着项目SpringMVC02 做一个登陆
->新建User.java
package com.java1234.model;

public class User {

	private int id;
	private String userName;
	private String password;

	public User() {
		super();
		// TODO Auto-generated constructor stub
	}

	public User(String userName, String password) {
		super();
		this.userName = userName;
		this.password = password;
	}

	public int getId() {
		return id;
	}
	public void setId(int id) {
		this.id = id;
	}
	public String getUserName() {
		return userName;
	}
	public void setUserName(String userName) {
		this.userName = userName;
	}
	public String getPassword() {
		return password;
	}
	public void setPassword(String password) {
		this.password = password;
	}
}
->UserController.java
package com.java1234.controller;

import javax.servlet.http.Cookie;
import javax.servlet.http.HttpServletRequest;
import javax.servlet.http.HttpServletResponse;
import javax.servlet.http.HttpSession;

import org.springframework.stereotype.Controller;
import org.springframework.web.bind.annotation.RequestMapping;
import org.springframework.web.bind.annotation.ResponseBody;

import com.java1234.model.User;

@Controller
@RequestMapping("/user")
public class UserController {

	@RequestMapping("/login")
	public String login(HttpServletRequest request,HttpServletResponse response){
		System.out.println("----登录验证---");
		String userName=request.getParameter("userName");
		String password=request.getParameter("password");
		Cookie cookie=new Cookie("user",userName+"-"+password);//封装用户名密码
		cookie.setMaxAge(1*60*60*24*7);
		User currentUser=new User(userName,password);
		response.addCookie(cookie);//设置cookie
		HttpSession session=request.getSession();
		session.setAttribute("currentUser", currentUser);//获取Session
		return "redirect:/main.jsp";
	}

	@RequestMapping("/login2")
	public String login2(HttpServletRequest request){
		return "redirect:/main.jsp";
	}

	@RequestMapping("/login3")
	public String login3(HttpSession session){
		return "redirect:/main.jsp";
	}

}
->login.jsp
<%@ page language="java" contentType="text/html; charset=utf-8"
    pageEncoding="utf-8"%>
<!DOCTYPE html PUBLIC "-//W3C//DTD HTML 4.01 Transitional//EN" "http://www.w3.org/TR/html4/loose.dtd">
<html>
<head>
<meta http-equiv="Content-Type" content="text/html; charset=utf-8">
<title>Insert title here</title>
</head>
<body>
<a href="user/ajax.do">测试ajax</a>
<form action="user/login.do" method="post">
	<table>
		<tr>
			<td>用户名:</td>
			<td><input type="text" name="userName"/></td>
		</tr>
		<tr>
			<td>密码:</td>
			<td><input type="password" name="password"/></td>
		</tr>
		<tr>
			<td>
				<input type="submit" value="登录"/>
			</td>
		</tr>
	</table>
</form>
</body>
</html>
->main.jsp
<%@ page language="java" contentType="text/html; charset=ISO-8859-1"
    pageEncoding="ISO-8859-1"%>
<!DOCTYPE html PUBLIC "-//W3C//DTD HTML 4.01 Transitional//EN" "http://www.w3.org/TR/html4/loose.dtd">
<html>
<head>
<meta http-equiv="Content-Type" content="text/html; charset=ISO-8859-1">
<title>Insert title here</title>
</head>
<body>
Main.jsp  ${currentUser.userName }
</body>
</html>
->执行结果
输入zhangsan 123跳到main.jsp页面
显示Mai n.jsp zhangsan
->spring-mvc.xml 加上下面的代码就可以用json了,支持mvc
xmlns:mvc="http://www.springframework.org/schema/mvc
http://www.springframework.org/schema/mvc
http://www.springframework.org/schema/mvc/spring-mvc.xsd
<!-- 支持对象与json的转换。 -->
    <mvc:annotation-driven/>
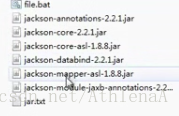
->加一个jar包
->UserController.java
	@RequestMapping("/ajax")
	public @ResponseBody User ajax(){
		User user=new User("zhangsan","123");
		return user;
	}
->运行结果
点击测试ajax,跳到页面显示
->新建com.java1234.util
ResponseUtil .java

package com.java1234.util;
import java.io.PrintWriter;
import javax.servlet.http.HttpServletResponse;
public class ResponseUtil {
	public static void write(HttpServletResponse response,Object o)throws Exception{
		response.setContentType("text/html;charset=utf-8");
		PrintWriter out=response.getWriter();
		out.println(o.toString());
		out.flush();
		out.close();
	}
}
第三章 Rest 风格的资源 URL
第一节:Restful 风格的资源 URL 简介
没有后缀风格的URL
第二节:SpringMvc 对 Rest 风格的支持
第三节:@PathVariable 获取 Url 变量
第四节:SpringMvc 对静态资源的处理
新建项目SpringMVC03
->Article.java
package com.java1234.model;

public class Article {

	private int id;
	private String title;
	private String content;
	public Article() {
		super();
		// TODO Auto-generated constructor stub
	}
	public Article(String title, String content) {
		super();
		this.title = title;
		this.content = content;

	public int getId() {
		return id;
	}
	public void setId(int id) {
		this.id = id;
	}
	public String getTitle() {
		return title;
	}
	public void setTitle(String title) {
		this.title = title;
	}
	public String getContent() {
		return content;
	}
	public void setContent(String content) {
		this.content = content;
	}
}
->ArticleController.java
package com.java1234.controller;

import org.springframework.stereotype.Controller;
import org.springframework.ui.Model;
import org.springframework.web.bind.annotation.PathVariable;
import org.springframework.web.bind.annotation.RequestMapping;
import org.springframework.web.servlet.ModelAndView;

import com.java1234.model.Article;

@Controller
@RequestMapping("/article")
//基路径
public class ArticleController {

	@RequestMapping("/list")
	public String list(Model model){
		return "article/list";
	}

	@RequestMapping("/details/{id}")
	//@PathVariable可以获取url的值
	public ModelAndView details(@PathVariable("id") int id){
		ModelAndView mav=new ModelAndView();
		if(id==1){
			mav.addObject("article", new Article("文章一","文章一的内容"));
		}else if(id==2){
			mav.addObject("article", new Article("文章二","文章二的内容"));
		}
		mav.setViewName("article/details");
		return mav;
	}
}
->article
list.jsp
<%@ page language="java" contentType="text/html; charset=utf-8"
    pageEncoding="utf-8"%>
<!DOCTYPE html PUBLIC "-//W3C//DTD HTML 4.01 Transitional//EN" "http://www.w3.org/TR/html4/loose.dtd">
<html>
<head>
<meta http-equiv="Content-Type" content="text/html; charset=utf-8">
<title>Insert title here</title>
</head>
<body>
<table>
	<tr>
		<th colspan="2">
			<img alt="文章列表" src="${pageContext.request.contextPath}/resources/article_list.jpg">
		</th>
	</tr>
	<tr>
		<td>1</td>
		<td>
			<a href="${pageContext.request.contextPath}/article/details/1" target="_blank">文章一</a>
		</td>
	</tr>
	<tr>
		<td>2</td>
		<td>
			<a href="${pageContext.request.contextPath}/article/details/2" target="_blank">文章二</a>
		</td>
	</tr>
</table>
</body>
</html>
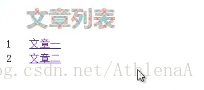
->运行结果
文章列表
1文章一
2文章二
->details.jsp
<%@ page language="java" contentType="text/html; charset=UTF-8"
    pageEncoding="UTF-8"%>
<!DOCTYPE html PUBLIC "-//W3C//DTD HTML 4.01 Transitional//EN" "http://www.w3.org/TR/html4/loose.dtd">
<html>
<head>
<meta http-equiv="Content-Type" content="text/html; charset=UTF-8">
<title>Insert title here</title>
<link rel="stylesheet" type="text/css" href="${pageContext.request.contextPath}/resources2/css.css"/>
</head>
<body>
<p class="p1">${article.title }</p>
<p>${article.content }</p>
</body>
</html>
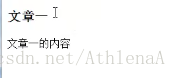
->运行结果
请求到了
现在有一个需求要显示图片
->spring-mvc.xml
<mvc:annotation-driven/>

	<mvc:resources mapping="/resources/**" location="/images/"/>

	<mvc:resources mapping="/resources2/**" location="/css/"/>
->css/
.p1{
font-size: 20px;
font-weight: bold;
}
->images/article_list
第四章 SpringMvc 文件上传
第一节:SpringMvc 单文件上传
第二节:SpringMvc 多文件上传
新建项目SpringMVC
->spring-mvc.xml 加一个bean
<bean id="multipartResolver"
        class="org.springframework.web.multipart.commons.CommonsMultipartResolver">

		<property name="defaultEncoding" value="UTF-8"/>
	    <property name="maxUploadSize" value="10000000"/>
</bean>
->加jar包
->FileUploadController.java
package com.java1234.controller;

import java.io.File;

import javax.servlet.http.HttpServletRequest;

import org.springframework.stereotype.Controller;
import org.springframework.web.bind.annotation.RequestMapping;
import org.springframework.web.bind.annotation.RequestParam;
import org.springframework.web.multipart.MultipartFile;

@Controller
public class FileUploadController {

	@RequestMapping("/upload")
	public String uploadFile(@RequestParam("file1") MultipartFile file1,HttpServletRequest request)throws Exception{
		String filePath=request.getServletContext().getRealPath("/");
		System.out.println(filePath);
		file1.transferTo(new File(filePath+"upload/"+file1.getOriginalFilename()));
		return "redirect:success.html";
	}

	@RequestMapping("/upload2")
	public String uploadFiles(@RequestParam("file") MultipartFile[] files,HttpServletRequest request)throws Exception{
		String filePath=request.getServletContext().getRealPath("/");
		System.out.println(filePath);
		for(MultipartFile file:files){
			file.transferTo(new File(filePath+"upload/"+file.getOriginalFilename()));
		}
		return "redirect:success.html";
	}
}
->index.jsp
<!DOCTYPE html>
<html>
<head>
<meta charset="UTF-8">
<title>Insert title here</title>
</head>
<body>
<form action="upload2.do" method="post" enctype="multipart/form-data">
	<table>
		<tr>
			<th colspan="2">上传文件</th>
		</tr>
		<tr>
			<td>文件一</td>
			<td>
				<input type="file" name="file"/>
			</td>
		</tr>
		<tr>
			<td>文件二</td>
			<td>
				<input type="file" name="file"/>
			</td>
		</tr>
		<tr>
			<td colspan="2">
				<input type="submit" value="上传文件"/>
			</td>
		</tr>
	</table>
</form>
</body>
</html>
->success.jsp
上传成功!
->执行结果
上传文件,成功后,访问路径就可以显示了
多文件也可以了