消息代理
消息代理是一种消息验证、传输、路由的架构模式。它在应用程序之间起到通信调度并最小化应用之间的依赖作用,使得应用程序可以高效地解耦通信过程。消息代理是一个中间件产品,它的核心是一个消息的路由程序,用来实现接受和分发消息,并根据设定好的消息处理流来转发给正确的应用。它包括独立的通信和消息传递协议,能够实现组织内部和组织间的网络通信。常用的场景有:
1.将消息路由到一个或多个目的地。
2.消息转化为其他的表现方式。
3.执行消息的聚集、消息的分解,并将结果发送到它们的目的地,然后重新组合响应返回给消息用户。
4.调用Web服务来检索数据。
5.响应事件或错误。
6.使用发布订阅模式来提供内容或基于主题的消息路由。
现成的有:
ActiveMQ
Kafka
RabbitMQ
RocketMQ
……
当前版本的Spring Cloud Bus仅支持RibbitMQ和Kafka。
RabbitMQ
基本概念
Broker:可以理解为消息队列服务器的实体,他是一个中间件应用,负载接受消息生产者的消息,然后将消息发送至消息接受者或者其他的Broker。
Exchange:消息交换机,是消息第一个到达的地方,消息通过它指定路由规则,分发到不同的消息队列中。
Queue:消息队列,消息通过发送和路由之后最终到达的地方,到达Queue的消息即进入逻辑上等待消费的状态。每个消息都会被发送到一个或多个队列。
Binding:绑定,它的作用就是把Exchange和Queue按照路由规则绑定起来,也就是Exchange和Queue之间的虚拟连接。
Routing Key:路由关键字,Exchange根据这个关键字进行消息投递。
Virtual host:虚拟主机,它是对Broker的虚拟划分,将消费者、生产者和它们依赖的AMQP相关结构进行隔离,一般都是为了安全考虑。比如在Broker中设置多个虚拟主机,对不同用户进行权限的分离。
Connection:连接,代表生产者、消费者、Broker之间进行通信的物理网络。
Channel:消息通道,用于连接生产者、消费者、Broker之间进行通信的物理网络。
Producer:消息生产者,制造消息并发送消息的程序。
Consumer:消息消费者,接受消息并处理消息的程序。
消息投递到队列的过程如下:
1.客户端连接到消息队列服务器,打开一个Channel。
2.客户端声明一个Exchange,并设置相关属性。
3.客户端声明一个Queue,并设置相关属性。
4.客户端使用Routing Key,在Exchange和Queue之间建立好绑定关系。
5.客户端投递消息到Exchange。
6.Exchange接受到消息后,根据消息的Key和已设置的Binding,进行消息路由,将消息投递到一个或多个Queue里。
Exchange有三种类型:
1.Direct交换机:完全根据Key进行投递。比如绑定时设置Routing Key为abc,那么客户端提交信息时,只有设置了Key为abc才会被投递到队列。
2.Topic交换机:对Key进行模式匹配后进行投递,可以使用#匹配一个或多个词,符号*匹配正好一个词。
3.Fanout交换机:不需要任何Key,它采取广播的模式,一个消息进来时,投递到与该交换机绑定的所有队列。
SpringBoot整合RabbitMQ
(在此之前需要先行安装RabbitMQ,安装:RabbitMQ安装)
1.新建一个Spring Boot工程,命名为rabbitmq-hello。
2.在pom.xml中引入spring-boot-starter-amqp支持RabbitMQ。
<?xml version="1.0" encoding="UTF-8"?>
<project xmlns="http://maven.apache.org/POM/4.0.0" xmlns:xsi="http://www.w3.org/2001/XMLSchema-instance"
         xsi:schemaLocation="http://maven.apache.org/POM/4.0.0 http://maven.apache.org/xsd/maven-4.0.0.xsd">
    <modelVersion>4.0.0</modelVersion>

    <groupId>com.example</groupId>
    <artifactId>rabbitmq-hello</artifactId>
    <version>0.0.1-SNAPSHOT</version>
    <packaging>jar</packaging>

    <name>rabbitmq-hello</name>
    <description>Demo project for Spring Boot</description>

    <parent>
        <groupId>org.springframework.boot</groupId>
        <artifactId>spring-boot-starter-parent</artifactId>
        <version>2.0.5.RELEASE</version>
        <relativePath/> <!-- lookup parent from repository -->
    </parent>

    <properties>
        <project.build.sourceEncoding>UTF-8</project.build.sourceEncoding>
        <project.reporting.outputEncoding>UTF-8</project.reporting.outputEncoding>
        <java.version>1.8</java.version>
    </properties>

    <dependencies>
        <dependency>
            <groupId>org.springframework.boot</groupId>
            <artifactId>spring-boot-starter</artifactId>
        </dependency>

        <dependency>
            <groupId>org.springframework.boot</groupId>
            <artifactId>spring-boot-starter-test</artifactId>
            <scope>test</scope>
        </dependency>

        <dependency>
            <groupId>org.springframework.boot</groupId>
            <artifactId>spring-boot-starter-amqp</artifactId>
        </dependency>
    </dependencies>

    <build>
        <plugins>
            <plugin>
                <groupId>org.springframework.boot</groupId>
                <artifactId>spring-boot-maven-plugin</artifactId>
            </plugin>
        </plugins>
    </build>


</project>
3.在application.properties中配置关于RabbitMQ的连接信息和用户信息。
spring.application.name=rabbitmq-hello

spring.rabbitmq.host=localhost
spring.rabbitmq.port=5672
spring.rabbitmq.username=SpringCloud
spring.rabbitmq.password=123456789
4.创建消息生产者,通过注入AmqpTemplate接口的实例来实现消息的发送,AmqpTemplate接口定义了一套针对AMQP协议的基础操作。
@Component
public class Sender {

    @Autowired
    private AmqpTemplate amqpTemplate;

    public void send(){
        String context="hello "+new Date();
        System.out.println();
        System.out.println("--------------------------------------------------------");
        System.out.println("Sender:"+context);
        System.out.println("--------------------------------------------------------");
        System.out.println();
        amqpTemplate.convertAndSend("hello",context);
    }
}
5.创建消息消费者Receiver。通过@RabbitListener注解定义该类对hello队列的监听,并用@RabbitHandler注解来指定对消息的处理方法:
@Component
@RabbitListener(queues = "hello")
public class Receiver {

    @RabbitHandler
    public void process(String hello){
        System.out.println();
        System.out.println("--------------------------------------------------------");
        System.out.println("Receiver:"+hello);
        System.out.println("--------------------------------------------------------");
        System.out.println();
    }

}
创建RabbitMQ的配置类RabbitConfig用来配置队列,交换器路由等信息:
@Configuration
public class RabbitConfig {

    @Bean
    public Queue helloQueue(){
        return new Queue("hello");
    }
}
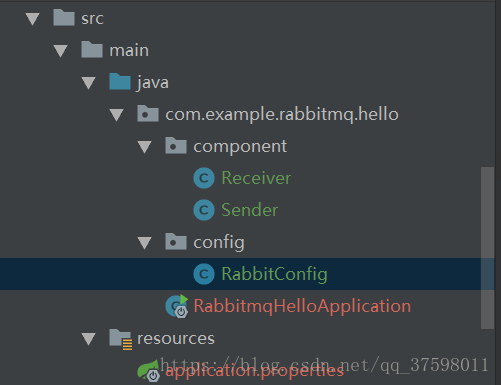
最后的目录结构如下:
下面创建一个单元测试类用于调用消息生产:
@RunWith(SpringRunner.class)
@SpringBootTest
public class RabbitmqHelloApplicationTests {

    @Autowired
    private Sender sender;

    @Test
    public void contextLoads() {
    }

    @Test
    public void hello(){
        sender.send();
    }

}
启动应用主类后:

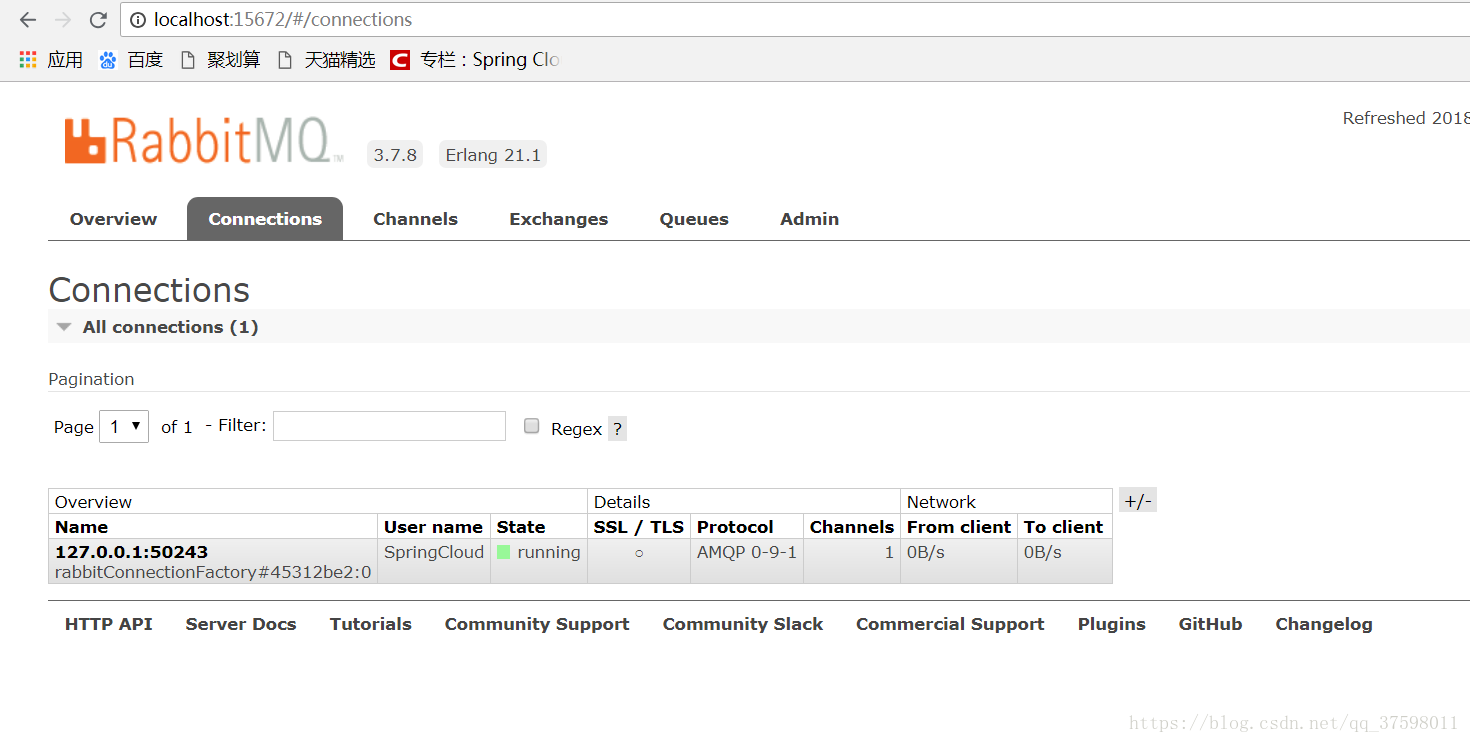

运行单元测试类:

可以看到它发送了一条队列消息。
然后转到应用主类的控制台,可以看到消息消费者对hello队列的监听程序执行了并输出接收到的消息。

Ok一个简单的RabbitMQ与Spring Boot的程序就简单整合了。
整合Spring Cloud Bus
1.在config-server和config-service中新增:
        <dependency>
            <groupId>org.springframework.cloud</groupId>
            <artifactId>spring-cloud-starter-bus-amqp</artifactId>
            <version>2.0.0.RELEASE</version>
        </dependency>
在配置文件中加上配置信息:
spring.rabbitmq.host=localhost
spring.rabbitmq.port=5672
spring.rabbitmq.username=SpringCloud
spring.rabbitmq.password=123456789

management.endpoints.web.exposure.include=*然后修改github上的文件后访问:http://localhost:7001/bus/refresh
它会对文件进行更新:
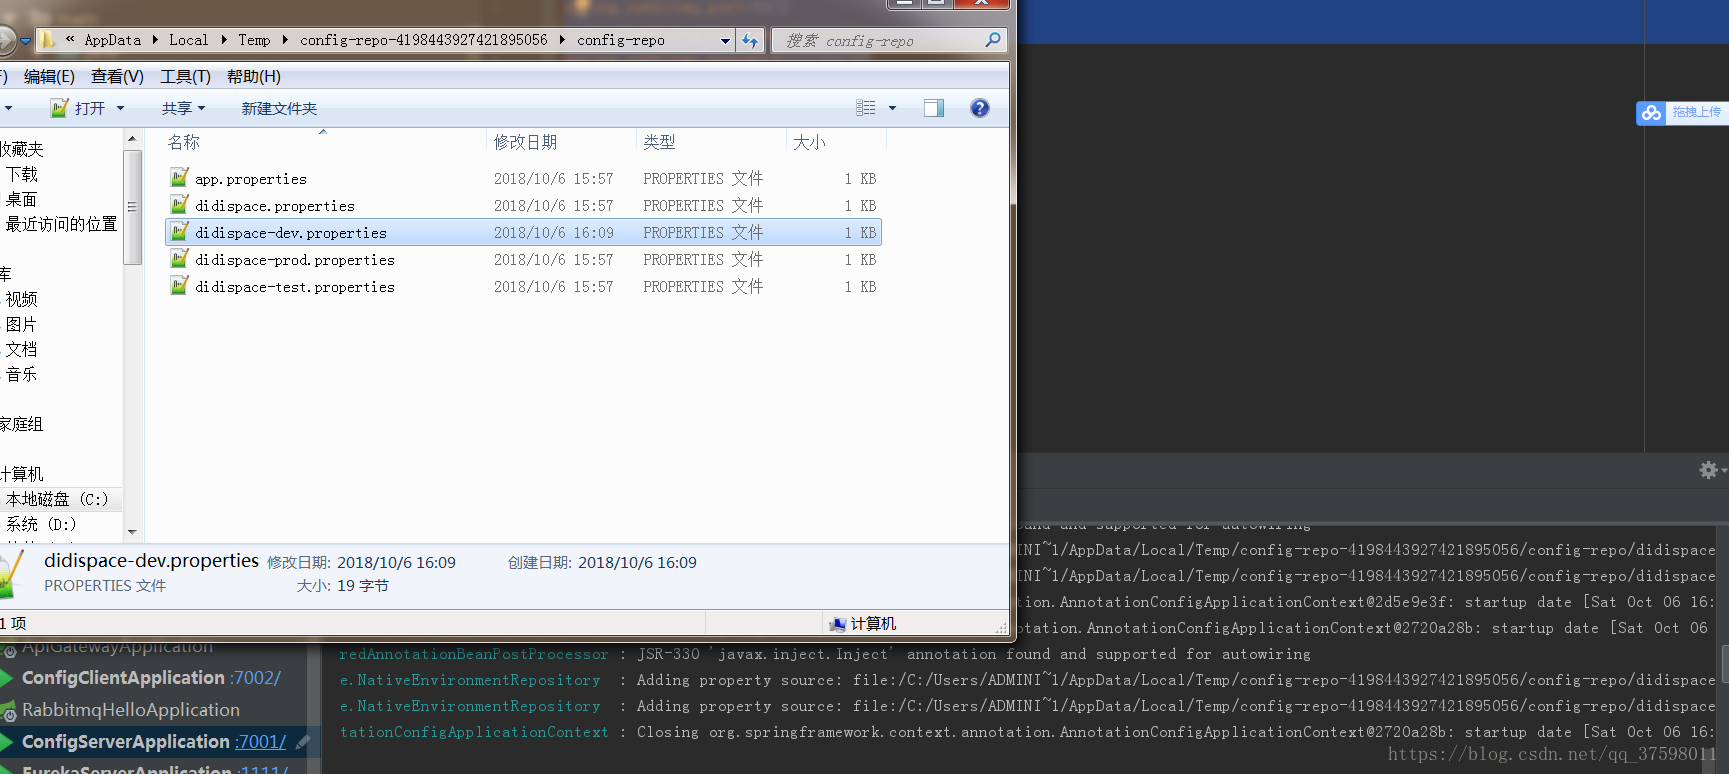

然后再访问客户端就可以发现配置已经更新了。

如果需要服务端对某个客户端单个刷新则需要这么访问:http://localhost:7001/bus/refresh?destination=configClient:7002
destination参数除了可以定位具体的实例之外还能用来定位具体的服务。如:/bus/refresh?destination=customers:**,该请求会触发customers服务的所有实例进行刷新。
参考《Spring Cloud 微服务实战》