MQTT与webSocket
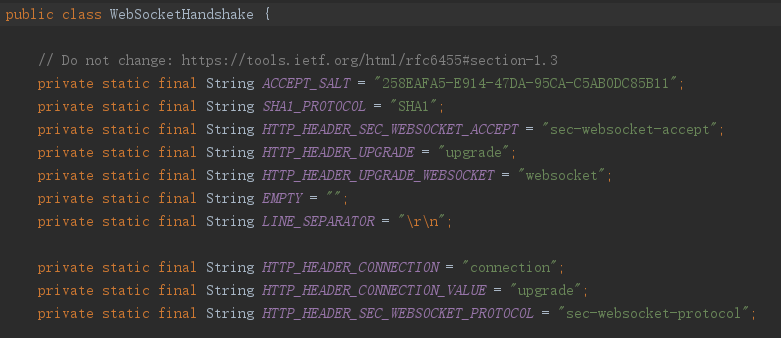
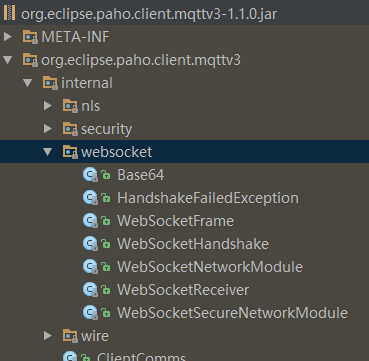
Mqtt底层使用webSocket实现,通过发送http或https请求与服务端开始进行handshake,握手完成后协议将从http(https)升级成webSocket并建立长连,之后通过长连进行通信。sdk中关于websocket部分结构及handshake信息如下:
MQTT心跳包
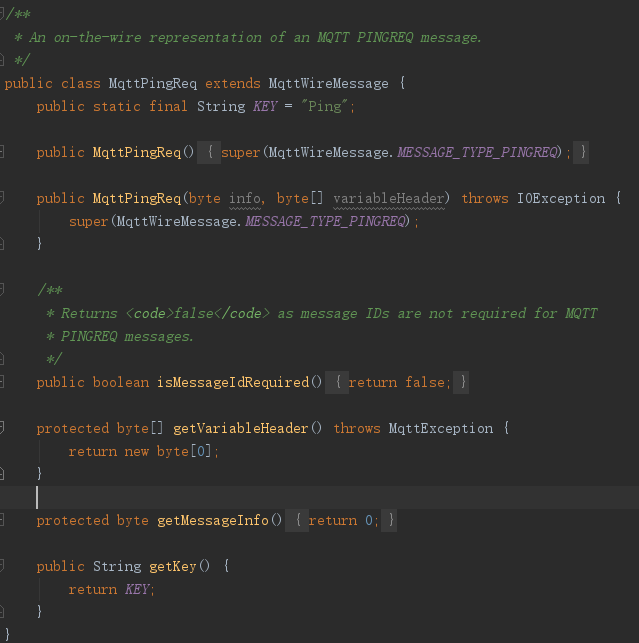
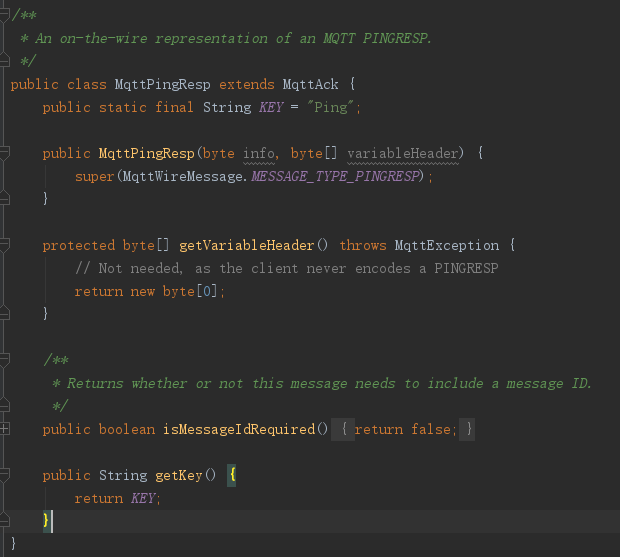
分析心跳包首先看用于发送心跳信息的MqttPingReq.class和用于接收心跳答复的MqttPingResp.class
然后,我们需要从其发送的内容当中逆向推出其心跳包的内容。我 们先看其发送的的模块:找到public class CommsSender implements Runnable 类,看到其有一个private MqttOutputStream out;私有字段,一看这个方法,我们就能判断,这个字段就是输出流,打开public class MqttOutputStream extends OutputStream这个类,你会看到这样一个方法:
/**
    * Writes an <code>MqttWireMessage</code> to the stream.
    */
   public void write(MqttWireMessage message) throws IOException, MqttException {
      final String methodName = "write";
      byte[] bytes = message.getHeader();
      byte[] pl = message.getPayload();
//    out.write(message.getHeader());
//    out.write(message.getPayload());
      out.write(bytes,0,bytes.length);
      clientState.notifySentBytes(bytes.length);

        int offset = 0;
        int chunckSize = 1024;
        while (offset < pl.length) {
           int length = Math.min(chunckSize, pl.length - offset);
           out.write(pl, offset, length);
           offset += chunckSize;
           clientState.notifySentBytes(length);
        }

      // @TRACE 500= sent {0}
       log.fine(CLASS_NAME, methodName, "500", new Object[]{message});
   }
原来,其发送的是header和payload,然后我们再看看心跳包的header和payload。
MqttPingReq和MqttPingResp中都有这么个方法:
protected byte[] getVariableHeader() throws MqttException {
   return new byte[0];
}
往上查看其共同父类MqttWireMessage.class中的getHeader():
public byte[] getHeader() throws MqttException {
    try {
        int first = ((getType() & 0x0f) << 4) ^ (getMessageInfo() & 0x0f);
        byte[] varHeader = getVariableHeader();
        int remLen = varHeader.length + getPayload().length;//长度为0

        ByteArrayOutputStream baos = new ByteArrayOutputStream();
        DataOutputStream dos = new DataOutputStream(baos);
        dos.writeByte(first);//写入一个字节
        dos.write(encodeMBI(remLen));//查看encodeMBI()方法实现可知此处也是只有一个字节
        dos.write(varHeader);//new byte[0]
        dos.flush();
        return baos.toByteArray();
    } catch(IOException ioe) {
        throw new MqttException(ioe);
    }
}
protected static byte[] encodeMBI( long number) {
   int numBytes = 0;
   long no = number;
   ByteArrayOutputStream bos = new ByteArrayOutputStream();
   // Encode the remaining length fields in the four bytes
   do {
      byte digit = (byte)(no % 128);
      no = no / 128;
      if (no > 0) {
         digit |= 0x80;
      }
      bos.write(digit);
      numBytes++;
   } while ( (no > 0) && (numBytes<4) );

   return bos.toByteArray();
}
而MqttWireMessage中还有一个getPayload方法,MqttPingReq和MqttPingResp都没有重写这个方法:
/**
 * Sub-classes should override this method to supply the payload bytes.
 */
public byte[] getPayload() throws MqttException {
   return new byte[0];
}
综合以上分析可知MQTT的心跳包实际只有2个字节,且第一个字节中前4位表示消息类型后4位表示消息内容。
默认心跳频率:
KEEP_ALIVE_INTERVAL_DEFAULT = 60;心跳包的发送在ClientState.checkForActivity()中:
public MqttToken checkForActivity(IMqttActionListener pingCallback) throws MqttException {
   ...
   long nextPingTime = getKeepAlive();
   if (connected && this.keepAlive > 0) {
      long time = System.currentTimeMillis();
      //Reduce schedule frequency since System.currentTimeMillis is no accurate, add a buffer
      //It is 1/10 in minimum keepalive unit.
      int delta = 100;
           synchronized (pingOutstandingLock) {
        ...
         // 1. Is a ping required by the client to verify whether the broker is down?
               //    Condition: ((pingOutstanding == 0 && (time - lastInboundActivity >= keepAlive + delta)))
               //    In this case only one ping is sent. If not confirmed, client will assume a lost connection to the broker.
               // 2. Is a ping required by the broker to keep the client alive?
               //    Condition: (time - lastOutboundActivity >= keepAlive - delta)
               //    In this case more than one ping outstanding may be necessary.
               //    This would be the case when receiving a large message;
               //    the broker needs to keep receiving a regular ping even if the ping response are queued after the long message
               //    If lacking to do so, the broker will consider my connection lost and cut my socket.
               if ((pingOutstanding == 0 && (time - lastInboundActivity >= keepAlive - delta)) ||
                   (time - lastOutboundActivity >= keepAlive - delta)) {

                   //@TRACE 620=ping needed. keepAlive={0} lastOutboundActivity={1} lastInboundActivity={2}

                   // pingOutstanding++;  // it will be set after the ping has been written on the wire
                   // lastPing = time;    // it will be set after the ping has been written on the wire
                   token = new MqttToken(clientComms.getClient().getClientId());
                   if(pingCallback != null){
                       token.setActionCallback(pingCallback);
                   }
                   tokenStore.saveToken(token, pingCommand);
                   pendingFlows.insertElementAt(pingCommand, 0);

                   nextPingTime = getKeepAlive();

                   //Wake sender thread since it may be in wait state (in ClientState.get())
                   notifyQueueLock();
               }
               else {
                   nextPingTime = Math.max(1, getKeepAlive() - (time - lastOutboundActivity));
               }
           }
           //@TRACE 624=Schedule next ping at {0}
           pingSender.schedule(nextPingTime);
   }

   return token;
}
如果需要做修改可参考环信的方案,设置默认值后再根据实时连接情况智能调整心跳间隔,如下:
1.如何建立长连
MqttAndroidClient暴露了connect()方法用于连接代理服务器:
@Override
public IMqttToken connect(MqttConnectOptions options, Object userContext,
                          IMqttActionListener callback) throws MqttException {

    IMqttToken token = new MqttTokenAndroid(this, userContext, callback);
    ...

    if (mqttService == null) { // First time - must bind to the service 首次启动服务
        Intent serviceStartIntent = new Intent();
        serviceStartIntent.setClassName(myContext, SERVICE_NAME);
        Object service = myContext.startService(serviceStartIntent);
        if (service == null) {//如果服务启动失败则回调连接失败
            IMqttActionListener listener = token.getActionCallback();
            if (listener != null) {
                listener.onFailure(token, new RuntimeException("cannot start service " + SERVICE_NAME));
            }
        }

        //如果服务启动成功,则绑定service生命周期
        // We bind with BIND_SERVICE_FLAG (0), leaving us the manage the lifecycle
        // until the last time it is stopped by a call to stopService()
        myContext.bindService(serviceStartIntent, serviceConnection, Context.BIND_AUTO_CREATE);

        if (!receiverRegistered) registerReceiver(this);
    } else {
        pool.execute(new Runnable() {

            @Override
            public void run() {
                doConnect();//连接broker

                //Register receiver to show shoulder tap.
                if (!receiverRegistered) registerReceiver(MqttAndroidClient.this);
            }

        });
    }

    return token;
}
查看方法代码,connect()中会先检查是否已启动MqttService,确定服务已启动才执行doConnect()。doConnect()中其实也就是调用:
mqttService.connect(clientHandle, connectOptions, null, activityToken);
再往下看,定位到MqttConnection.class中的connect()方法:
public void connect(MqttConnectOptions options, String invocationContext, String activityToken) {
    connectOptions = options;
    reconnectActivityToken = activityToken;

    //根据cleanSession清除历史消息
    if (options != null) {
        cleanSession = options.isCleanSession();
    }
    if (connectOptions.isCleanSession()) { // if it's a clean session,discard old data
        service.messageStore.clearArrivedMessages(clientHandle);
    }

    service.traceDebug(TAG, "Connecting {" + serverURI + "} as {" + clientId + "}");
    final Bundle resultBundle = new Bundle();
    resultBundle.putString(MqttServiceConstants.CALLBACK_ACTIVITY_TOKEN, activityToken);
    resultBundle.putString(MqttServiceConstants.CALLBACK_INVOCATION_CONTEXT, invocationContext);
    resultBundle.putString(MqttServiceConstants.CALLBACK_ACTION, MqttServiceConstants.CONNECT_ACTION);

    try {
        if (persistence == null) {
            // ask Android where we can put files
            File myDir = service.getExternalFilesDir(TAG);
            if (myDir == null) {
                // No external storage, use internal storage instead.
                myDir = service.getDir(TAG, Context.MODE_PRIVATE);

                if (myDir == null) {
                    //Shouldn't happen.
                    resultBundle.putString(MqttServiceConstants.CALLBACK_ERROR_MESSAGE, "Error! No external and internal storage available");
                    resultBundle.putSerializable(MqttServiceConstants.CALLBACK_EXCEPTION, new MqttPersistenceException());
                    service.callbackToActivity(clientHandle, Status.ERROR, resultBundle);
                    return;
                }
            }

            // use that to setup MQTT client persistence storage
            persistence = new MqttDefaultFilePersistence(myDir.getAbsolutePath());
        }

        IMqttActionListener listener = new MqttConnectionListener(resultBundle) {

            @Override
            public void onSuccess(IMqttToken asyncActionToken) {
                doAfterConnectSuccess(resultBundle);
                service.traceDebug(TAG, "connect success!");
            }

            @Override
            public void onFailure(IMqttToken asyncActionToken, Throwable exception) {
                resultBundle.putString(MqttServiceConstants.CALLBACK_ERROR_MESSAGE, exception.getLocalizedMessage());
                resultBundle.putSerializable(MqttServiceConstants.CALLBACK_EXCEPTION, exception);
                service.traceError(TAG, "connect fail, call connect to reconnect.reason:" + exception.getMessage());

                doAfterConnectFail(resultBundle);
            }
        };

        if (myClient != null) {//如果已经创建过MqttAsyncClient,也即之前就调用过本connect()方法
            if (isConnecting) {//上次调用的connect()还在连接中,不做处理,等待connect()结果
                service.traceDebug(TAG, "myClient != null and the client is connecting. Connect return directly.");
                service.traceDebug(TAG, "Connect return:isConnecting:" + isConnecting + ".disconnected:" + disconnected);
            } else if (!disconnected) {//当前已处于长连接,提示连接成功
                service.traceDebug(TAG, "myClient != null and the client is connected and notify!");
                doAfterConnectSuccess(resultBundle);
            } else {//之前的连接未成功或者已掉线,重新尝试连接
                service.traceDebug(TAG, "myClient != null and the client is not connected");
                service.traceDebug(TAG, "Do Real connect!");
                setConnectingState(true);
                myClient.connect(connectOptions, invocationContext, listener);
            }
        } else {// if myClient is null, then create a new connection 连接未曾建立或已被销毁,新建连接
            alarmPingSender = new AlarmPingSender(service);//用于发送心跳包
            myClient = new MqttAsyncClient(serverURI, clientId, persistence, alarmPingSender);
            myClient.setCallback(this);

            service.traceDebug(TAG, "Do Real connect!");
            setConnectingState(true);
            myClient.connect(connectOptions, invocationContext, listener);
        }
    } catch (Exception e) {
        service.traceError(TAG, "Exception occurred attempting to connect: " + e.getMessage());
        setConnectingState(false);
        handleException(resultBundle, e);
    }
}
查看以上代码,我在关键行都添加了注释。另外需要注意到其中有两个比较重要的对象resultBundle和persistence,persistence用于将connection信息持久化,而resultBundle我会在后面分析,它最终会被用于发送广播触发我们connect、publish、subscribe等的回调监听。继续深入到MqttAsyncClient.connect():
public IMqttToken connect(MqttConnectOptions options, Object userContext, IMqttActionListener callback)
      throws MqttException, MqttSecurityException {
    ...

   final boolean automaticReconnect = options.isAutomaticReconnect();

   comms.setNetworkModules(createNetworkModules(serverURI, options));
   comms.setReconnectCallback(new MqttCallbackExtended() {

      public void messageArrived(String topic, MqttMessage message) throws Exception {
      }
      public void deliveryComplete(IMqttDeliveryToken token) {
      }
      public void connectComplete(boolean reconnect, String serverURI) {
      }

      public void connectionLost(Throwable cause) {
         if(automaticReconnect){
               // Automatic reconnect is set so make sure comms is in resting state
               comms.setRestingState(true);
               reconnecting = true;
               startReconnectCycle();
            }
      }
   });

   // Insert our own callback to iterate through the URIs till the connect succeeds
   MqttToken userToken = new MqttToken(getClientId());
   ConnectActionListener connectActionListener = new ConnectActionListener(this, persistence, comms, options, userToken, userContext, callback, reconnecting);
   userToken.setActionCallback(connectActionListener);
   userToken.setUserContext(this);

   // If we are using the MqttCallbackExtended, set it on the connectActionListener
   if(this.mqttCallback instanceof MqttCallbackExtended){
      connectActionListener.setMqttCallbackExtended((MqttCallbackExtended)this.mqttCallback);
   }

   comms.setNetworkModuleIndex(0);
   connectActionListener.connect();

   return userToken;
}
代码比较多,我省略了一部分,主要关注comms.setReconnectCallback()中的自动重连逻辑即可,自动重连的实现看下面的attemptReconnect()方法,重连失败会继续重连直到连接成功,不过重连的间隔时间会随着重连次数增加最大到128s:
private void attemptReconnect(){
   final String methodName = "attemptReconnect";
   //@Trace 500=Attempting to reconnect client: {0}
   try {
      connect(this.connOpts, this.userContext,new IMqttActionListener() {

         public void onSuccess(IMqttToken asyncActionToken) {
            //@Trace 501=Automatic Reconnect Successful: {0}
            comms.setRestingState(false);
            stopReconnectCycle();
         }

         public void onFailure(IMqttToken asyncActionToken, Throwable exception) {
            //@Trace 502=Automatic Reconnect failed, rescheduling: {0}
            if(reconnectDelay < 128000){//reconnectDelay初始值为1000,每次重连失败时*2
               reconnectDelay = reconnectDelay * 2;
            }
            rescheduleReconnectCycle(reconnectDelay);
         }
      });
   } catch (MqttSecurityException ex) {
      //@TRACE 804=exception
   } catch (MqttException ex) {
      //@TRACE 804=exception
   }
}
好了,看完重连逻辑我们再回到前面的connect()方法,MqttAsyncClient.connect()会进入ClientComms.connect():
public void connect(MqttConnectOptions options, MqttToken token) throws MqttException {
   final String methodName = "connect";
   synchronized (conLock) {
      if (isDisconnected() && !closePending) {
         ...
         tokenStore.open();
         ConnectBG conbg = new ConnectBG(this, token, connect);
         conbg.start();//经由ConnectBG然后执行ClientComms.internalSend()方法
      }else {
         ...
      }
   }
}
经由ConnectBG然后执行ClientComms.internalSend()方法,并最终进入ClientState.send()方法
public void send(MqttWireMessage message, MqttToken token) throws MqttException {
   final String methodName = "send";
。。。
   if (message instanceof MqttPublish) {
      synchronized (queueLock) {
         if (actualInFlight >= this.maxInflight) {
            //@TRACE 613= sending {0} msgs at max inflight window
            log.fine(CLASS_NAME, methodName, "613", new Object[]{new Integer(actualInFlight)});

            throw new MqttException(MqttException.REASON_CODE_MAX_INFLIGHT);
         }

         MqttMessage innerMessage = ((MqttPublish) message).getMessage();
         //@TRACE 628=pending publish key={0} qos={1} message={2}
         log.fine(CLASS_NAME,methodName,"628", new Object[]{new Integer(message.getMessageId()), new Integer(innerMessage.getQos()), message});

         switch(innerMessage.getQos()) {
            case 2:
               outboundQoS2.put(new Integer(message.getMessageId()), message);
               persistence.put(getSendPersistenceKey(message), (MqttPublish) message);
               break;
            case 1:
               outboundQoS1.put(new Integer(message.getMessageId()), message);
               persistence.put(getSendPersistenceKey(message), (MqttPublish) message);
               break;
         }
         tokenStore.saveToken(token, message);
         pendingMessages.addElement(message);
         queueLock.notifyAll();
      }
   } else {
      //@TRACE 615=pending send key={0} message {1}
      log.fine(CLASS_NAME,methodName,"615", new Object[]{new Integer(message.getMessageId()), message});

      if (message instanceof MqttConnect) {
         synchronized (queueLock) {
            // Add the connect action at the head of the pending queue ensuring it jumps
            // ahead of any of other pending actions.
            tokenStore.saveToken(token, message);
            pendingFlows.insertElementAt(message,0);
            queueLock.notifyAll();
         }
      } else {
         if (message instanceof MqttPingReq) {
            this.pingCommand = message;
         }
         else if (message instanceof MqttPubRel) {
            outboundQoS2.put(new Integer(message.getMessageId()), message);
            persistence.put(getSendConfirmPersistenceKey(message), (MqttPubRel) message);
         }
         else if (message instanceof MqttPubComp)  {
            persistence.remove(getReceivedPersistenceKey(message));
         }

         synchronized (queueLock) {
            if ( !(message instanceof MqttAck )) {
               tokenStore.saveToken(token, message);
            }
            pendingFlows.addElement(message);
            queueLock.notifyAll();
         }
      }
   }
}
现在我们再回头聊一聊刚才说的resultBundle,取其中一处引用:
private void doAfterConnectSuccess(final Bundle resultBundle) {
    //since the device's cpu can go to sleep, acquire a wakelock and drop it later.
    acquireWakeLock();
    service.callbackToActivity(clientHandle, Status.OK, resultBundle);
    deliverBacklog();
    setConnectingState(false);
    disconnected = false;
    releaseWakeLock();
}
连接成功后会调用MqttService.callbackToActivity(),resultBundle就作为其中一个参数被传入,接下来我们看看这个方法的实现:
/**
 * 所有消息都经此方法发出
 * pass data back to the Activity, by building a suitable Intent object and
 * broadcasting it
 *
 * @param clientHandle source of the data
 * @param status       OK or Error
 * @param dataBundle   the data to be passed
 */
void callbackToActivity(String clientHandle, Status status, Bundle dataBundle) {
    // Don't call traceDebug, as it will try to callbackToActivity leading
    // to recursion.
    Intent callbackIntent = new Intent(MqttServiceConstants.CALLBACK_TO_ACTIVITY);
    if (clientHandle != null) {
        callbackIntent.putExtra(MqttServiceConstants.CALLBACK_CLIENT_HANDLE, clientHandle);
    }
    callbackIntent.putExtra(MqttServiceConstants.CALLBACK_STATUS, status);
    if (dataBundle != null) {
        callbackIntent.putExtras(dataBundle);
    }
    LocalBroadcastManager.getInstance(this).sendBroadcast(callbackIntent);
}
callbackToActivity()方法用于发送本地广播,广播中携带resultBundle,其实包括publish、subscribe等行为不论成功失败都会调用此方法,发出一个指示行为类型及状态的本地广播。那么发出的广播又是在哪里被处理的呢?请往下看。MqttAndroidClient类继承自BroadCastReceiver,查看其onReceive()方法:
@Override
public void onReceive(Context context, Intent intent) {
    Bundle data = intent.getExtras();
    String handleFromIntent = data.getString(MqttServiceConstants.CALLBACK_CLIENT_HANDLE);

    if ((handleFromIntent == null) || (!handleFromIntent.equals(clientHandle))) {
        return;
    }

    String action = data.getString(MqttServiceConstants.CALLBACK_ACTION);

    if (MqttServiceConstants.CONNECT_ACTION.equals(action)) {
        connectAction(data);
    } else if (MqttServiceConstants.CONNECT_EXTENDED_ACTION.equals(action)) {
        connectExtendedAction(data);
    } else if (MqttServiceConstants.MESSAGE_ARRIVED_ACTION.equals(action)) {
        messageArrivedAction(data);
    } else if (MqttServiceConstants.SUBSCRIBE_ACTION.equals(action)) {
        subscribeAction(data);
    } else if (MqttServiceConstants.UNSUBSCRIBE_ACTION.equals(action)) {
        unSubscribeAction(data);
    } else if (MqttServiceConstants.SEND_ACTION.equals(action)) {
        sendAction(data);
    } else if (MqttServiceConstants.MESSAGE_DELIVERED_ACTION.equals(action)) {
        messageDeliveredAction(data);
    } else if (MqttServiceConstants.ON_CONNECTION_LOST_ACTION.equals(action)) {
        connectionLostAction(data);
    } else if (MqttServiceConstants.DISCONNECT_ACTION.equals(action)) {
        disconnected(data);
    } else if (MqttServiceConstants.TRACE_ACTION.equals(action)) {
        traceAction(data);
    } else {
        mqttService.traceError(MqttService.TAG, "Callback action doesn't exist.");
    }
}
没错,data.getString(MqttServiceConstants.CALLBACK_ACTION)获取的就是我们前面存放在resultBundle中的action,然后根据action去回调callback的对应方法,这里的callback就是我们建立连接时传入MqttAndroidClient的MqttCallback对象,如果需要监听action为MqttServiceConstants.CONNECT_EXTENDED_ACTION的行为,则要求我们传入的callback必须为MqttCallbackExtended的实现,MqttCallbackExtended是MqttCallback的子类
2.
MQTT消息类型汇总
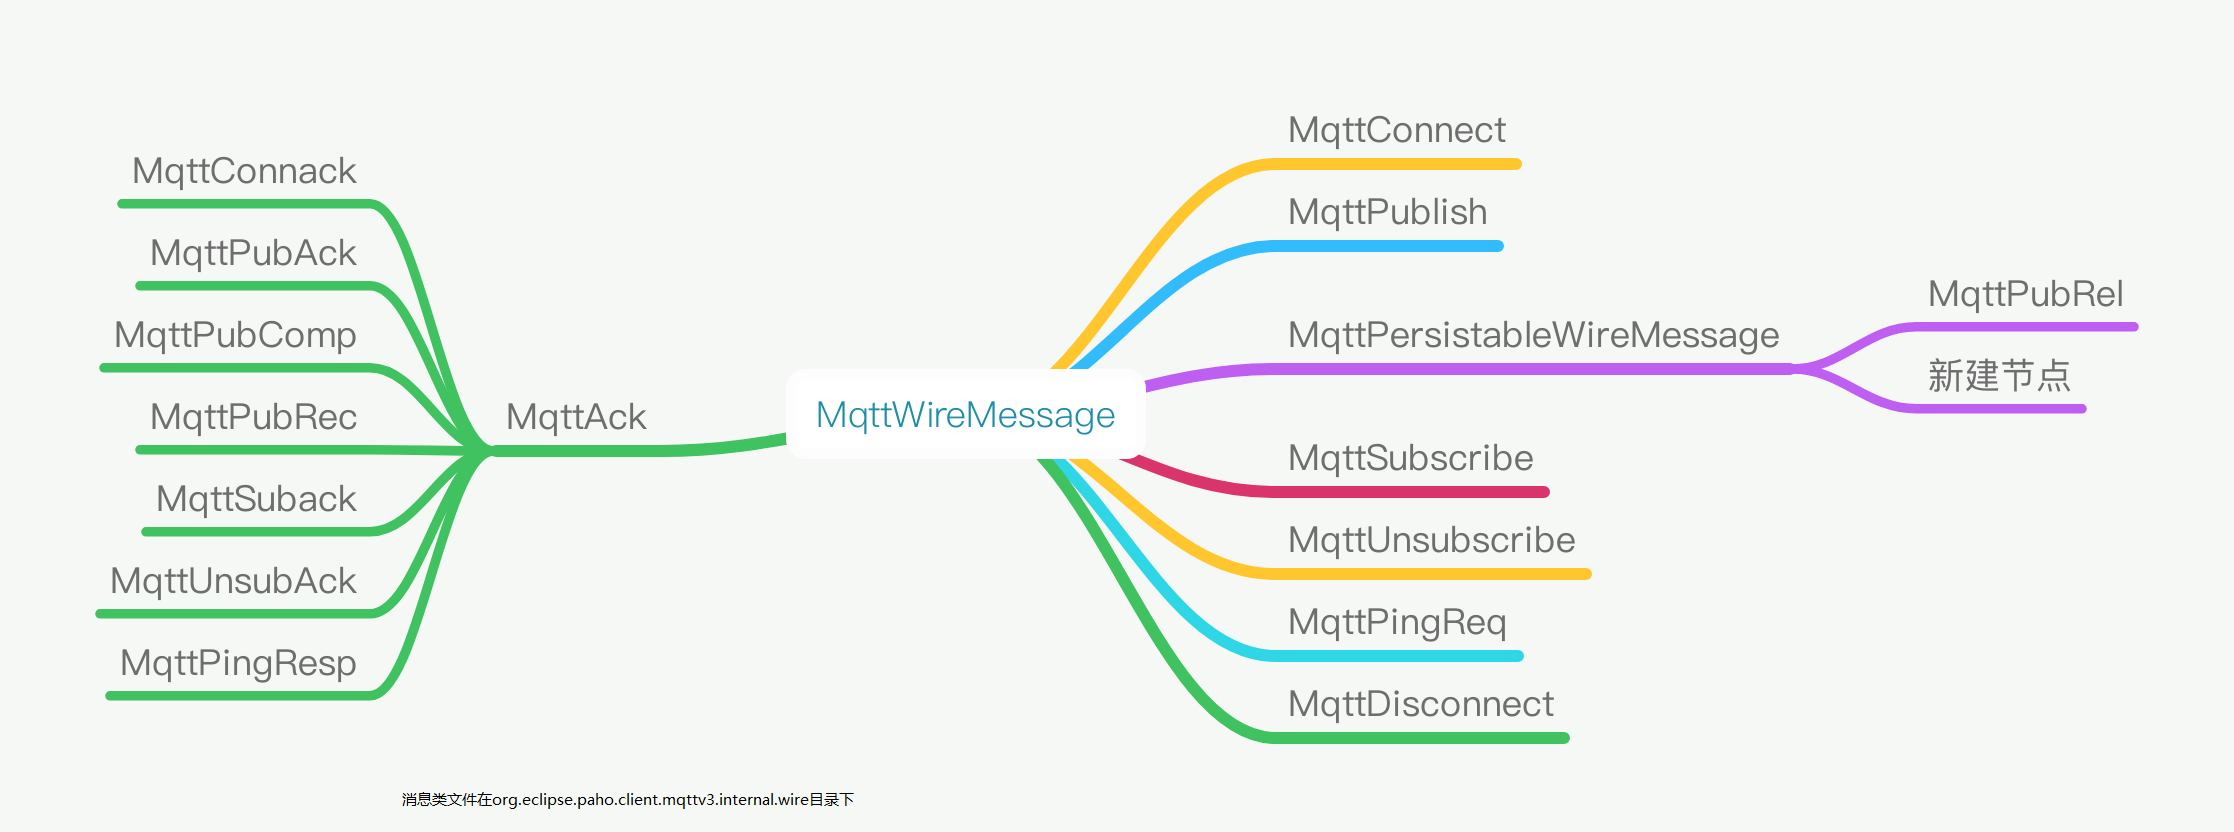
其中mqttAck为响应消息。eg:当publish时,SDK会生成一条MqttPublish消息用于发送,代理服务器接收到该消息后反馈给客户端,客户端SDK接收到反馈后会生成一条对应的MqttPubAck消息用于表示刚才那条MqttPublish消息已成功发送。
Qos=1
sdk针对qos=1维护一条消息队列,publish时会将msg加入队列,收到PubAck时将该msg从队列移除,收到Connack时会将当前qos1队列中的消息全部插入到待发送消息队列,然后再次排队发送。
SSL验证
Mqtt支持SSL验证,在建立长连时配置好SSL证书即可。SSL的调用是在MqttAsyncClient.createNetworkModule()方法中:
 case MqttConnectOptions.URI_TYPE_SSL:
                shortAddress = address.substring(6);
                host = getHostName(shortAddress);
                port = getPort(shortAddress, 8883);
                SSLSocketFactoryFactory factoryFactory = null;
                if (factory == null) {
//          try {
                    factoryFactory = new SSLSocketFactoryFactory();
                    Properties sslClientProps = options.getSSLProperties();
                    if (null != sslClientProps)
                        factoryFactory.initialize(sslClientProps, null);
                    factory = factoryFactory.createSocketFactory(null);
//          }
//          catch (MqttDirectException ex) {
//             throw ExceptionHelper.createMqttException(ex.getCause());
//          }
                } else if ((factory instanceof SSLSocketFactory) == false) {
                    throw ExceptionHelper.createMqttException(MqttException.REASON_CODE_SOCKET_FACTORY_MISMATCH);
                }

                // Create the network module...
                netModule = new SSLNetworkModule((SSLSocketFactory) factory, host, port, clientId);
                ((SSLNetworkModule) netModule).setSSLhandshakeTimeout(options.getConnectionTimeout());
                // Ciphers suites need to be set, if they are available
                if (factoryFactory != null) {
                    String[] enabledCiphers = factoryFactory.getEnabledCipherSuites(null);
                    if (enabledCiphers != null) {
                        ((SSLNetworkModule) netModule).setEnabledCiphers(enabledCiphers);
                    }
                }
                break;
配置起来也很简单,只需要在连接配置中添加SSL证书:
MqttConnectOptions mOptions = new MqttConnectOptions();
SSLContext sslContext = null;
try {
    sslContext = SSLContext.getInstance("TLS");
} catch (NoSuchAlgorithmException e) {
    e.printStackTrace();
}
try {
    sslContext.init(null, new TrustManager[]{new MyHTTPSTrustManager()}, null);
} catch (KeyManagementException e) {
    e.printStackTrace();
}
mOptions.setSocketFactory(sslContext.getSocketFactory());