简介
官网:https://projects.spring.io/spring-boot/
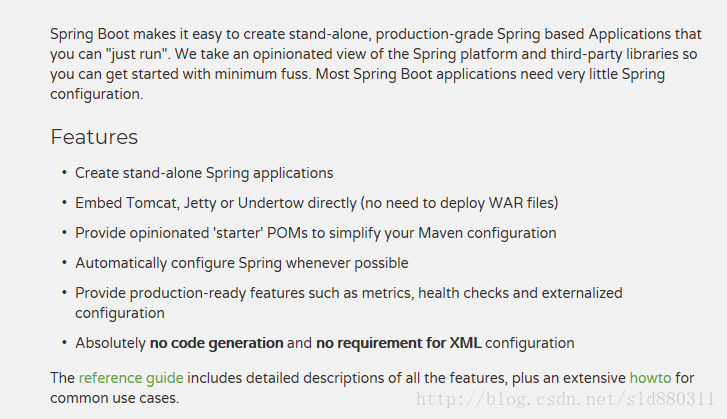
- springboot是由Pivotal团队提供的全新框架,其设计目的是用来简化新Spring应用的初始搭建以及开发过程。该框架使用了特定的方式来进行配置,从而使开发人员不再需要定义样板化的配置。通过这种方式,Spring Boot致力于在蓬勃发展的快速应用开发领域(rapid application development)成为领导者的。
- 在以前的spring项目中,都会面对大量繁琐的配置,使用的时候基本上都是大量的复制黏贴。而Spring Boot 则能让我们在不需要过多的配置下,轻松快速地搭建Spring Web应用,开箱即用,没有代码生成,也无需XML配置,从而快速使用spring框架。
开发工具
maven
下载地址:https://maven.apache.org/download.cgi
setting.xml配置文件参考:https://github.com/sld880311/common-config,可以直接下载【maven-settings.xml 】
也可以直接增加如下代码:
< !-- 在mirrors 中配置 mirror -->
<mirror>
    <id>alimaven</id>
    <name>aliyun maven</name>
    <url>
          http://maven.aliyun.com/nexus/content/groups/public/
    </url>
    <mirrorOf>central</mirrorOf>
 </mirror>
eclipse
版本:Oxygen.2 Release (4.7.2)
配置maven
安装sts
下载地址:https://spring.io/tools/sts/all
安装方式:
- 直接下载集成sts的eclipse
- 下载sts zip包,导入eclipse
- 在线安装:http://dist.springsource.com/release/TOOLS/update/e4.7/
安装:
eclipse中的help—》install new software打开安装页面选择zip包或者在线安装即可
快速构建helloworld
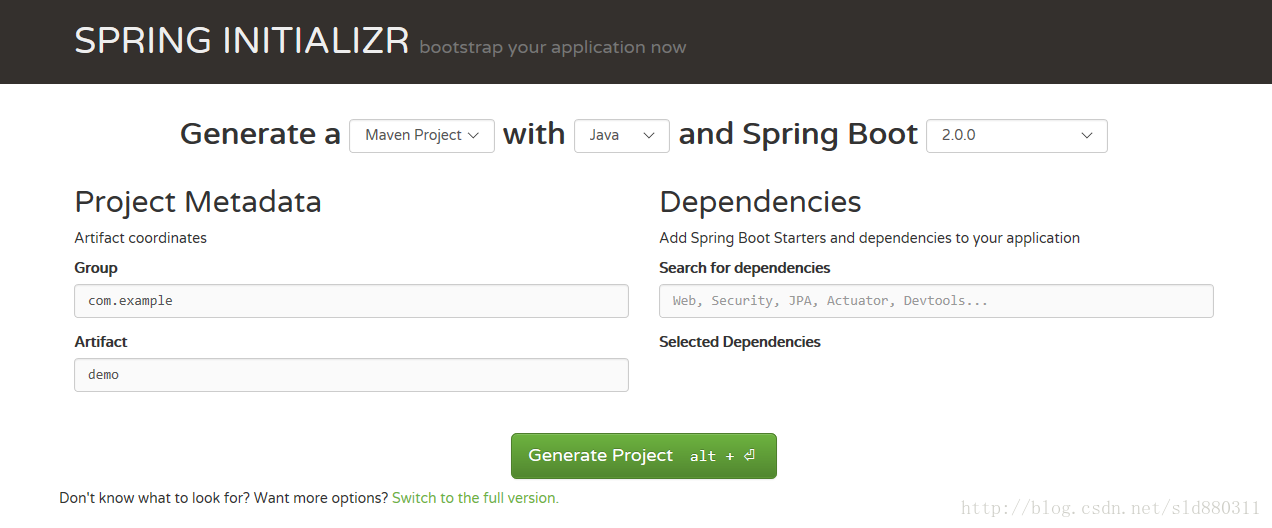
使用spring官方工具:SPRING INITIALIZR
- 访问地址:http://start.spring.io/
- 选择构建工具Maven Project、Spring Boot版本2.0.0以及一些工程基本信息,可参考下图所示
- 点击Generate Project即可完成
- 以maven的方式导入eclipse即可
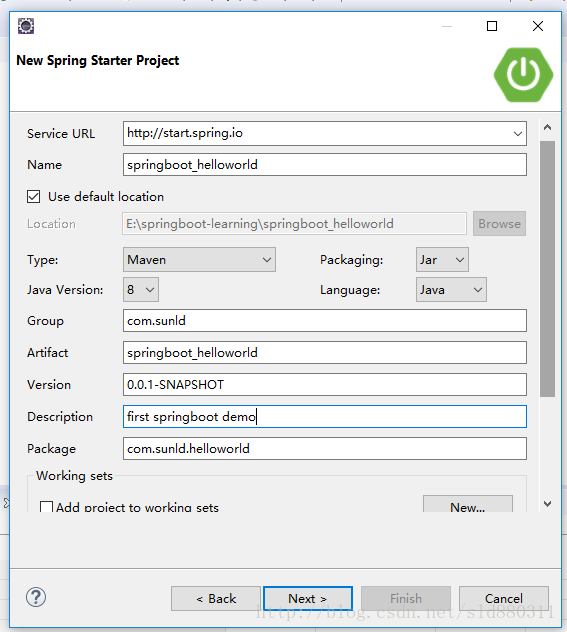
使用集成sts的eclipse
- 创建项目:file—->new—->spring starter project
- 基本信息配置
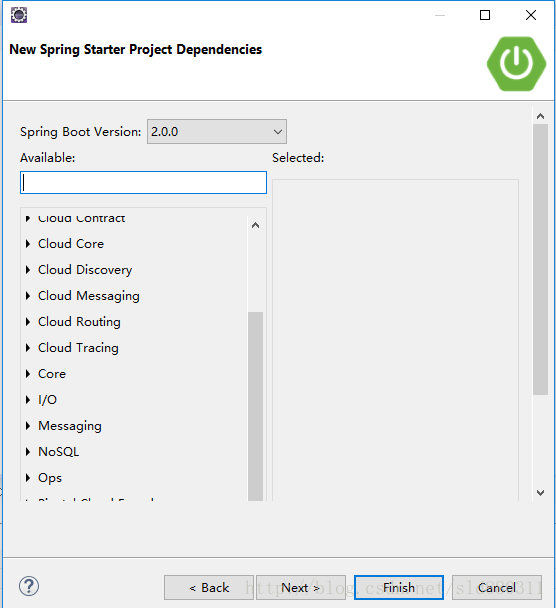
- 依赖包选择,根据实际需求选择

代码结构说明
默认结构
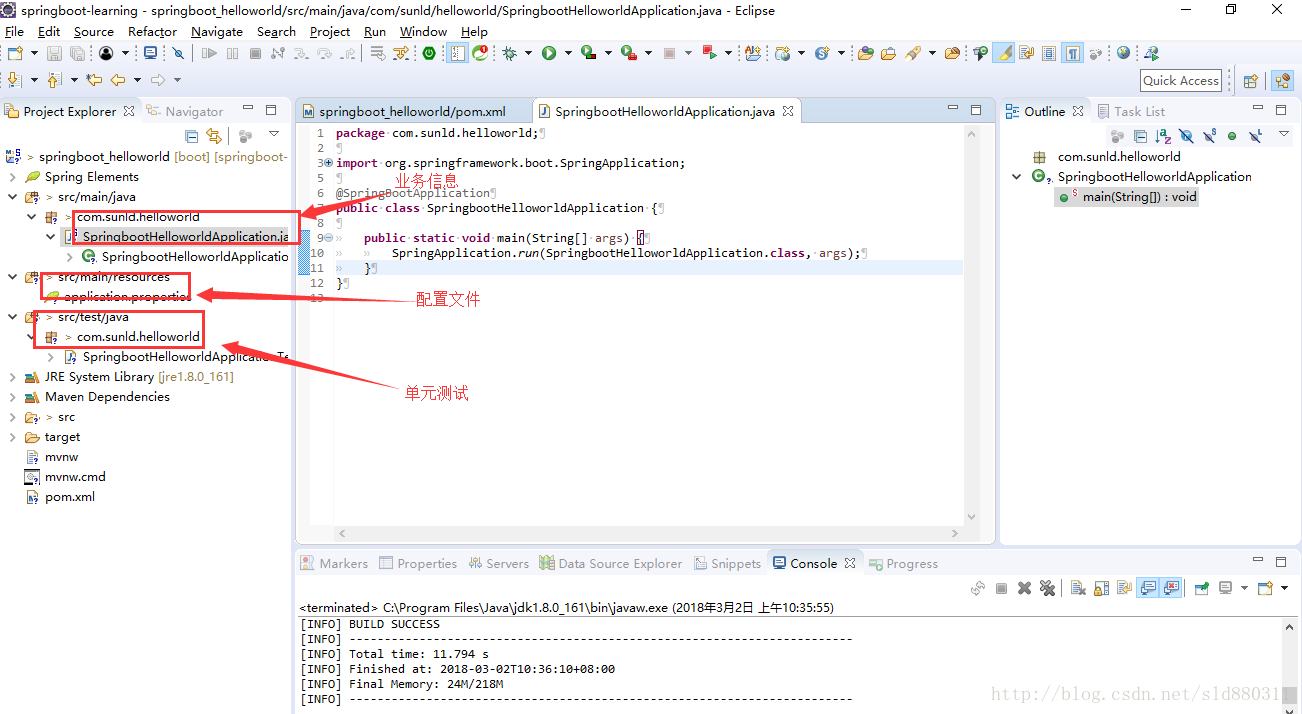
如上图所示,Spring Boot的基础结构共三个文件:
- src/main/java 程序开发以及主程序入口
- src/main/resources 配置文件
- src/test/java 测试程序
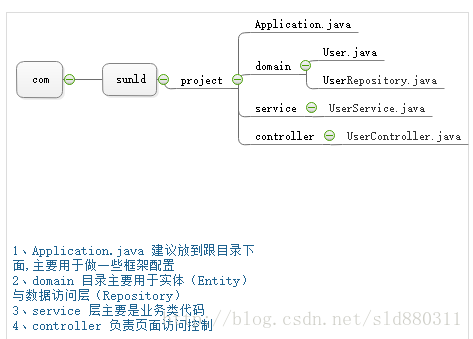
建议结构
root package结构:com.sunld.myproject
默认pom.xml文件
pom.xml文件中默认有两个模块:
spring-boot-starter:核心模块,包括自动配置支持、日志和YAML;
spring-boot-starter-test:测试模块,包括JUnit、Hamcrest、Mockito。
<?xml version="1.0" encoding="UTF-8"?>
<project xmlns="http://maven.apache.org/POM/4.0.0" xmlns:xsi="http://www.w3.org/2001/XMLSchema-instance"
    xsi:schemaLocation="http://maven.apache.org/POM/4.0.0 http://maven.apache.org/xsd/maven-4.0.0.xsd">
    <modelVersion>4.0.0</modelVersion>

    <groupId>com.sunld</groupId>
    <artifactId>springboot_helloworld</artifactId>
    <version>0.0.1-SNAPSHOT</version>
    <packaging>jar</packaging>

    <name>springboot_helloworld</name>
    <description>first springboot demo</description>

    <parent>
        <groupId>org.springframework.boot</groupId>
        <artifactId>spring-boot-starter-parent</artifactId>
        <version>2.0.0.RELEASE</version>
        <relativePath/> <!-- lookup parent from repository -->
    </parent>

    <properties>
        <project.build.sourceEncoding>UTF-8</project.build.sourceEncoding>
        <project.reporting.outputEncoding>UTF-8</project.reporting.outputEncoding>
        <java.version>1.8</java.version>
    </properties>

    <dependencies>
        <!-- spring-boot-starter:核心模块,包括自动配置支持、日志和YAML;-->
        <dependency>
            <groupId>org.springframework.boot</groupId>
            <artifactId>spring-boot-starter</artifactId>
        </dependency>
        <!-- spring-boot-starter-test:测试模块,包括JUnit、Hamcrest、Mockito。 -->
        <dependency>
            <groupId>org.springframework.boot</groupId>
            <artifactId>spring-boot-starter-test</artifactId>
            <scope>test</scope>
        </dependency>
    </dependencies>

    <build>
        <plugins>
            <plugin>
                <groupId>org.springframework.boot</groupId>
                <artifactId>spring-boot-maven-plugin</artifactId>
            </plugin>
        </plugins>
    </build>

    <!--
        可以通过maven的setting.xml配置文件和pom.xml文件配置第三方的仓库完成依赖包的加速下载
    -->

    <!-- 由于在阿里仓库中,spring-boot-starter-parent 2.0.0.RELEASE
           版本的pom文件不存在,所以增加spring的maven库,如果后续阿里仓库中存在则可以删除spring的仓库
     -->
    <!-- <repositories>
        <repository>
            <id>spring-snapshots</id>
            <name>Spring Snapshots</name>
            <url>https://repo.spring.io/libs-snapshot</url>
            <snapshots>
                <enabled>true</enabled>
            </snapshots>
        </repository>
    </repositories> -->
    <!-- <repositories>
        <repository>
            <id>aliyun</id>
            <name>aliyun maven</name>
            <url>http://maven.aliyun.com/nexus/content/groups/public/</url>
        </repository>
    </repositories>
    <pluginRepositories>
        <pluginRepository>
            <id>aliyun</id>
            <name>aliyun maven</name>
            <url>http://maven.aliyun.com/nexus/content/groups/public/</url>
        </pluginRepository>
    </pluginRepositories> -->

</project>
helloworld实现
在pom.xml文件中引入web包
<!-- 增加web依赖包 -->
<dependency>
        <groupId>org.springframework.boot</groupId>
        <artifactId>spring-boot-starter-web</artifactId>
</dependency>
编写HelloWorldController
package com.sunld.helloworld.controller;

import org.springframework.web.bind.annotation.RequestMapping;
import org.springframework.web.bind.annotation.RestController;

//@RestController的意思就是controller里面的方法都以json格式输出,不用再写什么jackjson配置的了!
@RestController
public class HelloWorldController {

    @RequestMapping("/helloworld")
    public String helloWorld() {
        return "HelloWorld ....";
    }
}
运行效果
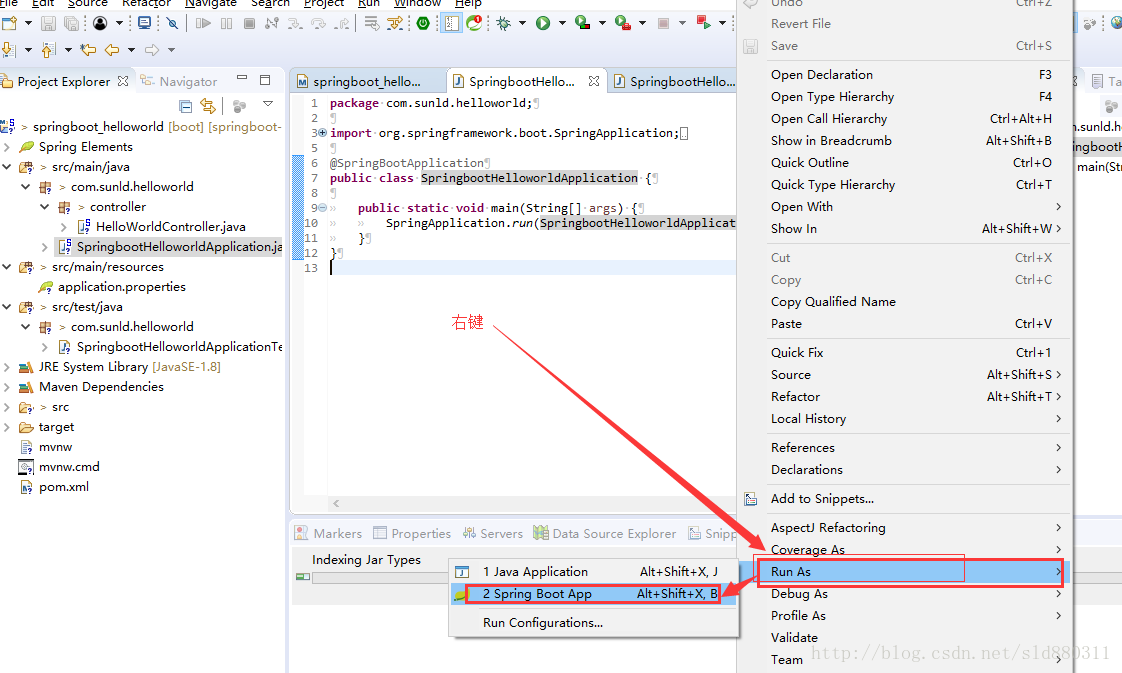
运行方式
在编译器中直接执行SpringbootHelloworldApplication
使用jar
把项目通过maven命令 mvn package 打成jar包,通过命令 java -jar springboot_helloworld-0.0.1-SNAPSHOT.jar 直接执行jar包
使用maven插件
借助maven插件,执行mvn spring-boot:run 即可运行项目。
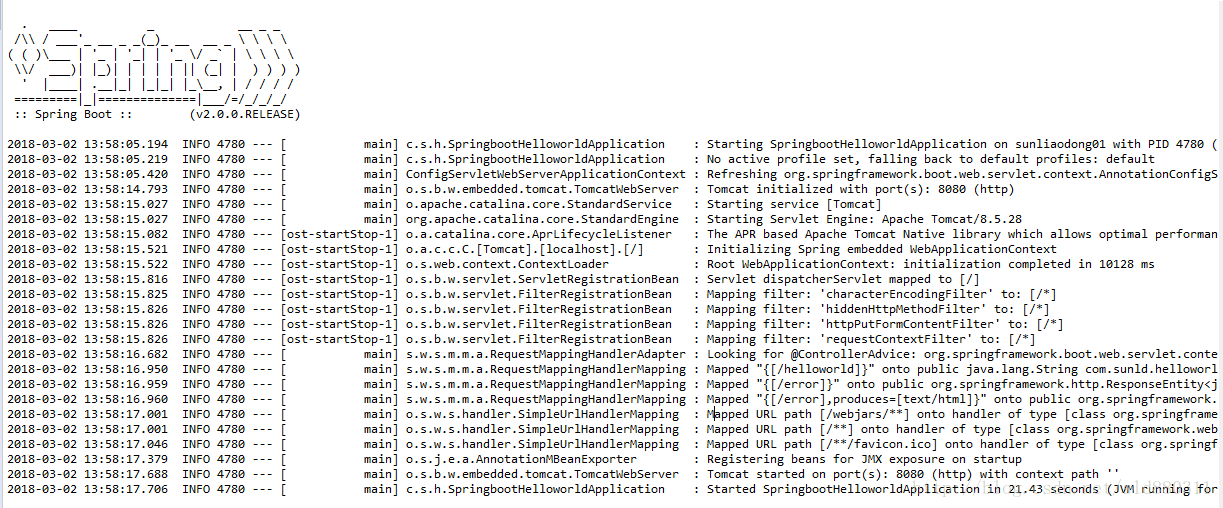
运行SpringbootHelloworldApplication启动项目
启动效果如下
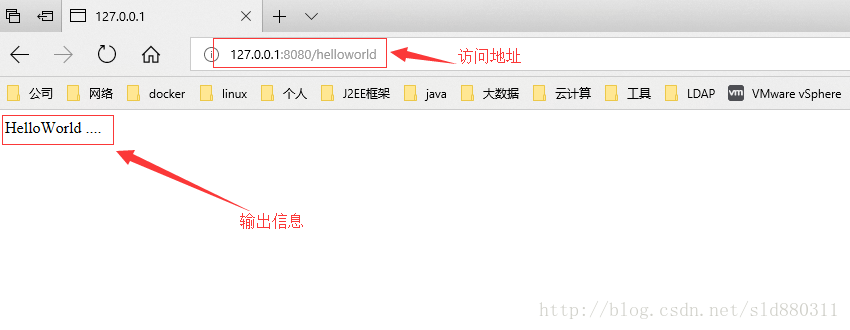
在浏览器中验证
编写单元测试类
package com.sunld.helloworld.controller;

import org.junit.Before;
import org.junit.Test;
import org.junit.runner.RunWith;
import org.springframework.boot.test.context.SpringBootTest;
import org.springframework.http.MediaType;
import org.springframework.test.context.junit4.SpringRunner;
import org.springframework.test.web.servlet.MockMvc;
import org.springframework.test.web.servlet.request.MockMvcRequestBuilders;
import org.springframework.test.web.servlet.result.MockMvcResultHandlers;
import org.springframework.test.web.servlet.result.MockMvcResultMatchers;
import org.springframework.test.web.servlet.setup.MockMvcBuilders;

@RunWith(SpringRunner.class)
@SpringBootTest
/**
 *
 * @author sunliaodong
 * 使用mockmvc进行,利用MockMvcResultHandlers.print()打印出执行结果。
 * 使用MockServletContext来构建一个空的WebApplicationContext,
 * 这样我们创建的HelloController就可以在@Before函数中创建并传递到MockMvcBuilders.standaloneSetup()函数中。
 */
public class HelloWorldControllerTest {

    private MockMvc mvc;
    @Before
    public void setUp() throws Exception {
        mvc = MockMvcBuilders.standaloneSetup(new HelloWorldController()).build();
    }
    @Test
    public void getHello() throws Exception {
    mvc.perform(MockMvcRequestBuilders.get("/helloworld").accept(MediaType.APPLICATION_JSON))
                .andExpect(MockMvcResultMatchers.status().isOk())
                .andExpect(MockMvcResultMatchers.content().string("HelloWorld ...."))
                .andDo(MockMvcResultHandlers.print())
                .andReturn();
    }

}
其他
自动部署:devtools
原理
深层原理是使用了两个ClassLoader,一个Classloader加载那些不会改变的类(第三方Jar包),另一个ClassLoader加载会更改的类,称为restart ClassLoader,这样在有代码更改的时候,原来的restart ClassLoader 被丢弃,重新创建一个restart ClassLoader,由于需要加载的类相比较少,所以实现了较快的重启时间。
配置,修改pom.xml文件
增加依赖
<dependency>
        <groupId>org.springframework.boot</groupId>
        <artifactId>spring-boot-devtools</artifactId>
        <!-- 表示依赖不会传递 -->
        <optional>true</optional>
</dependency>
修改编译插件
<build>
    <plugins>
        <plugin>
            <groupId>org.springframework.boot</groupId>
            <artifactId>spring-boot-maven-plugin</artifactId>
            <configuration>
                <fork>true</fork> <!-- 如果没有该配置,devtools不会生效 -->
            </configuration>
        </plugin>
    </plugins>
</build>
验证
- 修改类–>保存:应用会重启
- 修改配置文件–>保存:应用会重启
- 修改页面–>保存:应用不会重启,但会重新加载,页面会刷新(原理是将spring.thymeleaf.cache设为false。)
说明
该模块在完整的打包环境下运行的时候会被禁用。如果你使用java -jar启动应用或者用一个特定的classloader启动,它会认为这是一个“生产环境”。
总结
目前已经完成了springboot的基本使用,通过helloworld来了解springboot配置方便性和易用性。
完整代码:https://github.com/sld880311/springboot-learning/tree/master/springboot_helloworld