版权声明: https://blog.csdn.net/staHuri/article/details/81747423
起因
- 明日七夕好友表白在网上找到一个表白工具,地址如下 python表白工具
- 由于需要使用python才可以运行,故而使用pyinstaller 进行打包
代码说明
- 本文表白代码来自代码
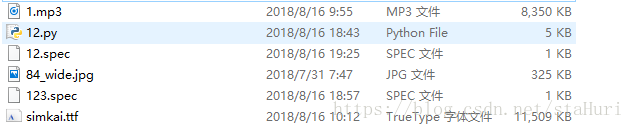
- 文件路径
import sys
import random
import pygame
from pygame.locals import *

WIDTH, HEIGHT = 640, 480
BACKGROUND = (0, 191, 255)


# 按钮
def button(text, x, y, w, h, color, screen):
    pygame.draw.rect(screen, color, (x, y, w, h))
    font = pygame.font.Font(fontfontfont(), 20)
    textRender = font.render(text, True, (0, 0, 0))
    textRect = textRender.get_rect()
    textRect.center = ((x + w / 2), (y + h / 2))
    screen.blit(textRender, textRect)


# 标题
def title(text, screen, scale, color=(255, 0, 0)):
    font = pygame.font.Font(fontfontfont(), WIDTH // (len(text) * 2))
    textRender = font.render(text, True, color)
    textRect = textRender.get_rect()
    textRect.midtop = (WIDTH / scale[0], HEIGHT / scale[1])
    screen.blit(textRender, textRect)


# 生成随机的位置坐标
def get_random_pos():
    x, y = random.randint(20, 620), random.randint(20, 460)
    return x, y


# 点击喜欢按钮后显示的页面
def show_like_interface(text, screen, color=(255, 0, 0)):
    screen.fill(BACKGROUND)
    font = pygame.font.Font(fontfontfont(), WIDTH // (len(text)))
    textRender = font.render(text, True, color)
    textRect = textRender.get_rect()
    textRect.midtop = (WIDTH / 2, HEIGHT / 2)
    screen.blit(textRender, textRect)
    pygame.display.update()
    while True:
        for event in pygame.event.get():
            if event.type == QUIT:
                pygame.quit()
                sys.exit()


# 主函数
def main():
    pygame.init()
    screen = pygame.display.set_mode((WIDTH, HEIGHT), 0, 32)
    pygame.display.set_caption('FROM一个喜欢你很久的小哥哥')
    clock = pygame.time.Clock()
    pygame.mixer.music.load(mpmpmp())
    pygame.mixer.music.play()

    # sleep(60)
    #
    # pygame.mixer.music.stop()

    pygame.mixer.music.set_volume(0.25)

    #
    unlike_pos_x = 330
    unlike_pos_y = 300
    unlike_pos_width = 100
    unlike_pos_height = 50
    like_pos_x = 180
    like_pos_y = 300
    like_pos_width = 100
    like_pos_height = 50
    running = True
    like_color = (255, 0, 255)
    while running:
        screen.fill(BACKGROUND)
        img = pygame.image.load(aaaaasdasdad())
        imgRect = img.get_rect()
        imgRect.midtop = WIDTH // 2, HEIGHT // 4
        screen.blit(img, imgRect)
        for event in pygame.event.get():
            if event.type == pygame.MOUSEBUTTONDOWN:
                mouse_pos = pygame.mouse.get_pos()
                if mouse_pos[0] < like_pos_x + like_pos_width + 5 and mouse_pos[0] > like_pos_x - 5 and \
                        mouse_pos[1] < like_pos_y + like_pos_height + 5 and mouse_pos[1] > like_pos_y - 5:
                    like_color = BACKGROUND
                    running = False
        mouse_pos = pygame.mouse.get_pos()
        if mouse_pos[0] < unlike_pos_x + unlike_pos_width + 5 and mouse_pos[0] > unlike_pos_x - 5 and \
                mouse_pos[1] < unlike_pos_y + unlike_pos_height + 5 and mouse_pos[1] > unlike_pos_y - 5:
            while True:
                unlike_pos_x, unlike_pos_y = get_random_pos()
                if mouse_pos[0] < unlike_pos_x + unlike_pos_width + 5 and mouse_pos[0] > unlike_pos_x - 5 and \
                        mouse_pos[1] < unlike_pos_y + unlike_pos_height + 5 and mouse_pos[1] > unlike_pos_y - 5:
                    continue
                break
        title(u'小姐姐,我观察你很久了', screen, scale=[2, 10])
        title(u'做我女朋友好不好呀', screen, scale=[2, 6])
        button(u'好呀', like_pos_x, like_pos_y, like_pos_width, like_pos_height, like_color, screen)
        button(u'算了吧', unlike_pos_x, unlike_pos_y, unlike_pos_width, unlike_pos_height, (255, 0, 255), screen)
        pygame.display.flip()
        pygame.display.update()
        clock.tick(60)
    show_like_interface(u'我就知道小姐姐你也喜欢我~', screen, color=(255, 0, 0))

# 下面的返回文件之所以用 ./1/file    的原因是解压后会生成在一个叫做1的文件夹中 这个1 是在spce中的datas设置的
def aaaaasdasdad():
    return r"./1/84_wide.jpg"


def fontfontfont():
    return r'./1/simkai.ttf'


def mpmpmp():
    return r'./1/1.mp3'


if __name__ == '__main__':
    main()
- 首先安装pyinstaller
pip install pyinstaller - 进入该文件所在的目录执行
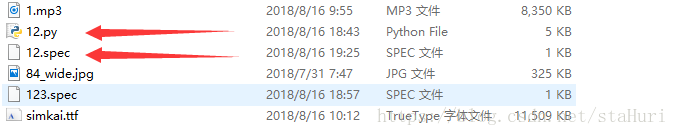
pyi-makespec ***.py - 执行完成后会得到一个 和py文件相同名字的 .spec文件
默认生成文件如下
# -*- mode: python -*-

block_cipher = None


a = Analysis(['12.py'],
             pathex=['G:\\work\\untitled\\bbbb'],
             binaries=[],
             datas=[],
             hiddenimports=[],
             hookspath=[],
             runtime_hooks=[],
             excludes=[],
             win_no_prefer_redirects=False,
             win_private_assemblies=False,
             cipher=block_cipher)
pyz = PYZ(a.pure, a.zipped_data,
             cipher=block_cipher)
exe = EXE(pyz,
          a.scripts,
          exclude_binaries=True,
          name='12',
          debug=False,
          strip=False,
          upx=True,
          console=True )
coll = COLLECT(exe,
               a.binaries,
               a.zipfiles,
               a.datas,
               strip=False,
               upx=True,
               name='12')
- 我们需要修改的地方有
- datas=[], [(“文件路径”,”解压后路径”)] 文件路径建议直接就放在同级目录下修改方便
- console=True 是否显示DOS
修改后
# -*- mode: python -*-

block_cipher = None


a = Analysis(['12.py'],
             pathex=['D:\\PycharmProjects\\untitled3\\bbbb'],
             binaries=[],
             datas=[("1.mp3",'1'),
             ('84_wide.jpg','1'),
             ('simkai.ttf','1')],
             hiddenimports=[],
             hookspath=[],
             runtime_hooks=[],
             excludes=[],
             win_no_prefer_redirects=False,
             win_private_assemblies=False,
             cipher=block_cipher)
pyz = PYZ(a.pure, a.zipped_data,
             cipher=block_cipher)
exe = EXE(pyz,
          a.scripts,
          exclude_binaries=True,
          name='12',
          debug=False,
          strip=False,
          upx=True,
          console=False )
coll = COLLECT(exe,
               a.binaries,
               a.zipfiles,
               a.datas,
               strip=False,
               upx=True,
               name='12')
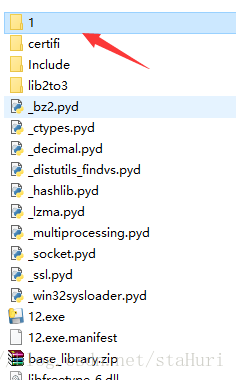
- 打包后文件
- datas设置的文件

交流群
160787372