最近有网友反应,直接上人脸识别的例子有些跨度大,现在将我实验中的一个小例子公布给大家,纯做入门使用
题目:
有函数
y = 0.5*x + 2
在此函数基础上,增加绝对值不超过0.05的扰动,利用keras进行函数拟合
预期结果:y=a1*x+a2
a1接近0.5, a2接近2,则拟合成功
思路:
1,生成训练数据
2,搭建keras
3,训练
4,输出结果
根据题目函数,一个全连接层即可预测,dense层的激活函数正好是dot,乘法
全接连层介绍:
Dense层
keras.layers.core.Dense(units, activation=None, use_bias=True, kernel_initializer='glorot_uniform', bias_initializer='zeros', kernel_regularizer=None, bias_regularizer=None, activity_regularizer=None, kernel_constraint=None, bias_constraint=None)
Dense就是常用的全连接层,所实现的运算是output = activation(dot(input, kernel)+bias)。其中activation是逐元素计算的激活函数,kernel是本层的权值矩阵,bias为偏置向量,只有当use_bias=True才会添加。
源码:
from keras.models import Sequential
from keras.layers import Dense
import matplotlib.pyplot as plt
import numpy as np
#生成-1到1的200均匀分佈的數字
x= np.linspace(-1,1,200)
np.random.shuffle(x)
#利用x生成y,并随机加入0.05之内的扰动
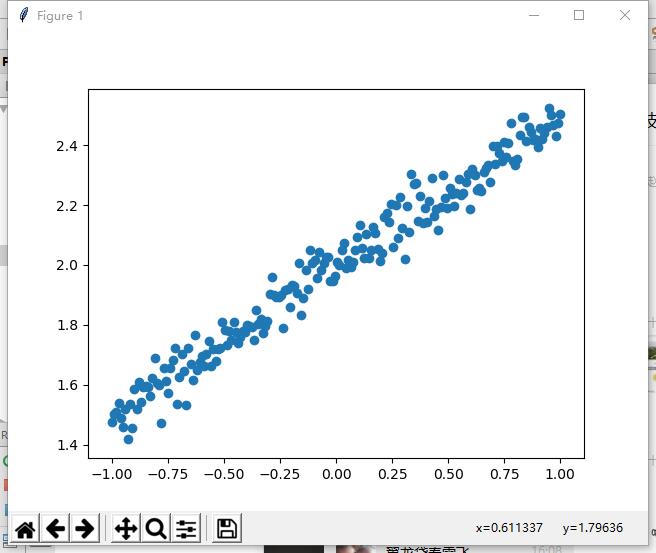
y = 0.5*x + 2 + np.random.normal(0,0.05,(200,))
plt.scatter(x,y)
plt.show()
#截取160个数据作为训练数据
#截取40个数据作为测试数据
x_train = x[:160]
x_test = x[160:]
y_train = y[:160]
y_test = y[160:]
#新建一个流式网络
model = Sequential()
#增加一个全连接层,输入一个参数,输出一个参数
model.add(Dense(output_dim=1,input_dim=1))
#编译网络,损失函数mse,优化函数 sgd
model.compile(loss='mse',optimizer='sgd')
#训练301次
for step in range(500):
cost = model.train_on_batch(x_train,y_train)
#每100次打印一次损失
if step%100==0:
print("cost:",cost)
#使用测试数据,测试损失
cost = model.evaluate(x_test,y_test,batch_size=40)
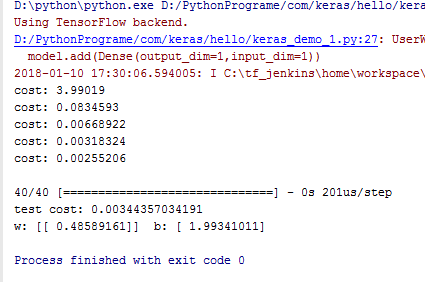
print("test cost:",cost)
#获取第一层网络的权重
W,b = model.layers[0].get_weights()
print("w:",W," b:",b)
#画图展示训练结果
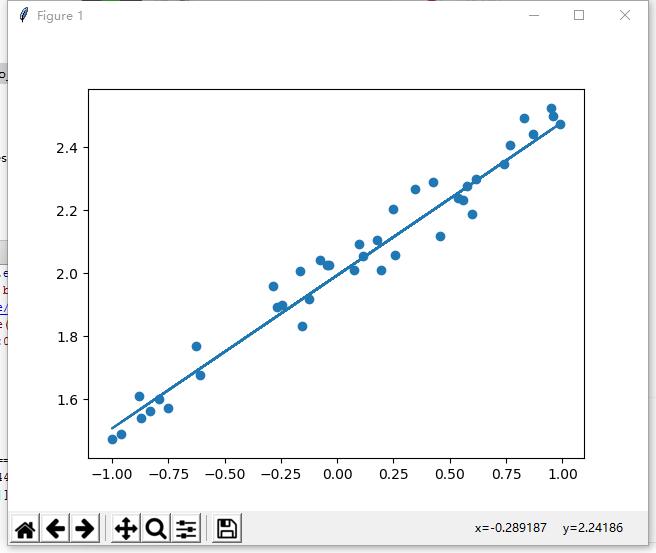
y_pred = model.predict(x_test)
plt.scatter(x_test,y_test)
plt.plot(x_test,y_pred)
plt.show()
执行结果:
第一个图像:
第二个图像:
总结:
keras的入门异常容易,几乎屏蔽了ai领域的所有困难环节,建议大家以此入门培养兴趣,有了兴趣后期就可以增加学习的深度