一、程序源码编译安装步骤
二、程序路径管理
三、简单源码编译安装示例
四、rpm源码包安装
一、程序源码编译安装步骤
---------------------------------------
1.cd SOURCE_CODE #cd到程序源码文件夹
---------------------------------------
2../configure #检查编译环境,对程序定制编译配置,编译前读一读README,INSTALL
#常用配置参数:--prefix=安装路径,--sysconfdir=配置文件路径,配置帮助--help

#./configure结合Makefile.in生成makefile,Linux中的automake程序帮助生成Makefile.in文件
#Linux中的autoconf程序帮助生成configure文件
---------------------------------------
3.make #编译程序,生成安装文件
#执行make命令,则结合makefile完成编译安装文件
---------------------------------------
4.make install #安装
二、程序路径管理
实际安装程序时,二进制可执行文件、库文件、头文件、man手册可能都不在系统默认环境变量的搜索路径中(配置文件程序会自动搜索匹配),此时需要手动将这些文件的路径添加进去
1、修改PATH
1.1、临时性全局:bash下直接运行命令export PATH=$PATH:/usr/local/apache/bin
1.2、永久全局修改:编辑/etc/profile,加入export PATH=$PATH:/usr/local/apache/bin;或者新建/etc/profile.d/apache.sh,加入export PATH=$PATH:/usr/local/apache/bin
1.3、针对用户:编辑~./bashrc或~./bash_profile,添加export PATH=$PATH:/usr/local/apache/bin
2、库文件搜索路径:编辑/etc/ld.so.conf或新建/etc/ld.so.conf.d/*.conf,新加路径后,使用ldconfig -v重新搜索当前系统上所有库文件搜索路径下的库文件,并生成缓存/etc/ld.so.cache,ldd /bin/ls:查看程序运行依赖的库及所在位置,例如
|
1
2
3
|
[root@TESTHOST ~]
# vim /etc/ld.so.conf.d/apache.conf #为apache单独建立lib路径文件
/usr/local/apache/lib
[root@TESTHOST ~]
# ldconfig -v #重建lib缓存
|
3、头文件:使用链接ln -s,例如
|
1
|
[root@TESTHOST ~]
# ln -sv /usr/local/apache/include /usr/include/httpd #系统头文件目录为/usr/include/下,在其中创建一个目录链接即可
|
4、man手册路径:编辑/etc/man.config文件中的“MANPATH=”,例如
|
1
2
3
4
5
6
7
|
[root@TESTHOST ~]
# vim /etc/man.config
MANPATH
/usr/local/apache/share/man
#将程序man路径加入
MANPATH
/usr/man
MANPATH
/usr/share/man
MANPATH
/usr/local/man
MANPATH
/usr/local/share/man
MANPATH
/usr/X11R6/man
|
三、简单源码编译安装示例
编译安装axel
|
1
2
3
4
5
6
7
8
9
10
11
12
13
14
15
16
17
18
19
20
21
22
23
24
25
26
27
28
29
30
31
32
33
34
35
36
37
38
39
40
41
42
43
44
45
46
47
48
49
50
51
52
53
54
55
56
57
58
59
60
61
62
63
64
65
66
67
68
69
70
71
72
73
74
75
76
77
|
[root@TESTHOST ~]
# tar xf axel-2.4.tar.bz2 #解包
[root@TESTHOST ~]
# ls
RPM-GPG-KEY-CentOS-6 RPM-GPG-KEY-CentOS-6.2 axel-2.4
install
.log
RPM-GPG-KEY-CentOS-6.1 anaconda-ks.cfg axel-2.4.
tar
.bz2
install
.log.syslog
[root@TESTHOST ~]
# cd axel-2.4 #cd到源码文件夹中
[root@TESTHOST axel-2.4]
# ls
API CREDITS axel.1 axel_zh_CN.1 conf.h conn.h
ftp
.h http.h search.c tcp.h
CHANGES Makefile axel.c axelrc.example configure de.po gui
nl
.po search.h text.c
COPYING README axel.h conf.c conn.c
ftp
.c http.c ru.po tcp.c zh_CN.po
[root@TESTHOST axel-2.4]
# less README #./configure前查看其README,或INSTALL文件,获取相关信息
[root@TESTHOST axel-2.4]
# ./configure --help #查看./configure支持的选项
Axel configure
Usage: .
/configure
[OPTIONS]
Option Description Default
--prefix=... Directories to put files
in
/usr/local
--bindir=... $prefix
/bin
--etcdir=... $prefix
/etc
--mandir=... $sharedir
/man
--locale=... $sharedir
/locale
--i18n=0
/1
Disable
/enable
internationalization 1
--debug=0
/1
Disable
/enable
debugging 0
--strip=0
/1
Disable
/enable
binary stripping 1
[root@TESTHOST axel-2.4]
# ./configure --prefix=/usr/local/axel #检查编译环境,定制程序编译相关配置,这里仅定义了安装目录
The strip option is enabled. This should not be a problem usually, but on some
systems it breaks stuff.
Configuration
done
:
Internationalization enabled.
Debugging disabled.
Binary stripping enabled.
[root@TESTHOST axel-2.4]
# make #使用make编译程序
gcc -c axel.c -o axel.o -Wall -D_LARGEFILE_SOURCE -D_FILE_OFFSET_BITS=64 -Os
gcc -c conf.c -o conf.o -Wall -D_LARGEFILE_SOURCE -D_FILE_OFFSET_BITS=64 -Os
gcc -c conn.c -o conn.o -Wall -D_LARGEFILE_SOURCE -D_FILE_OFFSET_BITS=64 -Os
gcc -c
ftp
.c -o
ftp
.o -Wall -D_LARGEFILE_SOURCE -D_FILE_OFFSET_BITS=64 -Os
gcc -c http.c -o http.o -Wall -D_LARGEFILE_SOURCE -D_FILE_OFFSET_BITS=64 -Os
gcc -c search.c -o search.o -Wall -D_LARGEFILE_SOURCE -D_FILE_OFFSET_BITS=64 -Os
gcc -c tcp.c -o tcp.o -Wall -D_LARGEFILE_SOURCE -D_FILE_OFFSET_BITS=64 -Os
tcp.c: In
function
'get_if_ip'
:
tcp.c:98: warning: dereferencing pointer
'x'
does
break
strict-aliasing rules
tcp.c:97: note: initialized from here
gcc -c text.c -o text.o -Wall -D_LARGEFILE_SOURCE -D_FILE_OFFSET_BITS=64 -Os
gcc *.o -o axel -lpthread
strip axel
msgfmt -vo
nl
.mo
nl
.po
40 translated messages, 6 fuzzy translations, 4 untranslated messages.
msgfmt -vo de.mo de.po
46 translated messages, 4 fuzzy translations.
msgfmt -vo ru.mo ru.po
46 translated messages, 2 fuzzy translations, 2 untranslated messages.
msgfmt -vo zh_CN.mo zh_CN.po
42 translated messages, 6 fuzzy translations, 2 untranslated messages.
[root@TESTHOST axel-2.4]
# make install #安装
mkdir
-p
/usr/local/axel/bin/
cp
axel
/usr/local/axel/bin/axel
mkdir
-p
/usr/local/axel/etc/
cp
axelrc.example
/usr/local/axel/etc/axelrc
mkdir
-p
/usr/local/axel/share/man/man1/
cp
axel.1
/usr/local/axel/share/man/man1/axel
.1
mkdir
-p
/usr/local/axel/share/man/zh_CN/man1/
cp
axel_zh_CN.1
/usr/local/axel/share/man/zh_CN/man1/axel
.1
Installing locale files...
[root@TESTHOST axel-2.4]
# vim /etc/profile.d/axel.sh #新建文件
export
PATH=$PATH:
/usr/local/axel/bin
#将程序路径加入PATH
[root@TESTHOST axel-2.4]
# . /etc/profile.d/axel.sh #source后即刻生效
[root@TESTHOST ~]
# man axel #因为man手册路径不在系统默认目录中,所以提示未找到
Cannot
open
the message catalog
"man"
for
locale
"zh_CN.UTF-8"
(NLSPATH=
"/usr/share/locale/%l/LC_MESSAGES/%N"
)
No manual entry
for
axel
[root@TESTHOST ~]
# man -M /usr/local/axel/share/man axel #手动指向man手册绝对路径
[root@TESTHOST ~]
# vim /etc/man.config #将axel的man手册路径加入系统默认搜索路径
MANPATH
/usr/local/axel/share/man
|
四、rpm源码包安装
安装nginx的src.rpm包
步骤:1、安装rpm源码包----->生成rpmbuild文件夹
2、通过nginx.spec,编译rpm包,命令:rpmbuild -ba nginx.spec
3、安装生成的rpm程序包
|
1
2
3
4
5
6
7
8
9
10
11
12
13
14
15
16
17
18
19
20
21
22
23
24
25
26
27
28
29
30
31
32
33
34
35
36
|
[root@TESTHOST ~]
# ls #src.rpm包
anaconda-ks.cfg axel-2.4 axel-2.4.
tar
.bz2 Geo
install
.log
install
.log.syslog nginx-1.0.15-5.el6.src.rpm RPM-GPG-KEY-CentOS-6 RPM-GPG-KEY-CentOS-6.1 RPM-GPG-KEY-CentOS-6.2
[root@TESTHOST ~]
# rpm -ivh nginx-1.0.15-5.el6.src.rpm #安装后并不是安装了程序,而相当于解压
warning: nginx-1.0.15-5.el6.src.rpm: Header V3 RSA
/SHA256
Signature, key ID 0608b895: NOKEY
1:nginx
########################################### [100%]
[root@TESTHOST ~]
# ls #安装完后文件存放在rpmbuild文件夹中
anaconda-ks.cfg axel-2.4 axel-2.4.
tar
.bz2 Geo
install
.log
install
.log.syslog nginx-1.0.15-5.el6.src.rpm rpmbuild RPM-GPG-KEY-CentOS-6 RPM-GPG-KEY-CentOS-6.1 RPM-GPG-KEY-CentOS-6.2
[root@TESTHOST ~]
# cd rpmbuild/
[root@TESTHOST rpmbuild]
# ls #rpmbuild下有两个文件夹
SOURCES SPECS
[root@TESTHOST rpmbuild]
# ls SOURCES/ #文件夹下有程序的源码,配置文件、补丁等其他信息文件
404.html 50x.html default.conf index.html nginx-1.0.15.
tar
.gz nginx-auto-cc-gcc.patch nginx.conf nginx.init nginx-logo.png nginx.logrotate nginx.sysconfig poweredby.png ssl.conf virtual.conf
[root@TESTHOST rpmbuild]
# cd SPECS/
[root@TESTHOST SPECS]
# ls #SPECS文件夹下存放的是编译配置文件,使用它能结合SOURCES文件夹中的文件生成rpm安装包
nginx.spec
[root@TESTHOST SPECS]
# rpmbuild -bs^C nginx.spec #-bs只编译源码rpm包
[root@TESTHOST SPECS]
# rpmbuild -bb^C nginx.spec #-bb只编译二进制rpm包
[root@TESTHOST SPECS]
# rpmbuild -ba nginx.spec #同时编译二进制和源码rpm包,这里我们用-ba编译程序
------------------------------
······编译过程省略
------------------------------
[root@TESTHOST SPECS]
# ls /root/rpmbuild/ #编译完,rpm文件夹下多出了几个文件夹
BUILD BUILDROOT RPMS SOURCES SPECS SRPMS
[root@TESTHOST SPECS]
# ls /root/rpmbuild/RPMS/
x86_64
[root@TESTHOST SPECS]
# ls /root/rpmbuild/RPMS/x86_64/ #此文件夹下为编译好的rpm包
nginx-1.0.15-5.el6.x86_64.rpm nginx-debuginfo-1.0.15-5.el6.x86_64.rpm
[root@TESTHOST SPECS]
# ls /root/rpmbuild/SRPMS/ #此文件夹为此次编译同时生成的源码rpm包
nginx-1.0.15-5.el6.src.rpm
[root@TESTHOST SPECS]
# rpm -ivh /root/rpmbuild/RPMS/x86_64/nginx-1.0.15-5.el6.x86_64.rpm #安装程序
Preparing...
########################################### [100%]
1:nginx
########################################### [100%]
[root@TESTHOST SPECS]
# /etc/init.d/iptables stop #为了快速测试,暂时关闭防火墙
iptables: Setting chains to policy ACCEPT: filter [ OK ]
iptables: Flushing firewall rules: [ OK ]
iptables: Unloading modules: [ OK ]
|
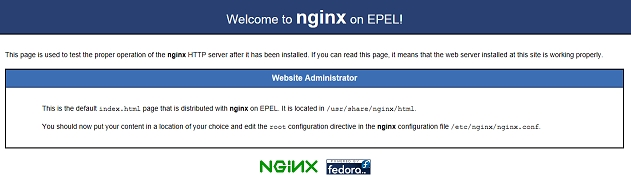
在浏览器中输入主机地址,出现下图提示,成功!!!
本文出自 “Arvin Lau” 博客,请务必保留此出处http://64314491.blog.51cto.com/2784219/1637680